***
Let’s Bake a Magical First Birthday Cake!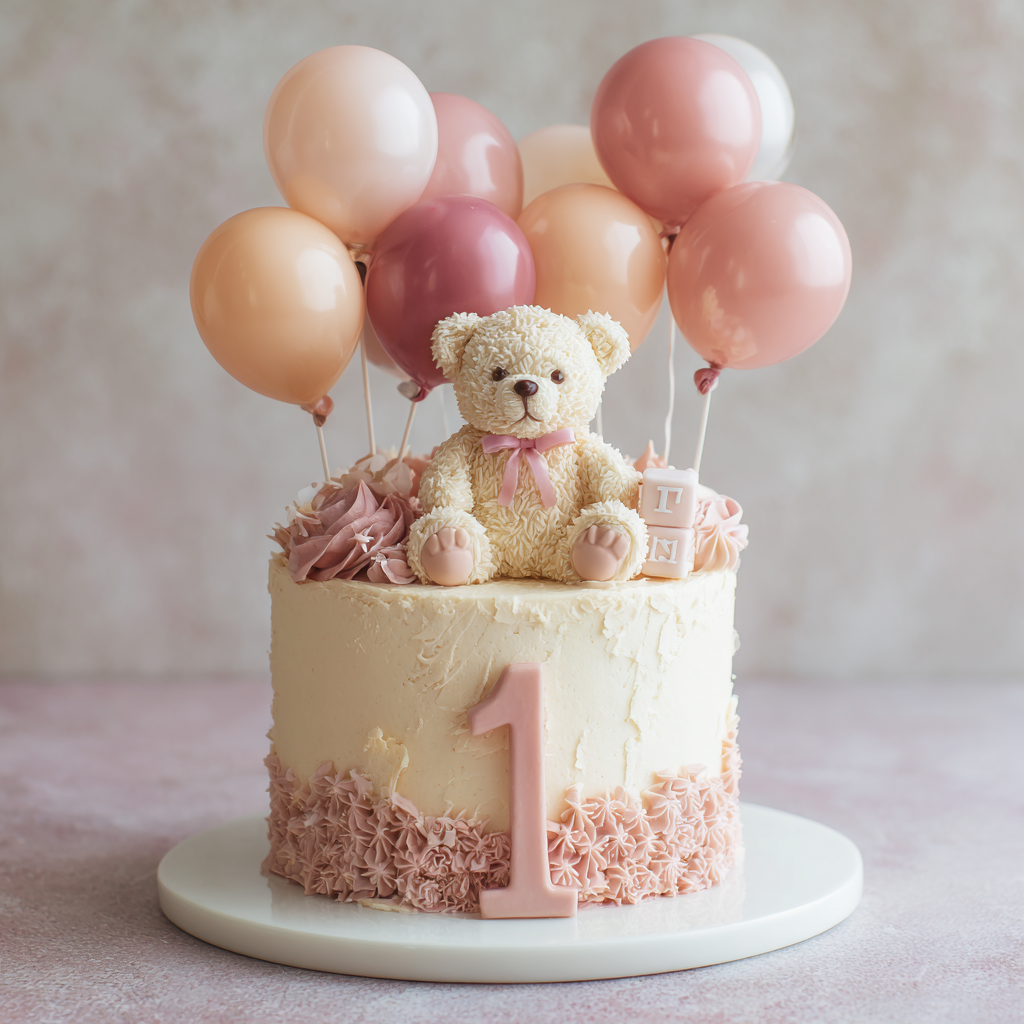
Hello, my friend! Anna here, ready to tie on our aprons and dive into one of the most joyful baking projects there is: a baby’s very first birthday cake. There’s something so incredibly special about this milestone. It’s a celebration of a whole year of giggles, first steps, and messy, wonderful memories—and the cake should be just as magical.
If you’re feeling a little intimidated, take a deep breath. I’m right here with you. I know the pressure feels high. You want it to be beautiful enough for the photos, delicious enough for the guests, and special enough for that sweet one-year-old who is about to experience the glorious chaos of their first taste of frosting. I promise you, we can create something stunning and delicious together, without the stress.
Today, we’re creating a Blush Pink “1” Themed Cake, complete with a cuddly fondant teddy bear, pastel building blocks, and whimsical balloons. It’s a classic, timeless theme that feels both elegant and playful. We’ll build a tender, moist vanilla cake from scratch, envelop it in a cloud of silky vanilla buttercream, and bring it all to life with charming decorations. This isn’t just about following a recipe; it’s about pouring all that love and celebration into something you create with your own hands. So, are you ready? Let’s gather our ingredients and make some magic!
A Cake Full of Sweet Memories
Print1st Birthday Cake Recipe : Blush Pink “1” with Teddy, Blocks & Balloons Theme

- Prep Time: 1 hour (excluding decorating)
- Cook Time: 35 minutes per layer
- Total Time: ~2–3 hours plus decorating
- Yield: 20–30 (8–10" round cake) 1x
Ingredients
For the Vanilla Cake (3 layers, 8-inch)
3 cups all-purpose flour
1 tbsp baking powder
1/2 tsp salt
1 cup unsalted butter, room temperature
2 cups granulated sugar
5 large eggs, room temperature
1 tbsp pure vanilla extract
1 1/4 cups whole milk, room temperature
Optional Fruit Layer (for inside cake)
3/4 cup strawberry or raspberry jam (seedless)
For Vanilla Buttercream
1 1/2 cups unsalted butter, room temperature
5–6 cups powdered sugar, sifted
3–4 tbsp milk or heavy cream
1 tbsp vanilla extract
Pinch of salt
Gel food coloring: blush pink (or a mix of pink and peach)
Decorations
Fondant (blush pink, ivory, pastel tones)
White or rose-gold “1” topper
Fondant teddy bear (light brown or ivory, with bow or flower crown)
Building blocks (A-B-C or baby’s name) in pastel shades
Fondant or piped balloon shapes, stars, tiny flowers
Ribbon around cake base (silk or satin in blush or metallic pink)
Optional: sprinkle of edible glitter for added whimsy
Instructions
1. Make the Vanilla Cake
Preheat oven to 350°F (175°C). Grease and line three 8-inch round cake pans.
Whisk together flour, baking powder, and salt.
Cream butter and sugar until fluffy, about 3–4 minutes.
Add eggs one at a time, then vanilla.
Alternate adding dry ingredients and milk, mixing gently until smooth.
Divide into pans and bake for 30–35 minutes. Cool completely before decorating.
2. Make the Buttercream
Beat butter until smooth. Add sugar gradually, then vanilla, salt, and milk to desired consistency.
Tint a portion blush pink with food coloring. Reserve white for piping or accents.
3. Assemble the Cake
Level cakes. Add buttercream between layers; you can also spread a thin layer of strawberry or raspberry jam.
Apply a crumb coat, chill for 30 minutes, then frost with pink buttercream or cover in blush-pink fondant.
4. Decorate
Place a white or rose-gold “1” on top.
Add fondant teddy bear, flower crown or bow optional.
Arrange pastel blocks spelling “ONE” or baby’s name.
Decorate with small balloon shapes, stars, and fondant flowers.
Tie a soft ribbon around the cake base for a polished finish.
Nutrition
- Calories: 420
- Sugar: 36g
- Sodium: 210mg
- Fat: 21g
- Carbohydrates: 54g
- Fiber: 1g
- Protein: 5g
This recipe takes me right back to my daughter’s first birthday. I had this grand vision of a perfect, pristine cake. I stayed up way too late, meticulously crafting tiny fondant flowers and a slightly lopsided teddy bear. The next day, we placed the smash cake in front of her. She stared at it with wide, curious eyes for a solid minute before plunging one chubby hand right into the center. Frosting went everywhere—in her hair, on her nose, all over the high chair. And the most beautiful sound followed: her deep, belly-shaking giggles. That perfect cake I’d stressed over was utterly destroyed, and it was the most perfect thing in the world. It wasn’t about the cake’s flawless appearance anymore; it was about the pure, unfiltered joy it created. That’s the spirit I want you to capture. This cake is a vessel for joy, a centerpiece for memories. So, if your “1” topper is a little crooked or your bear has a personality all its own, just remember—that’s what makes it perfect.
Gathering Your Cake-Making Magic
Here’s your shopping list! Using room-temperature ingredients is our number one secret for a smooth, perfectly risen cake. Plan ahead and pull your butter, eggs, and milk out about an hour before you start.
For the Vanilla Cake (Three 8-inch Layers)
- 3 cups all-purpose flour: The sturdy foundation of our cake. For a slightly lighter crumb, you can swap one cup with cake flour, but all-purpose works beautifully.
- 1 tbsp baking powder: Our leavening hero! This is what gives the cake its lovely lift. Make sure it’s fresh for the best rise.
- 1/2 tsp salt: Don’t skip this! Salt balances the sweetness and enhances all the other flavors, making the vanilla really sing.
- 1 cup unsalted butter, room temperature: The key to a light and fluffy cake is properly creamed butter. Room temp means it should give slightly when you press it, but not be oily or melted.
- 2 cups granulated sugar: Sweetness and tenderness, all in one.
- 5 large eggs, room temperature: Room-temperature eggs incorporate much more easily into the butter and sugar, creating a smooth, emulsified batter. Cold eggs can cause the batter to curdle.
- 1 tbsp pure vanilla extract: Go for the good stuff! This is the star flavor, so we’re using a full tablespoon for a warm, aromatic vanilla base.
- 1 1/4 cups whole milk, room temperature: Whole milk gives us the best richness and moisture. If you need a dairy-free option, unsweetened almond or oat milk works well.
Optional Fruit Layer
- 3/4 cup strawberry or raspberry jam (seedless): A little secret layer of fruity surprise! It cuts through the sweetness and adds a beautiful pop of flavor and color. Seedless is best for a smooth texture between the soft cake layers.
For the Vanilla Buttercream
- 1 1/2 cups unsalted butter, room temperature: We’re using a generous amount for a rich, stable, and dreamily creamy frosting.
- 5–6 cups powdered sugar, sifted: Sifting is non-negotiable here—it prevents lumps in our smooth frosting. We’ll start with 5 cups and add more if needed for stiffness.
- 3–4 tbsp milk or heavy cream: Heavy cream will give you an even richer buttercream. We’ll add this slowly to get the perfect spreading consistency.
- 1 tbsp vanilla extract: More vanilla for our frosting! This ensures every single bite is packed with flavor.
- Pinch of salt: Again, this is our flavor-balancing act. It makes the frosting taste less cloying and more complex.
- Gel food coloring (blush pink): Gel or paste food coloring is a must! It provides vibrant color without watering down your buttercream. I love a mix of a tiny dot of pink and a dot of peach for a soft, warm blush tone.
For the Decorations
- Fondant (blush pink, ivory, pastel tones): Fondant gives you a smooth canvas and allows for fun, clean decorations. You can make your own or use store-bought for convenience.
- White or rose-gold “1” topper: The star of the show! This can be made from fondant or purchased as a reusable cake topper.
- Fondant teddy bear: A light brown or ivory bear adds instant charm. A tiny bow or a simple flower crown makes it extra special.
- Building blocks (A-B-C or baby’s name): Spell out “ONE” or the baby’s name in pastel fondant blocks. It’s a personalized touch that guests will adore.
- Fondant or piped balloon shapes, stars, tiny flowers: These fill in the space with whimsy! Use small cutters or shape them by hand.
- Ribbon around the cake base: A silk or satin ribbon in a matching blush or metallic pink gives a super polished, finished look. Just remember to remove it before slicing!
- Optional: Edible glitter: For that magical, celebratory sparkle in your photos!
Let’s Build This Beautiful Cake, Step-by-Step
Okay, friend, this is where the fun really begins. Read through all the steps once before you start, and let’s move through this together with confidence!
Step 1: Make the Vanilla Cake Layers
1. Prep your pans and oven. Preheat your oven to 350°F (175°C). This is crucial for an even bake. Now, take your three 8-inch round cake pans. Grease the bottoms and sides generously with butter or baking spray, then line the bottoms with a circle of parchment paper. This is our insurance policy for perfectly released cakes! Chef’s Hack: I like to put a dab of butter in the pan, place the parchment on it, and swirl it around to stick—it makes it so much easier.
2. Whisk the dry ingredients. In a medium bowl, whisk together your 3 cups of flour, 1 tablespoon of baking powder, and 1/2 teaspoon of salt. Whisking does two things: it combines everything evenly, and it aerates the flour a little, contributing to a lighter cake. Set this bowl aside.
3. Cream the butter and sugar. In your stand mixer fitted with the paddle attachment (or a large bowl with a hand mixer), beat the room-temperature butter and granulated sugar together on medium-high speed. We’re not just mixing them; we’re “creaming” them. This process beats tiny air bubbles into the butter, which will expand in the oven and help the cake rise. Do this for a full 3-4 minutes, until the mixture is pale yellow and beautifully fluffy. Scrape down the bowl once halfway through.
4. Add the eggs and vanilla. With the mixer on medium, add your room-temperature eggs one at a time, letting each one fully incorporate before adding the next. This prevents the batter from breaking. Then, beat in that glorious tablespoon of vanilla. Your kitchen should smell amazing right now!
5. Combine wet and dry. Reduce your mixer speed to low. We’re going to add the dry ingredients and the milk alternately, starting and ending with the dry ingredients. So, add about one-third of the flour mixture, mix until *just* combined, then half the milk, another third of flour, the rest of the milk, and finally the last of the flour. Mix only until the last streaks of flour disappear. Do not overmix! Overmixing develops gluten and can lead to a tough cake. A few tiny lumps are just fine.
6. Bake and cool. Divide the batter evenly among your three prepared pans. I like to use a kitchen scale for precision, but the trusty spoon-and-level method works too. Smooth the tops with a spatula and give the pans a gentle tap on the counter to release any large air bubbles. Bake for 30-35 minutes, or until a wooden skewer inserted into the center comes out clean. Let the cakes cool in their pans on a wire rack for 15 minutes, then run a knife around the edge and carefully turn them out onto the rack to cool completely. Pro Tip: Absolutely, 100% make sure the cakes are completely cool before you frost them. Otherwise, you’ll have a melted buttercream mess!
Step 2: Whip Up the Dreamiest Vanilla Buttercream
1. Beat the butter. In the clean bowl of your stand mixer with the paddle attachment (or whisk attachment for a slightly fluffier frosting), beat the room-temperature butter on medium speed for about 2-3 minutes until it’s very smooth and pale.
2. Add the sugar and flavor. With the mixer on low, gradually add your sifted powdered sugar, one cup at a time, until it’s all incorporated. This prevents a sugar dust storm in your kitchen! Add the vanilla and pinch of salt. Increase the speed to medium-high and beat for a full 2-3 minutes. It will be thick.
3. Loosen it up. Scrape down the bowl and, with the mixer on low, add the milk or cream one tablespoon at a time until you reach your desired consistency. For a crumb coat, you might want it a tiny bit thinner; for the final coat and piping, a little stiffer is better. Once you’ve added your liquid, beat on medium-high for another minute until it’s incredibly light and fluffy.
4. Tint the frosting. Scoop about two-thirds of your buttercream into a separate bowl. Using a toothpick, add a tiny, tiny amount of your blush pink gel color and mix it in. Remember, you can always add more, but you can’t take it away! Mix until you have a uniform, soft blush color.
Step 3: Assemble and Decorate Your Masterpiece
1. Level the cakes. Once your cakes are completely cool, use a serrated knife or a cake leveler to slice off any domed tops so you have perfectly flat layers. This is key for a stable, professional-looking cake.
2. Stack and fill. Place your first cake layer on a cake board or serving plate. Spread a layer of your pink buttercream over it. If you’re using the jam, you can pipe a buttercream dam around the edge of the layer and then spread the jam inside the dam—this prevents it from squishing out the sides!
3. The crumb coat is your best friend. Add the second and third layers with frosting in between. Now, apply a very thin layer of your pink buttercream all over the entire cake. This is the “crumb coat”—it traps all the loose crumbs so they don’t get into your final, beautiful layer of frosting. Don’t worry about how it looks! Once done, pop the entire cake into the refrigerator for at least 30 minutes to chill and set.
4. The final frost. After the crumb coat is firm, apply your final, thick, and smooth layer of blush pink buttercream. Use a bench scraper or an offset spatula to get those clean sides. You can go for a perfectly smooth finish or a charming “naked” cake look by letting a little of the cake show through.
5. Bring on the decorations! This is the fun part! Gently press your ribbon around the base. Place your “1” topper proudly on top. Arrange your fondant teddy bear, building blocks, balloons, and flowers around the cake in a way that feels balanced and joyful to you. There are no rules here—just have fun with it! A light dab of buttercream can act as glue for fondant pieces.
Serving Your Celebration Cake
Presentation is the final flourish! Place your finished cake on a beautiful cake stand as the centerpiece of your dessert table. For slicing, use a long, thin knife. Dip it in hot water and wipe it dry between each cut for beautifully clean slices. Don’t forget to set aside a special “smash cake” (a single, unfrosted cupcake or a small 4-inch cake decorated in the same theme) just for the birthday baby. That’s where the real magic—and the best photos—happen!
Make It Your Own: Fun Variations
- Flavor Twist: Add the zest of one lemon to the cake batter and use a lemon curd layer instead of jam for a bright, zingy flavor.
- Chocolate Lover’s: Replace 3/4 cup of the flour with 3/4 cup unsweetened cocoa powder for a chocolate version. Pair it with chocolate buttercream!
- Dairy-Free Delight: Use vegan butter sticks and your favorite non-dairy milk (like oat or almond) in both the cake and frosting. The structure works beautifully.
- Fruit-Forward: Fold 1/2 cup of very finely chopped fresh strawberries into the cake batter for a natural pink hue and fruity bites.
- “Naked Cake” Style: Skip the final pink frosting coat over the crumb coat for a trendy, rustic look that showcases your perfect layers.
Anna’s Extra Tips & Kitchen Stories
This recipe has been a labor of love in my own kitchen. The first time I made it, I was so nervous about the fondant decorations that I made my teddy bear three times! The final one was still a little cross-eyed, but it had so much character, and now it’s my favorite part of the memory. Over time, I’ve learned to embrace the imperfections—they’re what make a homemade cake so special.
My biggest evolution with this recipe was adding the optional jam layer. I found the little burst of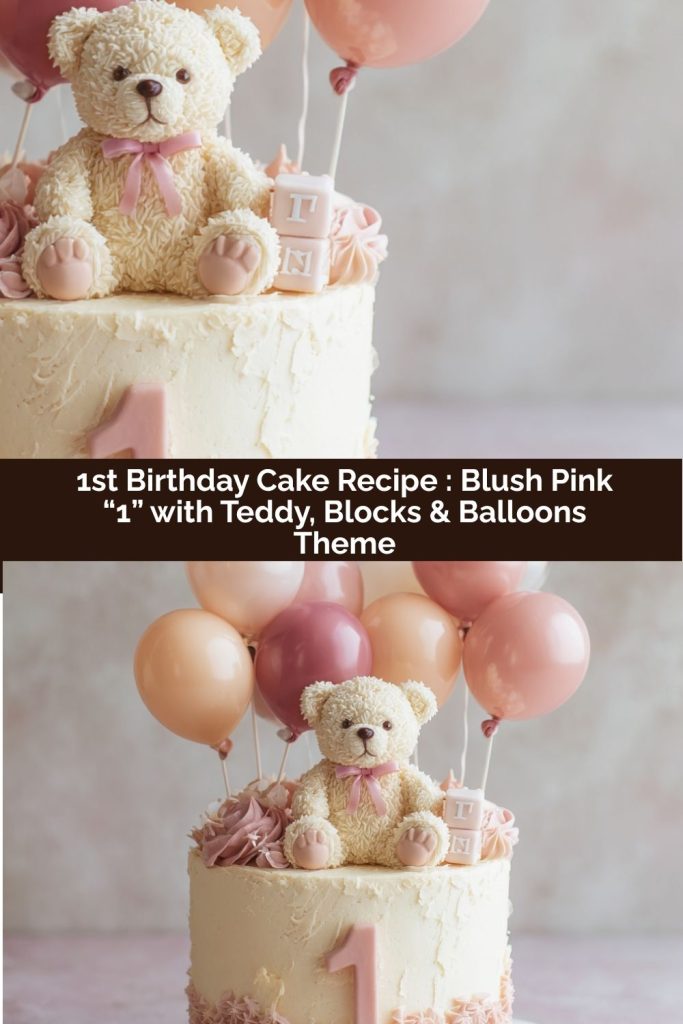
🎂 Final Thoughts
At the end of the day, this isn’t just a cake — it’s a love letter baked in butter and sugar. It’s the laughter when frosting ends up on tiny noses, the happy chaos of candles and clapping, and that magical moment when your little one takes their very first bite of birthday sweetness.
So don’t stress about perfection. Whether your teddy bear leans a little or your “1” topper tilts just so, every detail tells your story — full of joy, love, and homemade magic. Years from now, you’ll look back at those frosting-smeared photos and remember the laughter, not the symmetry. And that, my friend, is what makes this cake truly unforgettable.