***
Dinner in a Flash? Let’s Make It Fabulous!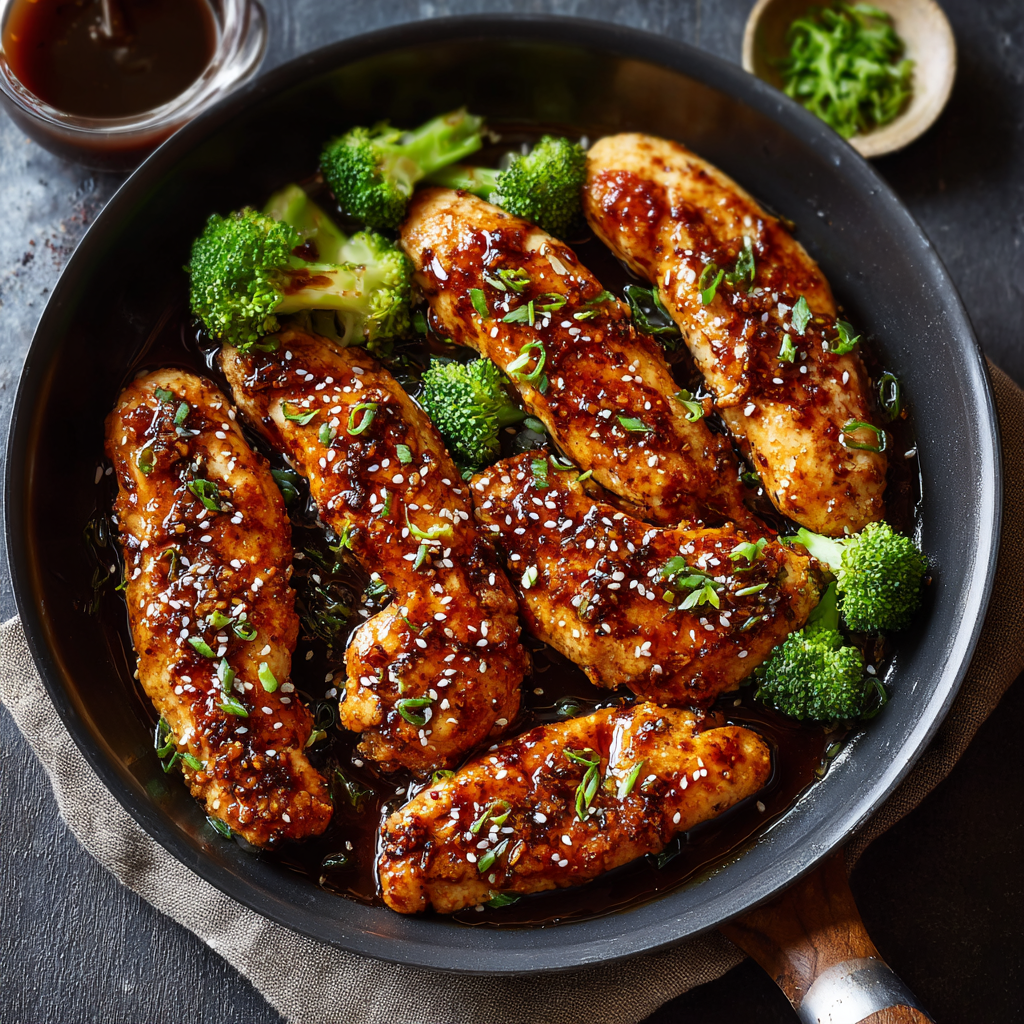
Hey there, friend! Let me guess: your day has been a whirlwind of to-do lists, errands, and maybe a few unexpected plot twists. The clock is ticking, stomachs are starting to rumble (yours included!), and the call for “What’s for dinner?” is looming. We’ve all been there, standing in front of the fridge, hoping for a culinary miracle to materialize.
Well, consider this your miracle, delivered with a big, sticky, sweet-and-savory hug. I’m talking about my 20-Minute Honey Garlic Chicken Tenders. This isn’t just a “quick dinner.” This is a “stop-everything-and-lick-the-plate” kind of meal that comes together faster than you can scroll through your social media feed.
Imagine this: juicy, tender chicken, pan-seared to golden-brown perfection, then tossed in a glossy, bubbling glaze of sweet honey, punchy garlic, and salty soy. It’s a symphony of flavors that feels indulgent and gourmet, but the process is so beautifully simple. It’s the recipe I turn to when I need a guaranteed win—a dish that makes my family’s eyes light up and makes me feel like a kitchen rockstar, even on my most frazzled days.
So, take a deep breath. Dinner is handled. Grab your favorite skillet, and let’s transform a handful of simple ingredients into your new weeknight superhero. You’ve got this, and I’m right here with you, cheering you on every step of the way!
A Little Nostalgia with Your Dinner
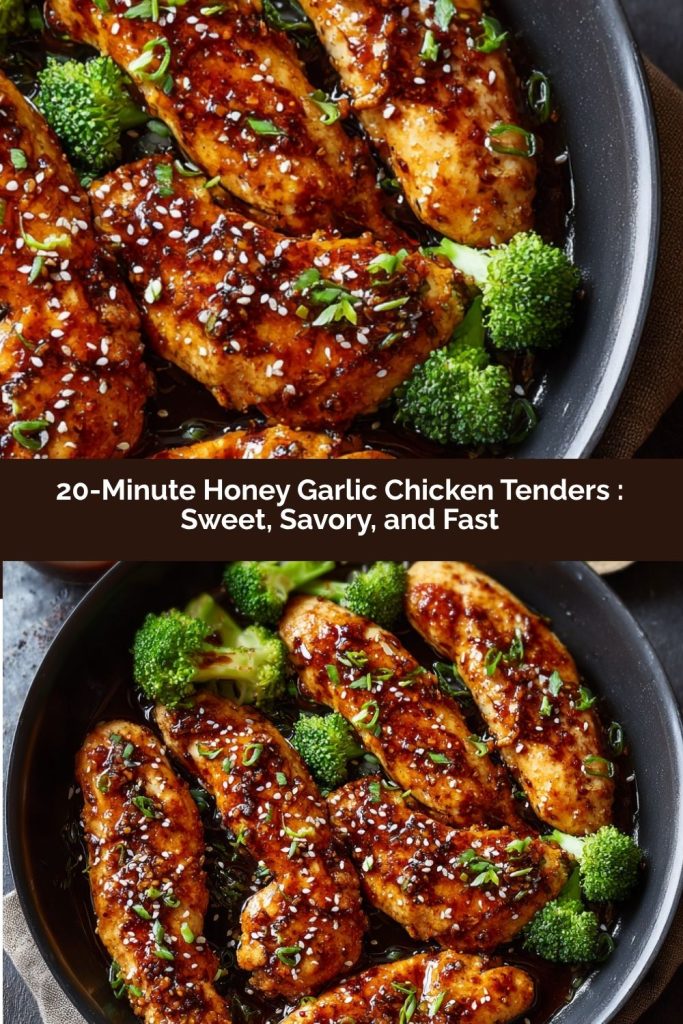
Print20-Minute Honey Garlic Chicken Tenders : Sweet, Savory, and Fast

Dinner in 20 minutes never tasted this good. These Honey Garlic Chicken Tenders are pan-seared to golden perfection and tossed in a sticky-sweet garlic glaze that pairs perfectly with rice, veggies, or noodles. Simple ingredients, bold flavor, and minimal effort—this one’s a total weeknight win.
- Prep Time: 5 minutes
- Cook Time: 15 minutes
- Total Time: 20 minutes
- Yield: 4 1x
Ingredients
1½ lbs chicken tenders
1 tbsp olive oil
2 tbsp butter
4 garlic cloves, minced
⅓ cup honey
2 tbsp soy sauce
1 tbsp water
Salt and black pepper to taste
Optional garnish: sesame seeds, green onions
Instructions
Season chicken tenders with salt and pepper. Heat oil in a skillet over medium-high heat.
Add chicken and sear 3–4 minutes per side until cooked through and golden. Remove and set aside.
In the same pan, melt butter. Add garlic and sauté until fragrant (about 30 seconds).
Stir in honey, soy sauce, and water. Simmer for 2–3 minutes until slightly thickened.
Return chicken to the pan and toss to coat in the glaze.
Serve hot with rice, garnished with sesame seeds or green onions.
Nutrition
- Calories: 380 per serving
- Fat: 18g
- Carbohydrates: 20g
- Protein: 34g
This recipe always takes me right back to my first tiny apartment kitchen. It was about the size of a postage stamp, with questionable linoleum and a stove that had exactly one reliable burner. My budget was tight, but my craving for delicious, satisfying food was enormous. I lived on a rotation of pasta, stir-fries, and whatever protein was on sale that week.
One particularly hectic Tuesday, after a long day of work and evening classes, I stood in that tiny kitchen with a pack of chicken tenders, feeling utterly uninspired. I started throwing things together—a glug of honey from a bear-shaped bottle, the last few cloves of garlic starting to sprout, a splash of soy sauce. I seared the chicken, made a quick sauce in the same pan, and tossed it all together. The smell that filled that little apartment was nothing short of magical. I sat down at my wobbly table, took one bite, and thought, “Wow. This is it.” It was fast, cheap, and so much greater than the sum of its parts. It was a tiny triumph that turned a stressful day into a happy memory. That’s the power of a great recipe, and it’s the feeling I want to share with you every time you make this.
Your Kitchen Allies: The Ingredient Lineup
One of the best things about this recipe is the short, sweet ingredient list. These are pantry heroes, the kind of things I bet you already have on hand. Let’s meet the team that’s going to make dinner amazing!
- 1½ lbs Chicken Tenders: The star of the show! I love using tenders because they cook so quickly and evenly. No fussing with cutting or pounding. Chef’s Insight: If you only have chicken breasts, just slice them into 1-inch thick strips. Pat them completely dry with a paper towel before seasoning for the best sear.
- 1 tbsp Olive Oil: Our trusty cooking fat for getting that beautiful golden crust on the chicken.
- 2 tbsp Butter: This is our secret weapon for richness and a gorgeous, glossy sauce. The combination of oil and butter gives us the high heat for searing and the incredible flavor of browned butter.
- 4 Garlic Cloves, minced: Don’t be shy! Freshly minced garlic is non-negotiable here for that potent, aromatic kick. Substitution Tip: In a true pinch, 1 teaspoon of garlic powder can work, but the flavor won’t be as vibrant and fresh.
- ⅓ cup Honey: Nature’s golden sweetener that creates that irresistible sticky glaze. Substitution Tip: For a different flavor profile, pure maple syrup works beautifully. For a lower-sugar option, you can use a sugar-free maple syrup, but the sauce won’t thicken quite as much.
- 2 tbsp Soy Sauce: This provides the salty, umami backbone that balances the sweetness of the honey. Substitution Tip: For a gluten-free version, tamari or coconut aminos are perfect 1:1 swaps. Coconut aminos will be a bit sweeter and less salty.
- 1 tbsp Water: A little splash to help loosen up the sauce and prevent it from becoming too thick too quickly.
- Salt and Black Pepper to taste: The fundamental flavor boosters. We season the chicken directly to build layers of flavor from the inside out.
- Optional Garnish: Sesame Seeds, Green Onions: The finishing touches! A sprinkle of toasted sesame seeds adds a nutty crunch, and thinly sliced green onions give a pop of fresh color and flavor. Highly recommended for that “wow” factor!
Let’s Get Cooking: Your Foolproof Steps to Glory
Ready to work some 20-minute magic? Follow these steps, and you’ll have a restaurant-quality meal on the table in no time. I’ve packed this section with my favorite chef hacks to ensure your success!
- Season and Prep Your Chicken: Pat your chicken tenders completely dry with paper towels. This is my number one tip for getting a gorgeous, golden sear instead of a steamy, pale chicken. Season both sides generously with salt and black pepper. Little Chef Hack: Let the chicken sit with the seasoning for a few minutes while you mince your garlic. This little rest allows the salt to pull some moisture to the surface, which then reabsorbs, seasoning the meat more deeply.
- Sear to Perfection: Heat the olive oil in a large skillet over medium-high heat. You’ll know the pan is ready when the oil shimmers. Carefully add the chicken tenders in a single layer, making sure not to overcrowd the pan. Why this matters: Overcrowding creates steam, and we want a sear! Cook for 3-4 minutes without moving them. You’re waiting for that beautiful, caramelized crust to form. Flip and cook for another 3-4 minutes on the other side until cooked through. Remove the chicken to a plate and set aside. Don’t worry if it’s not 100% cooked through; it will finish in the sauce later!
- Create the Glorious Glaze: Reduce the heat to medium. Add the butter to the same skillet. As it melts, use a whisk to scrape up all those delicious browned bits from the bottom of the pan. Those bits are pure flavor gold! Add the minced garlic and sauté for about 30 seconds, just until it becomes incredibly fragrant. Watch it closely! Burnt garlic tastes bitter, and we want sweet and aromatic.
- Simmer and Thicken: Carefully pour in the honey, soy sauce, and that one tablespoon of water. Whisk everything together until it’s a harmonious, bubbly mixture. Let it simmer for 2-3 minutes, stirring occasionally. You’ll see the sauce slowly thicken and become glossy. It should coat the back of a spoon. Chef’s Insight: The sauce will thicken more as it cools, so don’t over-reduce it here.
- The Grand Finale: Toss and Coat! Return the cooked chicken tenders and any accumulated juices from the plate back into the skillet. Toss them gently, spooning the sauce over every nook and cranny, until each piece is luxuriously coated in that sticky honey garlic glaze. Let it heat through for about a minute.
Plating Up Your Masterpiece
Now for the fun part! I love serving these honey garlic chicken tenders over a big, fluffy bed of jasmine rice. The rice soaks up the extra sauce in the most glorious way. For a pop of color and freshness, steam some broccoli or snap peas on the side, or toss together a simple green salad with a light vinaigrette. To make it look like it came from a fancy bistro, arrange the tenders artfully over the rice, drizzle any remaining glaze from the pan over the top, and finish with a generous sprinkle of sliced green onions and a pinch of toasted sesame seeds. Dinner is served!
Make It Your Own: Delicious Twists & Swaps
This recipe is a fantastic canvas for your creativity! Here are a few of my favorite ways to mix it up:
- Spicy Kick: Add 1-2 teaspoons of Sriracha or a pinch of red pepper flakes to the sauce along with the honey.
- Ginger Zing: Add 1 tablespoon of freshly grated ginger to the pan with the garlic for an extra layer of warm, zesty flavor.
- Citrus Brightness: Stir in the zest and juice of one lime or half an orange into the finished sauce for a bright, tangy twist.
- Crispy Baked Version: For a hands-off approach, toss the seasoned tenders in a little oil, bake at 400°F (200°C) for 15-20 minutes until cooked, then toss them in the sauce you’ve made separately in a saucepan.
- Pescatarian Swap: This glaze is incredible on salmon fillets or large shrimp! Just adjust the cooking time accordingly.
From My Kitchen to Yours: A Few Final Thoughts
This recipe has been a staple in my home for years, and it’s evolved in the best ways. I’ve learned that the type of honey makes a difference—a rich, dark wildflower honey gives a deeper flavor than a light clover honey. I’ve also been known to double the sauce recipe (because, let’s be real, you can never have too much), especially when I’m serving it to a crowd over noodles.
One of my favorite kitchen stories involves this dish. I was making it for a friend who claimed she “couldn’t cook.” She was so nervous, but as we followed the steps together, her confidence grew. When she took that first bite, her face just lit up. “I made this?” she said, amazed. That’s the moment I live for—helping someone discover their inner chef. So whether this is your first time or your fiftieth, I hope this recipe brings you as much joy and confidence as it has brought me and my family.
Your Questions, Answered!
Over the years, I’ve gotten a few repeat questions about this recipe. Here are the answers to help you troubleshoot like a pro!
Q: My sauce isn’t thickening up. What did I do wrong?
A: Don’t panic! This usually happens if the heat is too low. Crank it up to a solid simmer and let it bubble for another minute or two. The sauce will thicken as the water evaporates. Also, remember that it will continue to thicken significantly as it cools off the heat. If you’re still having trouble, you can make a quick slurry by mixing 1 teaspoon of cornstarch with 1 tablespoon of cold water and whisking it into the simmering sauce.
Q: Can I make this ahead of time?
A: Absolutely! You can cook the chicken and make the sauce up to 3 days in advance. Store them separately in airtight containers in the fridge. When you’re ready to eat, gently reheat the sauce in a skillet and add the chicken, tossing until everything is warm and glossy. The chicken can also be reheated in the microwave, but the stovetop method will keep the texture best.
Q: My garlic burned when I added it to the hot pan. How can I prevent this?
A> Great question! This is a common hiccup. The key is to reduce the heat to medium after you remove the chicken. The residual heat from the pan is often enough to melt the butter and cook the garlic perfectly. If your stove runs hot, you can even take the pan off the heat for 30 seconds before adding the butter. We just want to wake the garlic up and make it fragrant, not turn it brown and bitter.
Q: Is there a way to make this recipe less sweet?
A> Of course! Cooking is all about personal taste. You can reduce the honey to ¼ cup and it will still be wonderfully flavorful. You could also add an extra tablespoon of soy sauce or a splash of rice vinegar to balance the sweetness you do have.
Nutritional Information*
Per Serving (approximately 4 tenders with sauce):
Calories: ~380 | Protein: 34g | Carbohydrates: 20g | Fat: 18g
*Please note: This is an estimate provided for informational purposes only. Actual values can vary based on specific ingredients used and portion sizes.
Final Thoughts
At the end of a long day, recipes like this are the ones that remind me why I fell in love with cooking in the first place. They’re simple, dependable, a little magical, and they turn even the busiest weeknight into something that feels… well, a bit more like you’re taking care of yourself instead of just getting through the motions.
These Honey Garlic Chicken Tenders have been with me through tiny apartment kitchens, chaotic evenings, tight budgets, potlucks, breakups, new beginnings—you name it. Every time I make them, I’m amazed all over again at how a few everyday ingredients can transform into something glossy, golden, and downright irresistible. It’s the kind of meal that doesn’t just feed you, it lifts you.
So whether you’re cooking for yourself, your family, or someone who needs a little comfort on a plate, I hope this recipe brings a spark of joy to your kitchen. I hope it makes you feel confident. I hope it reminds you that great food doesn’t have to be complicated to be unforgettable.