***
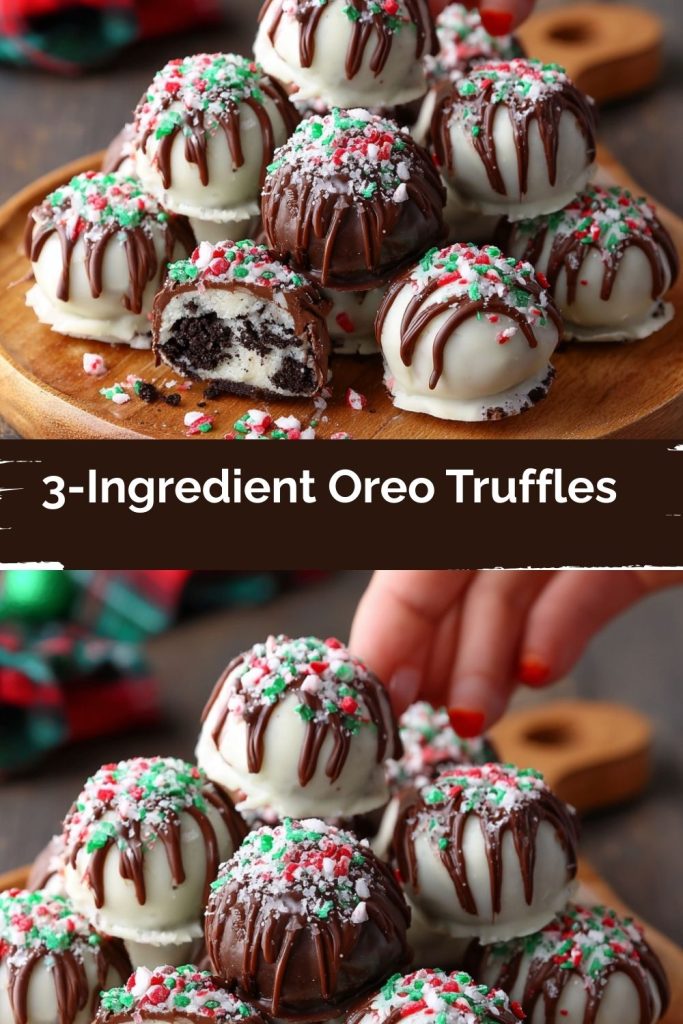
Your New Favorite Holiday Treat: 3-Ingredient Oreo Truffles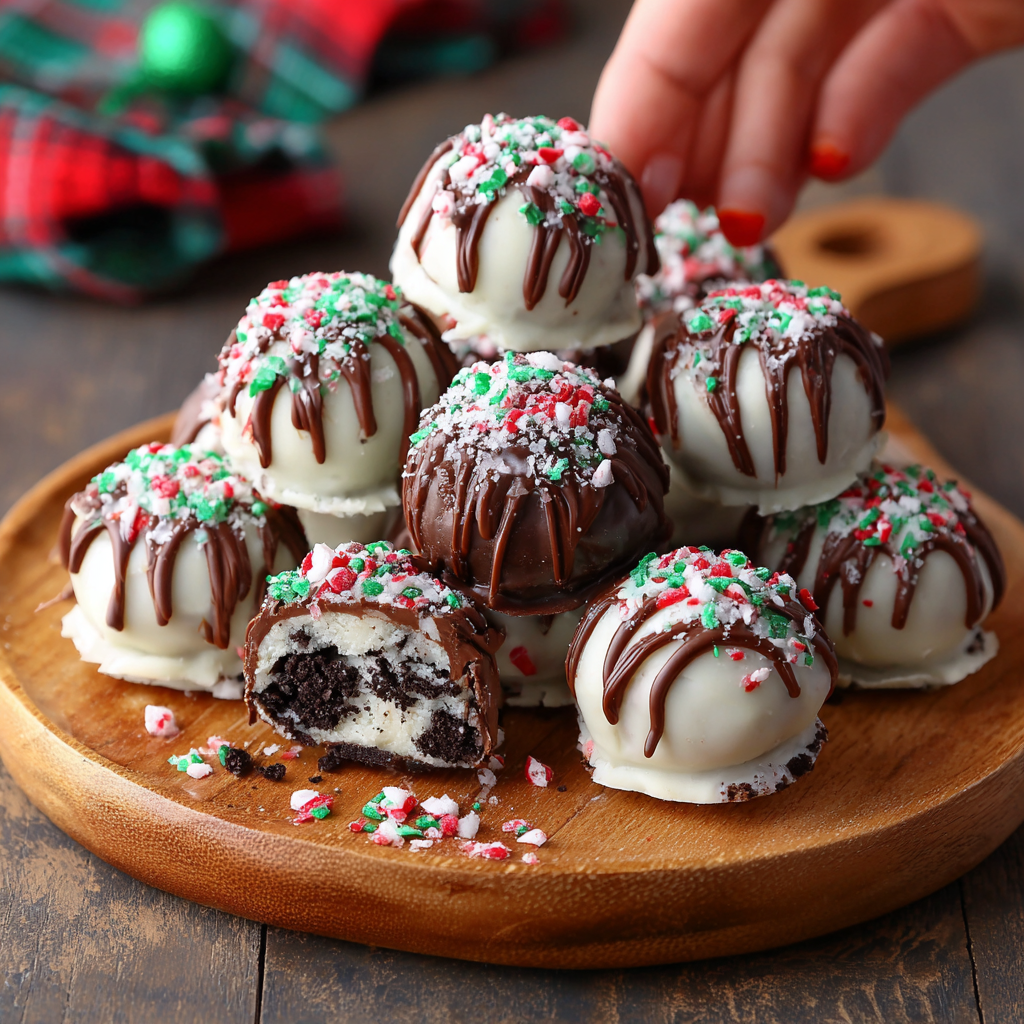
Hey there, friend! Anna here. Can you smell that? It’s officially that time of year—the air is crisp, the festive lights are twinkling, and my kitchen is buzzing with the promise of sweet, magical treats. I absolutely love holiday baking, but let’s be real: between shopping, decorating, and trying to find a moment of peace with a mug of hot cocoa, our schedules are packed. The last thing we need is a complicated recipe that dirties every bowl we own and leaves us more frazzled than festive.
That’s exactly why I’m so excited to share one of my all-time favorite, no-fuss, maximum-reward recipes with you today: 3-Ingredient Oreo Truffles. These little bites of joy are rich, fudgy, and dipped in pure holiday spirit. They look like you spent hours slaving over a double boiler, but our little secret is that they are ridiculously easy to make. With just crushed cookies, creamy filling, and a chocolatey shell, they’re the perfect festive treat to whip up for a party, package as a heartfelt homemade gift, or (my personal favorite) stash in the fridge for a well-deserved midnight snack.
Whether you’re a baking pro or this is your very first foray into holiday treats, these truffles are for you. They require zero baking, just a bit of mixing, rolling, and dipping. So, tie on your favorite apron, put on some cheerful holiday tunes, and let’s cook up something amazingly simple and delicious together. I promise, these will become a permanent spot on your holiday traditions list!
A Sweet Slice of Nostalgia: My First Truffle Triumph
Print3-Ingredient Oreo Truffles

These no-bake Oreo truffles are ridiculously easy, unbelievably delicious, and perfect for Christmas. With just crushed cookies, creamy filling, and a chocolatey shell, they’re a festive treat with major “wow” for minimal effort.
- Prep Time: 15 minutes
- chill: 40 minutes
- Total Time: 1 hour
Ingredients
1 pack (36) Oreo cookies
1 (8 oz / 226g) block cream cheese, softened
300g chocolate (dark, milk, or white for coating)
Optional for Holiday Cheer:
Crushed peppermint or sprinkles for topping
Red & green candy melts for a drizzled finish
Flavored Oreos (mint, gingerbread) for a twist
Instructions
Crush Oreos (cookies and filling) in a food processor or by hand in a zip bag until finely ground.
Mix crumbs with cream cheese until smooth and dough-like.
Scoop and roll into 1-inch balls. Chill in the freezer for 20 minutes.
Melt chocolate in the microwave in 20-second intervals until smooth.
Dip truffles into melted chocolate, place on parchment paper, and top with sprinkles or crushed candy canes while still wet.
Chill again for 15–20 minutes until firm.
Nutrition
- Calories: 120
- Fat: 7g
- Carbohydrates: 12g
- Protein: 1g
I’ll never forget the first time I made these truffles. It was my second year hosting our big family Christmas Eve dinner, and I was determined to prove I could handle it. The main course was a (mostly) success, but I had completely run out of steam for dessert. Panic started to set in—a dessert-less Christmas? Unthinkable! Then I remembered a ridiculously simple recipe a friend had mentioned: Oreo truffles.
With a half-hour until guests arrived, I frantically blitzed a package of Oreos, mashed them with cream cheese, and started rolling. My then-five-year-old nephew, Leo, saw the chaos and asked if he could help. Covered in a fine dusting of black cookie crumbs and with the most serious look of concentration, he became my chief truffle roller. We were a messy, laughing, chocolate-covered duo. When we presented our platter of hastily-dipped-but-made-with-love truffles, they were the absolute hit of the night. They weren’t perfect—some were lopsided, others had a few fingerprint divots—but they were made together, and that made them magical. Now, making these truffles with my family is a non-negotiable holiday tradition. It’s a beautiful reminder that the best recipes aren’t about perfection; they’re about the joy you stir into them.
Gathering Your Magical Ingredients
See? I told you it was simple! The beauty of this recipe is in its short, powerful ingredient list. Each one plays a starring role, and I’ve got a few chef insights and swaps to make sure your truffles turn out perfectly every time.
- 1 package (36 cookies) Oreo Cookies: This is the heart and soul of your truffle! You’ll use the entire cookie—the chocolate wafers AND the creamy filling. It all gets blitzed together into a fine, delicious crumb. Chef’s Insight: While classic Oreos are perfect, this is your chance to get creative! Try mint Oreos for a candy-cane vibe, gingerbread Oreos for a spiced twist, or even peanut butter Oreos if that’s your jam.
- 1 (8 ounce / 226g) block Cream Cheese, softened: This is the magic binder that transforms dry crumbs into a smooth, rollable “dough.” It also adds a lovely tang that cuts through the sweetness. Pro Tip: SOFTENED is the key word here. Take it out of the fridge at least an hour before you start. If it’s too cold, you’ll have lumps and a major arm workout trying to mix it. For a dairy-free version, vegan cream cheese works wonderfully!
- 300g (about 2 cups) Chocolate for Coating: This is your truffle’s beautiful, shiny coat. You can use high-quality chocolate bars chopped up, or good melting wafers (like Candy Melts or Ghirardelli melting chips). Chef’s Choice: I love using semi-sweet chocolate for a classic, rich flavor, but milk chocolate is sweeter and more kid-friendly, and white chocolate makes a stunning contrast. For easiest dipping, melting wafers are designed to melt smoothly and set with a snap.
Optional for that Extra Holiday Cheer:
- Crushed candy canes or peppermints
- Festive sprinkles or sanding sugar
- Red or green candy melts for a pretty drizzled finish
- A pinch of espresso powder mixed into the crumbs for a deep mocha flavor
Let’s Make Some Magic: Step-by-Step Instructions
Ready to create? Follow these steps, and you’ll have a gorgeous plate of truffles in no time. I’ve packed this section with all my best tips and little hacks I’ve learned over the years!
Step 1: Crush Those Cookies!
Grab your food processor and pulse the entire package of Oreos (yes, filling and all!) until you have a fine, even crumb. No food processor? No problem! Place the cookies in a large zip-top bag, seal it tightly (get that air out!), and use a rolling pin to crush them to a fine powder. You want the texture to be like dark, sandy soil—no big chunks! This ensures your truffle center will be smooth and luxurious.
Step 2: The Creamy Bind
In a large mixing bowl, combine your finely ground Oreo crumbs with the softened cream cheese. Use a sturdy spatula or even your (clean!) hands to mix it all together until it’s completely combined and has the consistency of a thick, fudgy cookie dough. You shouldn’t see any streaks of white cream cheese. This is a great step to get the kids involved with—it’s basically playing with edible Play-Doh!
Step 3: Roll, Roll, Roll Your Truffles
Using a small cookie scoop (a melon baller or a tablespoon measure works too), portion out the dough. I aim for about 1-inch balls. Roll each portion between your palms to form a smooth, round sphere. Chef’s Hack: If the dough is sticking to your hands, lightly dampen them with a bit of water. It works like a charm! Place the rolled balls on a parchment or wax paper-lined baking sheet.
Step 4: The Essential Chill
This step is non-negotiable! Pop the entire baking sheet into the freezer for at least 20 minutes. You want the truffles to be very firm. This “flash freeze” prevents them from falling apart when you dip them into the warm chocolate. A cold center + warm shell = perfect, crack-free truffles every time.
Step 5: Melt That Chocolate
While the truffles are chilling, melt your coating chocolate. Place it in a microwave-safe bowl and heat it in 20-second intervals, stirring well after each burst. Stop heating when it’s almost all melted—the residual heat will melt the last few lumps. This prevents the chocolate from scorching and seizing. For extra smoothness, you can add a tiny teaspoon of coconut oil to the chocolate as it melts.
Step 6: The Grand Dip
Remove a few truffles from the freezer at a time (keeping the rest cold). Using a fork or a dipping tool, lower a truffle into the melted chocolate. Swirl it around to coat it completely, then gently tap the fork on the edge of the bowl to shake off any excess chocolate. This gives you a beautiful, thin, even shell. Carefully place the dipped truffle back onto the parchment-lined sheet.
Step 7: Decorate While Wet!
Immediately after placing the dipped truffle on the sheet, sprinkle on your crushed candy canes, sprinkles, or any other toppings. You have to work quickly before the chocolate sets! If you’re planning to drizzle with a different color of chocolate, wait until the first coat is fully set.
Step 8: The Final Set
Once all your truffles are beautifully coated and decorated, place the entire tray back into the refrigerator for another 15-20 minutes, or until the chocolate shell is completely firm and shiny.
Serving Up Your Sweet Creations
Presentation is part of the fun! For a casual family treat, simply pile these glorious truffles high in a rustic wooden bowl. For a more elegant touch, place each truffle in a mini paper candy cup (you can find festive holiday ones at any craft store) and arrange them on a beautiful platter. They make an incredible addition to a holiday dessert charcuterie board alongside some fresh berries, nuts, and other small sweets. Package them in a cute box tied with a ribbon for the most beloved homemade gift on the block!
Get Creative: Fun Flavor Twists!
The basic formula is your canvas—now go create! Here are a few of my favorite ways to mix things up:
- Peppermint Bark: Use dark chocolate for coating and immediately top with crushed peppermint candies. Add a drop of peppermint extract to the truffle mixture for an extra kick.
- Salted Caramel Delight: After dipping in milk chocolate, drizzle with melted caramel and sprinkle with a tiny pinch of flaky sea salt.
- Cookies & Cream Dream: Use white chocolate for coating and roll the wet truffles in additional Oreo crumbs for a double-dose of cookie goodness.
- Mocha Magic: Add 1-2 teaspoons of instant espresso powder to the Oreo crumbs before mixing with the cream cheese. Dip in dark chocolate.
- Birthday Cake Fun: Use Golden Oreos, mix in a tablespoon of rainbow sprinkles into the dough, and dip in white chocolate.
Anna’s Chef Notes & Kitchen Stories
This recipe has been my trusty sidekick for so many years, and it’s evolved in the best ways. I’ve learned that a small cookie scoop is worth its weight in gold for getting uniformly sized truffles. I’ve also embraced the mess—my kitchen always looks like a cookie crumb bomb went off by the end, but it’s a happy mess!
One year, in a pre-coffee haze, I accidentally used a tub of onion and chive cream cheese instead of plain. Let’s just say those were… savory truffles. A complete disaster! We still laugh about it. So, double-check your labels, friends! The beauty of this recipe is its flexibility. Don’t be afraid to play and make it your own. The “mistakes” often lead to the best new creations.
Your Questions, Answered!
Q: My truffle mixture is too sticky to roll! What did I do wrong?
A: This usually means your cream cheese was a bit too warm or you might have a particularly humid kitchen. Don’t worry! Just pop the whole bowl of mixture into the fridge for 20-30 minutes to firm up. You can also lightly wet your hands to prevent sticking while rolling.
Q: Why did my chocolate coating crack after dipping?
A: The most common culprit is the temperature difference. If your truffle centers aren’t cold enough, the warm chocolate will cause the outside to expand and crack. Ensure you do that crucial 20-minute freezer chill! Also, make sure your melted chocolate isn’t scalding hot; just warm enough to be fluid.
Q: Can I make these ahead of time?
A: Absolutely! They are the perfect make-ahead treat. Store them in a single layer in an airtight container in the refrigerator for up to a week. You can also freeze them for up to 3 months. Just thaw in the fridge before serving.
Q: My chocolate got clumpy and seized when I melted it. Can I fix it?
A> Oh, seized chocolate—a classic kitchen hurdle! This happens if even a tiny drop of water gets into the melting chocolate. To rescue it, try stirring in a tablespoon of neutral oil (like vegetable or coconut oil) at a time until it smooths back out. It won’t set quite as hard, but it will still taste delicious.
Nutritional Information*
*This is an estimate provided for informational purposes only. I am not a nutritionist.
Per Truffle (approx.): Calories: 120 | Fat: 7g | Saturated Fat: 3g | Carbohydrates: 12g | Sugar: 9g | Protein: 1g
Allergy Info: Contains dairy, gluten, and soy. For dietary restrictions, you can successfully substitute vegan cream cheese and gluten-free/vegan sandwich cookies (like Glutino or Trader Joe’s brands) and dairy-free chocolate.
🎄 Final Thoughts: Joy in Every Bite
These Oreo Truffles prove that the sweetest holiday traditions don’t have to be complicated. With just three simple ingredients, a little rolling, and a lot of laughter, you’ve got a treat that feels decadent, festive, and oh-so-magical. They’re the kind of dessert that wins over every crowd—whether they’re gracing a cookie tray, tucked into a gift box, or sneaked straight from the fridge during a midnight cocoa run.
So, don’t stress about perfection. A few lopsided ones, a smudge of chocolate here and there—it’s all part of the fun. What matters most is the joy stirred into every batch and the memories you create while making them. Here’s to simple recipes, sweet traditions, and treats that remind us the holidays are best when shared.