Your New Favorite Fall Treat: Apple Pie Cookies Are Here!
Hey there, friend! Let’s talk about one of life’s greatest little pleasures: that moment you pull a baking sheet out of the oven, and your entire kitchen is instantly wrapped in the warm, spicy-sweet hug of cinnamon and baked apples. It’s pure magic, isn’t it? It’s the smell of cozy sweaters, crisp autumn air, and happy memories. Now, what if I told you we could capture that entire feeling—the essence of a perfect, from-scratch apple pie—and pack it into a adorable, handheld, totally dunkable cookie?
That’s exactly what we’re doing today with these incredible Apple Pie Cookies. Imagine this: flaky, buttery layers of pie crust hugging a tender, spiced apple filling, all baked until golden perfection and finished with a dreamy cinnamon glaze. They’re fun to make, absolutely irresistible to eat, and they solve that age-old problem of wanting a whole pie but not necessarily wanting to commit to slicing and serving a whole pie. These are perfect for lunchboxes, holiday platters, sneaky afternoon snacks, or just because you deserve a little joy today. So, are you ready to turn your kitchen into the coziest bakery on the block? Let’s grab our favorite mixing bowls and make some magic together!
The Little Pie That Started It All
PrintApple Pie Cookies
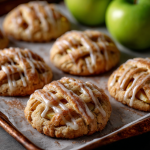
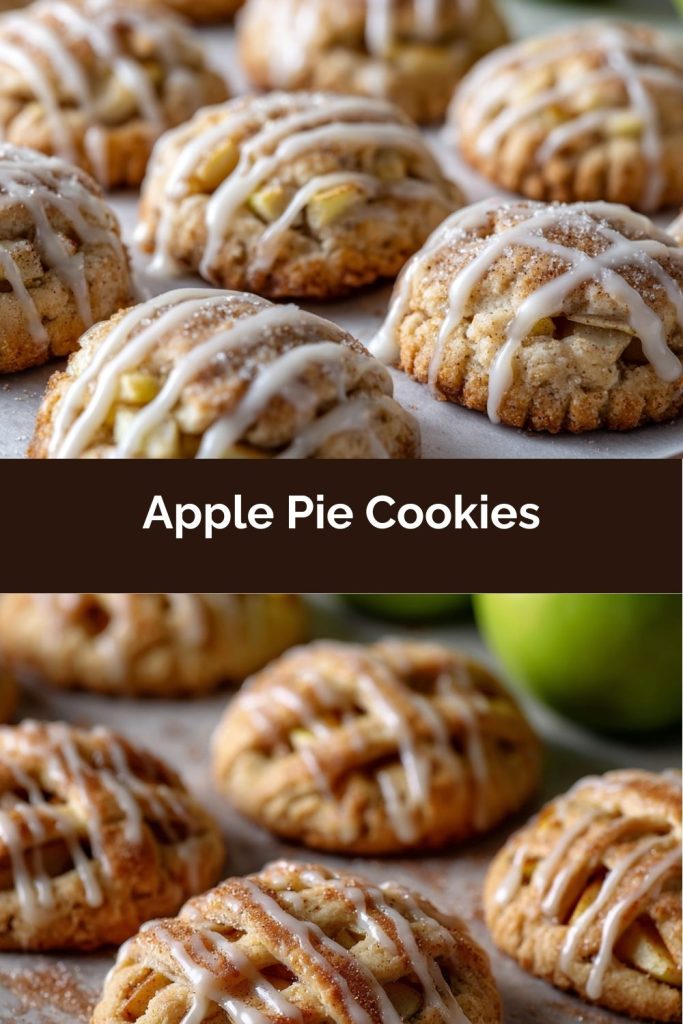
These bite-sized beauties are the best parts of apple pie—flaky crust, warm spiced apples, and gooey caramel—all wrapped up in cookie form. Sweet, cinnamon-kissed, and totally portable, they’re perfect for fall gatherings or holiday cookie trays.
- Prep Time: 20 mins
- Cook Time: 20 mins
- Total Time: 40 mins
- Yield: 24–28 cookies 1x
Ingredients
2 packages refrigerated pie crusts (4 crusts total)
10 oz caramel topping
20 oz apple pie filling (chopped finely)
2 eggs, beaten
2 tsp cinnamon
1/2 tsp nutmeg
1/2 cup sugar
Instructions
Preheat oven to 350°F (175°C). Line baking sheets with parchment.
Prepare filling: Chop apple pie filling into small pieces for easy spreading.
Roll out crusts: Lay out two crusts. Spread caramel topping evenly over each, then add a thin layer of apple pie filling.
Top and seal: Place the remaining crusts on top. Press gently. Use a pizza cutter or knife to slice into rounds or squares.
Cut and crimp: Use a cookie cutter to shape cookies. Seal edges with a fork. Place on baking sheet.
Egg wash & sugar: Whisk egg and brush tops of cookies. Mix sugar, cinnamon, and nutmeg; sprinkle generously on top.
Bake: 18–22 minutes or until golden brown. Let cool slightly before serving.
Nutrition
- Calories: 180 |
- Sugar: 14g
- Fat: 7g
- Carbohydrates: 27g
- Protein: 1g
This recipe always takes me right back to my grandma’s linoleum-floored kitchen. She was a pie wizard—her lattice tops were works of art that I’m still trying to replicate. But as a little kid, I was far less interested in the art of the crust and far more interested in the speed at which I could get a slice onto my plate. I’d hover by the oven, practically vibrating with impatience while her famous apple pie cooled on the stovetop.
One day, she saw me eyeing the discarded scraps of pie dough she was about to toss away. Instead, she smiled that knowing smile of hers, gathered them up, and pressed them into a tiny, ramekin-sized pie dish. She scooped in a spoonful of the leftover filling, crumbled a little sugary streusel on top, and baked me my very own, personal “mini pie.” It felt so special, like a secret just for me. These apple pie cookies are my grown-up, shareable (but you won’t want to) version of that memory. They’re a little nod to my grandma’s ingenuity and a big, delicious promise that great food is always, always about the love you bake into it.
Gathering Your Cookie Pie Adventure Squad
Part of the joy of this recipe is its beautiful simplicity! We’re using a brilliant shortcut (refrigerated pie crust) that guarantees a flaky, perfect result every single time, so you can focus on the fun part: the filling! Here’s everything you’ll need.
- 1 package (2 crusts) refrigerated pie dough – This is our superstar timesaver! I keep a box in the fridge for pastry emergencies. It’s consistently flaky and buttery. Of course, if you’re feeling ambitious, my foolproof all-butter pie crust works wonderfully here too!
- 2 medium apples, peeled and finely diced – The right apple makes all the difference. I love a mix for complexity: Granny Smith for its tartness that holds its shape, and Honeycrisp for its incredible sweetness and juiciness. Braeburn or Jazz apples are fantastic choices, too!
- 2 tbsp granulated sugar – This is our workhorse sweetener, dissolving easily into the apple juices.
- 2 tbsp brown sugar – This is for flavor, friend! The molasses in the brown sugar adds a deep, caramel-like warmth that plays so nicely with the cinnamon.
- 1 tsp ground cinnamon – The heart and soul of the spice blend. Please use fresh, fragrant cinnamon for the best flavor!
- ½ tsp lemon juice – A tiny but mighty ingredient! The acid from the lemon juice prevents the apples from browning and adds a tiny bit of brightness that cuts through the sweetness perfectly.
- 1 tbsp all-purpose flour – This is our thickening agent. It soaks up the juices the apples release as they bake, preventing a soggy bottom crust and keeping the filling luscious and contained.
- 1 egg, beaten (for egg wash) – This isn’t just for looks! Brushing the crust with egg wash is what gives it that gorgeous, professional, deep golden-brown color and beautiful sheen.
- 1 tbsp coarse sugar (optional, for topping) – I highly recommend not skipping this! That crunchy, sparkling sugar on top provides the most wonderful texture contrast to the flaky crust.
For the Optional (but highly recommended) Glaze:
- ½ cup powdered sugar – The base of our simple glaze, it creates a smooth, sweet drizzle.
- 1–2 tbsp milk – Start with one tablespoon and add more as needed to reach your desired drizzling consistency. Whole milk or even a splash of cream makes it extra rich.
- Pinch of cinnamon – Because we can never have too much cinnamon! It makes the glaze pretty and adds one more layer of spice.
Let’s Build Some Cookie Magic: A Step-by-Step Guide
Okay, team! Aprons on, let’s do this. I’ll walk you through each step with all my favorite chef hacks to ensure your apple pie cookies are nothing short of spectacular.
Step 1: Preheat and Prep. Preheat your oven to 375°F (190°C). This is crucial for getting that initial oven spring and flaky layers. Line a baking sheet with parchment paper. Not only does this prevent sticking, but it makes cleanup an absolute dream. I never bake without it!
Step 2: Create the Spiced Apple Filling. In a medium bowl, toss together your finely diced apples, granulated sugar, brown sugar, cinnamon, lemon juice, and flour. Keep those apple pieces small, about ¼-inch dice, so they cook through quickly and become perfectly tender. Mix until every little piece of apple is coated in that sugary, spiced goodness. Let it sit for a minute—you might even see the flour and sugar start to form a little syrup with the apple juices. That’s exactly what we want!
Step 3: Roll and Mound. Take one of your pie crusts and roll it out just slightly on a lightly floured surface. We’re not trying to make it huge, just smooth out any creases. Now, imagine a grid on your crust. Using a small spoon or a cookie scoop, place small mounds of the apple filling (about 1 heaping tablespoon each) evenly spaced across the crust. Leave about 1.5 to 2 inches between each mound—this is your real estate for sealing and cutting!
Step 4: The Secret Seal (Egg Wash!). Here’s a pro tip! Take your beaten egg and lightly brush it on the exposed pie crust in between the mounds of filling. This acts like edible glue and will help the top crust adhere much better, creating a strong seal so none of that delicious filling bubbles out.
Step 5: Top and Press. Gently place the second rolled-out pie crust on top. Now, using your fingertips, gently press down around each mound of filling, pushing out any air pockets. Air is the enemy of a good seal! You should see the outlines of all your little apple packages.
Step 6: Cut and Crimp. This is the satisfying part! Use a 2.5 to 3-inch round cookie cutter (or even the rim of a glass) to cut out each cookie. Press down firmly and try to center each mound as best you can. Now, take a fork and press down all around the edges of each circle to crimp and seal them shut. This double seal (the egg wash and the crimping) is your guarantee of a leak-proof cookie!
Step 7: Glaze and Sparkle. Transfer your beautiful little cookie pies to your prepared baking sheet. Brush the tops of each one generously with the remaining egg wash. This is what gives them that gorgeous color! Now, sprinkle liberally with that coarse sugar. Don’t be shy!
Step 8: Bake to Golden Perfection. Pop them in the oven for 18-22 minutes. You’re looking for a deep, golden brown crust and you might even see some of the spiced apple filling bubbling happily inside. Your kitchen will smell like heaven. I promise.
Step 9: The Final Drizzle. Let the cookies cool on the baking sheet for at least 10 minutes. They need time to set up! While they’re cooling, whisk together your powdered sugar, milk, and pinch of cinnamon for the glaze. You want it to be thin enough to drizzle but thick enough to hold its shape. Use a spoon or a piping bag to zig-zag that gorgeous glaze over every single cookie.
How to Serve These Little Bites of Joy
Presentation is part of the fun! Let these cookies cool just enough so the glaze sets, but serving them still slightly warm is an absolute game-changer. I love to arrange them on a rustic wooden board or a pretty cake stand. For the ultimate experience, place a small bowl of lightly sweetened whipped cream or a scoop of vanilla bean ice cream for dipping. They’re perfect with a hot cup of coffee for a decadent breakfast (I won’t tell!) or a mug of spiced tea for the coziest afternoon pick-me-up. Stack them high on a plate for a party—they disappear fast!
Make It Your Own! Delicious Variations
The beauty of this recipe is how easily you can customize it! Here are a few of my favorite twists:
- Apple Cranberry: Add 2 tablespoons of dried cranberries to the apple filling for a sweet-tart burst and a pop of color.
- Mapley-Glazed: Swap the milk in the glaze for real maple syrup. It adds an incredible autumnal depth of flavor.
- Allergic to Eggs? No problem! You can use a simple milk wash instead of the egg wash. The color won’t be quite as rich, but they’ll still be delicious.
- Caramel Drizzle: Skip the cinnamon glaze and warm up some store-bought caramel sauce to drizzle over the top. It’s next-level indulgence.
- Savory-Sweet Twist: Add a very small pinch of black pepper to your apple filling. It sounds wild, but it enhances the warmth of the cinnamon in the most amazing way!
Anna’s Chef Notes & Kitchen Stories
This recipe has evolved so much since my first attempt, which I’ll affectionately call “The Great Apple Leak of 2018.” I didn’t use enough flour, I didn’t seal the edges properly, and I ended up with a baking sheet of delicious but… deconstructed apple cookies. The filling was everywhere! It was a delicious, sticky mess. That disaster taught me the importance of the flour thickener and the fork-crimp seal. So if your first batch isn’t perfect, don’t sweat it! They’ll still taste amazing.
Another tip: don’t overfill them! I know it’s tempting to pack in as much apple goodness as possible, but trust me, a heaping tablespoon is plenty. Any more and you risk a blowout. These little guys are all about balance. I hope this recipe becomes a new tradition in your home, just like my grandma’s mini pie is in mine.
Your Questions, Answered!
Q: Can I make these ahead of time?
A: Absolutely! You can assemble the cookies up to the point of baking, then cover the baking sheet tightly with plastic wrap and refrigerate for up to 24 hours. You can also freeze the unbaked cookies on the sheet, then transfer to a freezer bag once solid. Bake from frozen, adding just a few extra minutes to the baking time. You can also bake them a day ahead and store them in an airtight container at room temperature. I’d wait to add the glaze until just before serving for the prettiest presentation.
Q: My filling leaked out everywhere! What did I do wrong?
A: Welcome to the club! The most common culprits are: 1) Not using the flour, which is essential for thickening the juices. 2) Not creating a good seal with the fork. Really press down hard all the way around the edge. 3) Overfilling the cookies. Remember, a heaping tablespoon is perfect! Even if they leak, they’ll still be delicious.
Q: My crust isn’t flaky. It’s kinda tough. Why?
A: This usually happens if the dough was over-handled or got too warm. Work quickly and keep the dough cold. If you notice the butter in the crust softening too much while you’re working, just pop the whole baking sheet into the fridge for 10 minutes to let the dough firm up again before baking. Cold butter = steam = flaky layers!
Q: Can I use homemade pie crust?
A: Of course! You’ll need one standard double-crust recipe. Roll it out to about a 12-inch circle and proceed with the recipe as written. Using homemade crust will give you an incredible, buttery flavor.
Nutritional Information*
*Disclaimer: This is an estimate provided by an online nutrition calculator for one cookie without glaze. Values will vary based on specific ingredients used.
- Calories: ~150kcal
- Carbohydrates: 20g
- Fat: 7g
Final Thoughts: Apple Pie Happiness in Every Bite 🍎✨
Apple Pie Cookies are proof that comfort doesn’t have to come in big, complicated packages. They’ve got all the cozy flavors of a slice of homemade pie, tucked into a flaky, handheld cookie that’s just as fun to share as it is to sneak straight off the cooling rack. Whether you bake them for a holiday platter, tuck them into a lunchbox, or whip up a batch just because the kitchen feels like it needs a little sweetness, these cookies deliver nostalgia and joy in every bite.
So channel a little grandma magic, roll out that dough, and bake up a tray of love. Because sometimes, the smallest treats carry the biggest memories