Let’s Bake the Coziest, Most Magical Banana Bread of Your Life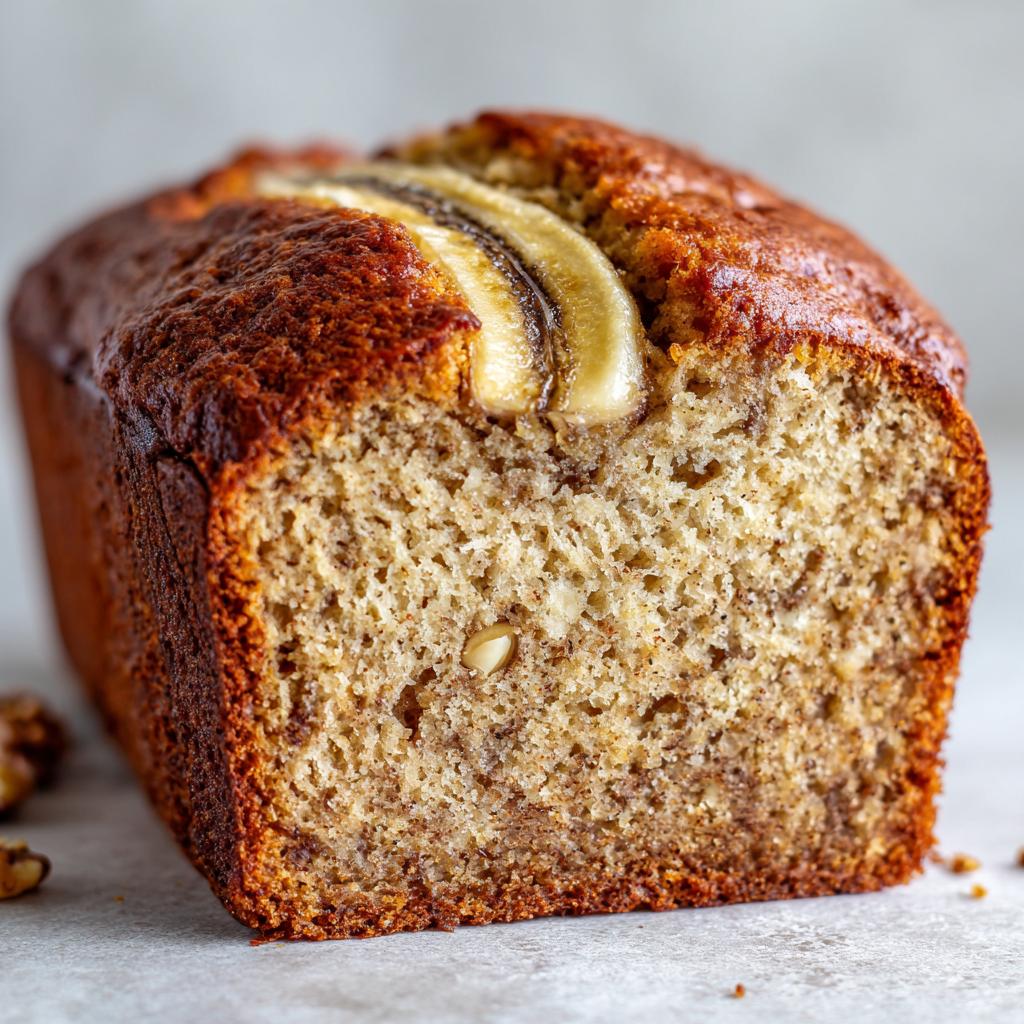
Hey there, friend! Is there anything quite like the smell of banana bread wafting through the house? That warm, sweet, comforting aroma that promises a slice of pure happiness is one of my absolute favorite things. It’s a hug in loaf form. But what if I told you we could take that classic, beloved recipe and make it even better? Get ready to meet your new kitchen bestie: my Ultra-Moist Greek Yogurt Banana Bread.
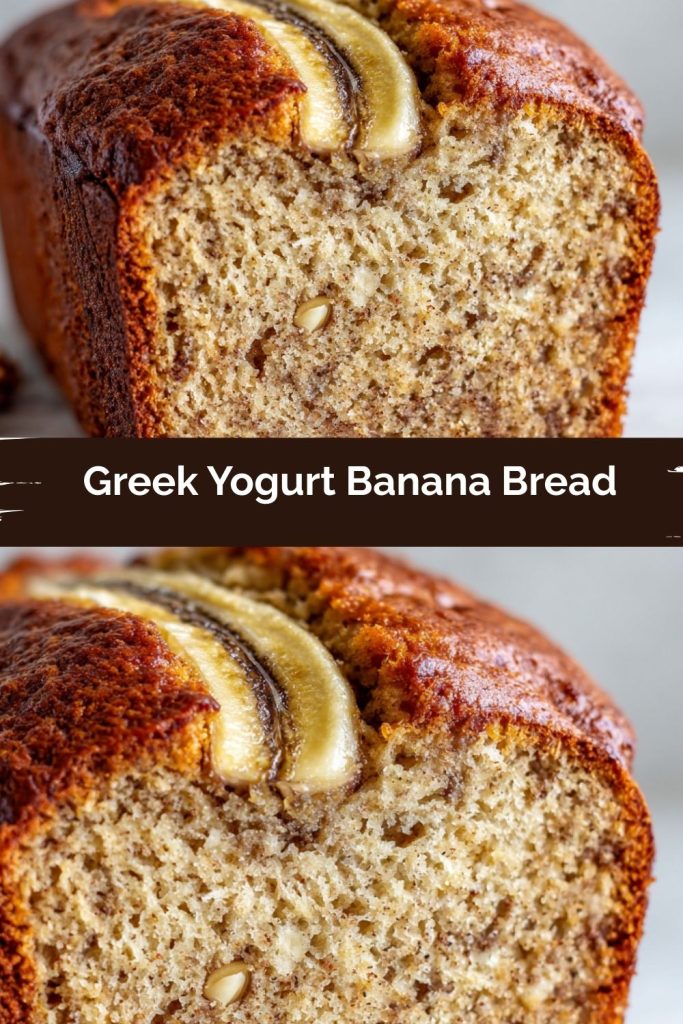
This isn’t just any banana bread. This is a loaf that’s incredibly tender, packed with real banana flavor, and has a subtle tang that makes it utterly irresistible. The secret weapon? A big, generous scoop of plain Greek yogurt. It works magic, adding incredible moisture and a protein boost without any heaviness. We’re talking about a bread that’s wholesome enough to feel good about slicing for breakfast, yet decadent enough to satisfy your afternoon snack craving or evening dessert fix. It’s uncomplicated, joyful baking at its finest. So, let’s preheat that oven, mash those bananas, and create something truly amazing together. I promise, this recipe is about to become a staple in your home, just like it is in mine.
A Loaf of Love and Very Ripe Bananas
PrintGreek Yogurt Banana Bread
Moist, Wholesome & Packed with Banana Flavor
This Greek Yogurt Banana Bread takes your classic loaf to the next level—ultra-moist, subtly tangy, and perfectly sweet. The yogurt adds richness without extra fat, making it a feel-good option for breakfast, snacks, or anytime you need a warm, comforting slice.
- Prep Time: 10 mins
- Cook Time: 55 mins
- Total Time: 1 hr 5 mins
- Yield: 10 slices 1x
Ingredients
3 ripe bananas, mashed
1/2 cup plain Greek yogurt
1/2 cup sugar or honey
2 large eggs
1/4 cup melted butter or oil
1 tsp vanilla extract
1 1/2 cups all-purpose flour
1 tsp baking soda
1/2 tsp salt
Optional: 1/2 cup chopped walnuts or chocolate chips
Instructions
Preheat oven to 350°F (175°C). Grease a 9×5-inch loaf pan.
In a bowl, whisk mashed bananas, yogurt, sugar, eggs, melted butter, and vanilla.
Stir in flour, baking soda, and salt until just combined.
Fold in nuts or chocolate chips if using.
Pour batter into pan and smooth the top.
Bake for 50–60 minutes or until a toothpick comes out clean.
Cool in pan for 10 minutes, then transfer to a rack.
Nutrition
- Calories: 190
- Sugar: 13g
- Fat: 6g
- Carbohydrates: 30g
- Protein: 4g
My love affair with banana bread started not in a fancy kitchen, but in my grandma’s cozy, flour-dusted one. She had a magical, seemingly psychic ability to know the exact moment a bunch of bananas on her counter had crossed the line from “just ripe” to “perfect for baking.” She’d never let a single banana go to waste. To her, those speckled, soft fruits weren’t past their prime; they were an opportunity.
I can still picture her, humming an old tune, mashing the bananas in her big yellow bowl with a kind of gentle ferocity. She’d let me pour in the vanilla and sneak a taste of the batter (a tradition I proudly uphold to this day). Her recipe was simple, a well-loved index card smudged with butter and sugar. This Greek Yogurt version is my own little twist on her classic. I started adding yogurt years ago when I wanted to create a version that felt a bit more nourishing but lost none of the soul-warming comfort. It’s my modern homage to her timeless lesson: that the best cooking often comes from a place of resourcefulness and love. Every time I bake it, the smell takes me right back to her kitchen table.
Gathering Your Banana Bread Dream Team
Here’s the beautiful cast of characters that will come together to create pure magic. The beauty of this recipe is in its simplicity and flexibility!
- 3 ripe bananas, mashed (about 1 ½ cups) – This is the star of the show! The riper the banana (think lots of brown spots), the sweeter and more flavorful your bread will be. No ripe bananas? Place unpeeled bananas on a baking sheet and bake at 300°F (150°C) for 15-20 minutes until the skins are black, then let them cool. Instant ripening hack!
- 1/2 cup plain Greek yogurt – Our secret weapon! Full-fat will give you the richest, moistest crumb, but low-fat works great too. It adds tang, protein, and incredible tenderness. Chef’s Insight: Sour cream is a perfect 1:1 substitute if that’s what you have on hand.
- 1/2 cup sugar or honey – I often use honey for a more complex flavor, but granulated sugar works perfectly. For a less sweet loaf, you can reduce this to 1/3 cup without issue.
- 2 large eggs – They act as the binder, giving our loaf structure. Make sure they’re at room temperature for best mixing! To quickly bring eggs to room temp, place them in a bowl of warm water for 5-10 minutes.
- 1/4 cup melted butter or oil – Butter gives that classic, rich flavor, while a neutral oil (like avocado or coconut) keeps it super moist. I’m a butter gal at heart!
- 1 tsp vanilla extract – The supporting actor that makes all the other flavors sing. Never skip it!
- 1 1/2 cups all-purpose flour – The foundation. For a slightly denser, whole-grain version, you can substitute up to half with whole wheat flour.
- 1 tsp baking soda – Our leavening agent! This is what gives the bread its lift and airy texture. Make sure it’s not expired for best results.
- 1/2 tsp salt – Crucial for balancing all the sweetness and enhancing the flavors. Don’t you dare forget it!
- Optional: 1/2 cup chopped walnuts or chocolate chips – The fun part! Walnuts add a lovely crunch, and chocolate chips make it a treat. Or be a rebel and add both!
Let’s Bake! Your Step-by-Step Guide to Banana Bliss
Ready to make some magic? Follow these steps for a foolproof, perfect loaf every single time. I’ve packed this section with all my favorite little hacks to set you up for success.
Step 1: Prep Like a Pro. Preheat your oven to 350°F (175°C). Now, grab your 9×5-inch loaf pan and grease it thoroughly with butter or non-stick spray. For absolute insurance against sticking, I like to line the bottom with a small strip of parchment paper, leaving an overhang on the two long sides. This makes it a breeze to lift the finished loaf right out! Chef’s Hack: A well-greased pan is non-negotiable for a clean release.
Step 2: The Wet Team Mix-Up. In a large mixing bowl, peel and mash your super ripe bananas with a fork until you have a chunky puree. A few small lumps are totally fine! To the bananas, add the Greek yogurt, sugar (or honey), eggs, melted (and slightly cooled) butter or oil, and vanilla. Whisk everything together until it’s smooth and beautifully combined. You’ll see the mixture emulsify and thicken slightly. Chef’s Tip: If you melted your butter in a microwave-safe bowl, use that same slightly greasy bowl for mixing. Why dirty another dish?
Step 3: Bring in the Dry Crew. Place a mesh sieve over your bowl of wet ingredients and add the flour, baking soda, and salt right into the sieve. Sift them directly into the bowl! This little extra step ensures no lumps of baking soda and aerates the flour for a lighter texture. If you don’t have a sieve, just whisk the dry ingredients together in a separate bowl before adding them. Chef’s Hack: Sifting is a small act with a big payoff!
Step 4: The Gentle Fold. Now, with a spatula, gently fold the dry ingredients into the wet ingredients. Stop as soon as you no longer see streaks of flour. A few lumps are okay! Do not overmix! Overmixing is the number one cause of tough, dense banana bread. We want tenderness, not toughness. If you’re adding walnuts or chocolate chips, fold them in now, right at the end.
Step 5: Into the Pan & Off to the Oven. Pour the beautiful, thick batter into your prepared loaf pan. Use your spatula to smooth the top. For a professional-looking split down the middle, you can make a shallow slit down the length of the batter with a knife. Pop it into the preheated oven and set your timer for 50 minutes.
Step 6: The Toothpick Test. Ovens vary, so start checking at 50 minutes. The bread is done when it’s golden brown on top and a toothpick or thin knife inserted into the very center comes out with just a few moist crumbs attached, not wet batter. If it needs more time, check in 3-5 minute increments. Chef’s Warning: It might look done on top but still be raw inside, so that toothpick test is your best friend!
Step 7: The All-Important Cool Down. Once perfectly baked, take the loaf pan out of the oven and place it on a wire cooling rack. This is the hard part: let it cool in the pan for 10 minutes exactly. This allows the structure to set. Then, run a knife around the edges to loosen it, and carefully lift it out using the parchment paper handles or by gently inverting it. Let it cool completely on the wire rack before slicing. I know, I know… it’s pure torture. But slicing into a warm loaf can make it gummy. Trust me, it’s worth the wait!
Serving Up Your Masterpiece
Once your loaf has cooled (mostly… I won’t judge if you sneak a slightly warm slice!), it’s time to enjoy. I love a thick slice all on its own, maybe with a hot cup of coffee or tea. For a next-level breakfast, toast a slice lightly and spread it with a little salted butter or almond butter. If you’re feeling decadent, it’s absolutely heavenly warm with a scoop of vanilla ice cream melting over the top for the simplest, most satisfying dessert. However you serve it, serve it with a smile—you baked something wonderful!
Make It Your Own! Delicious Variations
The fun doesn’t stop here! This recipe is a fantastic canvas for your creativity. Here are a few of my favorite riffs:
- Lemon Blueberry Bliss: Add the zest of one lemon to the wet ingredients and fold in 1 cup of fresh or frozen blueberries (tossed in a tbsp of flour) instead of nuts/chocolate.
- Chocolate Swirl: Replace ¼ cup of the flour with ¼ cup unsweetened cocoa powder. Or, for a marbled effect, divide the finished batter in half, mix cocoa into one half, and swirl them together in the pan.
- Spiced & Nice: Warm things up with 1 tsp of cinnamon, ¼ tsp of nutmeg, and a pinch of cloves added to the dry ingredients.
- Gluten-Free Goodness: Substitute the all-purpose flour with a 1:1 gluten-free baking blend. The results are fantastic!
- Dairy-Free Delight: Use a plant-based yogurt (like coconut or almond milk yogurt) and coconut oil instead of butter. It works like a dream.
Anna’s Chef Notes & Kitchen Stories
This recipe has evolved so much over the years in my kitchen. I’ve made it in a frenzy for last-minute potlucks, baked it as a welcome gift for new neighbors, and whipped it up with my kiddos on lazy Sunday mornings. It’s seen it all! One of my funniest kitchen fails involved this very bread: I once, in a serious pre-coffee haze, accidentally used powdered sugar instead of flour. Let’s just say it resulted in a very sweet, very flat puddle. We all have those days! The lesson? Always label your containers and have that first cup of coffee before you start baking.
This loaf also freezes like a champion. I often double the batch and wrap one cooled loaf tightly in plastic wrap and then foil before freezing. It’s my secret weapon for having a homemade treat ready for unexpected guests or a future me who needs a pick-me-up. Just thaw it on the counter for a few hours, and it’s as good as new.
Your Questions, Answered!
Q: My banana bread is raw in the middle but dark on top. What happened?
A: This usually means your oven was too hot, causing the outside to bake too quickly. Ovens can run hot! I highly recommend using an oven thermometer to check its accuracy. Next time, tent a piece of foil loosely over the top for the last 15-20 minutes of baking to prevent over-browning while the center finishes cooking.
Q: Can I use regular yogurt instead of Greek yogurt?
A: You can, but because regular yogurt is thinner, your batter will be wetter and the bread might be slightly denser. If it’s all you have, go for it—it will still be delicious! You could also strain regular yogurt in a cheesecloth for 30 minutes to thicken it up.
Q: Why is my bread dense and gummy?
A: The two most common culprits are overmixing the batter (which develops too much gluten) and slicing into it while it’s still hot. Remember, fold gently until just combined, and let it cool completely on a wire rack. This allows the steam to escape and the crumb to set properly.
Q: My bananas aren’t very ripe. Can I still use them?
A: You can, but your bread will be less sweet and have a milder banana flavor. I highly recommend using the quick-ripening hack mentioned in the ingredients section (baking them) for the best results.
Nutritional Information*
*This is an estimate provided for informational purposes only. Actual values may vary based on specific ingredients used.
Per slice (based on 10 slices, made with honey and butter, without add-ins):
Calories: ~190 | Fat: 6g | Saturated Fat: 3.5g | Carbohydrates: 30g | Fiber: 1g | Sugar: 13g | Protein: 4g
Prep Time: 10 mins | Cook Time: 55 mins | Total Time: 1 hr 5 mins | Servings: 10 slices
Final Thoughts
Banana bread is one of those timeless recipes that never goes out of style, and this Greek Yogurt Banana Bread takes it to the next level. With its ultra-moist crumb, deep banana flavor, and that subtle tang from the yogurt, it’s the kind of loaf you’ll come back to again and again. It’s simple enough to whip up on a lazy Sunday, but special enough to share with friends, gift to neighbors, or serve at brunch with pride.
What I love most is how versatile it is—you can keep it classic, fold in chocolate chips or nuts, or play with fun twists like blueberries, spices, or even a swirl of cocoa. No matter how you make it, one thing’s for sure: the smell of it baking will wrap your whole home in comfort, and the first bite will feel like pure joy.