***
Let’s Bake Some Holiday Magic: Peppermint Bark Cookies!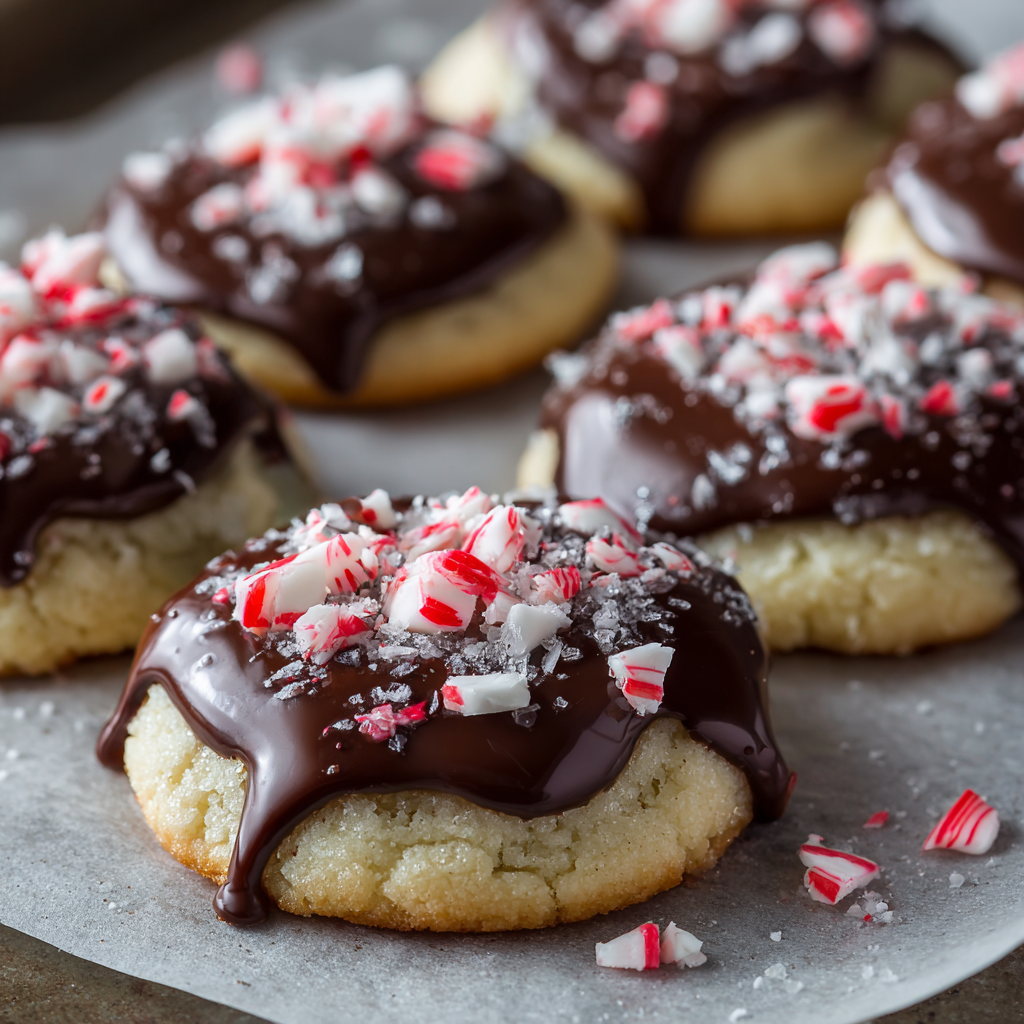
Hey there, friend! Is there anything that quite captures the spirit of the holidays like the cool, refreshing zing of peppermint and the rich, decadent embrace of dark chocolate? It’s a combination that sings of twinkling lights, cozy sweaters, and the joyful chaos of the season. I’m so thrilled you’re here, because today, we’re taking that classic holiday treat we all know and love—peppermint bark—and turning it into something even more incredible: melt-in-your-mouth, buttery Peppermint Bark Cookies!
Imagine this: a tender, crumbly shortbread cookie that just shatters perfectly when you take a bite. Now, picture it dipped in a sleek layer of glossy, semi-sweet chocolate. And as if that wasn’t enough, we’re crowning it with a cheerful sprinkle of crushed candy canes for that iconic holiday crunch and burst of minty freshness. It’s elegant enough for your fanciest cookie swap, easy enough for a fun afternoon of baking with the kids, and absolutely, 100% guaranteed to make your kitchen smell like a North Pole workshop (in the best way possible).
This recipe is my little gift to you—a stress-free, joy-filled baking project that delivers huge on flavor and wow-factor. So, preheat that oven, put on your favorite holiday playlist, and let’s create something deliciously magical together. I’ll be right here with you, cheering you on every step of the way!
A Sweet Slice of Christmas Past
PrintPeppermint Bark Cookies

These festive keto peppermint bark cookies combine rich chocolate almond flour bases with a creamy sugar-free white chocolate drizzle and a sprinkle of crushed peppermint—minus the sugar and carbs. Crisp edges, soft centers, and full holiday flavor in every bite.
- Prep Time: 10 min
- Cook Time: 10–12 min
- Total Time: 25 min
- Yield: 20 cookies 1x
Ingredients
Chocolate Cookies
1 ¾ cups almond flour
¼ cup cocoa powder (unsweetened)
½ tsp baking soda
¼ tsp salt
⅓ cup butter, softened (or coconut oil)
½ cup powdered monk fruit sweetener
1 egg
1 tsp vanilla extract
½ tsp peppermint extract
Topping
½ cup sugar-free white chocolate chips (melted)
2 tbsp crushed sugar-free peppermint candies
Instructions
Preheat oven to 350°F (175°C). Line a baking sheet with parchment.
In a bowl, whisk almond flour, cocoa powder, baking soda, and salt.
In another bowl, cream butter and sweetener until smooth. Mix in egg, vanilla, and peppermint extract.
Combine wet and dry ingredients into a soft dough.
Scoop dough into 1-inch balls and flatten slightly on baking sheet.
Bake 10–12 minutes. Let cool fully on the pan—they’ll firm as they cool.
Drizzle with melted sugar-free white chocolate and sprinkle crushed peppermint on top. Let set.
Nutrition
- Calories: 100
- Fat: 9g
- Carbohydrates: 2g
- Protein: 2g
This recipe always takes me right back to my grandma’s kitchen, a place that seemed to be permanently dusted with a fine layer of flour and filled with the warm scent of cinnamon and butter. Every December, we’d have our “Grand Cookie Bake-Off,” a day dedicated to making dozens upon dozens of cookies to gift to neighbors, teachers, and the mailman.
One year, when I was about ten, I was put in charge of crushing the candy canes for her famous peppermint bark. I took my job very seriously, meticulously unwrapping each one and placing them in a zip-top bag. But instead of gently tapping them with a rolling pin, I got a little overzealous and gave the bag one mighty WHACK with a canned good! Candy cane shards flew everywhere, glittering like red and pink confetti all over the kitchen floor. Instead of being upset, my grandma just laughed her deep, rumbling laugh, handed me a broom, and said, “Well, Anna, now the whole kitchen will smell like Christmas!” We salvaged what we could, and that year’s bark was a little less pepperminty than most, but it’s a memory I now cherish. These cookies are my way of combining the elegance of her bark with the homey, hands-on fun of cookie baking—with hopefully less cleanup required!
Gathering Your Cookie Crew (The Ingredients!)
One of the things I love most about this recipe is its beautiful simplicity. You likely have most of these staples in your pantry right now! Here’s what you’ll need to make about two dozen gorgeous cookies.
For the Shortbread Base:
- 1 cup (2 sticks) unsalted butter, softened: This is the heart and soul of our shortbread, providing that incredible rich, melt-in-your-mouth texture. Chef’s Tip: For truly perfect shortbread, your butter should be softened at room temperature for about an hour. It’s ready when you can press your finger into it and leave a slight indent. If you’re in a pinch, you can cut the sticks into tablespoons and let them sit for 15-20 minutes.
- ½ cup powdered sugar: Also known as confectioner’s sugar, it gives the shortbread a delicate sweetness and fine crumb, unlike the grittiness granulated sugar can sometimes create.
- 1 teaspoon pure vanilla extract: A warm, floral note that complements the butter and chocolate beautifully. Don’t skip it!
- 2 cups all-purpose flour: The structure of our cookie. Chef’s Insight: For a lighter, more tender cookie, fluff your flour with a spoon before scooping it into your measuring cup, then level it off. This prevents accidentally packing in too much flour.
- ¼ teaspoon salt: The secret weapon! Salt enhances all the other flavors and balances the sweetness, making the chocolate and peppermint pop.
For the Topping:
- 8 oz semi-sweet or dark chocolate, chopped or chips: I’m a dark chocolate gal myself (around 60-70% cacao is perfect), but semi-sweet is a classic crowd-pleaser. Using a high-quality baking bar (chopped) will give you the smoothest melt and best “snap,” but chocolate chips work wonderfully in a pinch because they have stabilizers that make them easy to melt. It’s all about what you have on hand!
- ½ cup crushed candy canes: The star of the show! You’ll need about 6-8 standard-sized candy canes. Unwrap them, place them in a sturdy zip-top bag, and use a rolling pin to crush them into small pieces. You want a mix of fine powder and little chunks for the best texture.
- Optional: ½ teaspoon peppermint extract: If you’re a true peppermint devotee like me, adding just a hint of extract to the melted chocolate gives it an incredible, extra layer of cool, minty flavor. A little goes a long way!
Let’s Get Baking: Your Step-by-Step Guide
Ready to create some magic? Follow these steps, and you’ll have a tray of gorgeous cookies before you know it. I’ve packed this section with all my favorite tips and hacks to ensure your success!
Step 1: Preheat and Prep
Preheat your oven to 350°F (175°C). Line a baking sheet with parchment paper. This is non-negotiable for me! It prevents sticking and makes cleanup an absolute dream. No parchment? A silicone baking mat works great, too.
Step 2: Cream the Butter and Sugar
In a medium-sized bowl, combine the softened butter and powdered sugar. Using a hand mixer or a stand mixer fitted with the paddle attachment, beat them together on medium speed for 2-3 minutes. Chef’s Hack: We’re not just mixing; we’re “creaming.” This process incorporates tiny air bubbles into the butter, which is the first secret to that light, tender shortbread texture. Stop when the mixture is pale, fluffy, and looks almost like a light whipped cream.
Step 3: Bring in the Vanilla
Mix in the vanilla extract until it’s fully incorporated. Scrape down the sides of the bowl with a spatula to make sure everything is getting to know each other.
Step 4: Gently Add the Dry Ingredients
In a separate bowl, whisk together the flour and salt. This distributes the salt evenly so you don’t get a salty bite. With your mixer on low speed, gradually add the flour mixture to the butter mixture. Watch closely here! Mix only until the flour just disappears and a soft dough forms. Overmixing is the enemy of tender shortbread—it develops the gluten in the flour and can make the cookies tough.
Step 5: A Quick Chill (If Needed)
If your dough feels too soft or sticky to handle—this can happen if your kitchen is warm—simply cover the bowl and pop it into the refrigerator for about 15 minutes. This firms up the butter just enough to make rolling a breeze.
Step 6: Roll and Cut
On a lightly floured surface, roll the dough out to about ¼-inch thickness. This is the perfect thickness for a cookie that’s substantial enough to dip but still delicate. Use your favorite cookie cutter! I love classic 2-inch rounds for simplicity, but rectangles lean into the “bark” aesthetic beautifully. Feel free to get festive with holiday shapes like trees or stars! Re-roll the scraps and cut out more cookies until you’ve used all the dough.
Step 7: Bake to Golden Perfection
Place your cut-out cookies on the prepared baking sheet about an inch apart. They don’t spread much, so you don’t need a ton of room. Bake for 10-12 minutes. You’re looking for the very edges to just barely start turning a light golden brown. The tops should still look fairly pale. Chef’s Tip: For even baking, rotate your baking sheet halfway through the bake time.
Step 8: The All-Important Cool Down
This might be the hardest step—waiting! Let the cookies cool on the baking sheet for 5 minutes before transferring them to a wire rack to cool completely. If you try to dip a warm cookie in chocolate, the chocolate will melt into a puddle. Patience is a virtue here, I promise!
Step 9: Melt the Chocolate
You can use a double boiler, but my quick-and-easy method is the microwave. Place the chocolate (and peppermint extract, if using) in a microwave-safe bowl. Heat in 20-second bursts on 50% power, stirring well after each interval. Stop when most of the chocolate is melted and just a few lumps remain—keep stirring off the heat, and the residual warmth will melt them perfectly. This prevents the chocolate from scorching.
Step 10: Dip, Sprinkle, and Set!
Now for the fun part! Hold a cooled cookie and dip one half (or just the end!) into the melted chocolate. Use a knife or small offset spatula to help spread it evenly if needed. Let the excess chocolate drip back into the bowl, then place the cookie back onto the parchment-lined sheet. Immediately, while the chocolate is still wet, sprinkle on a generous pinch of the crushed candy canes. The chocolate sets as a glue, locking those colorful bits in place. Repeat with all the cookies. Let them set at room temperature for about an hour, or for a quicker set, pop the whole tray in the fridge for 15 minutes.
How to Serve These Holiday Stars
Once set, these cookies are ready to shine! Pile them high on a beautiful vintage platter for your holiday party—they look especially stunning against a white or red plate. For gifting, place them in a clear cellophane bag tied with a festive ribbon, or stack them carefully in a holiday tin between layers of parchment paper. They pair wonderfully with a mug of strong hot coffee, a glass of cold milk, or even a rich hot chocolate for the ultimate peppermint-chocolate experience. However you serve them, get ready for compliments!
Make It Your Own: Delicious Variations
The beauty of this recipe is its adaptability. Feel free to play and create your own signature version!
- White Chocolate Dream: Swap the dark chocolate for high-quality white chocolate. The creamy sweetness with the peppermint is pure, snowy bliss.
- Mocha Twist: Add ½ teaspoon of instant espresso powder to the melted dark chocolate. It deepens the chocolate flavor and adds a wonderful, sophisticated complexity.
- Gluten-Free Friendly: You can easily use a 1:1 gluten-free all-purpose flour blend in place of the regular flour. I’ve had great success with brands like Bob’s Red Mill or Cup4Cup.
- Different Crunch: No candy canes? Use crushed hard peppermint candies or even a crushed peppermint puff (like a Junior Mint) for a different texture.
- Double Dipper: For an extra decadent treat, dip the entire cookie in chocolate for a full peppermint bark experience!
Anna’s Chef Notes & Kitchen Stories
This recipe has become a non-negotiable part of my holiday baking lineup. It’s evolved from a simple idea into a beloved tradition. One year, my daughter decided she wanted to “help” with the sprinkling and ended up creating one cookie that was literally just a mound of candy canes with a tiny bit of cookie peeking out from the bottom. We called it the “Peppermint Monster,” and it became her special cookie. Now, she insists on making one “Monster” every year—it’s our silly little kitchen tradition.
A pro tip from my many test batches: if your crushed candy canes seem to be “bleeding” their color into the chocolate after a few hours, it’s usually due to moisture in the air or from the candy canes themselves. To prevent this, make sure your cookies are completely cool before dipping, and try to use candy canes that are fresh and still crisp. But honestly, even if they do bleed a little pink, they still taste absolutely amazing!
Your Questions, Answered!
Q: My dough is too crumbly and won’t hold together when I try to roll it. What did I do wrong?
A: This usually means there’s a bit too much flour or the butter wasn’t quite soft enough. Next time, try fluffing your flour before measuring. For now, don’t worry! Just add cold water, one teaspoon at a time, and mix until the dough just comes together. Be patient; it might take 2-3 teaspoons.
Q: Can I make these cookies ahead of time?
A: Absolutely! They are fantastic make-ahead treats. You have two options: 1) You can bake the shortbread bases, let them cool completely, and store them in an airtight container at room temperature for up to 3 days before dipping and decorating. Or 2) Fully assemble the cookies and store them in a single layer in an airtight container in the fridge for up to a week. The chocolate will keep everything fresh.
Q: My chocolate got thick and clumpy when I was melting it. How can I fix it?
A> It sounds like your chocolate may have gotten too hot and “seized.” This happens when even a tiny drop of water gets into the melting chocolate. If this happens, don’t panic! You can often rescue it by vigorously stirring in a teaspoon of neutral oil (like vegetable or coconut oil) at a time until it becomes smooth and fluid again.
Q: Can I freeze these cookies?
A: Yes, they freeze beautifully! Place the fully set cookies in a single layer in a freezer-safe container, separated by layers of parchment paper. They will keep for up to 2 months. Thaw them in the container at room temperature to prevent condensation from making the candy canes sticky.
Nutritional Information*
*Please note: This is an estimated nutritional breakdown provided by an online calculator. It will vary based on specific brands and portion sizes.
Per Cookie (1 of 24): Calories: ~160 | Total Fat: 9g | Saturated Fat: 5g | Cholesterol: 20mg | Sodium: 25mg | Total Carbohydrates: 18g | Dietary Fiber: 1g | Sugars: 10g | Protein: 1g
Prep Time: 15 minutes | Bake Time: 12 minutes | Additional Time: 30 minutes (cooling & setting) | Total Time: About 1 hour | Servings: 24 cookies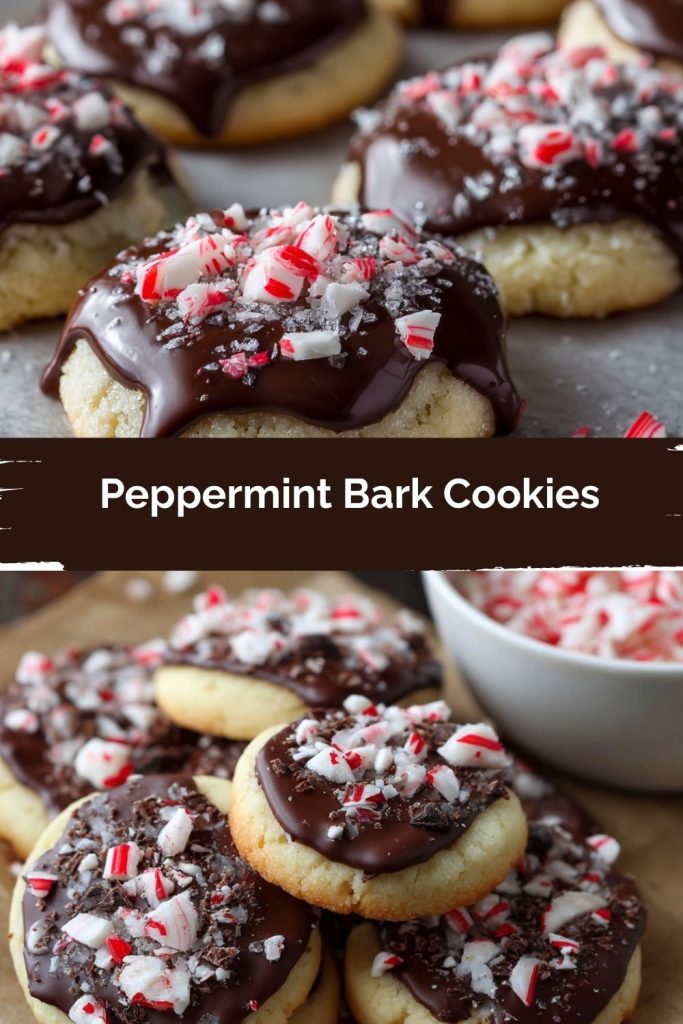
Final Thoughts: A Little Peppermint Joy in Every Bite
At the end of the day, these Peppermint Bark Cookies are so much more than a recipe—they’re a holiday tradition just waiting to happen. They’re the sweet little sparkle on the cookie tray, the treat you slip into a neighbor’s gift tin, and the memory your kids will carry long after the candy canes are gone.
What I love most is how simple they are, yet how much joy they bring—shortbread, chocolate, and peppermint come together like the ultimate holiday trio. No stress, no fuss, just pure cookie magic.
So tie on your apron, crank up the carols, and let these cookies bring a little extra holiday cheer into your kitchen. Trust me—once you share a batch, everyone will be asking when you’re making them again.