***
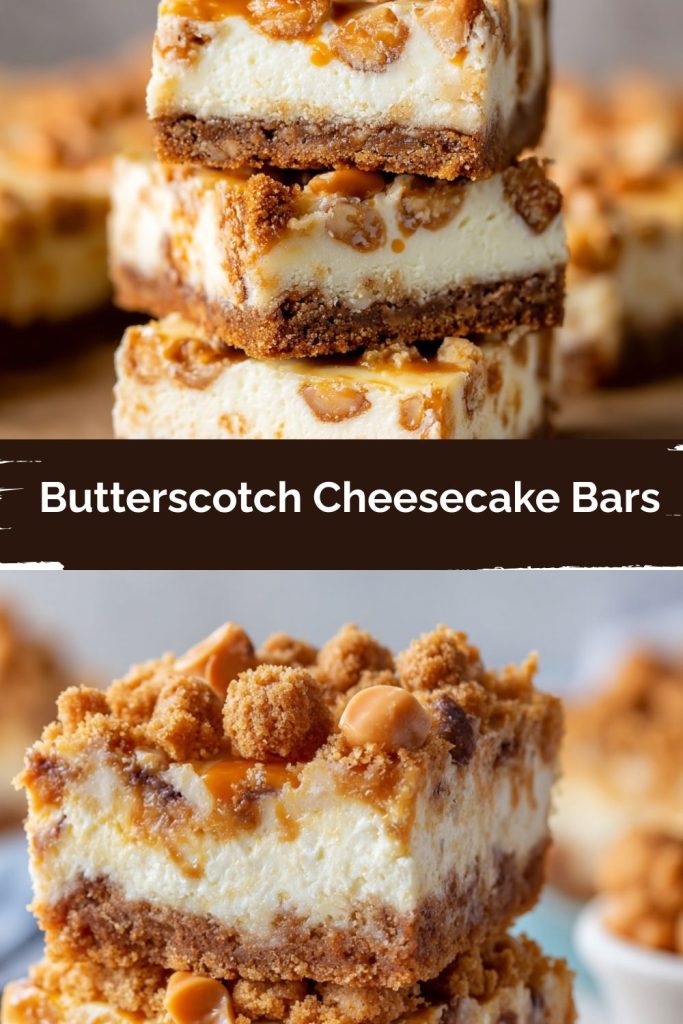
Butterscotch Cheesecake Bars: Your New Favorite Sweet Escape
Hey there, friend! Let’s be real for a second: is there anything more comforting than the smell of something sweet and buttery baking in the oven? It’s like a warm hug for your soul, a little bit of magic that turns any ordinary day into a celebration. And if you’re looking for a dessert that delivers maximum joy with minimal fuss, you, my friend, have landed in the right place.
Today, we’re whipping up a batch of my legendary Butterscotch Cheesecake Bars. Imagine this: a crisp, buttery graham cracker crust that gives way to an impossibly creamy, luxuriously smooth cheesecake filling. But we’re not stopping there. We’re loading that filling with a whole cup of rich, meltingly sweet butterscotch chips. Every single bite is a perfect harmony of texture and flavor—a little bit crunchy, a whole lot creamy, and bursting with that nostalgic, toasty butterscotch flavor that takes you right back to your grandma’s kitchen.
These bars are the ultimate crowd-pleaser. They’re perfect for potlucks, holiday parties, or those nights when you just need a little something special with your cup of tea. The best part? They’re surprisingly simple to make. No water baths, no fancy springform pans, and no stress. Just straightforward, joyful baking. So, are you ready to create a little magic? Let’s grab our bowls and get started!
A Sweet Slice of Nostalgia
PrintButterscotch Cheesecake Bars
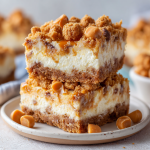
Buttery, sweet, and loaded with rich butterscotch chips—these cheesecake bars are the perfect handheld dessert for holidays, potlucks, or cozy nights in. With a graham cracker crust and ultra-creamy brown sugar filling, every bite melts in your mouth with nostalgic warmth.
- Prep Time: 15 min
- chill time: 4 hrs
- Cook Time: 40 min
- Total Time: 5 hrs
Ingredients
For the Crust:
2 cups graham cracker crumbs
½ cup unsalted butter, melted
¼ cup granulated sugar
For the Cheesecake Filling:
24 oz cream cheese, softened
1 cup brown sugar
3 large eggs
½ cup sour cream
1 tsp vanilla extract
1 cup butterscotch chips
Instructions
Preheat oven to 325°F (163°C). Line a 9×13-inch pan with parchment.
Make the crust: Mix graham crumbs, sugar, and melted butter. Press into pan. Bake 8–10 minutes, then cool slightly.
Make the filling: Beat cream cheese and brown sugar until smooth. Add eggs one at a time, then mix in sour cream and vanilla.
Fold in butterscotch chips, then pour mixture over crust.
Bake for 35–40 minutes, or until center is just set. Cool to room temp, then chill at least 4 hours before slicing.
Nutrition
- Calories: 310
- Sugar: 20g
- Fat: 21g
- Carbohydrates: 28g
- Protein: 4g
This recipe takes me right back to my Great-Aunt Maureen’s cluttered, wonderful kitchen. She wasn’t a fancy baker, but she was a generous one. Her counter was always covered in tins of cookies and bars, and she had a way of making you feel like you were the most important person in the world when she offered you one.
I remember one rainy autumn afternoon, I was about ten years old, feeling a little glum. She sat me down at her yellow Formica table, pushed aside a stack of crossword puzzles, and placed a small plate in front of me. On it was a square of something I’d never seen before—it was pale and studded with little golden bits. “Try that, sweet pea,” she said with a wink. “It’s a little taste of sunshine.” That first bite of her butterscotch cheesecake bar was a revelation. The creamy filling, the sweet crunch, the way the butterscotch chips melted on my tongue… it was pure, unadulterated happiness. It wasn’t just a dessert; it was a feeling. This recipe is my homage to Aunt Maureen, to her simple, powerful brand of kitchen love, and to the idea that a little sweetness can indeed brighten even the grayest of days.
Gathering Your Kitchen Crew: The Ingredients
One of the secrets to stress-free baking is knowing your ingredients! Here’s everything you’ll need, along with a few chef’s notes to make you feel like a pro.
For the Graham Cracker Crust:
- 2 cups graham cracker crumbs: You can buy pre-crushed crumbs or crush about 15 full-sheet graham crackers yourself. I pulse them in a food processor for a fine, even crumb. Chef’s Insight: For a deeper flavor, try using ginger snaps or biscoff cookies instead!
- ½ cup unsalted butter, melted: Unsalted lets us control the salt level. Melt it and let it cool slightly so it doesn’t make the crumbs soggy. This is the glue that holds our delicious foundation together.
- ¼ cup granulated sugar: This adds a subtle sweetness and helps the crust caramelize slightly and crisp up in the oven. It’s the perfect supporting actor to the butter and graham.
For the Ultra-Creamy Cheesecake Filling:
- 24 oz (three 8-oz blocks) cream cheese, softened: This is non-negotiable! Full-fat, brick-style cream cheese is key for that rich, dense, classic cheesecake texture. Let it sit on the counter for at least an hour until it’s room temperature. This ensures a silky-smooth filling with no lumps. Substitution Tip: For a lighter version, you can use Neufchâtel cheese, but the texture will be slightly less firm.
- 1 cup packed brown sugar: The molasses in the brown sugar is the secret weapon! It adds a warm, caramel-like depth that pairs perfectly with the butterscotch. Pack it firmly into your measuring cup.
- 3 large eggs, at room temperature: Room temp eggs incorporate much more smoothly into the cream cheese, preventing you from overmixing. Overmixing = too much air = cracked cheesecake. We don’t want that!
- ½ cup sour cream, at room temperature: This is my favorite cheesecake hack. Sour cream adds a incredible tanginess that balances the sweetness and makes the texture even creamier and more luxurious.
- 1 tsp pure vanilla extract: The flavor enhancer. It rounds out all the other flavors beautifully.
- 1 cup butterscotch chips: The star of the show! I prefer the classic store-bought chips for that hit of nostalgic flavor. Toss them in a teaspoon of flour before folding them in—this little trick helps prevent them from all sinking to the bottom of the bars!
Let’s Create Some Magic: Step-by-Step Instructions
Alright, let’s get our hands busy! Follow these steps, and you’ll have perfect bars in no time. I’ve sprinkled in all my best tips to guide you.
Step 1: Prep Like a Pro. First, preheat your oven to 325°F (163°C). This lower temperature is crucial for baking cheesecake evenly without over-browning or cracking. Then, line a 9×13-inch baking pan with parchment paper, leaving a slight overhang on two opposite sides. This is your ultimate lifesaver—it creates “handles” so you can lift the entire slab of cheesecake out of the pan for pristine, crumb-free slicing later. Trust me on this!
Step 2: Craft the Crust. In a medium bowl, combine your graham cracker crumbs, granulated sugar, and melted butter. Stir it with a fork until the mixture looks like wet sand and every crumb is moistened. Dump it into your prepared pan and press it down firmly and evenly into the bottom. I like to use the flat bottom of a measuring cup to really pack it in—a firm crust won’t crumble when you cut the bars. Pop it in the oven for 8-10 minutes. This pre-baking, called “blinding,” sets the crust and gives it a wonderful toasty flavor. Let it cool on a wire rack while you make the filling.
Step 3: Whip Up the Dreamy Filling. Now, in the bowl of a stand mixer fitted with the paddle attachment (or a large bowl with a hand mixer), beat the softened cream cheese and packed brown sugar together on medium speed. Scrape down the bowl and beater thoroughly! Beat for 2-3 minutes until it’s completely smooth and no lumps remain. This is the most important step for a silky texture.
Step 4: Incorporate the Wet Ingredients. With the mixer on low speed, add the eggs one at a time, letting each egg fully incorporate before adding the next. Scrape the bowl down again. Now, mix in the sour cream and vanilla extract. Keep the mixer on low—we are avoiding incorporating extra air here. Mix just until everything is combined and smooth. Remember, overmixing is the enemy of a dense, creamy cheesecake!
Step 5: The Star of the Show. Toss your butterscotch chips with that teaspoon of flour. This is our little insurance policy against sinkage! Using a rubber spatula, gently fold them into the cheesecake batter until they’re evenly distributed.
Step 6: Bake to Perfection. Pour the filling over your slightly cooled crust and spread it out evenly. Give the pan a gentle tap on the counter to release any air bubbles. Bake for 35-40 minutes. The edges will look set, but the center should still have a slight jiggle—like Jell-O—when you gently shake the pan. It will firm up as it cools. This is the sign of a perfectly baked, moist cheesecake.
Step 7: The Patience Game (The Hardest Part!). Place the pan on a wire rack and let the bars cool completely to room temperature. Then, and only then, cover it and transfer it to the refrigerator. You must chill it for at least 4 hours, but overnight is even better. This waiting period allows the flavors to meld and the texture to set up perfectly for clean slicing.
How to Serve These Beauties
Once they’re thoroughly chilled, use the parchment paper handles to lift the entire block of cheesecake out of the pan and onto a cutting board. Use a long, sharp knife to slice them into bars. For super clean cuts, wipe the knife blade clean with a hot, damp cloth between each slice.
These bars are sublime all on their own, but a little dollop of freshly whipped cream or a drizzle of caramel sauce takes them to a whole new level of decadence. Serve them straight from the fridge for a firm, cool treat!
Make It Your Own: Delicious Variations
The beauty of this recipe is its versatility! Here are a few ways to switch it up:
- Salted Caramel Twist: Swap the butterscotch chips for caramel chips or chunks. After baking, drizzle with store-bought caramel sauce and a light sprinkle of flaky sea salt.
- Chocolate Lover’s Dream: Use chocolate graham crackers for the crust and replace the butterscotch chips with semi-sweet or milk chocolate chips.
- Nutty Delight: Fold in ½ cup of chopped toasted pecans or walnuts along with the butterscotch chips for a wonderful crunch.
- Peanut Butter Cup: Swirl ½ cup of creamy peanut butter into the filled pan with a knife before baking. Use peanut butter chips instead of butterscotch for a full PB experience.
- Gluten-Free Friendly: Simply ensure your graham crackers are a certified gluten-free brand, and you’re good to go!
Anna’s Chef Notes & Kitchen Stories
This recipe has been a staple in my box for years, and it’s evolved with me. I initially tried making it with a shortbread cookie crust, but I found the simplicity of graham cracker just lets the butterscotch flavor shine brighter. The sour cream addition was a happy accident—I was out of heavy cream one day and used sour cream instead, and the result was so good I never looked back!
A funny story: I once brought these to a neighborhood block party, and a very sweet, very serious seven-year-old told me they were “even better than ice cream.” I consider that the highest praise possible. It’s a reminder that these bars have a magical, universal appeal. Don’t be afraid to make a double batch—they freeze beautifully for up to three months. Just wrap individual bars tightly in plastic wrap and toss them in a freezer bag. Your future self will thank you on a busy day!
Your Questions, Answered!
Q: My cheesecake filling cracked! What did I do wrong?
A: Don’t worry, it will still taste amazing! Cracking usually happens for one of three reasons: the oven temperature was too high, the cheesecake was overbaked, or it cooled too quickly. Remember, we bake low and slow, and we look for that jiggly center. Letting it cool gradually at room temperature is key. If you do get a small crack, just cover it with whipped cream!
Q: Can I use homemade butterscotch instead of chips?
A: You can, but it requires a little finesse. Make a thick butterscotch sauce and let it cool completely to room temperature. Instead of folding it in, you’d want to drizzle it over the filling and swirl it in with a knife before baking. The chips are easier and provide those delicious pockets of flavor.
Q: Why is it so important for everything to be at room temperature?
A> This is the #1 tip for a lump-free, smooth cheesecake! Cold cream cheese doesn’t blend smoothly with other ingredients, leading to a grainy texture. Cold eggs can also cause the fat in the cream cheese to seize up slightly, creating lumps. Taking the time to let your ingredients warm up is the single biggest guarantee of a professional-quality result.
Q: How do I know exactly when it’s done baking?
A> The “jiggle test” is your best friend. At around the 35-minute mark, open the oven and gently shake the pan. If the center wobbles like Jell-O and the edges look puffed and set, it’s done. The residual heat will continue to cook it as it cools. If the entire surface looks firm and doesn’t move, it’s likely overbaked.
Nutritional Information (Approximate, per bar)
Yield: 16 bars | Serving Size: 1 bar
Calories: ~310 | Fat: 21g | Saturated Fat: 12g | Carbohydrates: 28g | Sugar: 20g | Protein: 4g
Final Thoughts: A Bar Worth Remembering
At the end of the day, these Butterscotch Cheesecake Bars are more than just dessert—they’re a memory in the making. Every bite carries that creamy tang, that sweet golden crunch, and that nostalgic butterscotch flavor that feels like home. They’re simple enough for a casual Tuesday treat, yet special enough to hold their own on a holiday dessert table.
I love that this recipe has room for you to make it your own—whether you stick with Aunt Maureen’s spirit of cozy simplicity or add your own creative twist. However you slice them, these bars bring a little sunshine to even the grayest of days.
So bake up a batch, share them with people you love, and tuck a few away for yourself (future-you will be grateful). Because sometimes, the sweetest moments really do come wrapped in a graham cracker crust and a swirl of butterscotch. 💛