***
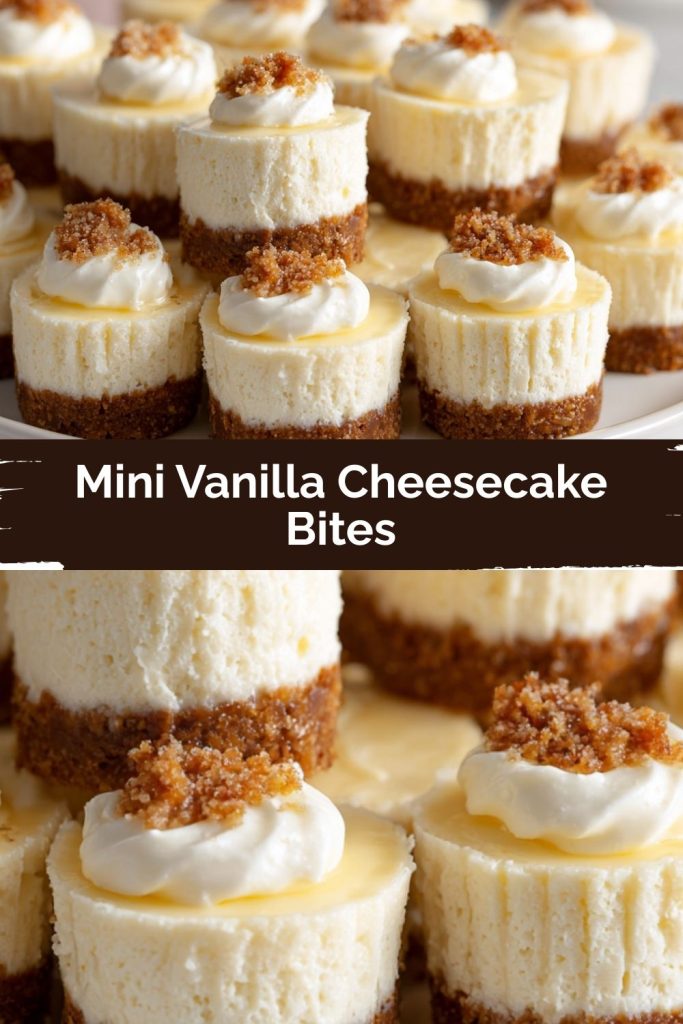
Your New Favorite Party Trick: Mini Vanilla Cheesecake Bites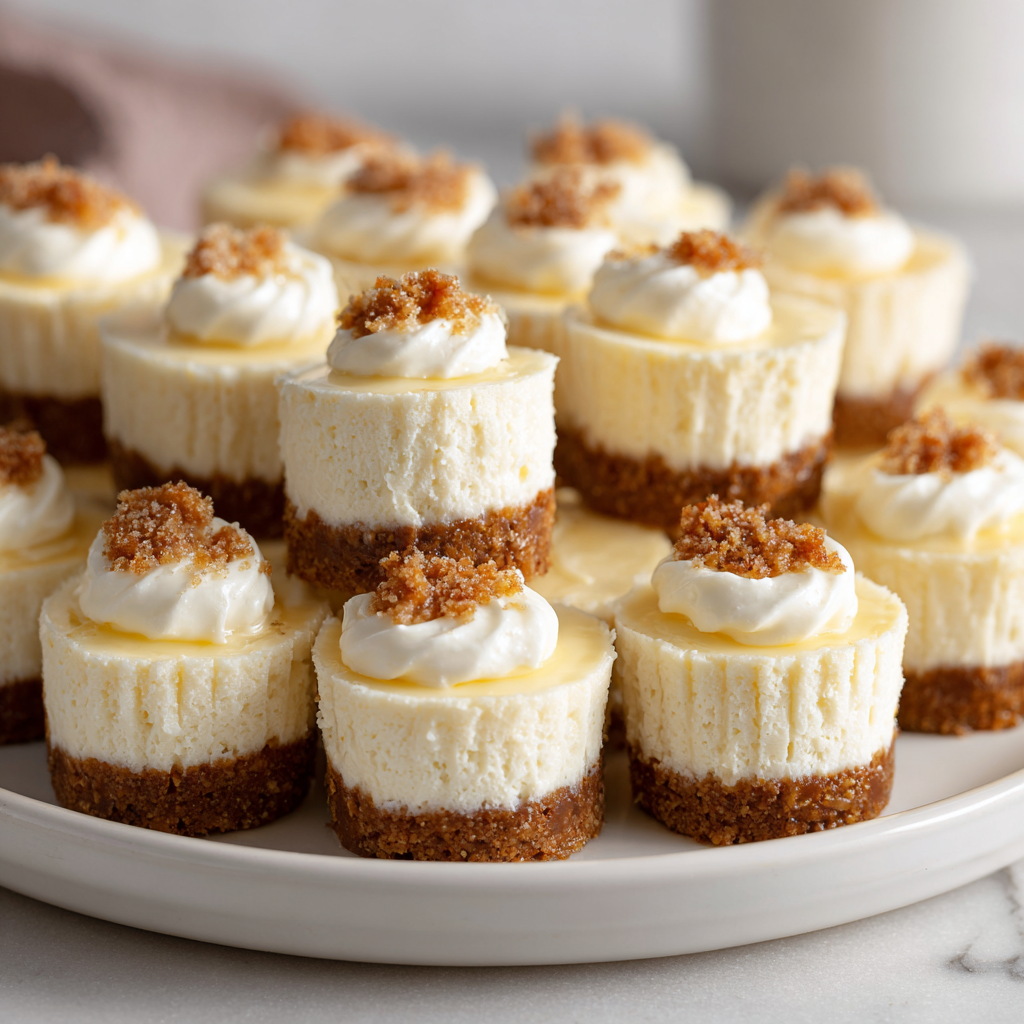
Hey there, friend! Let’s talk about one of life’s simple, creamy, glorious pleasures: cheesecake. But not just any cheesecake. We’re talking about the adorable, perfectly portioned, impossible-to-resist kind – Mini Vanilla Cheesecake Bites. Imagine it: a buttery, crisp graham cracker crust giving way to the smoothest, richest, most vanilla-kissed filling you’ve ever tasted, all in one delightful, two-bite package.
I don’t know about you, but sometimes a whole slice of cheesecake feels like a commitment. These mini marvels? Zero commitment, all joy. They’re the ultimate crowd-pleaser, the perfect potluck contribution, and your secret weapon for making a regular Tuesday feel like a celebration. They’re surprisingly simple to make, but they look and taste like you spent all day in the kitchen. That’s my kind of magic!
This recipe is a double batch because, trust me, 12 is never enough. This makes 24 beautiful bites, giving you plenty to share (or not-so-secretly stash in the fridge for yourself). We’re keeping the flavor classic and elegant with pure vanilla, but I’ve also got some incredibly fun twists up my sleeve to make them your own. So, are you ready to create something amazing? Grab your favorite mixing bowl, and let’s get started!
A Sweet Slice of Nostalgia
PrintMini Vanilla Cheesecake Bites
Smooth, rich, and just the right size—these mini vanilla cheesecake bites start with a buttery graham cracker base and bake into creamy, golden perfection. This double batch is perfect for parties or make-ahead treats, with optional twists to elevate the classic flavor.
- Prep Time: 20 min
- chill time: 2 hrs
- Cook Time: 20 min
- Total Time: 2 hrs 40 min
Ingredients
For the Crust:
1½ cups crushed graham crackers
2 tbsp white sugar
4 tbsp melted salted butter
For the Filling:
32 oz full-fat cream cheese, softened
1 cup white sugar
2 tsp vanilla essence (or swap in almond or lemon extract for a twist)
4 large eggs, room temp
Pinch of salt
Flavor Twists (Optional):
Swirl in raspberry jam or lemon curd before baking
Add mini chocolate chips or citrus zest to the batter
Top with fruit, ganache, or a caramel drizzle after cooling
Instructions
Preheat oven to 325°F (163°C). Line a mini muffin pan with paper liners.
Combine graham crumbs, sugar, and butter. Press 1 tbsp into each liner.
Beat cream cheese and sugar until smooth. Mix in eggs one at a time, then vanilla and salt.
Spoon batter over crusts, filling nearly to the top.
Bake for 18–20 minutes, or until centers are just set. Cool completely, then chill at least 2 hours.
Nutrition
- Calories: 150
- Sugar: 7g
- Fat: 12g
- Carbohydrates: 9g
- Protein: 3g
These little cheesecakes always take me right back to my grandma’s linoleum-floored kitchen. She wasn’t a fancy baker, but she was a powerhouse of warmth and love, often expressed through a well-stocked cookie tin. For every family gathering, without fail, she’d make her “famous” full-sized cheesecake. It was a behemoth, a dense, towering thing that required a special springform pan and what seemed like an entire day of meticulous preparation.
We kids were always so impatient, dancing around her ankles as she carefully prepared the water bath, whispering kitchen-spell incantations to prevent cracks. The waiting was agony! The reward, however, was a thick, heavenly slice that made it all worth it. This recipe is my loving, modern nod to her. I’ve taken all that classic flavor and nostalgia and shrunk it down into a no-fuss, no-water-bath-needed, quick-to-bake format. It’s all the cozy, creamy joy of Grandma’s kitchen, but designed for our busy, make-ahead, share-with-friends lives. Every time I pop one of these bites into my mouth, I get that same rush of happy comfort. I hope they create some delicious memories for you and your family, too.
Gathering Your Happy Ingredients
Here’s everything you’ll need to create these creamy dreams. Using great ingredients is the first step to baking success!
For the Buttery Graham Cracker Crust:
- 1½ cups crushed graham crackers – This is about one full sleeve from a standard box. You can crush them in a bag with a rolling pin or blitz them in a food processor until fine. Chef’s Insight: For a deeper flavor, try using digestive biscuits or even ginger snaps!
- 2 tbsp white sugar – Just a little bit to sweeten the crust and balance the slight bitterness of the crackers.
- 4 tbsp melted salted butter – The glue that holds our crust together! I prefer salted butter here for that sweet-and-salty vibe. If you only have unsalted, just add a tiny pinch of salt to the crumb mixture.
For the Luxuriously Smooth Filling:
- 32 oz (that’s four 8-oz blocks) full-fat cream cheese, softened – This is non-negotiable, my friend. Full-fat is essential for that rich, creamy texture and structure that won’t collapse. Pro Tip: Take the cream cheese out of the fridge at least 2 hours before you start. It must be completely soft at room temperature to blend smoothly and avoid a lumpy batter.
- 1 cup white sugar – The perfect amount of sweetness to complement the tangy cream cheese.
- 2 tsp vanilla essence or extract – The star of the show! Use the best pure vanilla extract you can for that gorgeous, warm flavor. This is where you can really taste the difference. As noted, feel free to swap in almond extract for a nutty twist or lemon extract for a citrusy zing!
- 4 large eggs, room temperature – Room temp eggs incorporate into the batter much more easily and evenly, which helps prevent overmixing. Quick Tip: To quickly bring eggs to room temp, place them in a bowl of warm water for 5-10 minutes.
- Pinch of salt – This little hero enhances all the other flavors and cuts through the sweetness perfectly.
Let’s Make Some Magic: Step-by-Step
Don’t let the fancy result fool you—the process is straightforward and oh-so-satisfying. Follow these steps for flawless mini cheesecakes every single time.
- Preheat and Prep. Preheat your oven to 325°F (163°C). This lower temperature is key for baking cheesecake gently and evenly without over-browning or cracking. While it heats up, line a 24-cup mini muffin pan with paper liners. This makes cleanup a breeze and ensures they pop out perfectly.
- Create the Crust. In a medium bowl, combine the finely crushed graham crackers, 2 tablespoons of sugar, and the melted butter. Mix it with a fork until it resembles wet sand and holds together when you pinch it. Using a measuring spoon or your fingers, press about 1 tablespoon of this mixture firmly into the bottom of each prepared muffin cup. I like to use a small glass or the back of a measuring spoon to really pack it down tight—this gives you a solid base that won’t crumble when you bite into it.
- Whip Up the Filling. Now, for the main event! In a large bowl, using a hand mixer or a stand mixer fitted with the paddle attachment, beat the softened cream cheese on medium speed until it’s completely smooth and creamy. This should take about 2 minutes. Scrape down the sides and bottom of the bowl well! Add the 1 cup of sugar and beat for another minute until fully combined and smooth. Scrape down the bowl again. This is the most important step for a lump-free filling!
- Incorporate the Eggs. With the mixer on low speed, add the eggs one at a time, mixing just until each yolk disappears into the batter before adding the next. Do not overmix after adding the eggs! Overbeating incorporates too much air, which can cause the cheesecakes to puff up and then fall, leading to cracks. Once the eggs are in, mix in the vanilla extract and pinch of salt, again just until blended. Give the bowl a final scrape and a gentle stir by hand to ensure everything is perfectly incorporated.
- Fill and Swirl. Spoon the beautiful, velvety batter over each crust, filling the cups nearly to the top. They don’t rise much, so this is safe! If you’re adding a swirl of raspberry jam or lemon curd, now’s the time. Drop about ¼ teaspoon on top of each filled cup and use a toothpick to gently swirl it into a marbled pattern.
- Bake to Perfection. Carefully transfer the pan to your preheated oven. Bake for 18-20 minutes. You’re looking for the edges to be set and the centers to still have just the slightest jiggle when you gently shake the pan. They will firm up dramatically as they cool. Remember, overbaking is the enemy of a creamy cheesecake!
- The All-Important Cool Down. Once baked, remove the pan from the oven and place it on a wire rack to cool completely to room temperature. This is crucial. Then, once they’re no longer warm, transfer the entire pan to the refrigerator to chill for at least 2 hours, though overnight is even better. This chilling time allows the flavors to meld and the texture to become perfectly firm and sliceable.
How to Serve These Tiny Treasures
The beauty of these mini cheesecakes is in their versatility! Serve them straight from the fridge, peeled out of their cute liners and arranged on a beautiful platter. They are elegant all on their own. For a extra special touch, create a topping bar! Set out small bowls of fresh berries (raspberries and blueberries are a classic!), a dollop of whipped cream, a drizzle of warm caramel or chocolate ganache, or a light dusting of powdered sugar. Let your guests customize their own perfect bite. They’re also fantastic with a cup of coffee at the end of a dinner party or packed into a lunchbox for a very special treat.
Get Creative! Flavor Twists & Swaps
Once you’ve mastered the classic vanilla, the playground is open! Here are a few of my favorite ways to mix things up:
- Fruit Swirl: As mentioned, before baking, add a small dollop (about ¼ tsp) of raspberry jam, strawberry preserves, or lemon curd to the top of each cheesecake and swirl with a toothpick.
- Chocolate Lover’s: Fold ½ cup of mini chocolate chips into the finished batter. For a chocolate crust, replace the graham crackers with crushed Oreo cookies (filling included!).
- Citrus Zing: Add the zest of one lemon or one orange to the batter along with the vanilla for a bright, sunny flavor.
- Peanut Butter Cup: Swirl in a tablespoon of peanut butter into the batter and top with a mini chocolate chip or a tiny piece of peanut butter cup after baking.
- Lighter Option: You can use reduced-fat cream cheese (Neufchâtel) for a slightly less rich version, though the texture will be a bit softer. I do not recommend fat-free cream cheese, as it won’t set properly.
Anna’s Chef Notes & Kitchen Stories
This recipe has been my go-to for years, and it’s evolved through many, many batches (tough job, but someone had to do it!). I once, in a frantic pre-party hurry, tried to make these with cold cream cheese. Big mistake. My arm almost fell off from mixing, and I still had little lumps throughout the batter. I had to bake them anyway, and let’s just say my friends politely called them “vanilla cheesecake bites with a surprise cream cheese chunk texture.” We still laugh about it. So learn from my mistake: SOFTEN YOUR CREAM CHEESE!
I also used to fret over every little crack that appeared on the surface. But you know what? They taste exactly the same, and once you top them with berries or whipped cream, nobody will ever know. I’ve learned to embrace the imperfections—it just shows they’re homemade with love. The double batch is a recent addition; I found myself constantly doubling the recipe anyway, so now we just start there! They freeze beautifully, too. Just pop the cooled cheesecakes in a single layer on a baking sheet to freeze solid, then transfer to a freezer bag for up to 3 months. Thaw in the fridge overnight.
Your Cheesecake Questions, Answered!
Q: My cream cheese filling is lumpy! What did I do wrong and can I fix it?
A: This almost always happens when the cream cheese is too cold. Unfortunately, it’s very hard to fix once lumpy. The best cure is prevention: ensure your cream cheese is truly softened at room temperature. If you have small lumps, you can try pressing the finished batter through a fine-mesh sieve, but it’s a bit of a process. For next time, just plan ahead!
Q: Why do my cheesecakes have cracks on top?
A Cracks are usually caused by two things: overmixing the batter after the eggs are added (which incorporates too much air) or overbaking. Remember to mix on low speed once the eggs go in and just until combined. Also, pull them from the oven when the centers still have a slight jiggle. But hey, if they crack, just cover it with a yummy topping! No stress.
Q: Can I make these gluten-free?
A: Absolutely! Simply ensure your graham crackers are a gluten-free brand, or swap them out for an equal amount of crushed gluten-free cookies like gluten-free Oreos or ginger snaps. The filling is naturally gluten-free.
Q: How far in advance can I make these?
A: They are the ultimate make-ahead dessert! They will keep beautifully in an airtight container in the refrigerator for up to 5 days. The flavor actually gets better after a day or two. You can also freeze them for up to 3 months.
Nutritional Information*
*This is an estimate provided for informational purposes only. Actual values will vary based on specific ingredients used and any substitutions.
Per Cheesecake Bite: Calories: ~150 | Fat: 12g | Saturated Fat: 7g | Carbohydrates: 9g | Sugar: 7g | Protein: 3g
Final Thoughts: Joy in Every Bite
At the end of the day, these Mini Vanilla Cheesecake Bites are proof that sometimes the sweetest things really do come in small packages. They’ve got all the creamy indulgence of a classic cheesecake, but with the added bonus of being fuss-free, perfectly portioned, and endlessly customizable.
For me, they’ll always taste like a love letter to my grandma’s cheesecake, only with a modern, no-stress twist. For you, maybe they’ll become your go-to potluck dessert, your freezer-friendly secret weapon, or the treat you keep on hand for “just because” moments. However they fit into your story, one thing’s certain: they’re little bites of joy that disappear faster than you can say “save me another.”
So grab your mixing bowl, whip up a batch (or two!), and get ready to watch these creamy, dreamy treasures vanish with happy smiles all around.