***
The Irresistible Magic of No-Bake Peanut Butter Balls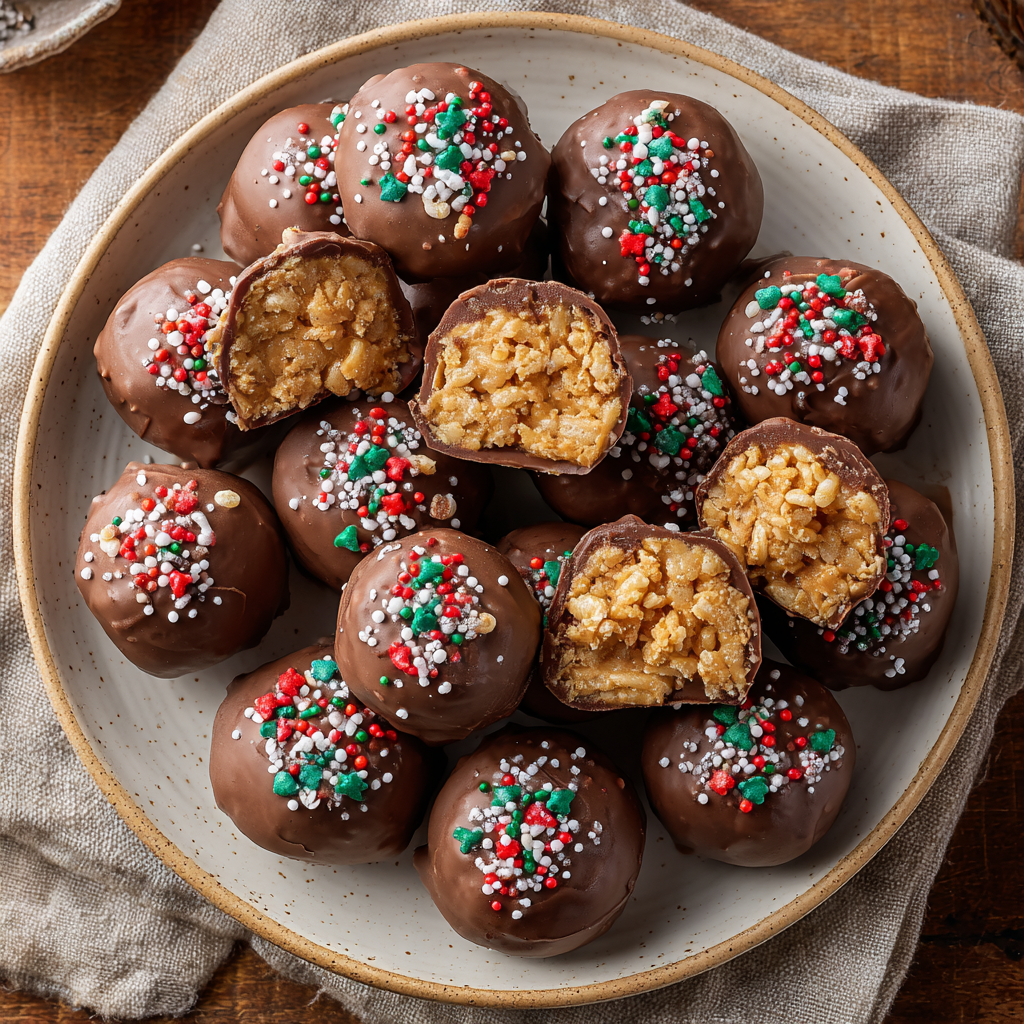
Hey there, friend! Is there anything quite like the sound of Rice Krispies snapping away in a bowl of creamy peanut butter? That gentle crackle is the sound of pure, unadulterated joy, and it’s the first step to creating one of my all-time favorite treats: Peanut Butter Balls with Rice Krispies. If you’ve ever found yourself scrolling through vintage cookie trays or reminiscing about holiday parties past, you’ve probably spotted these little gems. They’re the ones that always disappear first, the ones that spark that happy, collective “Mmm!” from everyone in the room. And the best part? They’re one of the easiest, most forgiving recipes you’ll ever make. No oven required, just a whole lot of heart and a little bit of chocolate.
This isn’t just a recipe; it’s a tiny, bite-sized escape. It’s the perfect project for a cozy afternoon when you want to create something magical without the stress of complicated baking. Whether you’re whipping up a batch for a holiday cookie swap, packaging them up as the most heartfelt homemade gift, or simply satisfying a serious peanut butter and chocolate craving (we’ve all been there!), these no-bake wonders are your answer. They’re crispy, they’re creamy, they’re decadently chocolatey, and they’re about to become a new staple in your treat-making repertoire. So, let’s put on our favorite playlist, clear a little counter space, and dive into the wonderfully simple world of making magic together.
A Christmas Eve Tradition: My First Batch of Peanut Butter Balls
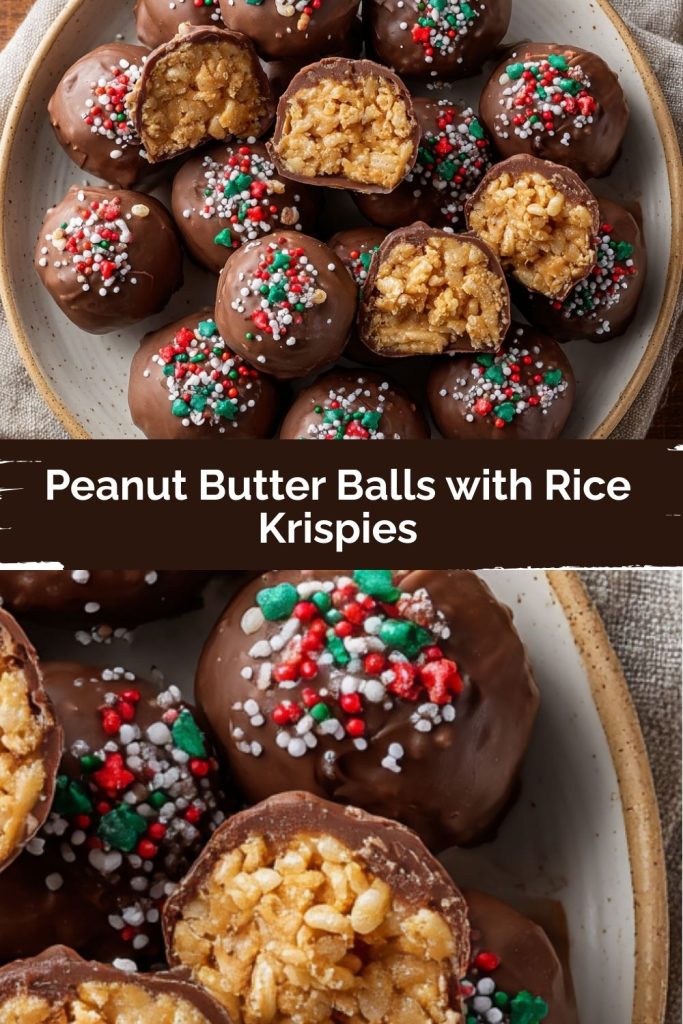
PrintPeanut Butter Balls with Rice Krispies
These easy, no-bake peanut butter balls are a beloved vintage holiday treat—crispy, creamy, chocolate-coated, and utterly irresistible. Perfect for gifting, cookie trays, or late-night cravings. A little crunch, a lot of nostalgia, and pure holiday joy in every bite.
- Prep Time: 20 minutes
- chill time: 30 minutes
- Total Time: 50 minutes
Ingredients
1 cup creamy peanut butter
¼ cup unsalted butter, softened
1½ cups powdered sugar
1½ cups Rice Krispies cereal
1 teaspoon vanilla extract
2 cups semi-sweet or milk chocolate chips
1 tablespoon coconut oil or shortening (helps smooth the chocolate)
Optional: holiday sprinkles or flaky sea salt for topping
Instructions
In a large bowl, beat peanut butter, butter, and vanilla until smooth and creamy.
Add powdered sugar and stir until fully combined. Gently fold in Rice Krispies.
Roll mixture into 1-inch balls. Place on a parchment-lined baking sheet. Chill for 30 minutes.
Melt chocolate chips with coconut oil in a heatproof bowl until smooth.
Dip each ball into the chocolate, allowing excess to drip off.
Place on parchment and decorate with sprinkles or sea salt if using. Let set at room temperature or refrigerate until firm.
Nutrition
- Calories: 130
- Sugar: 9g
- Fat: 8g
- Carbohydrates: 12g
- Protein: 2g
I’ll never forget the first time I helped my grandma make these. I was probably eight years old, standing on a wobbly wooden stool in her flour-dusted kitchen on Christmas Eve. The air was thick with the scent of gingerbread and pine, but all my focus was on the big yellow bowl in front of me. Grandma handed me a wooden spoon and a mission: to mix the peanut butter and powdered sugar into a “moon dough” consistency. Of course, I ended up with more sugar on my apron and in my hair than in the bowl, but she just laughed that warm, rumbling laugh of hers.
The real magic happened when we poured in the Rice Krispies. “Listen,” she whispered, as the cereal hit the sticky peanut butter mixture. The loud, crackling symphony that followed sounded like tiny fireworks. To my young ears, it was the sound of Christmas itself. We rolled the mixture into lopsided little balls, and I was given the very serious job of taste-testing the chocolate for dipping (a job I still take very seriously to this day). Those imperfect, sprinkle-covered balls were the proudest achievement of my eight-year-old life. Now, every time I make them, that sound and that feeling of simple, messy, joyful creation comes rushing back. It’s more than a recipe; it’s a edible memory.
Gathering Your Magical Ingredients
Part of the beauty of this recipe is its simplicity. You likely have most of these pantry heroes already! Here’s what you’ll need to make about 40 little bites of happiness.
- 1 cup creamy peanut butter – This is your star! I recommend using a standard, no-stir kind like Jif or Skippy for the best texture and easy mixing. The natural, oily kinds can make the mixture too greasy and difficult to hold its shape.
- ¼ cup unsalted butter, softened – This adds richness and helps everything bind together beautifully. Chef’s Insight: Take it out of the fridge an hour or so beforehand. If you forget, you can gently soften it in the microwave for a few seconds at a time.
- 1½ cups powdered sugar – Also known as confectioner’s sugar, it sweetens and creates that perfect, rollable dough. It also helps absorb the oils from the peanut butter.
- 1½ cups Rice Krispies cereal – The source of that iconic CRUNCH! Make sure your box is fresh for the best snap. Substitution Tip: Any crisp rice cereal will work perfectly here.
- 1 teaspoon vanilla extract – The secret background singer that enhances all the other flavors. Pure vanilla extract makes a lovely difference!
- 2 cups semi-sweet or milk chocolate chips – This is your luxurious coating. I love the deeper flavor of semi-sweet, but milk chocolate is a classic, crowd-pleasing choice. Feel free to use chopped chocolate bars for an even smoother melt!
- 1 tablespoon coconut oil or shortening – This is my #1 pro tip! Adding a little fat to your melting chocolate thins it out just enough for a smooth, professional-looking drip and a perfect, crackly shell. Substitution Tip: You can use either one. Coconut oil will add a very slight hint of flavor, while shortening is flavorless.
- Optional: holiday sprinkles or flaky sea salt for topping – Sprinkles for pure joy, flaky sea salt for a sophisticated sweet-and-salty kick. Don’t skip this finishing touch!
Let’s Make Some Magic: Step-by-Step Instructions
Ready to create? Follow these steps, and you’ll be a peanut butter ball pro in no time. I’ve sprinkled in all my best tips to ensure your success!
Step 1: The Creamy Base
In a large mixing bowl, combine the creamy peanut butter, softened butter, and vanilla extract. Using a hand mixer or a sturdy wooden spoon and some good old-fashioned elbow grease, beat it all together until it’s completely smooth, creamy, and well-combined. You want the butter to be fully incorporated so there are no little yellow streaks. This is the foundation of your treat, so make it smooth!
Step 2: Sweeten and Crisp
Now, add in the powdered sugar. I like to add it in two parts to avoid a giant sugar cloud (though a little cloud is part of the fun!). Stir until the sugar is fully absorbed—it will be thick and a bit crumbly, and that’s exactly what you want. Next, gently fold in the Rice Krispies cereal. Chef’s Hack: Use a spatula and a light hand here. You want to distribute the cereal evenly without crushing all the lovely bubbles. We’re preserving that CRUNCH!
Step 3: Roll and Chill
Line a baking sheet with parchment paper or a silicone baking mat. Using a small cookie scoop (about 1-inch in size) or a tablespoon, portion out the mixture. Then, get rolling! Roll the portions between your palms to form neat little balls. If the mixture is too sticky, a quick tip: lightly dust your hands with powdered sugar. Place each ball on the prepared baking sheet. Once they’re all rolled, pop the tray into the refrigerator for at least 30 minutes. This step is non-negotiable! Chilling firms them up and makes them much, much easier to dip without falling apart.
Step 4: The Chocolate Dip
This is the glamorous part! Place your chocolate chips and coconut oil (or shortening) in a microwave-safe bowl. Heat in the microwave in 30-second bursts, stirring vigorously between each burst, until the chocolate is completely smooth and melted. Alternatively, you can use a double boiler on the stove. Pro Tip: The key is low and slow to avoid seizing the chocolate. You can also transfer the melted chocolate to a narrow, deep glass or mug for easier dipping.
Step 5: Decorate and Set
Remove the peanut butter balls from the fridge. Using a fork or a dipping tool, submerge each ball into the melted chocolate, tap off the excess, and gently place it back onto the parchment-lined tray. Immediately, while the chocolate is still wet, add your sprinkles or a tiny pinch of flaky sea salt. If you wait, the chocolate will set and the decorations won’t stick! Let the chocolate set completely. You can leave them at room temperature for a few hours or speed up the process by refrigerating the tray for 15-20 minutes.
How to Serve These Little Bites of Joy
Presentation is part of the fun! For a casual family treat, simply pile them high on a cute plate or in a rustic bowl. If you’re gifting them or serving them at a party, place them in pretty paper candy cups (the mini muffin liners work perfectly) and arrange them on a festive platter. They pair wonderfully with a cold glass of milk, a hot cup of coffee, or even a glass of dessert wine. Honestly, they’re perfect anywhere, anytime.
Get Creative: Delicious Recipe Variations
Once you’ve mastered the classic, the world is your peanut butter ball! Here are a few fun twists to try:
- Nutty Twist: Swap out ½ cup of the Rice Krispies for an equal amount of finely chopped peanuts for an extra peanutty crunch.
- Double Chocolate: Add ¼ cup of cocoa powder to the peanut butter mixture along with the powdered sugar for a chocolate-peanut butter interior.
- Pretzel Power: Replace ½ cup of the cereal with crushed pretzel pieces for the ultimate sweet-and-salty experience.
- “Healthier” Swap: Use a natural peanut butter that requires stirring (just mix it well first!), and swap the butter for coconut oil. Use a sugar alternative powdered sugar for a lower-sugar option.
- White Chocolate Drizzle: Dip the balls in the classic semi-sweet chocolate, then drizzle with melted white chocolate for a gorgeous, festive look.
Chef’s Notes: From My Kitchen to Yours
This recipe has been a living, evolving thing in my kitchen for years. I once, in a pre-Christmas frenzy, accidentally used crunchy peanut butter because it was all I had left. You know what? They were fantastic! The extra peanut bits added a wonderful texture. I’ve also learned that the size of the ball is crucial. Too big, and they become a messy, albeit delicious, handful. Too small, and you lose the perfect ratio of peanut butter to chocolate. The one-inch goldilocks zone is just right. And a funny story: my dog, Buddy, is absolutely obsessed with the smell of these. I now have a very strict “peanut butter balls must be behind a closed door” rule after a minor counter-surfing incident. Learn from my mistakes!
Your Questions, Answered: FAQs & Troubleshooting
Q: My mixture is too dry and crumbly! It won’t hold together when I roll it. What did I do wrong?
A: This is a common hiccup, and it’s an easy fix! It usually means your peanut butter was a bit too thick or you packed your powdered sugar. Simply add a tiny bit more softened butter or a teaspoon of milk and mix it in. Add just a little at a time until it comes together.
Q: Why did my chocolate coating get thick and clumpy?
A: Ah, this is called “seizing,” and it usually happens if a tiny bit of steam or water gets into the chocolate. Always make sure your bowls and tools are completely dry. If it happens, you can sometimes save it by vigorously stirring in a teaspoon more of coconut oil until it smooths out again.
Q: Can I freeze these peanut butter balls?
A: Absolutely! They freeze beautifully. After the chocolate has fully set, place them in a single layer in an airtight container separated by layers of parchment paper. They’ll keep for up to 2 months. Thaw in the refrigerator or at room temperature.
Q: Is there a way to make these without peanut butter for allergies?
A: Yes! SunButter (made from sunflower seeds) is a fantastic, allergy-friendly substitute that works wonderfully in this recipe and gives a very similar color and texture.
Nutritional Information (Per Ball)
Please note: This is an estimate provided for informational purposes only.
Calories: ~130, Fat: 8g, Carbohydrates: 12g, Sugar: 9g, Protein: 2g
Prep Time: 20 minutes | Chill Time: 30 minutes | Total Time: 50 minutes
And there you have it, friend—bite-sized bundles of joy that prove holiday magic doesn’t need an oven timer or a candy thermometer. These Peanut Butter Balls are everything I love about baking season rolled into one: a little nostalgic crunch, a lot of creamy sweetness, and the kind of chocolate dip that makes you feel like a kid sneaking the first taste before the platter hits the table.
They’re simple enough to whip up on a whim, yet special enough to earn a spot on the holiday cookie tray year after year. Every batch carries that same spark of joy my grandma shared with me on Christmas Eve—the crackle of cereal, the smell of melted chocolate, and the laughter that always sneaks in somewhere between rolling and decorating.
So whether you’re gifting them, swapping them, or hoarding a few for late-night cocoa sipping (no shame in that game), I hope these little treats bring you the same cozy happiness they’ve brought my family for decades. Here’s to keeping traditions alive, one sweet bite at a time.