***
Your New Favorite Dessert: The Magically Easy No-Bake Eclair Cake
Hey there, friend! Anna here. Can I let you in on a little secret? Some of the most show-stopping, crowd-pleasing, “how-on-earth-did-you-make-this” desserts are also the easiest. They’re the ones that look like you spent hours slaving away in a hot kitchen but secretly came together in minutes with a whole lot of love and zero oven time. That’s the magic I live for, and that’s exactly what we’re creating today.
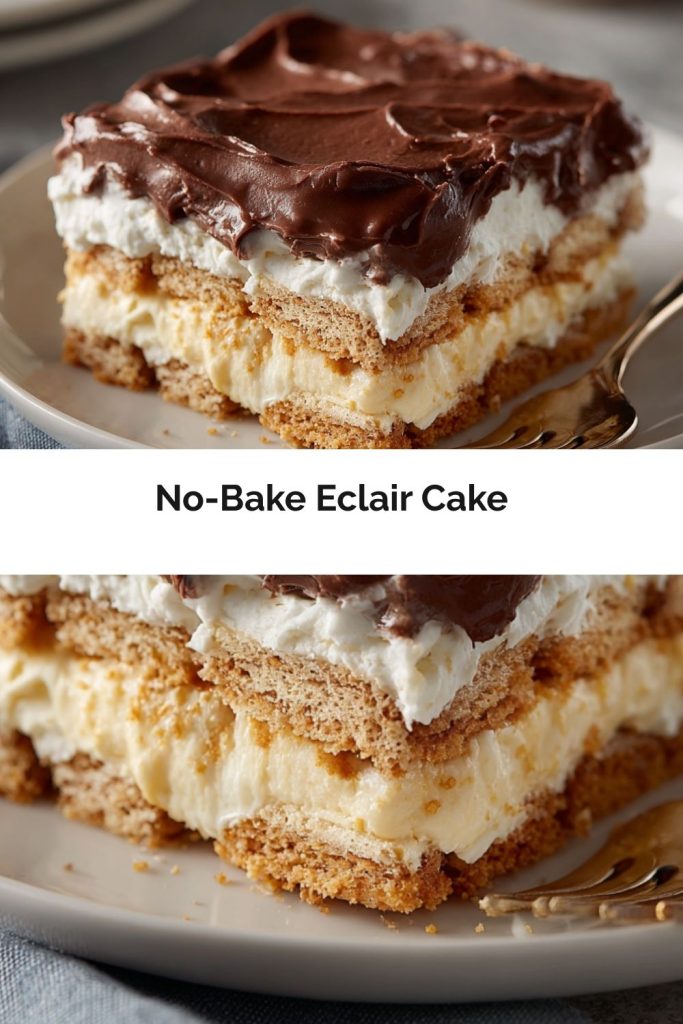
I’m talking about my legendary No-Bake Eclair Cake. Imagine this: layers of crisp graham crackers that magically soften into a cake-like tenderness, sandwiching a cloud of creamy, dreamy vanilla pudding filling. And the crowning glory? A slick, rich, and decadent chocolate frosting that sends this dessert straight into the stratosphere of deliciousness. It’s like the best parts of a classic eclair and a comforting pudding cake had a beautiful, no-fuss baby.
This is the dessert you make when it’s too hot to turn on the oven, when you need a last-minute potluck hero, or when a serious chocolate craving hits and you need satisfaction, stat. It’s a guaranteed hit with kids and adults alike, and the best part? It requires absolutely zero baking skills. All you need is a bowl, a whisk, and a little bit of patience while it chills (though I admit, the waiting is the hardest part!). So, are you ready to whip up a little bit of magic? Let’s get started!
A Slice of Summer Nostalgia
PrintNo-Bake Eclair Cake
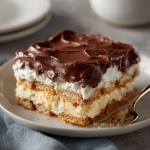
Creamy vanilla pudding, light whipped topping, graham crackers, and rich chocolate frosting—this No-Bake Eclair Cake delivers bakery-level flavor with zero oven time. It’s the ultimate make-ahead dessert for holidays, birthdays, or just because.
- Prep Time: 15 minutes
- chill time: 4 hours minimum
- Total Time: 4 hours 15 minutes
- Yield: 15 1x
Ingredients
2 small (3.4 oz) boxes instant vanilla pudding mix
1 (8 oz) tub whipped topping, thawed
3 cups cold milk
1 box graham cracker squares (approx. 14–16 full sheets)
1 container (16 oz) prepared chocolate frosting
Instructions
Mix Filling: In a large bowl, whisk together pudding mix, milk, and whipped topping until smooth and thick.
Layer: In a 13×9-inch pan, arrange a layer of graham crackers. Spread half the pudding mixture over it. Add another cracker layer, the rest of the pudding, and top with a final layer of crackers.
Frost: Microwave chocolate frosting for 10–15 seconds (optional), then spread evenly over the top layer.
Chill: Cover and refrigerate for at least 4 hours or overnight before serving.
Nutrition
- Calories: 290 kcal
- Sugar: 28g
- Fat: 12g
- Carbohydrates: 41g
- Fiber: <1g
- Protein: 3g
This recipe takes me right back to my grandma’s linoleum-floored kitchen on a sweltering July afternoon. The oscillating fan would be humming in the corner, trying its best against the Midwest humidity, and the smell of freshly cut grass would drift through the screen door. My grandma, a woman who believed cold desserts were a necessity, not a luxury, would pull this very cake from the depths of her avocado-green refrigerator.
It wasn’t fancy. It was always in a well-loved glass 9×13 pan, the chocolate frosting sometimes swirled with the marks of the spatula, sometimes smoothed perfectly. She’d cut generous squares, the layers perfectly distinct before your fork even touched them. That first bite was pure, cold, creamy bliss. It was the taste of summer vacation, of family gathered around the picnic table, of fireflies and laughter. It was proof that the simplest things, made with love, create the most powerful memories. Every time I make it, I’m right back in that kitchen, and I hope this recipe becomes a part of your family’s story, too.
Gathering Your Magical Ingredients
The beauty of this recipe is in its simplicity. You likely have most of these items in your pantry right now! Here’s what you’ll need to create this no-bake masterpiece:
- 2 small (3.4 oz) boxes instant vanilla pudding mix: This is the foundation of our creamy layer. Instant pudding is key here because it sets quickly without cooking. Chef’s Insight: For a deeper flavor, you can use French Vanilla pudding! I don’t recommend sugar-free as it can alter the setting consistency.
- 3 cups cold whole milk: The cold temperature is non-negotiable! It helps the pudding whip up thick and luxurious. Using whole milk gives the richest, creamiest texture, but 2% will work in a pinch.
- 1 (8 oz) tub whipped topping (like Cool Whip), thawed: This lightens the pudding filling, making it airy and mousse-like. Make sure it’s fully thawed in the fridge for easy mixing. Substitution Tip: For a from-scratch touch, you can substitute with an equal amount of freshly whipped heavy cream sweetened with a tablespoon of powdered sugar.
- 1 box graham cracker squares (about 14-16 full sheets): Our “cake” layers! They soften perfectly as they chill, mimicking the texture of choux pastry in a traditional eclair. Honey-made is the classic, but cinnamon would add a lovely warm note.
- 1 container (16 oz) prepared chocolate frosting: The simple, glorious finish. The store-bought kind works perfectly here, creating that classic glossy top. Chef’s Hack: Don’t skip the quick microwave blast! Warming it slightly makes it spread like a dream.
Let’s Build This Dreamy Dessert! (Step-by-Step)
Okay, team! Aprons on? Let’s do this. I’ll walk you through every step with my favorite tips and hacks to ensure your eclair cake is nothing short of perfect.
Step 1: Create the Cloud-Like Filling
Grab your largest mixing bowl. Trust me, you’ll want the space! Pour in the 3 cups of cold milk. Add the two boxes of instant pudding mix. Now, take your whisk and get to work! Whisk steadily for a good two minutes. You’re not just mixing; you’re activating the pudding and incorporating air. You’ll see it transform from a liquid into a gloriously thick paste. Now, gently fold in the entire tub of thawed whipped topping. I like to add it in two batches, using a spatula and a “figure-eight” motion to keep it light and airy. No deflating our cloud! Once it’s smooth and uniform, set it aside.
Step 2: The Art of Layering
Take your 9×13-inch baking dish (glass is my favorite for that nostalgic look!). Arrange a single layer of graham crackers to completely cover the bottom. You might need to break a few to fill in the gaps—think of it as edible puzzle pieces! Now, plop half of your pudding mixture right on top. Use your spatula to spread it into a smooth, even layer, making sure to get into all the corners. This is your foundation.
Time for layer two! Place another single layer of graham crackers directly on top of the pudding. Then, spread the remaining pudding mixture over this. Finally, top it all with one last, beautiful layer of graham crackers. You should have a gorgeous triple-decker cracker situation with two layers of creamy goodness. Pat yourself on the back; the hard part is over!
Step 3: The Chocolate Finale
Here’s my favorite chef hack for a professional-looking finish. Take the lid off the container of chocolate frosting and pop it in the microwave for 10-15 seconds. You just want it warm and slightly loosened, not hot and runny. This little trick makes it incredibly easy to spread evenly without tugging at the graham cracker layer underneath. Pour the warmed frosting over the final layer of crackers and spread it into a smooth, decadent, chocolatey blanket.
Step 4: The Test of Patience (The Chill)
This is the most crucial step for achieving that perfect cake-like texture. Cover the pan tightly with plastic wrap and gently place it in the refrigerator. You simply must let it chill for at least 4 hours, but honestly? Overnight is pure magic. This waiting period is where the alchemy happens. The graham crackers soften and meld with the pudding, transforming from crisp crackers into a tender, cake-like layer that will have everyone wondering how you baked such a moist cake without an oven.
How to Serve Your Masterpiece
When it’s finally time to serve, use a sharp knife to slice clean squares. For the prettiest slices, give the knife a quick wipe between cuts. This dessert is perfect all on its own, but a little extra love never hurts! I love serving it on a chilled plate with a tiny dollop of extra whipped topping and a few fresh raspberries on the side. The tartness of the berries cuts through the sweetness beautifully. A sprig of mint also adds a lovely pop of color. Serve it straight from the fridge—that cool, creamy texture is everything!
Make It Your Own! (Fun Variations)
The canvas of this recipe is begging for your personal touch! Here are a few of my favorite ways to mix it up:
- Chocolate Lover’s Dream: Use chocolate instant pudding instead of vanilla for a double-chocolate experience.
- Cookie Butter Bliss: Substitute the graham crackers with Biscoff cookies for a spiced, caramelized flavor that’s utterly addictive.
- Peanut Butter Cup: Swirl ½ cup of creamy peanut butter into the pudding mixture and use a chocolate frosting with peanut butter chips sprinkled on top.
- Summer Berry Delight: Add a layer of fresh raspberries or sliced strawberries between the pudding and cracker layers.
- From-Scratch Frosting: Feeling ambitious? Top it with a simple homemade chocolate ganache (heat 1 cup cream and pour over 1 cup chocolate chips, stir until smooth) instead of canned frosting.
Anna’s Chef Notes & Kitchen Stories
This recipe has been a part of my life for so long, it feels like an old friend. I’ve made it for countless birthdays, potlucks, and “just because” Tuesdays. Over the years, I’ve learned a few things. The first time I made it, I was so impatient I only chilled it for two hours. The crackers were still a bit crunchy—still tasty, but not the transformative experience it’s meant to be. I learned my lesson: patience is a virtue, especially in dessert-making!
One of my favorite kitchen memories is of my nephew, who is a notoriously picky eater, devouring two huge pieces and then asking if we could have “the cake that isn’t cake” for his birthday every year. It’s now our tradition. That’s the power of a great, simple recipe—it becomes woven into the fabric of your family. Don’t be afraid to make it your own and create your own stories with it!
Your Questions, Answered!
Q: My pudding filling seems runny. What did I do wrong?
A: The most common culprit is not using instant pudding mix. “Cook & Serve” pudding will not set properly in this no-bake application. Also, ensure your milk is very cold, and that you’re whisking for the full two minutes. It will also continue to firm up significantly during the chilling stage.
Q: Can I make this dessert dairy-free?
A: Absolutely! You can easily make a dairy-free version. Use a dairy-free instant pudding mix (Jell-O brand is accidentally dairy-free!), your favorite cold plant-based milk (oat or soy milk work great as they are creamier), a dairy-free whipped topping (like So Delicious CocoWhip), and a dairy-free chocolate frosting. The graham crackers are usually vegan, but always double-check the brand!
Q: How long will this keep in the fridge?
A: It keeps beautifully! Covered tightly with plastic wrap, it will stay fresh and delicious for 3-4 days. The graham crackers will continue to soften, but it remains utterly delicious.
Q: Can I use homemade pudding?
A: You can, but it needs to be a thick, cooked pudding that has been completely chilled before you fold in the whipped topping. Using a warm pudding will melt the whipped topping and make the layers soupy.
Nutritional Information*
Prep Time: 15 minutes | Chill Time: 4 hours | Total Time: 4 hours 15 minutes | Servings: 15
Calories per Serving: ~290 kcal | Fat: 12g | Carbs: 41g | Sugar: 28g | Protein: 3g | Fiber: <1g | Sodium: 290mg
*Please note: Nutritional information is an estimate only and can vary based on specific ingredients and brands used.
Final Thoughts: Dessert Magic, No Oven Required
At the end of the day, this No-Bake Eclair Cake is proof that sometimes the simplest desserts are the ones that make the biggest splash. It’s creamy, chocolatey, nostalgic, and just a little bit magical—layered love in a pan.
Whether you’re whipping it up for a summer cookout, a last-minute potluck, or just a Tuesday night treat (because why not?), this cake delivers every single time. It’s the kind of recipe that sneaks its way into family traditions, sparks smiles across the table, and reminds us all that baking doesn’t always need… well, baking.