***
The Magic of Candy Cane Chocolate Chip Cookies
Hey there, friend! Is there anything that smells more like pure, unadulterated joy than a batch of chocolate chip cookies baking in the oven? That warm, buttery, sugary scent just seems to hug the whole house, doesn’t it? Now, imagine that classic feeling, but all dressed up in its holiday best. We’re talking swirls of red and white, a cheerful crunch of peppermint, and that magical, cool sensation that makes everything feel a little bit like a snow day. That, my friend, is the absolute wonder of these Candy Cane Chocolate Chip Cookies.
This recipe is my go-to for turning a simple baking session into a full-blown festive event. It’s the cookie that makes an appearance on our cookie platters, gets tucked into gift boxes for neighbors, and is secretly enjoyed for breakfast with a giant mug of coffee (no judgment here!). They’re soft and chewy in the center, with just the right amount of crispness at the edges, and every single bite is a delightful surprise. You get the rich, melty comfort of two kinds of chocolate, followed by that bright, cool crunch of peppermint. It’s a flavor combination that feels both nostalgic and excitingly new.
I know the holiday season can get hectic, but I promise you, this recipe is your safe harbor. It’s based on a trusty classic, so you’re building on a foundation you already know and love. We’re just adding a sprinkle of holiday magic. Whether you’re baking with little ones, whipping up a treat for a party, or just need a moment of sweet, kitchen-therapy for yourself, these cookies are here to deliver. So, let’s preheat that oven, put on some festive tunes, and bake up a batch of happiness together. You’re about to create your new favorite holiday tradition!
A Sweet Slice of Memory: The Great Candy Cane Caper
PrintCandy Cane Chocolate Chip Cookies

The perfect holiday twist on a classic favorite. These Candy Cane Chocolate Chip Cookies are soft, buttery, and studded with crushed peppermint and melty chocolate chips. Every bite delivers that cool peppermint crunch balanced with rich, gooey sweetness — a festive treat everyone will crave.
- Prep Time: 15 minutes
- chill time: 30 minutes
- Cook Time: 12 minutes
- Total Time: 1 hour
- Yield: About 24 cookies 1x
Ingredients
1 cup unsalted butter, softened
¾ cup granulated sugar
¾ cup brown sugar, packed
2 large eggs
1 tsp vanilla extract
2½ cups all-purpose flour
1 tsp baking soda
½ tsp salt
1 cup semi-sweet chocolate chips
1 cup white chocolate chips
¾ cup crushed candy canes
Instructions
Cream Butter and Sugars
In a large bowl, beat butter, granulated sugar, and brown sugar until light and fluffy. Add eggs and vanilla, mixing until combined.
Add Dry Ingredients
In a separate bowl, whisk flour, baking soda, and salt. Slowly add to the wet mixture and mix until just combined.
Fold in Mix-Ins
Stir in chocolate chips, white chocolate chips, and crushed candy canes.
Scoop and Chill
Scoop dough into balls and place on a baking sheet. Chill for 30 minutes to prevent spreading.
Bake
Preheat oven to 350°F (175°C). Bake cookies for 10–12 minutes or until edges are golden. Let cool on the pan for 5 minutes before transferring to a wire rack.
Nutrition
- Calories: 210
- Sugar: 17g
- Fat: 11g
- Carbohydrates: 26g
- Protein: 2g
This recipe always takes me right back to my first Christmas in our current home. My daughter, who was about five at the time, was absolutely mesmerized by the giant candy canes hanging on our Christmas tree. To her, they weren’t decorations; they were a delicious, striped mystery waiting to be solved. One afternoon, I found her sitting under the tree, carefully unwrapping one, her eyes wide with determination. She took one lick, her face lit up with that cool peppermint zing, and she declared, “Mama, this is the best candy in the whole world!”
Later that week, we were baking our usual chocolate chip cookies, and she looked at me with those serious, big eyes and asked, “Can we put my best candy in the cookies?” How could I say no? We crushed up the remaining candy canes (saving the tree decorations, of course!) and stirred them into the dough. The result was a hilarious, messy, and utterly delicious kitchen experiment. The cookies were a bit crumbly, and the peppermint bled a little, creating pink swirls, but the taste was a revelation. That spontaneous act of creativity, driven by a five-year-old’s brilliant idea, became an instant family tradition. Now, every year, we make these cookies together, and it’s a sweet reminder that the best recipes often come from a little bit of love and a lot of curiosity.
Gathering Your Cookie Crew: The Ingredients
Here’s everything you’ll need to create these festive wonders. I’ve included some of my favorite tips and substitutions to make this recipe work for you!
- 1 cup (2 sticks) unsalted butter, softened: This is the heart of our cookie! Using unsalted butter lets you control the salt level. Chef’s Insight: “Softened” is key! It should be cool to the touch but leave a slight indent when you press it. Too melted, and your cookies will spread; too cold, and they won’t cream properly.
- ¾ cup granulated sugar: This gives our cookies that lovely crisp edge.
- ¾ cup brown sugar, packed: Pack it in! The molasses in brown sugar is the secret to a chewy, moist center and that deep, caramel-like flavor. Substitution Tip: You can use all light brown sugar for an even chewier cookie, or all granulated for a crisper result.
- 2 large eggs: They bind everything together and add richness. Make sure they’re at room temperature to blend seamlessly with the butter and sugar.
- 1 tsp vanilla extract: The flavor backbone. Use pure vanilla extract if you can—it makes a world of difference!
- 2½ cups all-purpose flour: The structure of our cookie. Chef’s Tip: For lighter cookies, fluff your flour with a spoon before scooping it into your measuring cup, then level it off. Don’t pack the cup!
- 1 tsp baking soda: Our leavening agent, which helps the cookies rise and become beautifully puffy.
- ½ tsp salt: Absolutely essential! Salt balances the sweetness and makes all the other flavors pop. Don’t skip it.
- 1 cup semi-sweet chocolate chips: The classic, rich chocolate we all know and love. Substitution Tip: Feel free to use dark chocolate chips for a less sweet, more intense chocolate flavor.
- 1 cup white chocolate chips: These add a creamy, sweet contrast that pairs perfectly with the peppermint. They look like little snowflakes in the finished cookie!
- ¾ cup crushed candy canes: The star of the show! Chef’s Insight: You’ll need about 6-8 standard-sized candy canes. Unwrap them, place them in a sturdy zip-top bag, and crush them with a rolling pin. Leave some small chunks for that fantastic crunch!
Let’s Bake! Your Step-by-Step Guide to Cookie Perfection
Okay, team, aprons on! Let’s walk through this together. I’ll be with you every step of the way with my best tips to ensure cookie success.
- Cream Butter and Sugars: The Foundation of Fluffiness. In a large bowl, beat the softened butter, granulated sugar, and brown sugar together until the mixture is light, pale, and fluffy. This should take about 2-3 minutes with a hand mixer or stand mixer. Why do we do this? Creaming incorporates tiny air bubbles into the butter, which expand in the oven, giving us a tender, cake-like texture. Don’t rush this step—it’s the secret to a perfect cookie texture!
- Incorporate the Eggs and Vanilla: Bringing it Together. Add the eggs one at a time, mixing well after each addition until they are fully incorporated. Then mix in the vanilla extract. Scrape down the sides of the bowl to make sure everything is homogenous. At this stage, your mixture might look a little curdled if your eggs were cold—don’t panic! It will all come together once you add the flour.
- Whisk and Combine the Dry Ingredients: The Gentle Touch. In a separate, medium-sized bowl, whisk together the flour, baking soda, and salt. This ensures the leavening agent is evenly distributed. Now, with your mixer on low speed, gradually add the dry ingredients to the wet ingredients. Mix until just combined. A few streaks of flour are okay! Chef’s Hack: Overmixing the flour develops gluten, which can lead to tough cookies. We want tender, so a light hand is key.
- Fold in the Fun: The Mix-Ins! Now for the best part! Switch to a spatula or wooden spoon. Gently fold in the semi-sweet chocolate chips, white chocolate chips, and the crushed candy canes. Mix until they are evenly distributed throughout the dough.
- Scoop and Chill: The Patience Pays Off Step. Using a cookie scoop or a tablespoon, portion the dough into balls (about 1.5 tablespoons each). Place them on a baking sheet lined with parchment paper. Now, here’s the non-negotiable part: chill the dough for at least 30 minutes. Why? Chilling solidifies the butter, which prevents the cookies from spreading too much into thin puddles in the oven. It also allows the flavors to meld together beautifully. You can chill the dough for up to 48 hours if you want to get a head start!
- Bake to Golden Perfection: The Grand Finale. Preheat your oven to 350°F (175°C). Place the chilled dough balls on parchment-lined baking sheets, leaving about 2 inches between them for spreading. Bake for 10-12 minutes. The cookies are done when the edges are set and lightly golden, but the centers still look soft and slightly underdone. Chef’s Secret: They will continue to cook on the hot baking sheet after you take them out. This is the secret to a soft, chewy center!
- The Cool Down: Resist the Urge! Remove the baking sheet from the oven and let the cookies cool on the sheet for at least 5 minutes. This allows them to set up enough to be moved without falling apart. Then, transfer them to a wire rack to cool completely. I know it’s hard, but try to wait until they are just warm before diving in—the flavors are even better!
Sharing the Joy: How to Serve Your Masterpieces
These cookies are a showstopper all on their own, but a little presentation goes a long way! For a truly festive platter, stack them high on a rustic wooden board or a beautiful holiday plate. Just before serving, you can sprinkle a tiny bit of extra crushed candy cane over the top for a fresh pop of color and crunch. They are absolutely divine with a glass of cold milk, a mug of rich hot chocolate, or a warm cup of coffee. They also make the most thoughtful homemade gifts! Tuck a few into a cellophane bag tied with a ribbon, or layer them in a festive tin for a present that comes straight from the heart.
Make It Your Own: Delicious Recipe Variations
Feel like mixing it up? Here are a few fun twists on this classic:
- Peppermint Bark Cookies: Swap the semi-sweet and white chocolate chips for 2 cups of chopped peppermint bark. You get double the peppermint and double the chocolate!
- Dark Chocolate & Peppermint: For a more sophisticated treat, use all dark chocolate chips and add a ½ teaspoon of peppermint extract to the dough along with the vanilla.
- Gluten-Free Swap: Simply replace the all-purpose flour with a 1:1 gluten-free baking blend. My favorite brands work like a charm in this recipe.
- Candy Cane Thumbprints: After scooping the dough, press your thumb into the center of each ball. After baking, while the cookies are still warm, fill the indentations with a simple peppermint buttercream or melted chocolate, then sprinkle with candy cane dust.
- “Coal” Cookies: For a fun Grinch-themed twist, use only black cocoa powder or add black food coloring to the dough and use only dark chocolate chips!
From My Kitchen to Yours: A Few Final Thoughts
This recipe has evolved so much since that first messy batch with my daughter. I’ve learned that the chilling step is non-negotiable for the perfect texture, and that using a mix of chocolates creates a more complex flavor. One year, I got a little overzealous with the candy canes and added a whole cup—the cookies were delicious, but they were almost too fragile to pick up! Lesson learned: ¾ cup is the sweet spot. The best part about this recipe, though, is how it brings people together. I’ve had friends text me photos of their baking triumphs, and it truly makes my day. So, when you make these, tag me or send me a note! I love being part of your kitchen story. Remember, baking is about joy, not perfection. Even a lopsided cookie made with love is a beautiful thing.
Your Questions, Answered! FAQ & Troubleshooting
Q: My cookies spread too much and became flat. What happened?
A: This is usually caused by butter that was too warm or by skipping the chilling step. Make sure your butter is softened but still cool, and please, please chill the dough! It makes all the difference. Also, check that your baking soda is fresh.
Q: Can I make the dough ahead of time and freeze it?
A: Absolutely! This is a fantastic time-saver. Scoop the dough balls onto a baking sheet and freeze them solid. Then, transfer the frozen dough balls to a zip-top bag. You can bake them straight from the freezer; just add 1-2 minutes to the baking time. Dough will keep well for up to 3 months.
Q: My candy canes melted and created colorful swirls. Is that normal?
A> Yes, this can happen, and it’s actually quite pretty! Candy canes are sugar, and sugar melts. To minimize melting and keep more of the crunch, make sure your candy cane pieces aren’t too fine—small chunks are best. The colorful swirls are part of the holiday charm, so I say embrace it!
Q: The cookies are too cakey for my taste. How can I make them chewier?
A> For a chewier cookie, try using ½ cup granulated sugar and 1 cup of brown sugar. The extra molasses promotes chewiness. Also, make sure you’re not over-measuring your flour (use the spoon-and-level method!) and avoid overmixing once the flour is added.
Nutritional Information (Approximate, per cookie)
Calories: 210 | Carbohydrates: 26g | Protein: 2g | Fat: 11g | Saturated Fat: 7g | Sugar: 17g
Please note: This is an estimate generated from an online calculator. Values can vary based on specific ingredients used.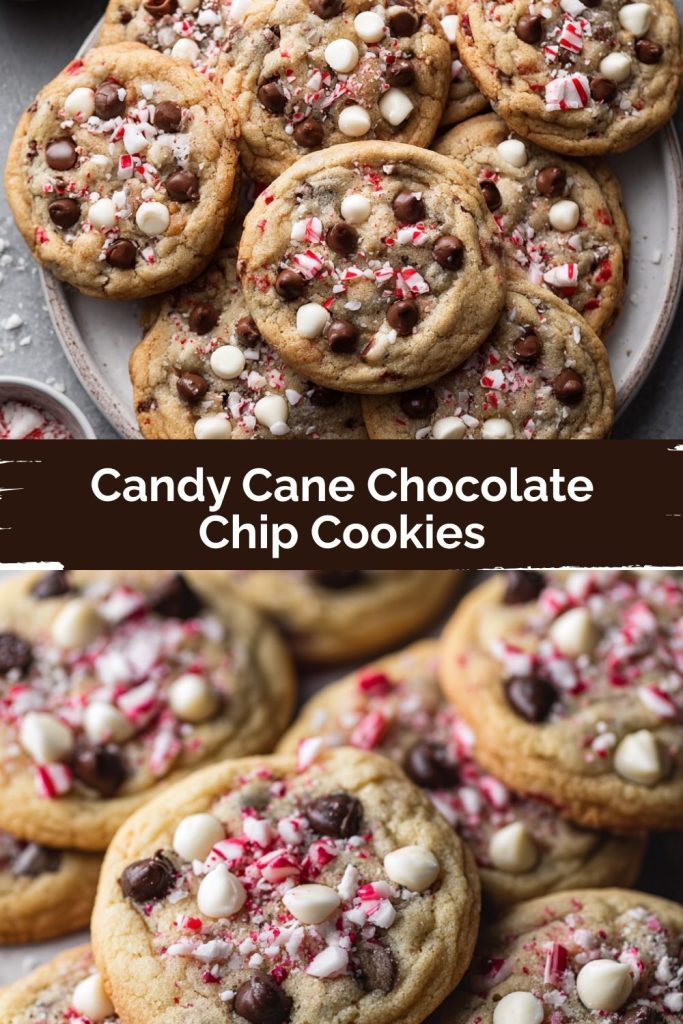
Final Thoughts
At the end of the day, these Candy Cane Chocolate Chip Cookies aren’t just cookies—they’re little bites of memory, laughter, and holiday spirit. They remind me that the best kitchen traditions often start with a “what if” moment, and that baking is really about joy, connection, and sharing something sweet with the people we love. So whether you make them for gifting, for your holiday table, or just to sneak one with your morning coffee (I fully approve!), I hope they bring you the same kind of happiness they’ve brought to my family. Here’s to peppermint crunch, melted chocolate smiles, and holiday baking that feels like pure magic.