***
Your New Favorite Fall Treat: Mini Pumpkin Cheesecakes!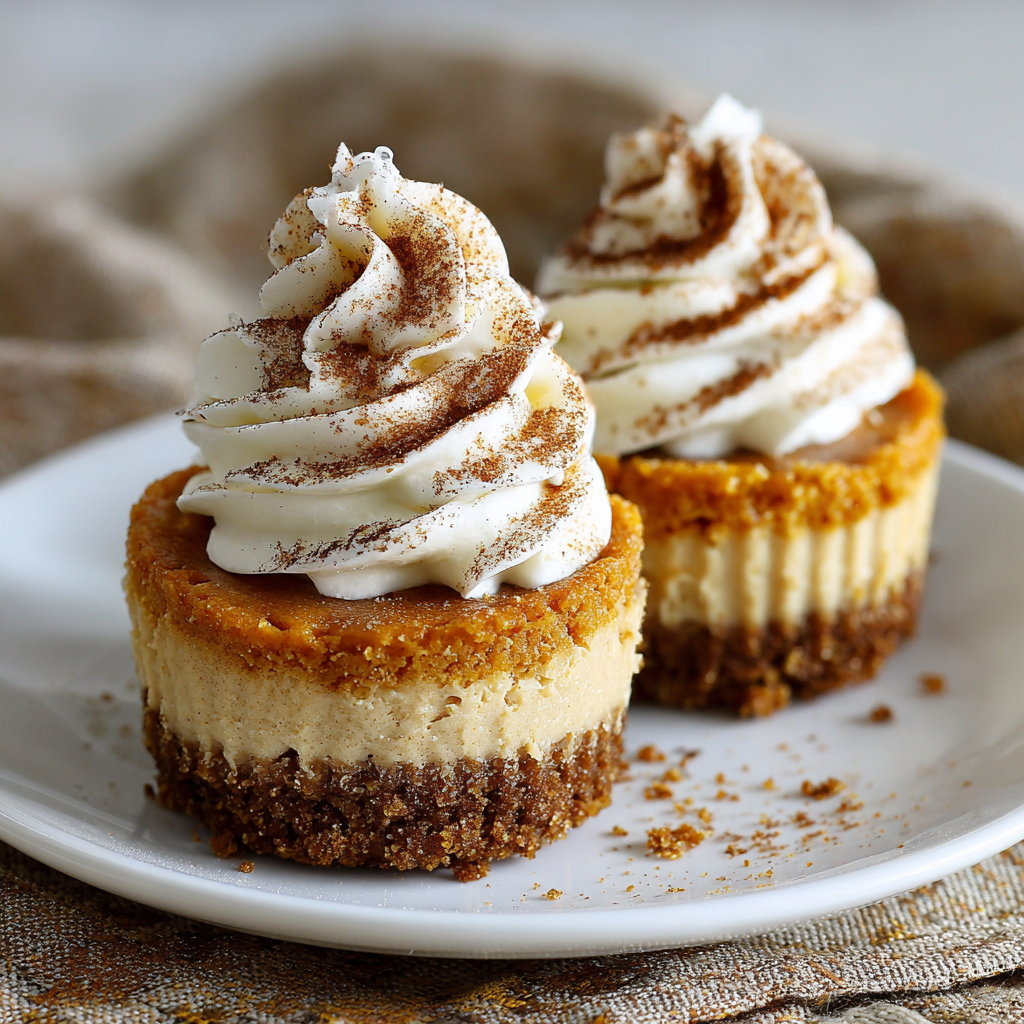
Hey there, friend! Can you smell it? That crisp, cozy, slightly-spiced scent in the air that can only mean one thing: pumpkin season is in full swing. And I don’t know about you, but my heart does a little happy dance the moment I see those first orange gourds at the farm stand. It’s the official signal to pull out my favorite baking pans, tie on my most flour-dusted apron, and get creating in the kitchen.
While I adore a classic pumpkin pie with my whole heart, sometimes you want all that autumnal bliss in a more shareable, portable, and downright adorable package. Enter the star of today’s show: Mini Pumpkin Cheesecakes. Imagine the creamiest, dreamiest pumpkin filling, lightly spiced with cinnamon and warmth, all nestled on a buttery graham cracker crust and perfectly sized for popping in your mouth. They bring all the nostalgic flavor of your favorite holiday dessert but in a fun, single-serving form that’s absolutely perfect for parties, potlucks, or just treating yourself on a lazy Sunday afternoon. No slicing, no messy plates—just pure, uncomplicated pumpkin bliss. So, let’s preheat that oven and fill your kitchen with the most magical fall aroma. I promise, this is one recipe you’ll want to make on repeat all season long!
A Slice of Memory: Why These Mini Cheesecakes Feel Like Home
PrintMini Pumpkin Cheesecakes

All the cozy flavor of pumpkin pie, but creamier, cuter, and way easier to serve. These Mini Pumpkin Cheesecakes bring together the best of fall in a velvety, spiced bite-sized dessert. Perfect for gatherings, gifting, or treating yourself — no forks, no fuss, just pure pumpkin bliss.
- Prep Time: 15 mins
- chill time: 2 hrs
- Cook Time: 18 mins
- Total Time: 2 hrs 35 mins
- Yield: 24 mini cheesecakes 1x
Ingredients
Crust:
1 cup graham cracker crumbs
2 tbsp sugar
4 tbsp melted butter
Filling:
8 oz cream cheese, softened
½ cup pumpkin purée
¼ cup brown sugar
1 tsp pumpkin pie spice
½ tsp cinnamon
1 tsp vanilla extract
1 large egg
Optional Topping:
Whipped cream
Crushed pecans or cinnamon dust
Instructions
Preheat oven to 325°F (160°C). Line a mini muffin tin with paper liners.
Mix graham crumbs, sugar, and melted butter. Press 1 tsp into each liner to form a crust. Bake 5 minutes, then cool.
Beat cream cheese until smooth. Add pumpkin, sugar, spices, vanilla, and egg. Mix until creamy.
Spoon filling over crusts, nearly to the top.
Bake for 15–18 minutes until set. Cool completely, then chill for at least 2 hours.
Top with whipped cream or pecans before serving if desired.
Nutrition
- Calories: 130
- Sugar: 7g
- Fat: 9g
- Carbohydrates: 10g
- Protein: 2g
This recipe always takes me right back to my first autumn in my own home. I was so eager to host Friendsgiving, wanting to impress my friends with a grand, from-scratch feast. I decided on a show-stopping, full-sized pumpkin cheesecake. Well, let me tell you, it was a disaster! The water bath leaked, the top cracked into a miniature Grand Canyon, and when I went to slice it? It completely fell apart. My heart sank. But my friends? They didn’t care one bit. They just grabbed spoons and dug right into the messy, delicious pile right from the pan, laughing and declaring it the best “pumpkin cheesecake pudding” they’d ever had.
That’s when it hit me: it’s not about perfection; it’s about the joy you share. I created these mini cheesecakes the very next year as my foolproof, no-fuss, *always-impressive* solution. They bake evenly, they set beautifully, and they come with their own little built-in portion control (though I won’t judge if you have two… or three). They carry that same spirit of warmth and friendship from that messy first try, but now, they’re guaranteed to turn out picture-perfect every single time.
Gathering Your Cozy Ingredients
One of the best things about this recipe is that you probably have most of these ingredients in your pantry already! Here’s what you’ll need to create your own little bites of autumn magic.
For the Buttery Graham Cracker Crust:
- 1 cup graham cracker crumbs: You can buy these pre-crumbled or simply pulse whole graham crackers in a food processor until fine. This is your classic, nostalgic base that provides the perfect crunchy contrast to the creamy filling.
- 2 tablespoons granulated sugar: Just a little bit to sweeten the crust and help it caramelize slightly as it bakes.
- 4 tablespoons (½ stick) unsalted butter, melted: This is the glue that holds our crust together! Using unsalted butter lets you control the salt level. Chef’s Insight: If you only have salted butter, that’s totally fine—just the finished crust might have a very subtle salty-sweet vibe, which is actually delicious.
For the Velvety Pumpkin Filling:
- 8 oz (one block) cream cheese, softened: This is non-negotiable—softened cream cheese is the key to a silky-smooth filling with no lumps! Take it out of the fridge at least an hour before you start. Substitution Tip: You can use full-fat or reduced-fat, but I find full-fat gives the richest, creamiest texture.
- ½ cup pure pumpkin purée: Make sure you’re using 100% pure pumpkin purée, not pumpkin pie filling, which has added sugar and spices. We’re adding our own!
- ¼ cup packed brown sugar: I love brown sugar here for its deep molasses flavor; it pairs so beautifully with the pumpkin and spices.
- 1 teaspoon pumpkin pie spice: The cozy flavor powerhouse! This blend usually includes cinnamon, ginger, nutmeg, and allspice.
- ½ teaspoon cinnamon: A little extra cinnamon never hurt anybody! It adds another layer of warm, familiar flavor.
- 1 teaspoon pure vanilla extract: The secret weapon in so many desserts. It enhances all the other flavors and adds a beautiful aroma.
- 1 large egg, at room temperature: The egg acts as a binder and gives the cheesecake its structure. A room-temperature egg incorporates much more easily into the batter.
Let’s Make Some Magic: Step-by-Step Instructions
Ready to see how these adorable little treats come together? It’s easier than you think! I’ll walk you through each step with my favorite chef hacks to ensure your success.
- Prep and Preheat. Start by preheating your oven to 325°F (160°C). This lower temperature is perfect for cheesecakes—it cooks them gently and evenly without over-browning or causing cracks. Then, line a mini muffin tin with 24 paper liners. This is your biggest timesaver, trust me! Chef’s Hack: Give the liners a very light spritz with cooking spray. This ensures the finished cheesecakes peel away cleanly without sticking.
- Create the Crust. In a medium bowl, combine the graham cracker crumbs and granulated sugar. Pour in the melted butter and stir with a fork until the mixture resembles wet sand and holds together when you pinch it. Now, place a heaping teaspoon of this mixture into the bottom of each prepared liner. Use a small, flat-bottomed glass (or your fingers!) to press the crumbs down firmly into an even layer. We bake this for just 5 minutes to set it, which gives us a sturdy, crisp base. Let it cool while you make the filling.
- Whip Up the Dreamy Filling. In a large mixing bowl, beat the softened cream cheese with an electric hand mixer (or in your stand mixer with the paddle attachment) on medium speed until it’s completely smooth and creamy. This should take about 1-2 minutes. Scrape down the sides and the bottom of the bowl with a spatula—this is a crucial step to avoid hidden lumps of cream cheese! Now, add the pumpkin purée, brown sugar, pumpkin pie spice, cinnamon, and vanilla extract. Beat again until everything is beautifully combined and smooth.
- Incorporate the Egg. Crack your room-temperature egg into the bowl. Now, here’s my pro-tip for the creamiest texture: mix on low speed just until the egg is fully incorporated. Over-beating the egg can incorporate too much air, which might cause the cheesecakes to puff up and then fall, leading to cracks. So, once that yellow streak disappears, stop mixing!
- Fill ‘Em Up! Using a small cookie scoop or two spoons, carefully spoon the filling over the cooled crusts, filling each liner almost to the top. I like to smooth the tops gently with the back of a spoon or a small offset spatula for a prettier finish. Don’t worry, they don’t rise much, so filling them high is the way to go!
- Bake to Perfection. Slide the pan into your preheated oven and bake for 15-18 minutes. You’re looking for the tops to look set and maybe have a slight wobble in the very center when you gently jiggle the pan. They will firm up significantly as they cool. Chef’s Note: Ovens can vary, so start checking at the 15-minute mark.
- The All-Important Cool Down. This is the step that tests your patience! Let the cheesecakes cool completely in the pan on a wire rack. Then, for the final transformation, transfer them to the refrigerator to chill for at least 2 hours, but ideally overnight. This chilling time allows the flavors to meld and the texture to become perfectly firm and sliceable. It’s 100% worth the wait!
Serving Up the Cozy Vibes
The fun part is here—serving and devouring! I love taking these mini cheesecakes out of the fridge just before my guests arrive. Right before serving, I add a tiny dollop of freshly whipped cream on top (the kind from a can is totally fine, no shame in my game!) and a sprinkle of crushed pecans for a little crunch. For a super simple, elegant touch, a light dusting of cinnamon or even a tiny cinnamon stick placed on top looks gorgeous. Arrange them on a beautiful platter and watch them disappear!
Make It Your Own: Delicious Recipe Variations
Feel like playing around? Here are a few of my favorite ways to mix things up:
- Gingersnap Crust: Swap the graham crackers for gingersnap crumbs. The spicy, snappy flavor is a match made in heaven with the pumpkin filling.
- Chocolate Drizzle: Melt some semi-sweet chocolate chips with a teaspoon of coconut oil and drizzle it over the chilled cheesecakes for a decadent touch.
- Maple Kissed: Replace the brown sugar with pure maple syrup in the filling and add a tiny pinch of flaky sea salt on top before serving. *Chef’s kiss!*
- Bourbon Spiked: For a grown-up twist, add one tablespoon of bourbon to the filling along with the vanilla. It deepens the flavor so beautifully.
- Dairy-Free Delight: Use your favorite plant-based cream cheese and butter, and a flax egg to make these friendly for everyone.
Anna’s Chef’s Notes
This recipe has been my little kitchen workhorse for years, and it has never let me down. I’ve learned a thing or two along the way! One of my favorite kitchen stories involves my dog, Barnaby, who is an expert at positioning himself directly under the mixer, hoping for a splash of cream cheese to come his way. (Spoiler: it sometimes does).
Over time, I’ve found that the quality of your pumpkin purée really makes a difference. I’m a huge fan of the organic canned pumpkin, but if you have the time to roast and purée your own sugar pumpkins, the flavor is out-of-this-world incredible! It tastes brighter and more… well, pumpkin-y. But on a busy weeknight, canned is absolutely fantastic. The goal is joy, not stress, remember? So use what works for you. The most important ingredient you can add is a dash of love and a smile.
Your Questions, Answered!
I’ve gotten so many wonderful questions about this recipe over the years. Here are the answers to the most common ones!
Q: Can I make these in a regular muffin tin?
A: Absolutely! You sure can. The recipe will make about 12 standard-sized cheesecakes. Just press a heaping tablespoon of crust mixture into each liner and increase the baking time to 20-25 minutes, or until the centers are set.
Q: My cheesecakes cracked on top! What did I do wrong?
A: Oh, don’t you worry about a few cracks! They still taste amazing. Cracking usually happens for one of three reasons: the oven was too hot (always use an oven thermometer to check!), the cream cheese was over-beaten after the egg was added, or they cooled down too quickly. But here’s the secret: that’s what the whipped cream and pecans are for! They hide any and all imperfections beautifully.
Q: How far in advance can I make these?
A: They are the perfect make-ahead dessert! You can store them in an airtight container in the fridge for up to 4 days. I actually think they taste even better on day two after the flavors have had more time to mingle. You can also freeze them for up to 3 months. Just thaw in the fridge overnight before serving.
Q: Can I use fresh pumpkin instead of canned?
A: You can! Just make sure you use sugar pumpkins (also called pie pumpkins), not the large carving pumpkins, which are too watery. Roast or steam it until tender, then purée it until completely smooth. The key is to strain the fresh purée in a fine-mesh sieve lined with cheesecloth for a few hours to remove excess moisture, or your filling might be too wet.
Quick Nutritional Info (Per Mini Cheesecake)
Calories: 130 | Fat: 9g | Carbs: 10g | Sugar: 7g | Protein: 2g
Please note: This is an estimate and can vary based on specific ingredients used and any substitutions.
Prep Time: 15 mins | Cook Time: 18 mins | Chill Time: 2 hrs | Total Time: ~2 hrs 35 mins
Yields: 24 mini cheesecakes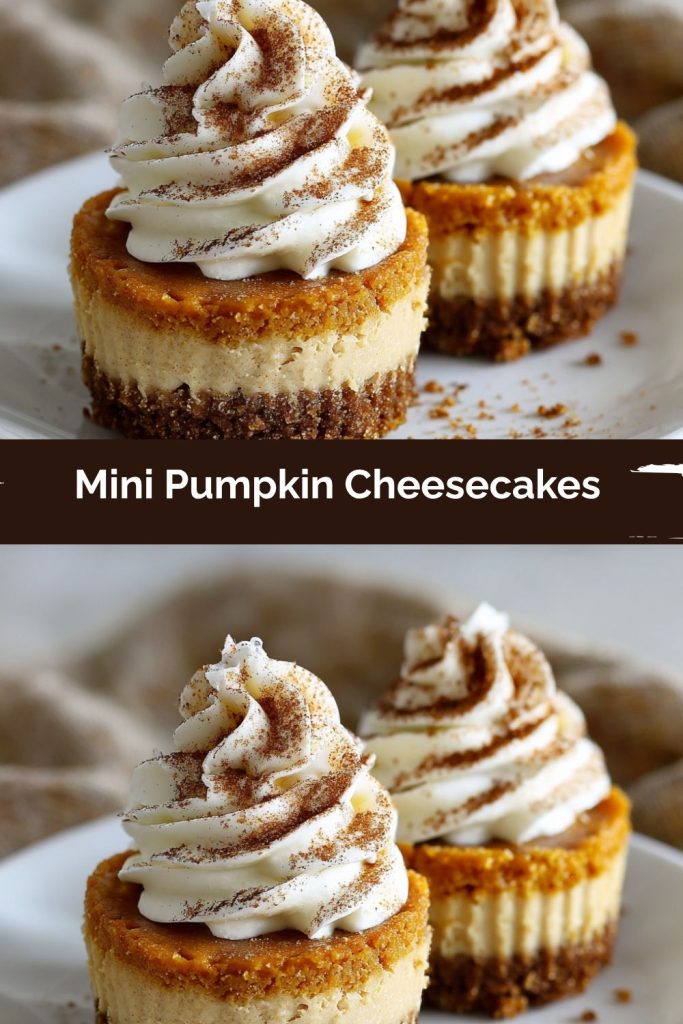
Final Thoughts
There’s just something about these Mini Pumpkin Cheesecakes that feels like a hug in dessert form. They’ve got all the nostalgic warmth of pumpkin pie, but dressed up in a playful, party-ready package. Whether you’re setting them out for a Friendsgiving dessert table, tucking them into a lunchbox for a midday treat, or sneaking one straight from the fridge on a quiet night, they never fail to bring joy.
To me, they’re proof that baking doesn’t have to be fussy to feel special. A few simple ingredients, a little patience during the chill time, and suddenly you’ve got a tray full of golden, spiced, creamy bites that everyone will rave about.
So this fall, when the air turns crisp and your kitchen starts to whisper for something cozy, I hope you’ll whip up a batch of these little treasures. Who knows—they just might become the tradition your family looks forward to year after year.