***
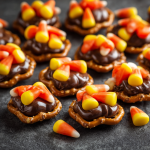
Your New Favorite No-Bake Treat: Candy Corn Pretzel Bites!
Hey there, friend! Anna here, ready to share one of my all-time favorite, can’t-stop-eating-them, magically-easy treats. If you’ve ever found yourself staring into your pantry, craving something that’s equal parts sweet, salty, and ridiculously simple to make, you have absolutely come to the right place. We’re talking about Candy Corn Pretzel Bites, and trust me, your life is about to get a whole lot more delicious.
I’m a firm believer that the best recipes are often the ones that don’t require a fancy degree or a sink full of dishes. They’re the ones that bring people together, spark joy with a single bite, and make you look like a kitchen wizard with minimal effort. These little bites are the epitome of that philosophy. They’re the perfect project for a cozy afternoon, a last-minute party lifesaver, or a fun activity to do with your favorite little helpers in the kitchen.
With just three main ingredients and about 15 minutes of your time, you can create a treat that feels festive, fun, and utterly irresistible. The combination of the salty, crunchy pretzel, the creamy, melting chocolate, and the sweet, classic candy corn is a texture and flavor trio that sings. So, let’s put on our favorite aprons, preheat that oven, and dive into making a snack that’s sure to become a new tradition in your home!
A Sweet and Salty Flashback
PrintCandy Corn Pretzel Bites
- Prep Time: 10 minutes
- Cook Time: 5 minutes
- Total Time: 15 minutes
- Yield: 150 bites 1x
Ingredients
150 miniature pretzels
150 Hershey’s Kisses (about 2 standard 12-oz bags)
150 pieces of candy corn
Optional Flavor Twists:
Swap some Kisses for Hershey’s Hugs, Caramel Kisses, or Pumpkin Spice Kisses
Use Reese’s Pieces or M&M’s instead of candy corn for variation
Add a few drops of pumpkin pie spice or sea salt for a flavor boost
Instructions
Preheat oven to 250°F (120°C).
Line a baking sheet with parchment paper. Arrange pretzels in a single layer.
Place one Hershey’s Kiss on top of each pretzel.
Bake for 4–5 minutes or until Kisses are soft but not fully melted.
Immediately press a piece of candy corn (or your twist topping) into the center of each softened Kiss.
Let cool completely at room temp or chill in the fridge for 10–15 minutes to set.
Nutrition
- Calories: 40–45 c
- Fat: 2g
- Carbohydrates: 5g
- Protein: 1g
I’ll never forget the first time I stumbled upon the concept of these bites. It was years ago, right before my daughter’s first school bake sale. I was a ball of nerves, wanting to contribute something that would stand out amongst the sea of classic chocolate chip cookies and brownies. I wanted something unique, something eye-catching, but let’s be real—I also needed something I could whip up during naptime.
I started pulling things out of the cupboard in a slight panic: a bag of mini pretzels from a snack attack, a giant bag of Hershey’s Kisses leftover from a s’mores night, and a jar of candy corn my husband insists on buying every fall despite it not being his favorite. And then, the lightbulb moment. What if I…? A quick search online confirmed I wasn’t the first genius to have this idea, and I got to work. The result was pure magic. Not only did they look adorable and festive, but they were the first treat to completely sell out. I came home with an empty tray and a heart full of pride. Now, making these bites signals the start of the cozy season in our house—a little ritual that’s as sweet as the treats themselves.
Gathering Your Magical Trio (And Some Fun Twists!)
The beauty of this recipe is in its simplicity. You likely have most of these ingredients on hand already! Here’s what you’ll need to create about 150 perfect little bites.
- 150 Miniature Pretzels: The salty, sturdy foundation of our treat. I love the classic square knotted ones—they create a perfect little cup to hold the chocolate. If you can only find the tiny twist pretzels, those will work in a pinch, but the flat squares are ideal.
- 150 Hershey’s Kisses (about 2 standard 12-oz bags): Our creamy, melty centerpiece! The classic milk chocolate Kiss is perfection here, melting into a velvety pool. Pro tip: Unwrapping 150 Kisses is a fantastic job for little hands eager to help (and maybe sneak a few).
- 150 Pieces of Candy Corn: The iconic, sweet finale! The candy corn doesn’t just add a pop of color and a hit of sugary vanilla-honey flavor; it also acts as the anchor, pressing the soft chocolate down into the pretzel. It’s the final piece of the puzzle.
Let’s Create Some Magic: Step-by-Step Instructions
Ready? This is where the fun really begins. I’ll walk you through each step, sharing all my little chef hacks to ensure your Candy Corn Pretzel Bites turn out perfectly every single time.
Step 1: Preheat and Prep. First things first, preheat your oven to a low and slow 250°F (120°C). This gentle heat is key—it softens the chocolate without turning it into a messy puddle. While it’s warming up, line a baking sheet (or two!) with parchment paper. This is a non-negotiable step for me; it prevents sticking and makes cleanup an absolute dream. No parchment? A silicone baking mat works wonderfully, too.
Step 2: The Pretzel Foundation. Now, arrange your miniature pretzels in a single layer on the prepared baking sheet. Give them a little space, like good neighbors. You don’t want them touching, as this can cause the chocolate from one to merge with its neighbor, and we want perfectly distinct, adorable bites.
Step 3: The Chocolate Crown. Here comes the fun part! Carefully place one unwrapped Hershey’s Kiss on the center of each pretzel. You’ll want the flat, stamped side of the Kiss facing down, resting on the pretzel. It might feel a bit tedious, but I promise, it goes quickly. Pop on some music and make a game of it!
Step 4: The Gentle Warmth. Slide your baking sheet into the preheated oven and bake for 4-5 minutes. Now, here’s my biggest chef hack: watch them like a hawk! You are not looking for the Kisses to be completely melted and liquid. You just want them to lose their shape, get soft and shiny, and look slightly puffed. If they start to lose their iconic tip and spread out, they are ready. This usually happens right around the 4-minute mark for me, but all ovens vary.
Step 5: The Grand Finale Press. As soon as you pull the tray from the oven, it’s go-time! Working quickly but carefully (the tray is hot!), press one piece of candy corn straight down into the center of each softened Kiss. Apply a firm but gentle pressure—you want to push the candy corn down and spread the chocolate into the pretzel’s nooks and crannies, creating a perfect seal. This is the most satisfying step!
Step 6: The Patience Game. Now, the hardest part: waiting. You must let the bites cool completely until the chocolate has re-solidified. You can do this at room temperature, which might take 30-45 minutes, or for a speedier result, pop the entire tray into the refrigerator for 10-15 minutes. The chill gives the chocolate a lovely snap when you bite into it.
Sharing the Sweetness: How to Serve
Once your Candy Corn Pretzel Bites are set, it’s time for the grand reveal! I love piling them high on a festive platter or in a wide, shallow bowl. They look stunning all on their own, but for an extra touch, you could sprinkle a few extra pieces of candy corn around the platter. They are the ultimate finger food, perfect for passing around at a party, setting out as a after-school surprise, or packaging up in little cellophane bags tied with a ribbon as the sweetest homemade gift.
Get Creative! Flavor Twists & Dietary Swaps
One of the best things about this recipe is its versatility. Once you master the basic technique, a world of flavor combinations opens up! Here are a few of my favorite twists:
- The Hug Life: Swap half the milk chocolate Kisses for Hershey’s Hugs. The white chocolate stripe creates a beautiful look and a deliciously different flavor profile.
- Caramel Dream: Use Hershey’s Caramel Kisses for a gooey, rich surprise in the center. Just be prepared for happy sighs from anyone who bites into one.
- Colorful Classic: Not a candy corn fan? No problem! Use a Reese’s Piece, an M&M (plain or peanut), or even a pecan half for a totally different vibe.
- Festive Spice: For a more grown-up twist, add a tiny, tiny pinch of pumpkin pie spice or a flake of sea salt on top of the chocolate right after you press the candy corn in.
Anna’s Kitchen Corner: A Few Parting Thoughts
Over the years, this recipe has become a true workhorse in my kitchen. I’ve made them for Halloween parties, Thanksgiving appetizer spreads, and even as a fun, non-cookie addition to Christmas cookie boxes. They are always a hit. One of my favorite kitchen memories is of my daughter, who is now a master unwrapper, meticulously placing the Kisses and declaring each one “a hat for the pretzel.” It’s these little moments that make cooking so special.
I’ve learned that the quality of the chocolate matters more than you’d think. While store-brand kisses can work, I find the name-brand Hershey’s Kisses have the perfect meltability and flavor for this application. And a word to the wise: if you’re making these on a particularly humid day, the chocolate can take a bit longer to set, so the fridge is your best friend!
Your Questions, Answered!
I’ve gotten so many wonderful questions about this recipe over the years. Here are the answers to the most common ones to help you on your way to pretzel bite perfection.
Q: My chocolate melted completely and ran everywhere! What did I do wrong?
A: Oh, I’ve been there! This almost always means your oven was too hot. Oven temperatures can be notoriously inaccurate. I highly recommend using an oven thermometer to check. Also, remember you’re only warming the Kisses until they are soft and slightly puffed, not until they are a liquid pool. A shorter bake time at the correct temperature is the key.
Q: Can I make these ahead of time?
A: Absolutely! These are a fantastic make-ahead treat. Once they are completely set, store them in a single layer in an airtight container at room temperature for up to 5 days. You can also layer them between sheets of parchment paper if you need to stack them. I don’t recommend refrigerating them long-term, as it can cause the pretzels to lose their crunch.
Q: My candy corn won’t stick and pops right out after cooling. Help!
A: This usually happens for one of two reasons: either the chocolate cooled too much before you pressed the candy corn in, or you didn’t press down firmly enough. You have to work quickly after taking the tray out of the oven, and don’t be shy! Give that candy corn a good, confident push to embed it in the soft chocolate.
Q: Can I use other types of chocolate?
A: You can experiment, but Kisses are uniquely formulated for this. I’ve tried with Rolo candies (delicious!) and even small squares of chocolate, but the results can be less predictable. If you try a different chocolate, do a small test batch first to nail down the timing.
A Quick Nutritional Note
While these are definitely a “sometimes” treat, it’s helpful to know what you’re enjoying! Please note, this is just an estimate.
Estimated per bite: 40–45 calories | 2g fat | 5g carbs | <1g protein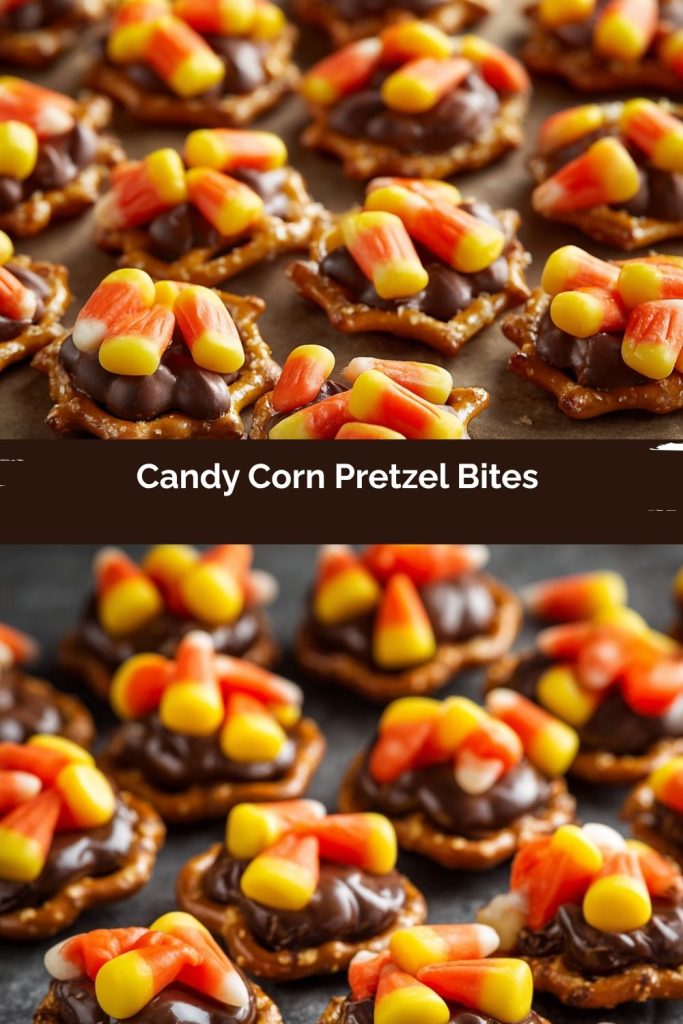
Final Thoughts
There’s something so wonderfully nostalgic about these little Candy Corn Pretzel Bites—they’re the kind of treat that brings instant smiles and cozy fall energy wherever they go. They’re proof that you don’t need fancy ingredients or hours in the kitchen to make something that feels special. Just a little salt, a little sweet, and a whole lot of love.
Whether you’re whipping up a batch for a Halloween party, sneaking a few into your kid’s lunchbox, or simply treating yourself after a long day, these bites hit that perfect balance of fun and flavor every single time. So grab that bag of candy corn and a handful of pretzels, and let’s make fall just a little bit sweeter—one bite at a time.