***
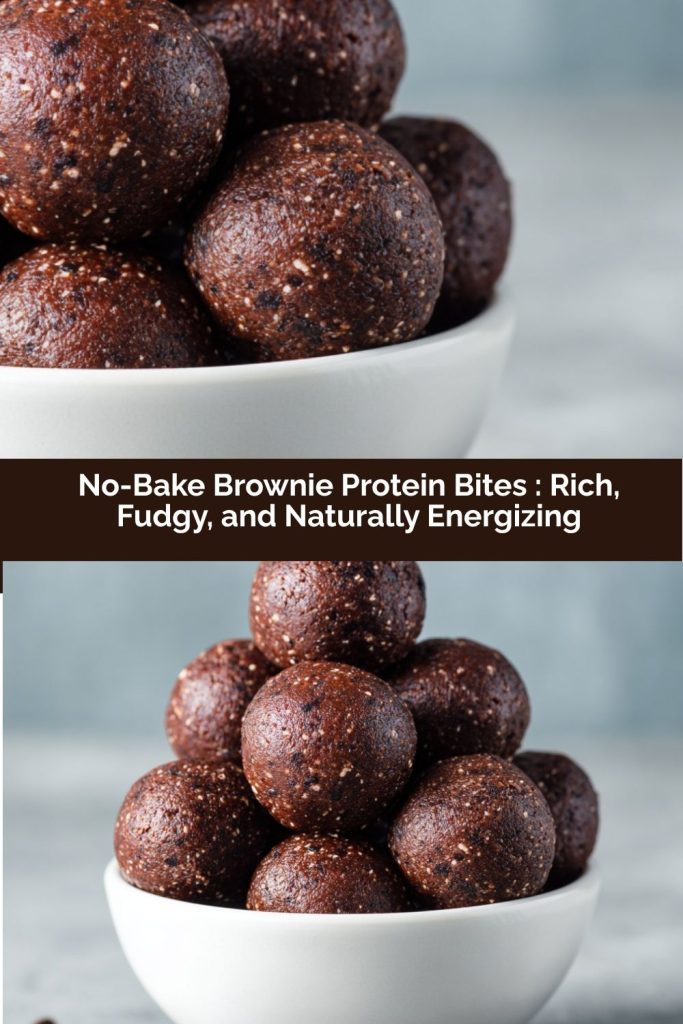
No-Bake Brownie Protein Bites: Your New Secret Weapon for a Rich, Energizing Treat
Who Says Healthy Snacks Can’t Taste Indulgent?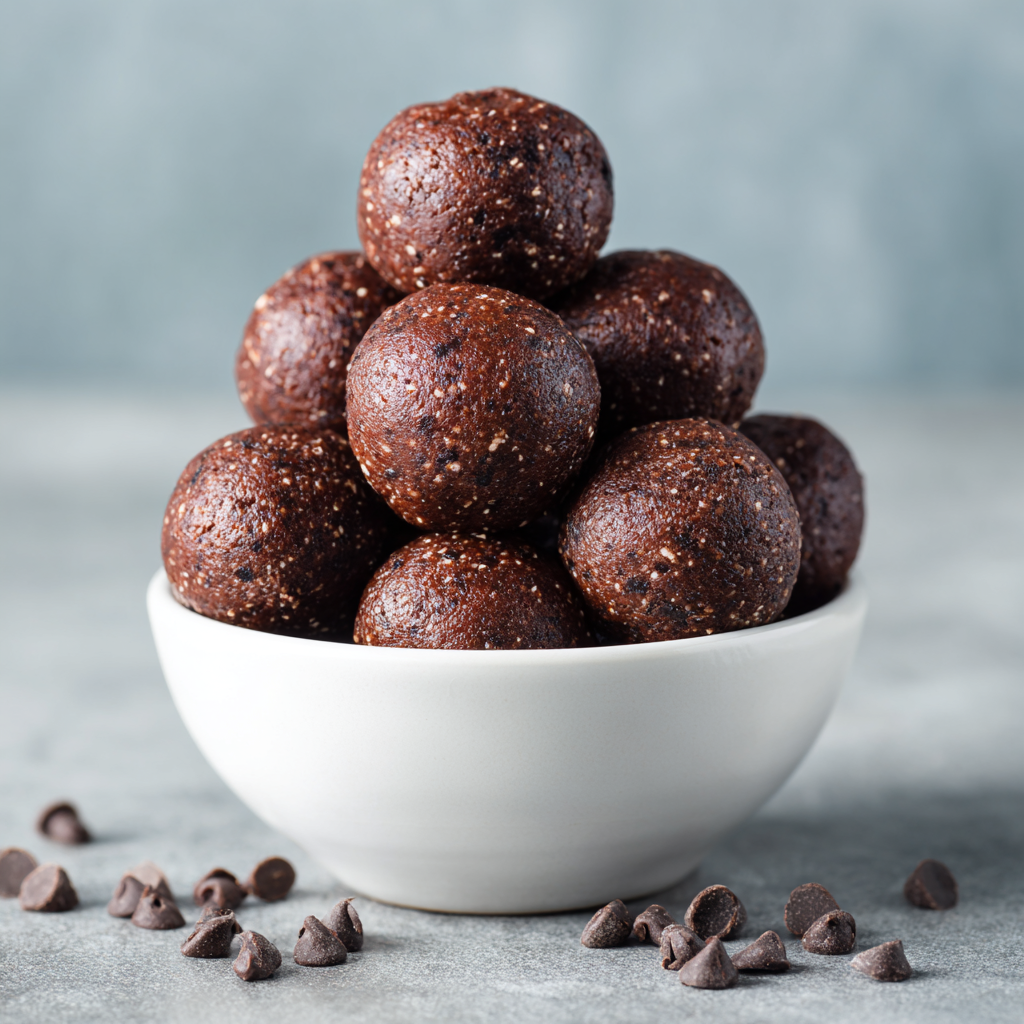
Hey there, friend! Let’s be real for a second. How many times have you found yourself staring into the pantry abyss, caught between a chocolate craving and the need for something that will actually fuel your day? You want something fudgy, rich, and satisfying, but you also know that a slab of traditional brownie might leave you in a sugar coma on the couch. I’ve been there more times than I can count, especially on those busy days filled with recipe testing, chasing after my little ones, and trying to squeeze in a workout.
That’s exactly why I became obsessed with creating the perfect solution: a snack that feels like a total treat but acts like a nutritional powerhouse. After countless iterations (a tough job, but someone’s gotta do it!), I’m so thrilled to share these No-Bake Brownie Protein Bites with you. They are the ultimate kitchen magic trick.
Imagine the deepest, fudgiest brownie batter you’ve ever tasted, rolled into a perfect, pop-able bite. They’re packed with clean protein to keep you full, healthy fats for sustained energy, and just the right amount of natural sweetness. Best of all? There’s no oven required, zero baking skills needed, and you can have a batch ready to go in about ten minutes flat. So, let’s ditch the guilt and grab a bowl—we’re about to make your new favorite grab-and-go snack.
A Batch of Brownie Bites & A Lesson in Kitchen Confidence
PrintNo-Bake Brownie Protein Bites : Rich, Fudgy, and Naturally Energizing

These no-bake brownie protein bites are a perfect balance of nutrition and indulgence. Packed with chocolate flavor, clean protein, and healthy fats, they make an ideal post-workout snack, afternoon pick-me-up, or quick breakfast bite. Ready in just ten minutes and made from pantry-friendly ingredients, they’re convenient and customizable for any lifestyle.
- Prep Time: 10 minutes
- Total Time: 10 minutes
- Yield: About 24 bites 1x
Ingredients
1 cup almond flour or almond meal
4 scoops chocolate whey protein powder
4 tablespoons unsweetened cocoa powder
4 tablespoons almond butter (or cashew or sunflower butter)
4 tablespoons honey or maple syrup
4 tablespoons water (add more as needed for consistency)
1 cup mini dark chocolate chips
1 teaspoon vanilla extract (optional, for added depth)
1/2 teaspoon espresso powder (optional, enhances chocolate flavor)
Optional add-ins:
2 tablespoons ground flaxseed or chia seeds
2 tablespoons shredded coconut
Pinch of sea salt for balance
Instructions
In a large bowl, whisk together the almond flour, protein powder, cocoa powder, and espresso powder if using.
Add almond butter, honey, water, and vanilla extract. Stir until a thick dough forms. Use your hands to mix if needed.
Fold in the chocolate chips and any optional add-ins.
Roll the dough into 1-inch balls using a scoop or your hands.
Chill in the refrigerator for 10 to 15 minutes to firm up, or enjoy immediately.
Nutrition
- Calories: 150
- Sugar: 5g
- Fat: 9g
- Carbohydrates: 10g
- Fiber: 3g
- Protein: 9g
This recipe always takes me back to my early days of blogging, when my kitchen was more of a “creative disaster zone” than a serene cooking sanctuary. I had just finished a grueling yoga class and was ravenous. All I could think about was the pan of fudge brownies my mom used to make when I was a kid—the kind with the crackly top and a heart so rich it was almost like eating chocolate fudge.
But my body was begging for something more. I started throwing things into a bowl: some almond flour from a past gluten-free baking experiment, the chocolate protein powder my husband used, a big scoop of almond butter, and a generous pour of honey. I mixed it all together, fully expecting a crumbly mess. But as I started pressing the dough between my fingers, something magical happened. It held together! I rolled a little ball, popped it in my mouth, and my eyes just about rolled back in my head. It was that good. It had the soul of my mom’s brownies but with a powerful, energizing twist. In that moment, I realized that the best recipes aren’t about perfection; they’re about intuition, a little bravery, and creating something that truly makes you feel good.
Gathering Your Magical, Pantry-Friendly Ingredients
One of the things I love most about this recipe is how simple and flexible the ingredient list is. You probably have most of these in your pantry right now! Here’s what you’ll need and a little “chef’s insight” on why each one is a star player.
- 1 cup almond flour or almond meal: This is our base, giving the bites a tender, crumbly texture that’s wonderfully similar to a baked brownie. It’s naturally gluten-free and packed with healthy fats. Chef’s Tip: If you’re out, oat flour or even sunflower seed flour work beautifully as a 1:1 swap!
- 4 scoops chocolate whey protein powder: This is our protein powerhouse and a major flavor booster. It really deepens that chocolatey goodness. Chef’s Tip: For a plant-based version, a brown rice or pea protein blend works great. Just make sure you like the taste of it on its own!
- 4 tablespoons unsweetened cocoa powder: This is non-negotiable for that authentic, rich brownie flavor. We’re using the good stuff here!
- 4 tablespoons almond butter (or cashew/sunflower butter): This is our “glue” and adds a delicious, nutty depth and healthy fats. Chef’s Tip: If your nut butter is super thick, gently warm it for a few seconds to make it easier to mix.
- 4 tablespoons honey or maple syrup: This natural sweetener binds everything together and adds that perfect touch of sweetness. Chef’s Tip: Maple syrup keeps these completely vegan-friendly!
- 4 tablespoons water (add more as needed): The secret weapon for achieving that perfect, fudgy dough consistency. Don’t be afraid to add an extra teaspoon or two if your dough feels dry.
- 1 cup mini dark chocolate chips:</strong Because every brownie needs melty pockets of chocolate! The mini chips distribute perfectly in every single bite.
- 1 teaspoon vanilla extract (optional): I almost never call vanilla optional, but here it is! It adds a warm, aromatic depth that makes the chocolate flavor sing.
- 1/2 teaspoon espresso powder (optional): My favorite little chef’s hack! It won’t make your bites taste like coffee; it just intensifies the chocolate flavor, making it taste even richer and more complex.
Optional Add-in All-Stars: Feel free to stir in 2 tablespoons of ground flaxseed or chia seeds for a fiber boost, 2 tablespoons of shredded coconut for a tropical twist, or a pinch of sea salt to make the chocolate flavors pop even more.
Let’s Make Some Magic: Your Foolproof, 10-Minute Method
Ready to see how quickly these come together? I promise, it’s almost as easy as, well, eating them. Follow these steps, and you’ll be a no-bake bite pro in no time.
- The Dry Team Assemble! Grab a large mixing bowl and add your almond flour, chocolate protein powder, unsweetened cocoa powder, and that secret-weapon espresso powder if you’re using it. Give them a good whisk. Chef’s Hack: Whisking not only combines everything but also helps to break up any little clumps in the protein powder, ensuring a super smooth texture in your final bites.
- Bring in the Wet Ingredients. Now, plop in your almond butter, honey (or maple syrup), water, and that glorious vanilla extract. Time to get your hands (or a sturdy spatula) dirty! Start stirring. It might seem dry at first, but keep going. The mixture will eventually come together into a thick, fudgy dough that’s reminiscent of Play-Doh. If it’s not holding together when you pinch it, add another teaspoon of water at a time until it does. Chef’s Hack: I almost always end up using my clean hands for this part. It’s the best tool for feeling the texture and making sure everything is perfectly incorporated.
- The Grand Finale: Chocolate Chips! Once your dough is uniform, it’s time for the best part. Gently fold in that entire cup of mini dark chocolate chips. Make sure they’re evenly distributed so that every single bite gets its fair share of melty chocolate goodness.
- Roll, Roll, Roll Your Bites! Using a small cookie scoop (about 1 tablespoon in size) or your hands, portion out the dough and roll it into smooth, 1-inch balls. The cookie scoop is my go-to because it keeps them all uniform and makes the process lightning-fast. If the dough is sticking to your hands, a very light spritz of cooking oil or dampening your palms with water can work wonders.
- The Quick Chill. Place your beautiful brownie bites on a plate or baking sheet lined with parchment paper. Pop them in the refrigerator for about 10-15 minutes to let them firm up. This step makes them easier to store and gives them a lovely, cool texture. But let’s be honest, I’ve been known to “quality test” one or two straight from the bowl—no judgment here!
How to Serve & Savor Your Creation
Honestly, these are perfect straight from the fridge, eaten over the kitchen sink in a moment of pure bliss. But if you want to get a little fancy, I love plating a few on a small ceramic dish with a dusting of extra cocoa powder or a few fresh raspberries on the side. They’re incredible with a cold glass of almond milk, a hot cup of coffee for your afternoon break, or even crumbled over a bowl of Greek yogurt for a next-level breakfast. However you enjoy them, do it with a smile—you just made something amazing!
Make It Your Own: Delicious Twists & Swaps
The fun doesn’t stop here! This recipe is a fantastic blank canvas. Here are a few of my favorite ways to mix it up:
- Rocky Road: Swap half the chocolate chips for mini marshmallows and a handful of chopped walnuts.
- Mint Chocolate Chip: Add 1/4 teaspoon of peppermint extract (not mint extract!) along with the vanilla for a refreshing, festive treat.
- Cookie Dough Delight: Use vanilla protein powder instead of chocolate and swap the chocolate chips for white chocolate chips. You’ll feel like you’re eating edible cookie dough!
- Double Nut Crunch: Fold in 1/4 cup of finely chopped pecans or peanuts along with the chocolate chips for a satisfying crunch.
- Nut-Free & School-Safe: Use sunflower seed flour instead of almond flour and sunflower seed butter. Just be aware that sunflower seed butter can sometimes react with baking soda, but since we’re not baking, you’re totally safe!
Anna’s Kitchen Chronicles: A Recipe That Grows With You
This is one of those recipes that has truly evolved in my kitchen over the years. The very first batch, born from that post-yoga craving, was much simpler. I’ve learned through trial and error that the water is the key to the perfect fudgy, not-crumbly texture. I’ve also had a few hilarious kitchen fails along the way—like the time I mistakenly used chili powder instead of cinnamon in a “Mexican hot chocolate” version. Let’s just say that was a… spicy surprise! My family still teases me about it.
I also love that this recipe has become a staple for my kids. They love getting their hands dirty and helping me roll the balls. It’s a wonderful way to get them involved in the kitchen and show them that healthy food can be fun and delicious. I hope this recipe finds a special place in your kitchen and becomes a tool you use again and again, making it your own with each new batch.
Your Questions, Answered!
I’ve gotten so many wonderful questions about these bites over the years. Here are the most common ones to help you on your no-bake journey.
Q: My dough is too dry and crumbly! What did I do wrong?
A: Don’t worry, this is the most common issue and it’s a super easy fix! It usually happens because almond flour and protein powder can vary in absorbency. Just add a bit more liquid. Add one teaspoon of water (or even milk of your choice) at a time, mixing thoroughly after each addition, until the dough holds together easily when you pinch it.
Q: Can I make these without protein powder?
A: You can, but the texture and flavor will be different. The protein powder adds structure and sweetness. If you omit it, I’d recommend adding an extra 1/4 cup of almond flour and potentially another tablespoon of honey or maple syrup. They’ll be more like a traditional no-bake energy bite, but still utterly delicious!
Q: Why are my protein bites too soft or greasy?
A: This usually points to the nut butter. If your nut butter is very oily or runny (especially if it’s a natural kind that’s separated), it can make the bites a bit greasy. Next time, try a slightly thicker brand, or make sure you’ve stirred your natural nut butter very well before measuring. Chilling them always helps firm them up, too!
Q: How long will these really last in the fridge or freezer?
A: In an airtight container in the fridge, they are perfect for up to one week—if they last that long! For longer storage, the freezer is your best friend. Layer them between parchment paper in a freezer-safe bag or container, and they’ll keep their texture and flavor beautifully for up to two months. You can eat them straight from the freezer; they have a fantastic fudgy, cold texture.
Quick Nutritional Snapshot
Please note: This is an approximate estimate and can vary based on the specific brands of ingredients you use.
Prep Time: 10 minutes | Total Time: 10 minutes | Servings: About 24 bites
Per Bite (approximate): Calories: 150 | Protein: 9g | Fat: 9g | Carbohydrates: 10g | Sugar: 5g | Fiber: 3g
Final Thoughts
There’s something so satisfying about recipes like these No-Bake Brownie Protein Bites—the ones that prove you can have your chocolate and feel amazing afterward, too. They’re quick, wholesome, and full of that nostalgic, fudgy brownie flavor we all crave, but without the sugar crash or oven time. Whether you’re fueling up before a workout, taming that 3 p.m. snack attack, or sneaking one (or three) straight from the fridge after dinner, these bites hit the perfect balance of indulgence and intention.
They’re the kind of snack that fits right into real life—busy mornings, lunchbox moments, road trips, or cozy movie nights. And the best part? You can make them once and enjoy them all week long. So go ahead and roll up a batch—because sometimes, the best energy boost comes in the shape of a chocolatey little bite that reminds you just how delicious “healthy” can be. 🍫✨