***
Mini Chocolate Chip Cookie Sandwich Sliders with Buttercream or Ice Cream
Let’s Make Some Mini Magic!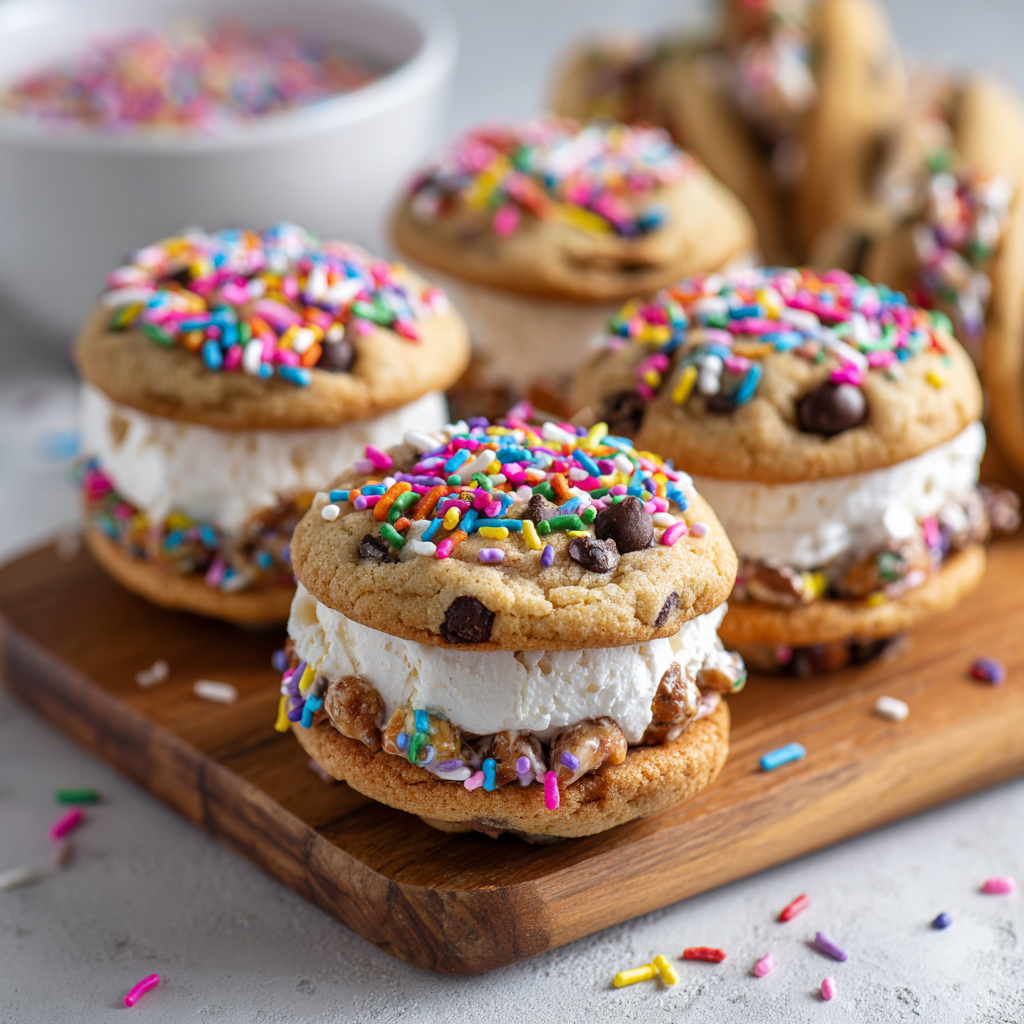
Hey there, friend! Anna here. Can we talk for a second about the universal language of joy that is a cookie? More specifically, a mini cookie that’s been sandwiched with something dreamy and rolled in a party of sprinkles? I’m telling you, these Cookie Sandwich Sliders are about to become your new secret weapon for bringing a little bit of happy to any day.
We all have those moments—a last-minute playdate, a birthday party you almost forgot was on the calendar, or just a Tuesday that needs a splash of color. That’s where these little guys come in. They’re sweet, they’re fun, and they have this incredible ability to make everyone, from the tiniest toddler to the most serious adult, break into a grin. They’re the culinary equivalent of a high-five.
I’m a firm believer that the best recipes are the ones that don’t just fill your belly, but also light up your spirit. And these sliders? They’re pure, unadulterated joy on a plate. They’re incredibly easy to put together, completely customizable, and they solve the age-old problem of “just one more bite” by being the perfect, poppable size. So, let’s ditch the stress and dive into a project that’s all about fun. Grab your favorite mixing bowl and your cutest apron—we’re about to cook up some unforgettable, bite-sized magic together.
The Story Behind the Slider
PrintCookie Sandwich Sliders : Sweet, Fun & Perfect for Parties
These Cookie Sandwich Sliders are bite-sized dessert perfection. With mini chocolate chip cookies hugging a creamy buttercream or ice cream center, each little sandwich is finished with a festive roll in sprinkles or crushed nuts. Whether you’re hosting a party, celebrating a birthday, or just want a fun treat, these sliders are guaranteed to bring smiles.
- Prep Time: 20 minutes
- Total Time: 20 minutes
- Yield: 24 cookie sliders 1x
Ingredients
48 mini chocolate chip cookies (homemade or store-bought)
1 ½ cups buttercream frosting or slightly softened vanilla ice cream
½ cup rainbow sprinkles
½ cup crushed nuts (walnuts, pecans, or peanuts)
Optional twist: Add a touch of sea salt to the cookies before baking or use flavored ice cream (like mint chip or cookies & cream) for a fun flavor variation.
Instructions
If using ice cream, scoop and freeze small balls ahead of time to firm up.
Lay out half of the cookies, flat side up.
Pipe or scoop 1 tablespoon of frosting or ice cream onto each cookie base.
Top with the second cookie, pressing gently to sandwich.
Roll the exposed edges in sprinkles or crushed nuts for a fun finish.
Serve immediately or freeze until ready to serve (if using ice cream).
Nutrition
- Calories: 190
- Sugar: 15g
- Fat: 9g
- Carbohydrates: 24g
- Protein: 2g
This recipe always takes me right back to my grandma’s linoleum-floored kitchen, with its perpetually humming refrigerator and the smell of something buttery always in the air. She was the queen of the “little something sweet.” She never made elaborate, towering cakes; her specialty was humble, heartfelt treats that made you feel loved with every bite.
I remember one sweltering summer afternoon, she had baked a giant batch of her famous chocolate chip cookies. As my cousins and I buzzed around like hyperactive bees, she had a spark of genius. She pulled a tub of vanilla ice cream from the freezer, scooped a little onto one warm cookie, smashed another on top, and handed it to me. It was messy, it was melting all over my fingers, and it was, without a doubt, the most perfect thing I had ever eaten. That simple, spontaneous sandwich was more than a treat; it was a moment of pure, shared happiness. These Cookie Sliders are my homage to her—a way to capture that feeling of improvisational joy and package it up for any occasion, making ordinary afternoons feel a little bit like a celebration at grandma’s.
Gathering Your Happy Ingredients
The beauty of this recipe is in its simplicity. You only need a few key players to create something truly spectacular. Here’s what you’ll need to gather:
- 48 Mini Chocolate Chip Cookies: You can absolutely go the homemade route for that extra-special touch (my go-to recipe is linked here!), but listen, no judgment here. A good-quality store-bought mini cookie is a fantastic shortcut that makes this recipe a true lifesaver. The key is to find cookies that are roughly the same size so your sliders look uniform and adorable.
- 1 ½ Cups Buttercream Frosting OR Slightly Softened Vanilla Ice Cream: This is the heart of the slider! Buttercream is stable at room temp, making it perfect for parties. Vanilla Ice Cream gives you that classic, nostalgic ice cream sandwich vibe. Chef’s Insight: If using ice cream, let it sit on the counter for just 5-10 minutes so it’s scoopable but not soupy. For buttercream, a classic American buttercream (just butter, powdered sugar, vanilla, and a splash of milk) works perfectly.
- ½ Cup Rainbow Sprinkles: Because sprinkles are instant confetti! They add a festive crunch and that undeniable “party” look. Feel free to use chocolate jimmies, nonpareils, or even holiday-themed sprinkles to match your event.
- ½ Cup Crushed Nuts (walnuts, pecans, or peanuts): This is for my texture-lovers! The nuts add a wonderful salty, crunchy contrast to the sweet cookie and creamy filling. Substitution Tip: Not a nut family? Try crushed pretzels for a sweet-and-salty kick, or graham cracker crumbs for a s’mores-like feel!
- Optional Twist: A Touch of Sea Salt: I am a huge advocate for flaky sea salt on chocolate chip cookies. Just a tiny sprinkle on top of the cookies before baking elevates the entire flavor profile, balancing the sweetness beautifully. It’s a tiny step with a massive payoff.
Let’s Build Our Bite-Sized Masterpieces!
Okay, the fun part is here! This is less of a rigid recipe and more of an assembly line of happiness. Put on some music, call in a helper (little hands are great for the rolling step!), and let’s get building.
- Prep Your Filling: If you’re using ice cream, this is your first and most crucial step. Use a small cookie scoop or a tablespoon to portion out 24 little balls of ice cream onto a parchment-lined baking sheet. Pop them back into the freezer for at least 30 minutes, or until they’re firm. Chef’s Hack: This step prevents a melty disaster during assembly and ensures you get a perfect, round scoop in every slider. If you’re using buttercream, make sure it’s fluffy and at a spreadable consistency.
- Create Your Cookie Base: Lay out 24 of your mini cookies on a clean work surface, flat-side-up. This gives you a stable foundation for your filling. I like to arrange them in rows—it makes the assembly process feel efficient and oh-so-satisfying.
- Add the Heart: Now, pipe or scoop about 1 tablespoon of your chosen filling onto the center of each cookie base. If using buttercream, a piping bag with a large round tip gives you a beautiful, professional look, but a simple spoon works just as well! If using your pre-scooped ice cream balls, just place one firm ball on each cookie. Little Tip: Don’t spread the filling all the way to the edge; leave a tiny border so it doesn’t squish out too much when you add the top.
- The Grand Sandwiching: Gently press the remaining 24 cookies on top, flat-side-down, to create your sliders. Press just until the filling reaches the edges—you want it to be secure, but you don’t want to crush the cookies. This is the moment they truly transform from cookies into sandwiches!
- The Festive Finish: Now for the magic touch! Pour your sprinkles and crushed nuts into separate shallow bowls. Take one slider and gently roll the exposed filling edge in your coating of choice. Roll it all the way around to create a beautiful, colorful border. Chef’s Secret: If the filling isn’t sticky enough to make the sprinkles adhere, you can very lightly dab the outside of the filling with a tiny bit of extra frosting or a swipe of corn syrup on a finger.
- Serve with a Smile: If you used buttercream, you can plate these up right away! If you used ice cream, I recommend placing the finished sliders on a tray and popping them back into the freezer for another 15-20 minutes to firm up completely before serving. This makes them much easier to eat.
How to Serve These Sweet Little Sliders
Presentation is part of the fun! I love arranging these sliders on a large wooden cutting board or a vibrant platter. For a real “slider bar” effect, stack them up like mini burgers and stick a little decorative flag or pick in the top of each one. They’re perfect for a dessert charcuterie board alongside some fresh fruit, mini cupcakes, and other sweet bites. Serve them with plenty of napkins—the best food is often a little messy!
Get Creative! Endless Flavor Twists
The basic formula is your playground. Don’t be afraid to mix and match! Here are a few of my favorite variations:
- Cookies & Cream: Use chocolate cookies and cookies & cream ice cream. Roll in crushed Oreo crumbs.
- Peanut Butter Paradise: Use peanut butter cookies and chocolate ice cream or peanut butter buttercream. Roll in chopped salted peanuts.
- Mint Chocolate Chip: Use chocolate cookies and mint chocolate chip ice cream. Roll in mini chocolate chips.
- Funfetti Birthday Cake: Use funfetti/sprinkle cookies and vanilla buttercream dyed with food coloring. Roll in rainbow sprinkles, of course!
- Dairy-Free Delight: Use your favorite vegan chocolate chip cookies and a dairy-free ice cream or vegan buttercream. All the joy, none of the dairy!
Anna’s Chef’s Notes
Oh, the stories these sliders could tell! I once made a triple batch for my daughter’s school bake sale, and I was up until 1 a.m. rolling them in sprinkles. I was so tired I started giving them silly names and personalities. Let’s just say “Sir Sprinkleton” was the star of the show. The best part? They sold out in under ten minutes, and I got three texts from parents asking for the recipe. That’s when I knew this recipe was a true keeper.
This recipe has evolved so much from my grandma’s simple ice cream smash. I’ve learned that a tiny pinch of flaky salt on top of the cookie before baking is a game-changer. I’ve also found that letting buttercream sit out for a bit to get super soft makes it so much easier to work with. The core of it, though—the joy, the shareability, the pure fun—that has remained exactly the same. It’s a recipe that invites you to play, and I hope you do!
Your Questions, Answered!
I’ve gotten so many wonderful questions about these sliders over the years. Here are the answers to the most common ones:
Q: Can I make these ahead of time?
A: Absolutely! For ice cream sliders, they are meant to be made ahead. Assemble them, place them in a single layer in an airtight container separated by parchment paper, and freeze for up to 2 weeks. For buttercream sliders, you can store them in an airtight container at room temperature for up to 2 days, or in the fridge for up to 5 days. Let them come to room temperature before serving for the best texture.
Q: My ice cream is melting way too fast while I assemble! Help!
A: This is the number one challenge! The key is a COLD kitchen and FAST hands. Work in small batches. Keep your ice cream balls in the freezer and only take out 4-6 at a time. Make sure your cookie bases are laid out and ready to go before you even open the freezer door. If it’s a really hot day, you can even pop your baking sheet of cookies in the freezer for a few minutes before you start.
Q: The sprinkles aren’t sticking to the sides. What am I doing wrong?
A: This usually means the filling isn’t exposed enough or isn’t sticky enough. First, make sure you’re pressing the cookies together firmly enough so that the filling is visible all the way around the edge. If it’s still not sticking, you can try two things: 1) Use a knife to lightly coat the outside edge of the filling with a thin layer of extra frosting or a tiny bit of corn syrup, then roll. 2) For ice cream sliders, just work quickly while the ice cream is still frosty and sticky from the freezer.
Q: Can I use gluten-free cookies?
A: You sure can! This recipe is incredibly adaptable. Just use your favorite gluten-free mini chocolate chip cookies, and you’re all set. The same goes for other dietary needs—the base recipe is a perfect canvas for your favorite allergy-friendly products.
Nutritional Information*
*Please note: This is an estimated calculation based on the buttercream version and standard ingredients. Values will vary based on your specific brands and ingredients used.
Per Slider (with buttercream): Calories: 190 | Fat: 9g | Carbohydrates: 24g | Sugar: 15g | Protein: 2g