Pineapple Upside-Down Sugar Cookies: A Tropical Twist on a Classic Treat
Sunshine in Every Bite!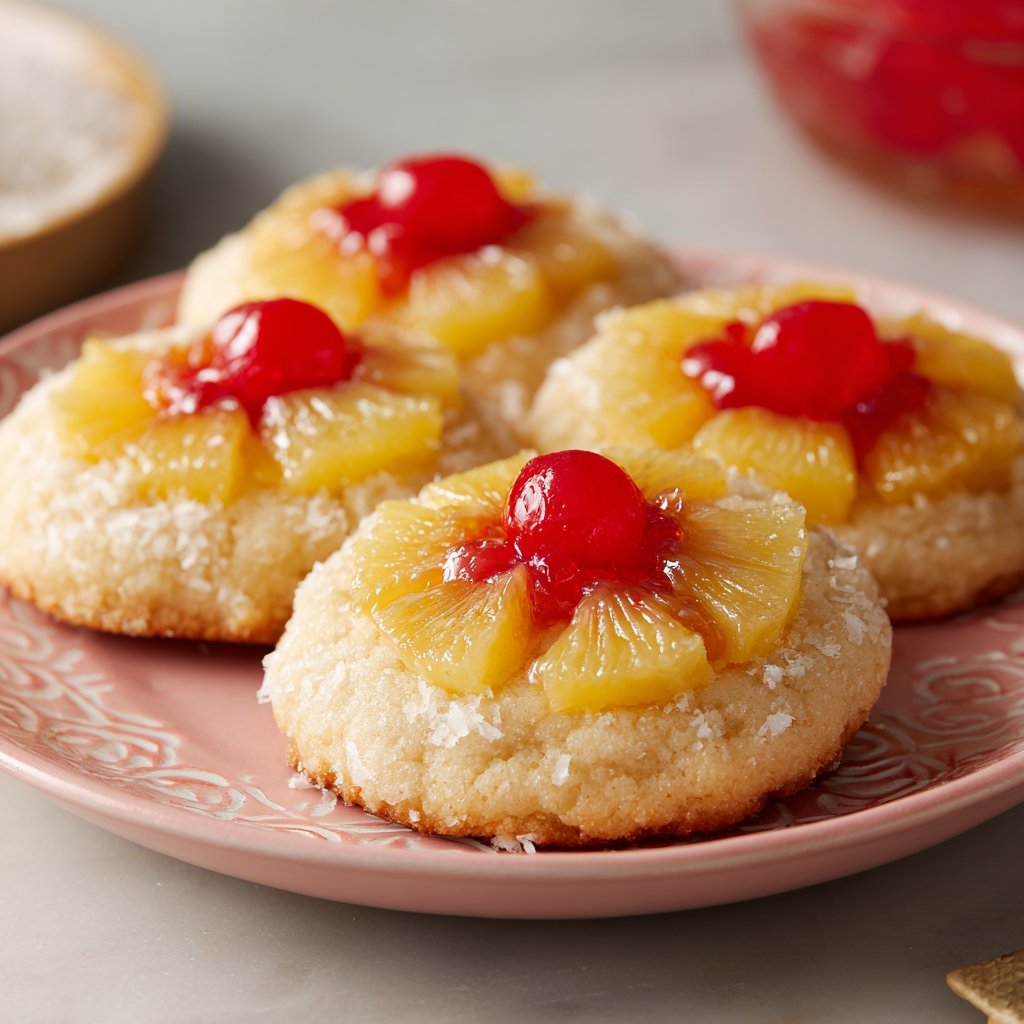
Hey there, friend! Anna here. Can we talk about that magical moment when you take a classic, beloved recipe and give it a fun, sunny spin? That’s exactly what we’re doing today in my kitchen, and I am so excited to share it with you. We’re taking everything we adore about that gorgeous, retro pineapple upside-down cake—the caramelized fruit, the juicy cherries, the warm, buttery goodness—and we’re transforming it into a delightful, handheld cookie. Yes, you heard me: Pineapple Upside-Down Sugar Cookies!
If you’ve ever felt a little intimidated by the thought of making a whole cake, or you simply need a dessert that’s as perfect for a potluck as it is for a Tuesday afternoon pick-me-up, these cookies are your new best friend. They’re soft, chewy, and packed with sweet, tropical flavor. Each one is like a little edible postcard from a sunny island, and I promise, they’ll bring a smile to everyone’s face. My goal is always to make cooking joyful, not stressful, and this recipe is a testament to that. It’s straightforward, uses simple ingredients, and the result is pure, unadulterated baking magic. So, grab your favorite mixing bowl and let’s turn this ordinary day into a delicious one, together!
A Sweet Slice of Nostalgia
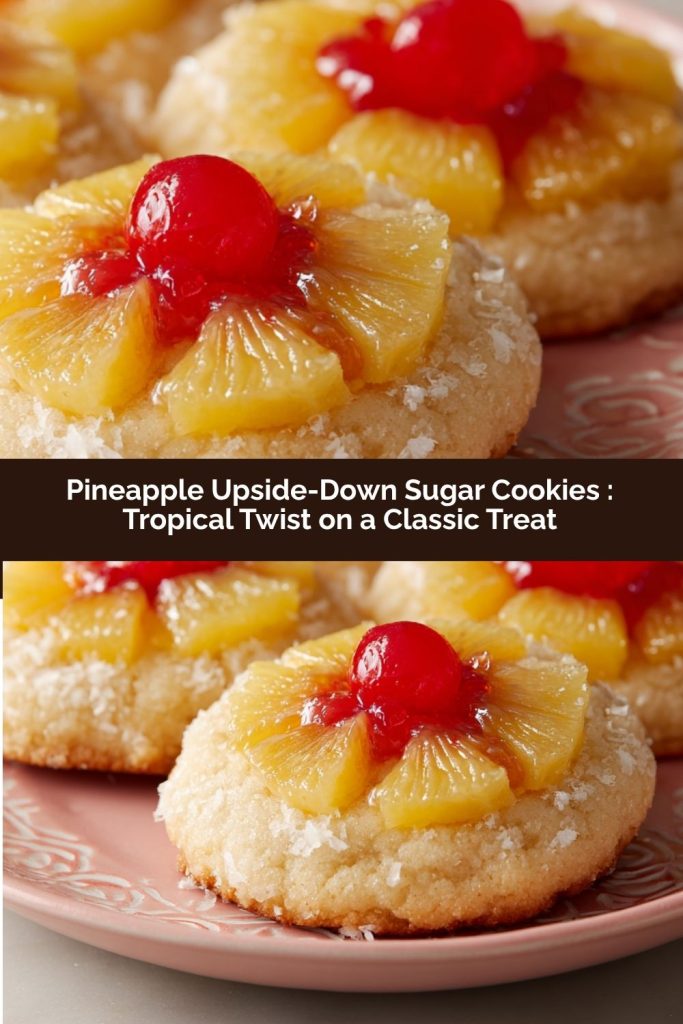
PrintPineapple Upside-Down Sugar Cookies : Tropical Twist on a Classic Treat

These pineapple upside-down sugar cookies bring sweet island vibes to your dessert table! With a soft sugar cookie base, caramelized crushed pineapple, and a cherry on top, they’re a fun twist on the beloved retro cake. Perfect for summer gatherings, potlucks, or whenever you want a cheerful, fruity cookie that’s as cute as it is delicious.
- Prep Time: 15 minutes
- Cook Time: 15 minutes
- Total Time: 30 minutes
- Yield: 12 cookies 1x
Ingredients
1½ cups all-purpose flour
½ tsp baking soda
¼ tsp salt
½ cup unsalted butter, softened
1 cup granulated sugar
1 large egg
1 tsp vanilla extract
¼ cup crushed pineapple (drained)
½ cup light brown sugar (packed)
12 maraschino cherries (or pineapple rings for topping)
Instructions
Preheat oven to 350°F (175°C) and line a baking sheet with parchment paper.
In a medium bowl, whisk together flour, baking soda, and salt. Set aside.
In a large bowl, beat softened butter and sugar until creamy. Add egg and vanilla; mix until smooth.
Gradually stir in the dry ingredients to form a soft dough.
Scoop 1 tbsp-sized portions, roll into balls, and place on the baking sheet.
Mix brown sugar with crushed pineapple. Spoon a little on top of each dough ball.
Gently press a maraschino cherry (or small pineapple ring) into the center.
Bake for 12–15 minutes, or until edges are golden.
Let cool on the pan a few minutes before moving to a wire rack.
Nutrition
- Calories: 180
- Fat: 8g
- Carbohydrates: 25g
- Protein: 2g
This recipe has a special little place in my heart because it always reminds me of my grandmother’s kitchen. Nana Reynolds was the queen of classic, mid-century desserts. Her signature party trick was a magnificent, sizzling pineapple upside-down cake, baked in her trusty cast-iron skillet. The scent of caramelizing brown sugar and pineapple would fill her entire house, a signal that a celebration was underway. My brother and I would jostle for position by the oven door, our noses pressed to the warm glass, waiting for that glorious moment when she’d flip the pan over to reveal the sticky, jeweled masterpiece. I’ve always wanted to capture that exact feeling of warmth and celebration, but in a format that’s a bit more… spontaneous. These cookies are my answer. They give you all that nostalgic flavor in a fraction of the time, and you don’t need a special occasion to make them. Sometimes, the sweetest memories are the ones we create on a simple, sunny afternoon, just because.
Gathering Your Sunshine Ingredients
One of the things I love most about this recipe is its beautiful simplicity. Let’s walk through the ingredients together. I’ve included some of my favorite chef insights and substitution tips to help you feel confident and make this recipe your own!
- 1½ cups all-purpose flour: This is the backbone of our cookie, giving it that perfect, soft structure. For a slightly more tender cookie, you can swap in ½ cup of cake flour for ½ cup of the all-purpose, but honestly, all-purpose works like a dream here.
- ½ tsp baking soda: Our leavening agent! This is what gives the cookies their gentle rise and lovely chewy texture. Make sure yours is fresh for the best results.
- ¼ tsp salt: Don’t you dare skip this! Salt is the flavor superhero that balances all the sweetness and makes the buttery, vanilla notes truly sing.
- ½ cup unsalted butter, softened: The key to cookie greatness! “Softened” means it should be pliable and cool to the touch, not melted. I usually take mine out of the fridge about an hour before I start baking. This creates a wonderfully creamy base for creaming with the sugar.
- 1 cup granulated sugar: This sweetens our cookie dough and helps create that lightly crisp edge we all love.
- 1 large egg: Our binding agent, bringing everything together and adding richness. Make sure it’s at room temperature to blend seamlessly into the creamed butter and sugar.
- 1 tsp vanilla extract: The soul of so many baked goods! A good quality vanilla adds a beautiful, warm aroma that complements the pineapple perfectly.
- ¼ cup crushed pineapple, drained: Here’s our star! Pro Chef Tip: Draining the pineapple is *crucial*. I press mine in a fine-mesh strainer and then give it a gentle squeeze with a paper towel. Removing that excess liquid prevents our cookies from spreading too much and keeps the texture perfect.
- ½ cup light brown sugar (packed): This is the magic ingredient for our “upside-down” topping. Its molasses content creates that classic, caramelized flavor and gorgeous color. Pack it firmly into your measuring cup!
- 12 maraschino cherries: The final, jewel-like touch! You can also use small pineapple rings or even a sprinkle of toasted coconut for a different look.
Let’s Bake Some Sunshine! (Step-by-Step)
Ready to create some magic? Follow these steps, and you’ll have a batch of gorgeous, tropical cookies in no time. I’ve sprinkled in my favorite little chef hacks to ensure your baking adventure is a total success.
- Preheat and Prep: First things first, preheat your oven to 350°F (175°C) and line a baking sheet with parchment paper. This is my number one secret for perfectly baked cookies—no sticking, and easy cleanup! Trust me, it’s a game-changer.
- Whisk the Dry Team: In a medium bowl, whisk together your flour, baking soda, and salt. Whisking is a fantastic way to aerate the flour and ensure the leavening is evenly distributed, so every cookie bakes up consistently. Set this bowl aside for its grand entrance later.
- Cream the Butter & Sugar: In a large bowl, beat the softened butter and granulated sugar together until the mixture is light, pale, and wonderfully creamy. This should take about 2-3 minutes with an electric mixer. Chef Hack: Don’t rush this step! Creaming incorporates tiny air bubbles into the dough, which is key for a tender, not dense, cookie.
- Bring in the Wet Ingredients: Crack in the egg and add the vanilla extract. Mix again until everything is beautifully smooth and combined. You’ll see the mixture come together into a lovely, cohesive blend. Scrape down the sides of the bowl to make sure no ingredient is left behind!
- Combine with Care: Now, gradually add your whisked dry ingredients to the wet ingredients. I like to do this in two or three additions, mixing on low speed just until the flour disappears. Pro Tip: Overmixing at this stage can lead to tough cookies. A few flour streaks are okay—they’ll incorporate when we form the dough balls!
- Scoop and Roll: Using a tablespoon or a small cookie scoop, portion out the dough. Roll each portion into a smooth ball between your palms. They should be about 1 to 1.5 inches in diameter. Place them on your prepared baking sheet, leaving about 2 inches between each one, as they will spread a little.
- Create the Topping: In a small bowl, stir together the drained crushed pineapple and the packed brown sugar. This creates our luscious, caramel-style topping. Spoon a small amount (about a teaspoon) right onto the top of each dough ball.
- The Cherry on Top: Gently press a maraschino cherry into the center of the pineapple-brown sugar mixture on each cookie. Don’t press it all the way down to the baking sheet; just nestle it in so it stays put during baking.
- Bake to Golden Perfection: Slide your beautiful creations into the preheated oven and bake for 12-15 minutes. You’re looking for golden edges and a top that looks set. The centers might still seem a tiny bit soft—that’s perfect! They will continue to cook as they cool, resulting in a dreamy, soft texture.
- The All-Important Cool Down: Let the cookies cool on the hot baking sheet for at least 5 minutes before transferring them to a wire rack. This is a patience-testing step, I know! But it allows the cookies to firm up enough to move without falling apart.
How to Serve These Tropical Gems
Presentation is part of the fun! I love serving these cookies on a vibrant, colorful platter that really makes the golden pineapple and red cherries pop. They are absolutely divine still slightly warm from the oven, perhaps with a dollop of lightly sweetened whipped cream or a scoop of vanilla bean ice cream for the ultimate indulgence. For a casual gathering, just pile them high on a cake stand and watch them disappear. They’re a true crowd-pleaser!
Get Creative! Fun Recipe Variations
Feel like playing? This recipe is a wonderful canvas for your creativity! Here are a few of my favorite twists:
- Coconut Dream: Add ½ cup of toasted shredded coconut to the cookie dough for a true pina colada experience.
- Boozy & Bold: Soak the maraschino cherries in a little dark rum or bourbon before placing them on the cookies for a sophisticated, adult-only treat.
- Nutty Crunch: Sprinkle the tops with finely chopped macadamia nuts right before baking for a delightful buttery crunch.
- Gluten-Free Goodness: Simply swap the all-purpose flour for your favorite 1:1 gluten-free baking blend. I’ve had fantastic results with this!
- Mini Marvels: Use a teaspoon to scoop the dough for bite-sized cookies—perfect for a party platter! Just reduce the baking time by a minute or two.
Anna’s Chef Notes & Kitchen Stories
This recipe has evolved so much since my first test batch! The very first time I made them, I made the classic rookie mistake of not draining the pineapple well enough. Let’s just say I ended up with “Pineapple Upside-Down Puddles” instead of cookies! They tasted amazing, but they were comically flat. It was a fantastic reminder that in baking, the little details really do matter. Now, I’m militant about draining that fruit, and the cookie structure is perfect every single time.
Another fun evolution was the topping. I started by just pressing a cherry into plain dough, but it felt like it was missing the true “upside-down” essence. The moment I started mixing the crushed pineapple with the brown sugar, the flavor completely transformed. It created that signature sticky, caramelized top that makes these cookies so special. Don’t be afraid to learn from your kitchen experiments—some of the best recipes are born from a little happy accident!
Your Questions, Answered!
I love hearing from you, and over time, a few common questions have popped up. Here’s some troubleshooting to help you bake with confidence!
- Q: My cookies spread too much. What happened?
A: This is almost always due to butter that’s too warm or pineapple that wasn’t drained thoroughly. Make sure your butter is softened but still cool, and really take the time to squeeze out that excess pineapple juice. Chilling the dough balls for 15-20 minutes before baking can also help prevent spreading.
- Q: Can I use fresh pineapple instead of canned?
A: You absolutely can! Just make sure to chop it very finely (almost to a crush) and cook it down in a small saucepan for a few minutes to soften it and release some of its liquid. Then, drain it very well before using.
- Q: How should I store these cookies, and how long do they last?
A: Once completely cool, store them in an airtight container at room temperature for up to 3 days. The pineapple topping makes them a bit more moist, so I don’t recommend storing them for much longer. For longer storage, you can freeze the baked cookies for up to 2 months.
- Q: My cookies are a bit dry. Any ideas why?
A: Dry cookies are usually a sign of overbaking or overmixing the flour. Remember to mix the dry ingredients in just until combined, and pull the cookies out of the oven when the edges are golden but the centers still look a little soft. They firm up perfectly as they cool!
Quick Nutritional Info
While we’re here for the joy of baking and the delicious results, I know it’s helpful to have a general idea of what you’re enjoying! This is a rough estimate per cookie.
Prep Time: 15 minutes | Cook Time: 15 minutes | Total Time: 30 minutes | Servings: 12 cookies
Estimated per cookie: 180 calories | 8g fat | 25g carbs | 2g protein
Final Thoughts
These Pineapple Upside-Down Sugar Cookies are sunshine in a bite—soft, chewy, and packed with tropical sweetness that instantly brightens any day. They capture all the nostalgic charm of a classic upside-down cake but in a fun, handheld cookie form that’s perfect for potlucks, afternoon treats, or just because.
What I love most is how approachable and versatile they are. With simple ingredients and straightforward steps, even a novice baker can create a batch of these little tropical gems. Feel free to get creative with toppings, mix-ins, or mini versions for a party platter—the base recipe is forgiving and endlessly adaptable.
Whether you’re baking for family, friends, or just yourself, these cookies bring warmth, joy, and a touch of nostalgia to every bite. So grab your mixing bowl, get a little messy, and enjoy the magic of turning classic flavors into a sunny, sweet delight.