***
Pink Oreo Cheesecake Bars: Your New Go-To Party Dessert!
Hey there, friend! Let’s talk about magic. Not the wand-waving kind, but the kind that happens when you preheat your oven and pull out your favorite mixing bowl. I’m talking about the magic of turning a few simple, joyful ingredients into a dessert that doesn’t just taste incredible, but feels like a celebration. And that’s exactly what these Pink Oreo Cheesecake Bars are all about.
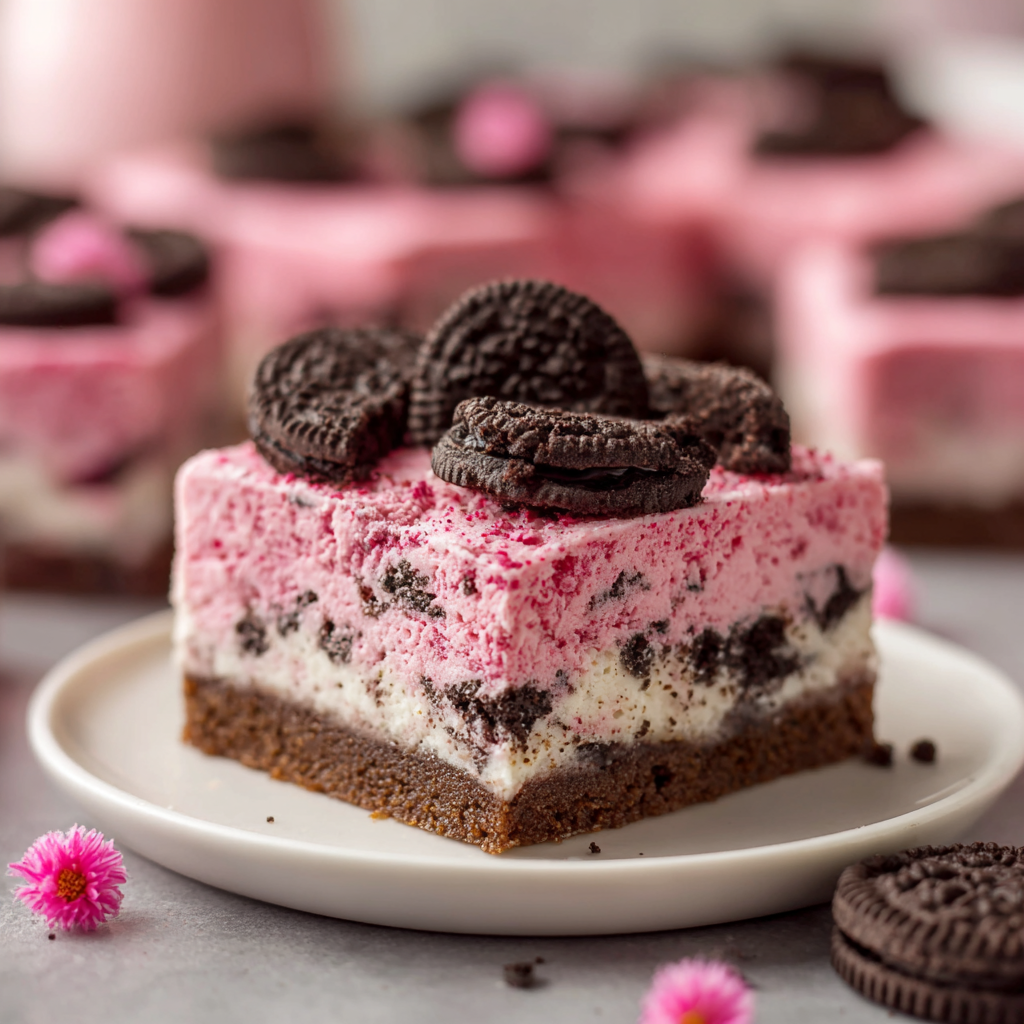
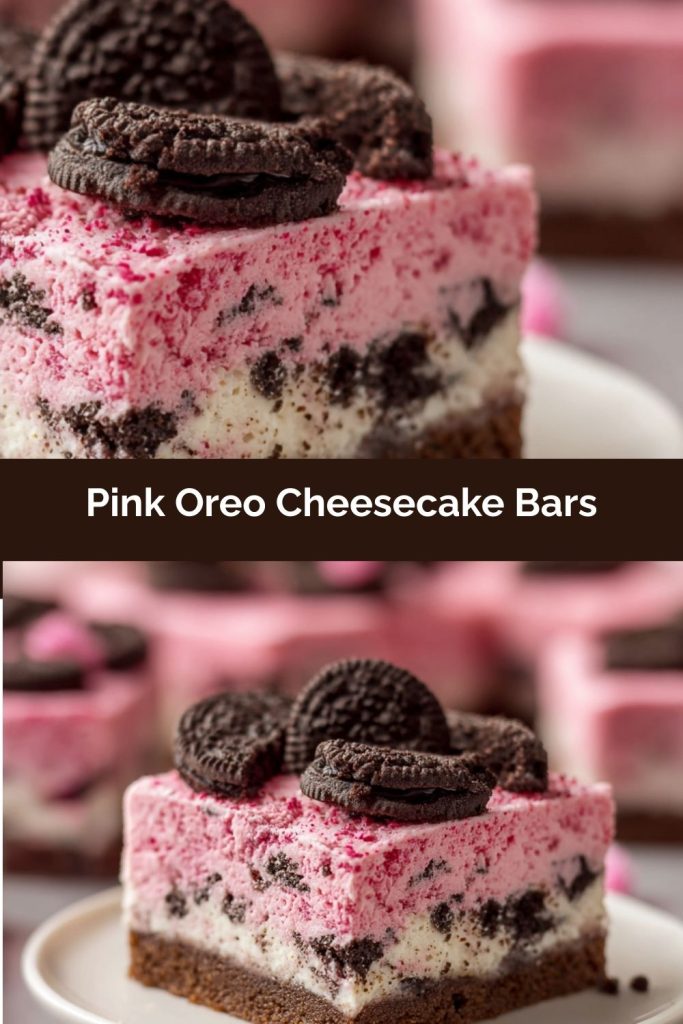
Imagine this: a buttery, crunchy Oreo crust that gives way to the creamiest, dreamiest pink cheesecake layer, all studded with more chunks of those iconic pink cookies. They’re sweet, a little tangy, undeniably pretty, and so much fun to eat. Whether you’re planning a baby shower, a birthday party, Galentine’s Day, or just want to make a regular Tuesday feel special, these bars are your secret weapon.
I know the words “cheesecake” can sometimes sound intimidating, but I promise you, this is the relaxed, no-fuss, bar version of its elegant cousin. We’re skipping the water bath, embracing the simplicity of a square pan, and creating something that’s genuinely easy to make but looks and tastes like it came from a fancy bakery. So, if you’re ready to create some kitchen magic and make a whole bunch of people very, very happy, grab your apron and let’s get started. We’re about to cook up something amazing together!
A Splash of Pink & A Dash of Nostalgia
PrintPink Oreo Cheesecake Bars : Pretty, Creamy, and Perfect for Parties

- Prep Time: 20 minutes
- chill time: hours (or overnight)
- Cook Time: 30–35 minutes
- Total Time: About 4 hours
- Yield: 12–16 bars 1x
Ingredients
For the Crust
24 Pink Oreo cookies (use the whole cookie, filling included)
4 tbsp unsalted butter, melted
For the Cheesecake Layer
16 oz cream cheese, softened (two 8-oz blocks)
½ cup granulated sugar
2 large eggs, room temperature
1 tsp pure vanilla extract
Pink gel food coloring, to desired color
6 Pink Oreo cookies, roughly crushed or chopped
Instructions
-
Prepare the Pan
Preheat oven to 325°F (165°C). Line an 8×8-inch baking dish with parchment paper, leaving overhang on two opposite sides for easy lifting. Lightly spray the pan so the parchment sticks. -
Make the Crust
Pulse 24 Oreos in a food processor until finely crushed. (Or crush in a zip-top bag with a rolling pin.)
Mix crumbs with melted butter until the texture resembles wet sand.
Press firmly into the bottom of the prepared pan.
Bake for 8–10 minutes. Set aside to cool slightly. -
Make the Cheesecake Filling
In a large bowl, use an electric mixer to beat the cream cheese and sugar until smooth and creamy with no lumps.
Add eggs one at a time, mixing just until combined after each addition.
Mix in the vanilla extract.
Add pink gel food coloring until you reach your preferred shade. -
Fold in the Oreos
Gently fold the 6 crushed Pink Oreos into the cheesecake batter with a spatula. -
Bake
Pour the filling over the pre-baked crust and smooth the top.
Tap the pan gently on the counter to release any big air bubbles.
Bake for 30–35 minutes, or until the edges look set but the center still has a slight jiggle. -
Chill Completely
Allow the bars to cool fully at room temperature, then transfer to the refrigerator to chill for at least 3 hours, preferably overnight, until fully set. -
Slice & Serve
Use the parchment overhang to lift the chilled cheesecake out of the pan.
Slice into squares, wiping the knife between cuts for clean edges.
Serve as-is or top with whipped cream, white chocolate drizzle, or extra Oreo crumbs.
These bars always bring a smile to my face because they remind me of my daughter’s fifth birthday. She was deep in her “pink-everything” phase, and her one request for her party was a “sparkly, pink, cookie cake.” I wanted to create something more special than a frosted sheet cake, something that felt whimsical and grown-up, but that would still make a five-year-old’s eyes light up.
I remember standing in the baking aisle, staring at a package of pink Oreos, and having one of those lightbulb moments. What if I used them for the crust AND the filling? The result was these cheesecake bars. The moment I pulled the vibrantly pink, perfectly set pan out of the fridge, I knew we had a winner. The kids adored them for the color and the cookies, and the adults raved about the creamy, sophisticated cheesecake texture. It was the ultimate crowd-pleaser, and it’s been a requested recipe in our family ever since. Every time I make them, I’m transported back to that sunny afternoon, surrounded by laughter and the simple, pure joy of a perfect pink dessert.
Gathering Your Magical Ingredients
One of the things I love most about this recipe is how straightforward the ingredient list is. Each one plays a specific role in creating that perfect texture and flavor. Here’s what you’ll need and a little “chef’s insight” on why each one matters.
For the Crust:
- 24 Pink Oreo Cookies: This is the star of our show! You’ll use the entire cookie—filling and all. The cream filling actually helps bind the crust together and adds a lovely extra layer of sweetness. If you can’t find pink Oreos, any flavor will work wonderfully. Golden Oreos make a fantastic “blonde” version!
- 4 tbsp Unsalted Butter, Melted: This is the glue that holds our crunchy crust together. I prefer unsalted so I can control the overall saltiness of the dessert, but salted butter will work in a pinch and add a nice sweet-and-salty vibe.
For the Cheesecake Layer:
- 16 oz (Two 8-oz blocks) Cream Cheese, Softened: This is non-negotiable, friends! You must let your cream cheese come to room temperature. A cold block won’t blend smoothly, and you’ll end up with a lumpy filling instead of that silky, creamy texture we’re after. Plan ahead and take it out about an hour before you start baking.
- ½ cup Granulated Sugar: This sweetens the deal without making it overly sweet. The Oreos bring their own sugar, so we don’t need a huge amount here.
- 2 Large Eggs: Eggs are the workhorses that give the cheesecake its structure and help it set beautifully in the oven. Make sure these are at room temperature, too, for the smoothest incorporation.
- 1 tsp Pure Vanilla Extract: A splash of vanilla is the secret background singer that enhances all the other flavors and adds a warm, aromatic depth. Don’t skip it!
- Pink Food Coloring (Optional): Now for the fun part! A few drops of gel food coloring will give you that vibrant, pretty-in-pink hue. Gel is better than liquid because it’s more potent and won’t thin out your batter. If you want a natural tint, a tiny bit of beet powder works wonders!
- 6 Pink Oreos, Crushed (for folding in): We’re doubling down on that cookie goodness! Folding in these extra chunks ensures you get a burst of Oreo flavor and texture in every single bite.
Let’s Make Some Magic: Step-by-Step Instructions
Ready to create? Follow these steps, and I’ll walk you through every tip and trick I’ve learned along the way. Read through all the instructions once before you start—it’s my number one tip for a stress-free baking session!
Step 1: Prep Your Pan and Preheat the Oven.
Preheat your oven to 325°F (165°C). Now, let’s make our lives easier for later. Take an 8×8-inch baking dish and line it with parchment paper, leaving some overhang on two opposite sides. This creates “slings” that will let you lift the entire block of cheesecake bars out of the pan for super clean, easy slicing. A little spritz of cooking spray on the pan before the parchment helps it stick in place. Chef’s Hack: Use binder clips to clamp the parchment paper to the sides of the pan while you press in the crust!
Step 2: Create the Dreamy Oreo Crust.
Place your 24 Oreo cookies (yes, the whole thing!) into a food processor and pulse until you have fine, even crumbs. No food processor? No problem! Place the cookies in a sturdy zip-top bag, seal it tightly, and use a rolling pin to crush them to your heart’s content—it’s a great way to release a little stress! Pour the crumbs into a bowl and stir in the 4 tablespoons of melted butter. You’re looking for a texture that resembles wet sand and holds together when you pinch it. Dump the mixture into your prepared pan and press it down firmly and evenly into the bottom. I like to use the flat bottom of a measuring cup to really compact it—this prevents a crumbly crust later. Pop it in the oven for 8-10 minutes to set. This pre-baking step gives us a sturdier base that won’t get soggy.
Step 3: Whip Up the Pink Cheesecake Filling.
While the crust is baking, let’s make the filling. In a large mixing bowl, beat the softened cream cheese and ½ cup of sugar together with an electric mixer on medium speed until it’s completely smooth, creamy, and free of lumps. Scrape down the sides and bottom of the bowl—this is a crucial step to ensure everything is evenly mixed! Now, add the room-temperature eggs, one at a time, beating just until each is incorporated. Then mix in the vanilla. Over-mixing after adding the eggs can incorporate too much air and lead to cracking, so mix with a gentle hand. Now, add your pink food coloring, a few drops at a time, until you reach your desired shade of fabulous.
Step 4: The Fun Part – Fold in the Oreos!
Take your 6 additional Oreos and give them a rough chop or a few pulses in the food processor so you have nice, chunky pieces. Use a spatula to gently fold these cookie chunks into your pink cheesecake batter. This ensures they’re evenly distributed without deflating that beautiful, creamy texture you just created.
Step 5: Bake to Perfection.
Pour the pink cheesecake filling over your pre-baked crust and spread it into an even layer. Give the pan a gentle tap on the counter to release any large air bubbles. Place it in the preheated oven and bake for 30-35 minutes. The edges should look set, but the center should still have a slight jiggle to it—like Jell-O when you tap the pan. Remember, it will continue to set up as it cools! This is the key to a creamy, not dry, cheesecake bar.
Step 6: The All-Important Chill Time.
This is the hardest part, I know! Once the bars are out of the oven, let them cool completely on a wire rack. Then, you must cover them and transfer them to the refrigerator to chill for at least 3 hours, but ideally overnight. This patience is rewarded with the perfect firm, sliceable texture and allows all the flavors to meld together beautifully.
Serving Up the Sweetness
When you’re ready to serve, use the parchment paper slings to lift the entire block of cheesecake out of the pan and onto a cutting board. For picture-perfect slices, I highly recommend wiping your knife clean between each cut. You can even run the knife under hot water and dry it for the cleanest cuts possible! These bars are delicious all on their own, but a little dollop of whipped cream, a drizzle of white chocolate, or a sprinkle of extra Oreo crumbs on the plate takes them to the next level of dessert decadence.
Make It Your Own: Delicious Recipe Variations
This recipe is a fantastic canvas for your creativity! Here are a few of my favorite twists:
- Chocolate Drizzle: Melt some white or semi-sweet chocolate and drizzle it over the top before serving for an elegant finish.
- Mint Chocolate Twist: Use Mint Oreos instead of pink ones for a refreshing, cool flavor that chocolate lovers will adore.
- Fruity Fun: Fold in ½ cup of freeze-dried raspberry or strawberry powder instead of food coloring for a natural pink color and a fruity tang.
- Gluten-Free Friendly: Use your favorite gluten-free sandwich cookies to make this recipe accessible to everyone.
- Extra Decadence: Press a layer of whole Oreos onto the crust before adding the filling for an intense, cookie-packed experience.
Anna’s Chef’s Notes
This recipe has seen a few fun evolutions in my kitchen. The first time I made it, I was so impatient that I only chilled it for an hour. Let’s just say we had “pink Oreo cheesecake pudding” instead of bars! It was still delicious, but it taught me the invaluable lesson of respecting the chill time. Now, I always make them the day before I need them.
Another funny kitchen story involves my attempt to make these for a holiday party and accidentally using red food coloring instead of pink. Let’s just say they looked… very passionate. Vibrant, but not exactly the soft, pretty pink I was going for! It’s all part of the adventure. The beauty of cooking is that even the “mistakes” are usually still pretty tasty. So don’t stress, have fun with it, and know that your bars are going to be fantastic.
Your Questions, Answered!
Q: My cheesecake filling cracked! What did I do wrong?
A: Oh, we’ve all been there! The most common culprits are over-mixing (which adds too much air) or a sudden temperature change. Make sure to mix just until the ingredients are combined after adding the eggs, and avoid opening the oven door frequently during baking. But hey, a little crack never hurt anyone, and it’s easily covered up with whipped cream or sprinkles!
Q: Can I use a different size pan?
A: You can! A 9×9-inch pan will work, but your bars will be thinner and will bake faster, so start checking at around 25 minutes. I don’t recommend a round springform pan, as the crust-to-filling ratio will be off, and the baking time will be completely different.
Q: How long do these bars last in the fridge?
A: Stored in an airtight container, these cheesecake bars will stay fresh and delicious for up to 5 days. The crust might soften a tiny bit by day 4 or 5, but they’ll still be utterly delightful.
Q: Can I freeze them?
A: Absolutely! These bars freeze beautifully. After they are fully chilled and sliced, place them in a single layer on a parchment-lined baking sheet and “flash freeze” for about an hour. Then, transfer the frozen bars to a freezer-safe bag or container. They’ll keep for up to 2 months. Thaw in the fridge overnight before serving.
Nutritional Information (Approximate, Per Bar)
- Calories: 220
- Protein: 3g
- Carbohydrates: 20g
- Fat: 14g
- Fiber: <1g
*Please note that this is an estimate and can vary based on specific ingredients used.
Final Thoughts
At the end of the day, friend, these Pink Oreo Cheesecake Bars are everything I adore about baking: playful, a little nostalgic, totally gorgeous, and guaranteed to make people smile before they even take a bite. They’re the kind of dessert that turns ordinary moments into something worth remembering — the way the kitchen smells when the crust comes out of the oven, the first swipe of that dreamy pink batter, the sparkle in someone’s eyes when you set the plate in front of them.
Whether you’re whipping them up for a birthday, a baby shower, a holiday, or your own private little celebration on the couch with a fork, these bars bring joy in the sweetest, simplest way. And truly — don’t worry if your pink turns out a shade brighter than planned or your Oreo chunks settle where they please. That’s the charm of homemade desserts: they carry your heart in every swirl and crumb.
So here’s to making something fun, something fabulous, and something undeniably pink. I hope these cheesecake bars bring your kitchen as much laughter, magic, and sweet memories as they’ve brought mine. Now go ahead — cut yourself a square and enjoy every creamy, cookie-packed bite. You’ve earned it. 💕🍰✨