***
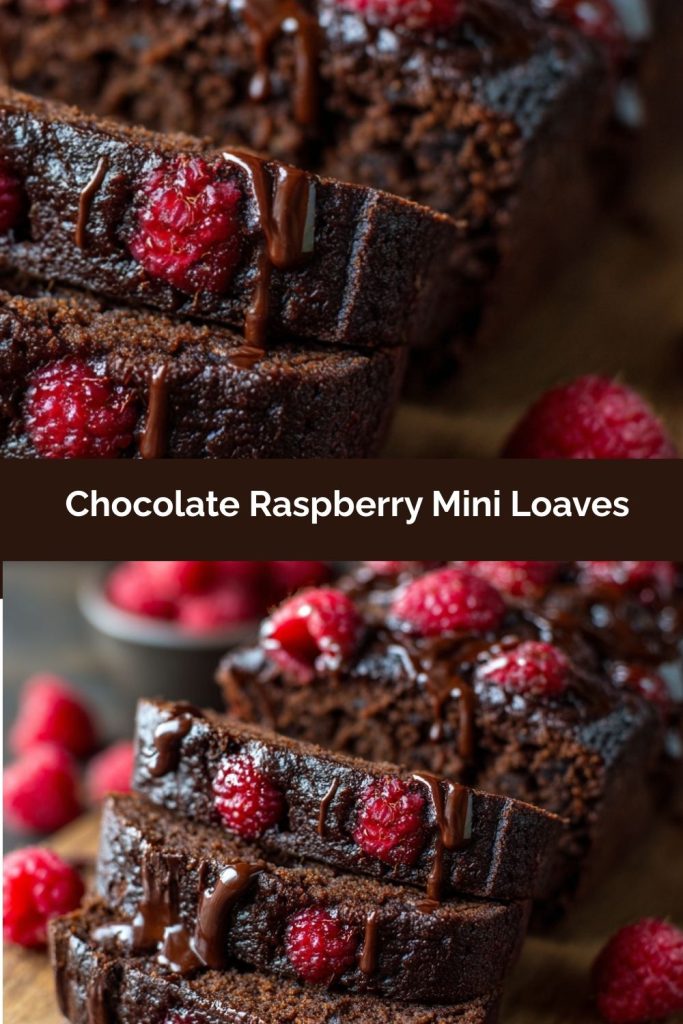
Chocolate Raspberry Mini Loaves: Your New Favorite Sweet & Cozy Treat
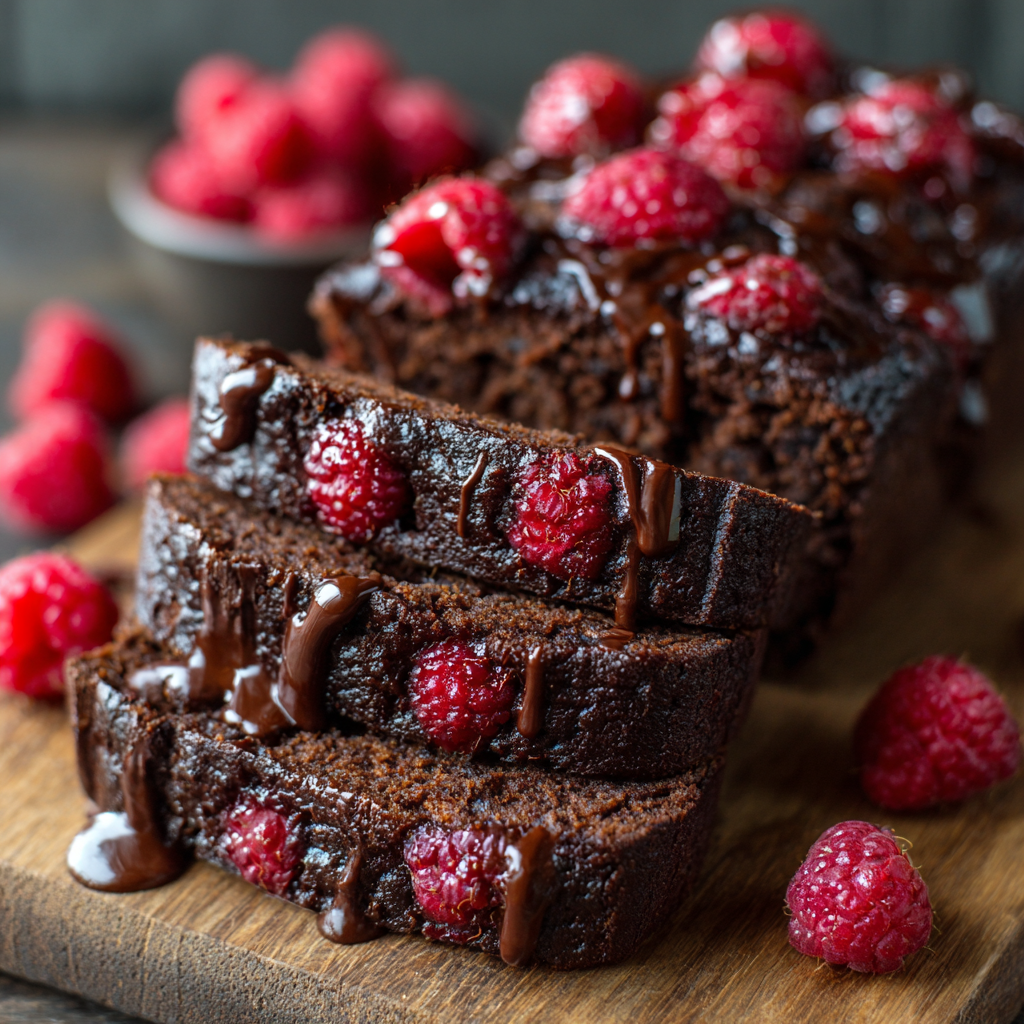
Hey there, friend! Can I let you in on a little secret? Some of the very best things in life come in small, beautifully wrapped packages. I’m not just talking about birthday presents or a perfectly ripe avocado (though those are pretty great, too). I’m talking about these unbelievably moist, deeply chocolatey, and bursting-with-berries Chocolate Raspberry Mini Loaves.
Imagine this: a soft, fudgy crumb that practically melts in your mouth, punctuated by pockets of tart, juicy raspberries that create little rivers of flavor. It’s a treat that feels indulgent and decadent, but is secretly made with wholesome, feel-good ingredients. We’re talking almond flour for a tender bite, naturally sweet maple syrup, and the hidden magic of ripe banana or applesauce that keeps everything incredibly moist without being overly heavy.
Whether you’re whipping up a quick batch for a weekend breakfast, packing a special lunchbox surprise, or creating a truly heartfelt homemade gift for a neighbor, these mini loaves are your new go-to. They are the edible equivalent of a warm hug—comforting, joyful, and guaranteed to turn an ordinary afternoon into something a little more magical. So, preheat that oven, grab your favorite mixing bowl, and let’s bake up a storm of deliciousness together!
A Story of Stained Aprons and Sweet Surprises
PrintChocolate Raspberry Mini Loaves (Moist, Rich & Naturally Sweetened)

These chocolate raspberry mini loaves are soft, fudgy, and bursting with juicy berries in every bite. Made with wholesome ingredients and lightly sweetened, they’re perfect for breakfast, snacking, or gifting. Think of them as a cozy mash-up of dessert and feel-good fuel.
- Prep Time: 10 minutes
- Cook Time: 25 minutes
- Total Time: 35 minutes
Ingredients
1 cup almond flour
½ cup cocoa powder
½ cup mashed ripe banana or unsweetened applesauce
2 eggs
¼ cup maple syrup or honey
¼ cup plain Greek yogurt
1 tsp vanilla extract
1 tsp baking soda
½ tsp salt
½ cup fresh or frozen raspberries
Optional: ¼ cup dark chocolate chips
Instructions
Preheat oven to 350°F (175°C) and grease or line mini loaf pans.
In a bowl, whisk together banana, eggs, maple syrup, yogurt, and vanilla.
Stir in almond flour, cocoa powder, baking soda, and salt until smooth.
Fold in raspberries and chocolate chips if using.
Divide batter into mini loaf pans and bake for 20–25 minutes or until a toothpick comes out clean.
Cool before removing from pans. Serve warm or chilled.
Nutrition
- Calories: 210
- Fat: 12g
- Carbohydrates: 18g
- Protein: 6g
This recipe takes me right back to my grandma’s sun-drenched kitchen. She wasn’t a fancy baker, but she was a genius at creating magic with whatever she had on hand. One rainy Saturday, I was determined to bake my first “solo” cake. I had a vision of a towering, multi-layered chocolate masterpiece. Well, let’s just say my ambitions were bigger than my ten-year-old baking skills. I over-mixed, I under-measured, and the result was… a dense, sad pancake of a cake.
Seeing my disappointment, Grandma swooped in. She took one look at my glum face and said, “Honey, sometimes the best things aren’t the biggest. They’re the ones made with heart.” She salvaged my chocolate batter, gently folded in a handful of raspberries from the bush outside her back door, and poured it into her little, vintage mini loaf pans. What emerged from the oven was a revelation. They were perfectly domed, crackly on top, and each one was a self-contained, personal-sized delight. It taught me a beautiful lesson: that joy and flavor don’t need to be grand to be profound. These mini loaves are my tribute to that day—a reminder that the sweetest successes often come in small, beautiful packages.
Gathering Your Happy Ingredients
One of the things I love most about this recipe is how simple and flexible the ingredient list is. Let’s take a quick tour of what we’re using and why each one is a rockstar in its own right. This isn’t just a list; it’s your roadmap to baking success!
- 1 cup almond flour: This is the base of our loaf, giving it a wonderfully tender, moist crumb and a subtle nutty flavor that pairs perfectly with chocolate. Chef’s Insight: Be sure to use finely ground almond flour, not almond meal, for the best texture. For a nut-free version, you can try oat flour, but the result will be a bit denser.
- ½ cup cocoa powder: The star of the show! This is what gives our loaves that deep, rich chocolate flavor. I always use unsweetened, natural cocoa powder for the purest taste.
- ½ cup mashed ripe banana or unsweetened applesauce: This is our magic moisture-maker and natural sweetener! The banana adds a subtle background flavor, while applesauce keeps it more neutral. Substitution Tip: If you’re using banana, the riper it is (read: covered in brown spots!), the sweeter and more flavorful your loaves will be.
- 2 eggs: Our trusty binders, giving the loaves structure and a lovely, soft texture. Make sure they’re at room temperature for best results—just pop them in a bowl of warm water for 5 minutes if you forgot to take them out earlier!
- ¼ cup maple syrup or honey: This is our liquid gold, providing a gentle, natural sweetness. I love the caramel notes of maple syrup with chocolate, but honey works beautifully, too.
- ¼ cup plain Greek yogurt: A secret weapon for ultra-moist baked goods! The yogurt adds a slight tang and incredible tenderness. Substitution Tip: Dairy-free? No problem! Any plain, unflavored yogurt (like coconut or almond-based) will work just fine.
- 1 tsp vanilla extract: The flavor enhancer that makes the chocolate taste even more chocolaty. Don’t skip it!
- 1 tsp baking soda: Our leavening agent, responsible for that perfect little rise and soft crumb.
- ½ tsp salt: Crucial for balancing all the sweetness and making the flavors pop. Trust me on this one!
- ½ cup fresh or frozen raspberries: The jewel in the crown! Their bright, tart burst cuts through the rich chocolate. Chef’s Insight: If using frozen, do NOT thaw them first. Toss them in a bit of the almond flour to prevent them from sinking to the bottom.
- Optional: ¼ cup dark chocolate chips: Because sometimes, more chocolate is the only correct answer. This is for those extra fudgy, decadent bites.
Let’s Bake! Your Step-by-Step Guide to Mini Loaf Perfection
Ready to create some magic? This process is as joyful and straightforward as it gets. I’ll walk you through each step with all my favorite little chef hacks to ensure your mini loaves turn out perfectly every single time.
- Preheat and Prep: First things first, get that oven heating to a cozy 350°F (175°C). While it’s warming up, generously grease your mini loaf pans with a little butter, coconut oil, or a spritz of non-stick spray. Chef’s Hack: For ultimate ease, I’m a huge fan of using parchment paper slings! Just cut strips of parchment to line the bottom and long sides of the pans, leaving an overhang. This makes removing the loaves an absolute breeze once they’re cooled.
- Mix the Wet Team: In a nice, spacious mixing bowl, grab your mashed banana (or applesauce) and crack in those room-temperature eggs. Add in the maple syrup, Greek yogurt, and that glorious teaspoon of vanilla. Now, take your whisk and give it a good, energetic whisking! You want to mix until the combination is completely smooth, homogenous, and looks a little bit frothy. This incorporates air, which helps with the lift. Little Tip: No need for a stand mixer here—a little arm workout is good for the soul!
- Welcome the Dry Crew: Now, it’s time to add our dry ingredients directly into the same bowl. Sprinkle in the almond flour, cocoa powder, baking soda, and salt. Chef’s Hack: If you’re a perfectionist, you can whisk these together in a separate bowl first to ensure the baking soda is evenly distributed. But for a quick-and-easy recipe like this, I often just add them right in and make sure I mix thoroughly! Switch to a spatula and gently fold everything together. Stop as soon as you no longer see any dry streaks of flour. A few small lumps are totally fine—we do NOT want to overmix!
- The Grand Finale Fold-In: This is my favorite part! Scatter your raspberries and dark chocolate chips (if you’re using them) over the top of the batter. Now, with a light hand and a gentle folding motion, incorporate them. Little Tip: Fold just 4-5 times. You want them distributed, but not smashed and bled all through the batter. This ensures those beautiful, distinct pockets of berry goodness.
- Pan and Bake: Equally divide the beautiful, speckled batter among your prepared mini loaf pans. I like to use a cookie scoop or a measuring cup for less mess. Fill them about ⅔ of the way full to leave room for that perfect rise. Slide them into the center of your preheated oven and bake for 20-25 minutes. Chef’s Test: Start checking at 20 minutes. The loaves are done when the tops are domed and spring back lightly when touched, and a toothpick inserted into the center comes out with just a few moist crumbs attached (not wet batter).
- The All-Important Cool Down: This is the hardest part—waiting! But it’s crucial. Let the loaves cool in their pans on a wire rack for at least 15-20 minutes. This allows them to set up. Then, run a knife around the edges and gently lift them out (see? Parchment slings for the win!) to cool completely on the rack. I know it’s tempting, but slicing into a warm loaf can make it crumble. The wait is worth it, I promise!
How to Serve Up the Coziness
Now for the fun part—enjoying your creation! These mini loaves are wonderfully versatile. For a simple, everyday treat, just grab one and go. But if you want to elevate them into something truly special, I love serving them slightly warm with a dollop of Greek yogurt or a drizzle of extra maple syrup. For a decadent dessert moment, a scoop of vanilla bean ice cream alongside a warm slice is pure heaven. And if you’re gifting them, let them cool completely, then wrap them in a cute cellophane bag tied with a ribbon for a present that’s guaranteed to delight.
Get Creative! Fun Flavor Twists
Once you’ve mastered the classic, feel free to play with your food! Here are a few of my favorite variations:
- Chocolate Orange Bliss: Add the zest of one orange to the wet ingredients and swap the chocolate chips for orange-infused dark chocolate chunks.
- Double Berry Bonanza: Use a mix of raspberries and blueberries for a patriotic and extra-fruity burst.
- Nutty Crunch: Fold in ¼ cup of chopped walnuts or pecans along with the raspberries for a wonderful textural contrast.
- Mocha Chip: Dissolve 1-2 teaspoons of instant espresso powder into the vanilla extract before adding it. It will make the chocolate flavor taste even deeper and richer!
- Vegan Version: Use the applesauce option, replace the eggs with 2 flax eggs, and use a dairy-free yogurt. The texture will be slightly denser but still delicious!
Anna’s Chef Notes & Kitchen Stories
This recipe has been a living, evolving little project in my kitchen for years. It started as that salvage operation with my grandma and has been tweaked and perfected through countless batches. I’ve learned that using frozen raspberries straight from the freezer actually helps them hold their shape better during baking, preventing too much juice from bleeding. I also have a funny habit of always having one loaf that’s the “baker’s treat”—the one that might have a few extra chocolate chips “accidentally” fall into it. It’s a sacred rule in my house that the slightly misshapen, extra-chippy loaf gets eaten warm, straight from the pan, by the cook. It’s the law! Don’t be afraid to make this recipe your own. That’s the true joy of cooking.
Your Questions, Answered!
I’ve made these so many times, I can almost anticipate your questions. Here are answers to the most common ones:
Q: My raspberries all sank to the bottom! What happened?
A: Ah, the classic sinking berry dilemma! The best trick to prevent this is to toss your raspberries (especially frozen ones) in a light dusting of the almond flour or a tiny bit of extra cocoa powder before folding them in. This little coating helps them “grip” the batter and stay suspended. Also, make sure your batter isn’t too thin—if it seems runny, add another tablespoon of almond flour.
Q: Can I make this as one big loaf instead of minis?
A: Absolutely! Pour the batter into a standard 9×5-inch loaf pan that you’ve greased and lined with parchment paper. You’ll need to increase the baking time to about 45-55 minutes. Start checking at the 45-minute mark with a toothpick. The center should be fully set.
Q: How should I store these, and do they freeze well?
A: These loaves keep beautifully! Once completely cooled, store them in an airtight container at room temperature for 2-3 days, or in the fridge for up to a week. They also freeze like a dream! Wrap each cooled loaf tightly in plastic wrap and then in foil, and pop them in a freezer bag. They’ll keep for up to 3 months. Thaw at room temperature or warm gently in the oven.
Q: My loaf is a bit wet in the middle. Did I underbake it?
A> It sounds like it might need a few more minutes. Oven temperatures can vary, so always trust the toothpick test over the timer. If you find the top is getting too dark but the center is still wet, simply tent the loaf pan with a piece of aluminum foil for the remainder of the baking time. This will prevent the top from burning while the center finishes cooking.
Quick Nutritional Snapshot
Please note: This is an approximate estimate per mini loaf and can vary based on specific ingredients used.
- Calories: 210
- Protein: 6g
- Carbohydrates: 18g
- Fat: 12g
- Prep Time: 10 minutes
- Bake Time: 25 minutes
- Total Time: 35 minutes
Final Thoughts
These Chocolate Raspberry Mini Loaves are proof that small things can bring the biggest joy. Moist, chocolatey, and bursting with berries, they are the perfect balance of indulgence and comfort. Whether you’re enjoying one with a cup of coffee, gifting a batch to a friend, or sneaking a slice straight from the pan, they never fail to put a smile on your face.
The beauty of these mini loaves is in their versatility and ease—they’re simple enough for a weekday treat but special enough to serve for brunch or dessert. And the best part? You can make them your own with all sorts of flavor twists, from double berries to a hint of espresso or nutty crunch. Every bite is a reminder that baking with love and a little creativity makes all the difference. These loaves are more than just dessert—they’re a little moment of happiness you can make and share any day of the week.