
***
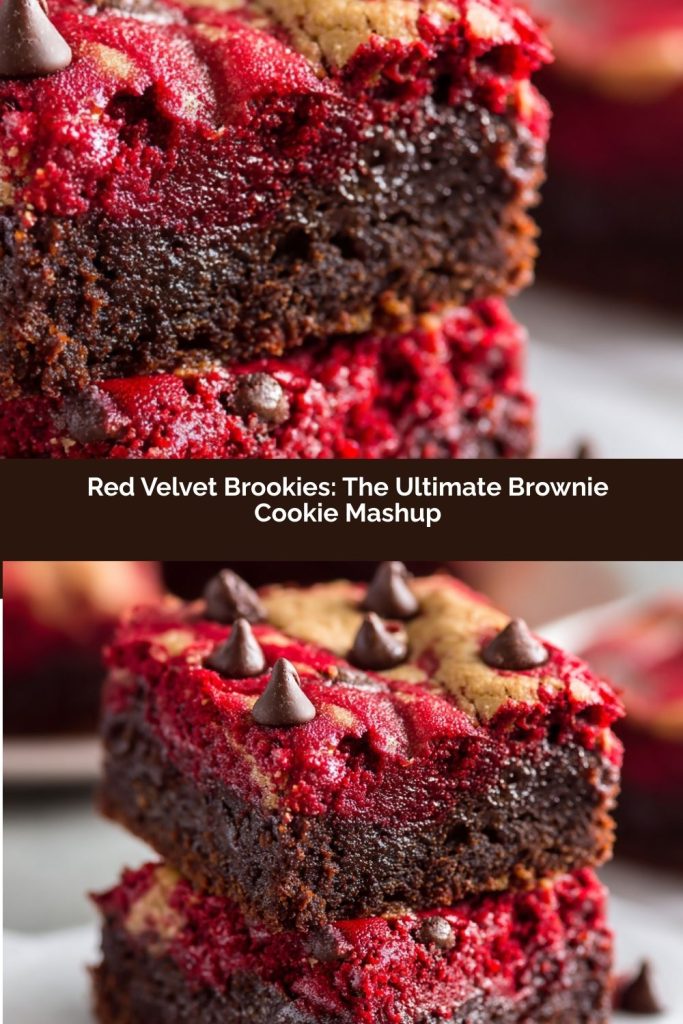
Red Velvet Brookies: The Fudgy, Festive & Cravе-Worthy Dessert Mashup
Why Choose Between a Brownie and a Cookie When You Can Have Both?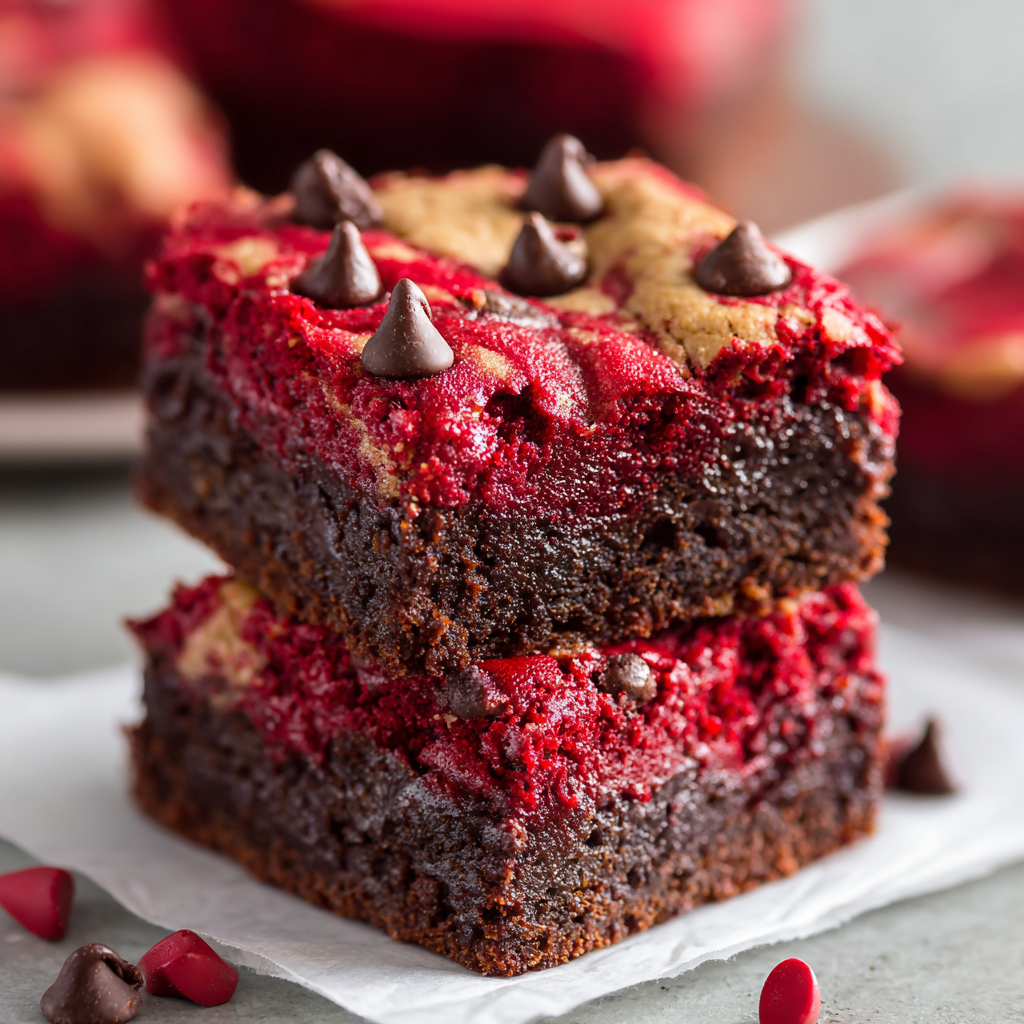
Hey there, friend! Let’s be real for a second. Have you ever stood in front of your oven, craving something sweet, but been completely torn between the dense, fudgy bliss of a brownie and the soft, chewy delight of a cookie? I’ve been there more times than I can count. It’s a delicious dilemma that used to leave me paralyzed by choice.
Well, what if I told you that you don’t have to choose? What if I showed you how to create a dessert that’s the absolute best of both worlds, swirled together in one spectacular, show-stopping pan? Enter the Red Velvet Brookie. This is the dessert hero we all need in our lives, especially when a little extra magic is on the menu.
Imagine it: a rich, dark chocolate brownie base, so fudgy it practically melts on your tongue. And right on top, a vibrant, soft-baked red velvet cookie layer, studded with pockets of melty chocolate chips. The contrast is everything—texture, flavor, and a pop of color that just makes you happy. It’s the perfect treat for holidays, birthday parties, potlucks, or for turning an ordinary Tuesday into a celebration. So, grab your favorite mixing bowl and let’s cook up some joy together. This is one recipe that’s guaranteed to become a new classic in your kitchen.
A Sweet Slice of Nostalgia
PrintRed Velvet Brookies (Fudgy, Festive & Crave-Worthy)

These red velvet brookies are the best of both dessert worlds—chewy, fudgy brownie meets soft red velvet cookie in one irresistible bite. With rich cocoa flavor, a pop of color, and melty chocolate chips, they’re perfect for holidays, parties, or when you just can’t choose between a brownie and a cookie.
- Prep Time: 15 minutes
- Cook Time: 30 minutes
- Total Time: 45 minutes
Ingredients
Red Velvet Cookie Layer:
½ cup butter, softened
½ cup brown sugar
¼ cup white sugar
1 egg
1 tsp vanilla extract
1 tbsp red food coloring
1¼ cups all-purpose flour
2 tbsp cocoa powder
½ tsp baking soda
¼ tsp salt
½ cup white chocolate or semi-sweet chips
Brownie Layer:
½ cup melted butter
½ cup cocoa powder
1 cup sugar
2 eggs
1 tsp vanilla extract
½ cup all-purpose flour
¼ tsp salt
Instructions
Preheat oven to 350°F (175°C). Line a 9×9-inch pan with parchment paper.
Make the brownie layer: Mix melted butter, cocoa, and sugar. Add eggs and vanilla, then fold in flour and salt. Spread evenly into pan.
Make the cookie layer: Cream butter and sugars. Add egg, vanilla, and food coloring. Mix in dry ingredients and stir in chocolate chips.
Drop spoonfuls of cookie dough over brownie batter. Gently spread or swirl with a spatula.
Bake for 25–30 minutes or until a toothpick comes out mostly clean. Cool completely before cutting.
Nutrition
- Calories: 220
- Fat: 12g
- Carbohydrates: 26g
- Protein: 3g
This recipe takes me right back to my grandma’s kitchen during the holidays. She was a wizard with a stand mixer and believed deeply in the power of a beautiful dessert. Every Christmas, her table was a landscape of treats, but the two stars were always her famous fudge brownies and a towering, crimson-red velvet cake. The “Great Dessert Debate” of which to have first was a family tradition.
One particularly snowy December, I decided to solve the debate once and for all. With a little bit of flour on my nose and a whole lot of determination, I started layering her brownie batter with a red velvet cookie dough I was experimenting with. The result was a little messy, a lot marbled, and an instant hit. My grandma took one bite, winked, and said, “Anna, you’ve gone and created a masterpiece.” That moment of her approval, surrounded by the warmth and laughter of my family, is baked right into the heart of this recipe. It’s a reminder that the best creations often come from a place of love and a willingness to play with your food.
Gathering Your Brookie Brigade
Here’s everything you’ll need to create this masterpiece. Don’t worry, it’s all simple, pantry-friendly stuff! I’ve included a few little chef-y insights and swaps to make this recipe work for you.
For the Red Velvet Cookie Layer:
- ½ cup butter, softened – This is key for a chewy cookie texture. “Softened” means it should give slightly when you press it, but not be oily or melted. Pro tip: if you forget to take it out of the fridge, you can quickly soften it by cutting it into chunks and letting it sit for 15 minutes.
- ½ cup brown sugar & ¼ cup white sugar – The brown sugar brings moisture and that deep, caramel-like flavor, while the white sugar helps the cookie spread and crisp up slightly at the edges.
- 1 large egg – Our binder! Make sure it’s at room temperature to help it incorporate smoothly into the creamed butter and sugar.
- 1 tsp vanilla extract – The flavor backbone. Don’t skip it! A good quality vanilla makes all the difference.
- 1 tbsp red food coloring – For that signature vibrant red. I prefer gel food coloring as it’s more potent and won’t thin out your batter, but liquid works too—you might just need a touch more.
- 1¼ cups all-purpose flour – The structure of our cookie. For a slightly softer brookie, you can swap in 2 tbsp of cornstarch for 2 tbsp of the flour to make a “cake flour” blend.
- 2 tbsp cocoa powder – This is what makes it “red velvet” and not just a red cookie! It gives that subtle, classic chocolate flavor. Use natural, unsweetened cocoa powder here.
- ½ tsp baking soda – Our leavening agent, helping the cookie layer puff up beautifully.
- ¼ tsp salt – Balances all the sweetness and makes the flavors pop.
- ½ cup white chocolate or semi-sweet chips – I love the creamy contrast of white chocolate against the red velvet, but semi-sweet chips are a classic, delicious choice too. Feel free to use whatever you have on hand!
For the Brownie Layer:
- ½ cup melted butter – Melted butter gives us that dense, fudgy brownie texture we’re after. Let it cool for a minute before adding it to the other ingredients.
- ½ cup cocoa powder – This is where our deep chocolate flavor comes from. Don’t be shy with it!
- 1 cup sugar – Sweetens the deal. You can use all white granulated sugar here.
- 2 large eggs – They provide structure and richness. Again, room temp is best!
- 1 tsp vanilla extract – Because chocolate and vanilla are a match made in heaven.
- ½ cup all-purpose flour – Just enough to hold our fudgy brownie together without making it cakey.
- ¼ tsp salt – The secret weapon in any good brownie recipe.
Let’s Bake Some Magic: Your Step-by-Step Guide
Ready to swirl? Follow these steps, and you’ll have a pan of perfect brookies in no time. I’ve packed this section with all my favorite tips and hacks to ensure your success.
- Preheat and Prep. First things first, get that oven preheating to a cozy 350°F (175°C). This is so important for even baking! Now, take your 9×9-inch baking pan and line it with parchment paper, leaving a little overhang on two sides. This is my #1 chef hack for easy removal and clean-up. You’ll be able to lift the entire slab of brookies out once they’re cooled, making for picture-perfect, clean cuts.
- Conquer the Brownie Base. Let’s start with the foundation. In a medium bowl, whisk together the melted (and slightly cooled) butter and the cocoa powder until it forms a smooth, glossy paste. This step, called “blooming” the cocoa, really deepens the chocolate flavor. Next, whisk in the sugar. It might look a bit grainy—that’s totally normal! Add the two eggs and the vanilla, and whisk vigorously until the mixture becomes thick, shiny, and smooth. Now, gently fold in the flour and salt until just combined. Be careful not to overmix here; we want fudgy, not tough! Spread this gorgeous batter evenly into the bottom of your prepared pan.
- Whip Up the Red Velvet Cookie Dough. Now for the star of the show! In a separate bowl, we’re going to cream together the softened butter, brown sugar, and white sugar. Use an electric mixer or some good old-fashioned elbow grease to beat it for 2-3 minutes until it’s light and fluffy. This incorporates air, which is key for that perfect cookie texture. Beat in the egg, vanilla, and that glorious tablespoon of red food coloring. The color should be vibrant and uniform. In a small bowl, whisk together the flour, 2 tbsp cocoa powder, baking soda, and salt. Gradually add these dry ingredients to the wet ingredients, mixing on low speed until a soft dough forms. Finally, stir in your chocolate chips by hand.
- The Grand Swirl. This is the fun part! Using a spoon or a small cookie scoop, drop dollops of the red velvet cookie dough all over the top of the brownie batter. Don’t worry about covering every single inch. Now, take a spatula or a butter knife and gently spread and swirl the cookie dough into the brownie layer beneath it. You’re aiming for a beautiful, marbled effect, not a perfect, solid top layer. Some brownie should still be peeking through!
- Bake to Perfection. Slide your beautiful creation into the preheated oven and bake for 25-30 minutes. Now, the toothpick test is your best friend here, but with a twist. You want to insert a toothpick into the center and have it come out with a few moist crumbs attached, but not wet, raw batter. Because of the fudgy brownie layer, it will never come out completely clean, and that’s exactly what we want! Overbaking is the enemy of a fudgy brookie.
- The Hardest Part: Let Them Cool! I know, the aroma is intoxicating and you want to dive right in. But trust me on this one. You must let the brookies cool completely in the pan on a wire rack. This allows them to set up properly, making them easier to cut and giving you those perfect, clean squares. If you cut them while warm, they’ll be deliciously messy, but if you want pretty layers, patience is key.
How to Serve Your Masterpiece
Once your brookies are completely cool, use the parchment paper to lift the entire block out of the pan onto a cutting board. Use a sharp knife to slice them into 12 or 16 squares. For a truly over-the-top experience, serve them slightly warm with a scoop of vanilla bean ice cream melting over the top. The cool creaminess against the rich, fudgy brookie is pure heaven. They’re also incredible all on their own with a tall glass of cold milk or a hot cup of coffee. Pile them high on a festive platter for your next gathering and watch them disappear!
Make It Your Own: Delicious Recipe Twists
One of the best things about this recipe is how adaptable it is! Here are a few of my favorite ways to mix it up:
- Peppermint Twist: Add ½ tsp of peppermint extract to the red velvet cookie dough and use dark chocolate chips for a festive holiday version.
- Cream Cheese Marble: Before swirling, drop small spoonfuls of sweetened cream cheese (4 oz softened cream cheese, ¼ cup sugar, 1 egg yolk) over the brownie batter, then add the cookie dough and swirl everything together.
- Gluten-Free Goodness: Simply swap the all-purpose flour in both layers for a 1:1 gluten-free flour blend. The texture is fantastic!
- Double Chocolate Delight: Stir an extra ½ cup of chocolate chips directly into the brownie batter for an even more intense chocolate experience.
- Funfetti Vibe: Omit the cocoa powder from the cookie layer and add a handful of rainbow sprinkles for a fun, colorful cookie top.
Anna’s Chef Notes & Kitchen Stories
This recipe has evolved so much since that first snowy day in my grandma’s kitchen. I’ve learned that the quality of your cocoa powder truly matters—a good one makes the flavor so much richer. I’ve also had my fair share of kitchen experiments, including the time I accidentally used a whole bottle of red food coloring (let’s just say my brookies were… intensely red, and my hands were stained for days!).
The biggest lesson? Don’t stress about the swirl. Every single pan turns out differently, and that’s the beauty of a homemade treat. Some have more cookie, some have more brownie, but they are all 100% delicious. This recipe is meant to be joyful, so have fun with it! It’s become my go-to for bake sales and new neighbor gifts because it never, ever fails to bring a smile.
Your Brookie Questions, Answered!
I’ve gotten so many wonderful questions about this recipe over the years. Here are the most common ones to help you on your brookie journey.
Q: My brookies are too cakey. What did I do wrong?
A: A cakey texture usually means the batter was over-mixed once the flour was added. When you mix flour too much, you develop the gluten, which leads to a tougher, more bread-like crumb. The key is to fold the flour in gently, just until you no longer see white streaks. Also, double-check your measurements—too much flour is a common culprit!
Q: Can I make these brookies ahead of time?
A: Absolutely! They are a fantastic make-ahead dessert. Once completely cooled, store them in an airtight container at room temperature for up to 3 days. For longer storage, you can freeze them for up to 3 months. Just layer them between sheets of parchment paper in a freezer-safe container. Thaw at room temperature when you’re ready for a treat.
Q: Why did my red velvet layer turn out brownish instead of bright red?
A: This can happen if your cocoa powder is very dark or if you’re using a natural (non-alkalized) cocoa. To guarantee a vibrant red, use a good-quality gel food coloring, as it’s more concentrated than liquid. Also, make sure your baking soda is fresh, as it helps the color stay bright during baking.
Q: Can I use a boxed mix to save time?
A> You can! Prepare one box of fudge brownie mix according to package directions for a 9×9 pan and use it as your base. Then, just make the red velvet cookie layer from scratch and swirl it on top. It’s a great shortcut that still yields amazing results.
Nutritional Information*
*This is an approximate estimate calculated using an online nutrition tool. Values may vary based on specific ingredients used.
Per Brookie (based on 16 servings): Calories: 220 | Protein: 3g | Carbohydrates: 26g | Fat: 12g
Prep Time: 15 minutes | Bake Time: 30 minutes | Total Time: 45 minutes
Final Thoughts
There’s something undeniably magical about a dessert that can make everyone happy at once—and that’s exactly what Red Velvet Brookies do. They bring together the fudgy richness of a brownie and the soft, chewy delight of a red velvet cookie in one glorious, swirly creation. Every bite is a little celebration, perfect for holidays, birthdays, or even just a cozy night at home when you want something sweet to lift your spirits.
The beauty of this recipe is how simple, adaptable, and forgiving it is. From playful mix-ins like peppermint or funfetti sprinkles to classic cream cheese swirls, it’s a canvas for creativity. And while the swirling may never be perfect, that’s part of the charm—each pan is uniquely yours, full of warmth, love, and a touch of nostalgia.
So go ahead, preheat that oven, swirl your layers, and let the smell of chocolate and red velvet fill your kitchen. Your friends, family, and sweet tooth will thank you—and I promise, you’ll find yourself reaching for this recipe again and again.