***
The Cake That Will Make You Forget All Other Banana Cakes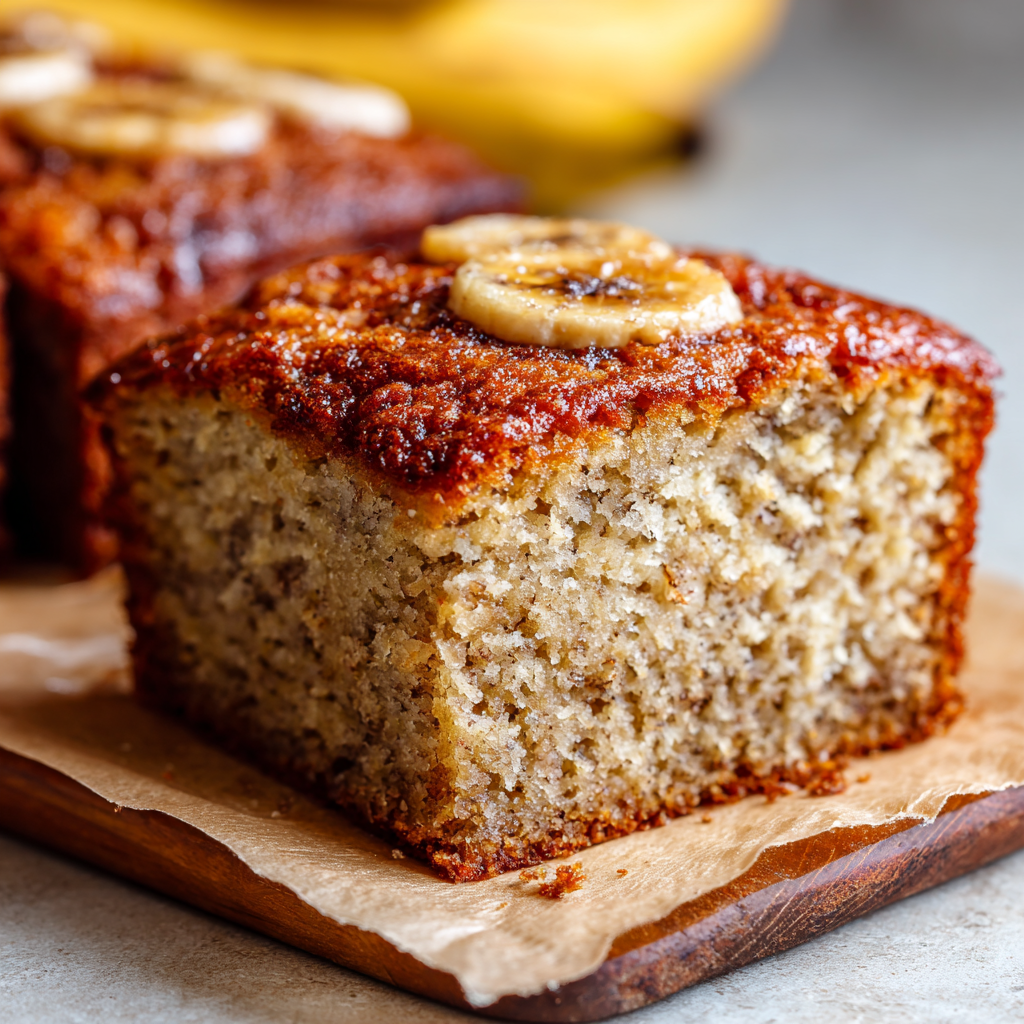
Hey there, friend! Let’s talk about those bananas sitting on your counter. You know the ones. They’ve gone from bright yellow and hopeful to a little spotty, a little soft, maybe even… *enthusiastically* brown. Most of the world sees a fruit past its prime. But you and I? We see potential. We see the start of something truly magical.
I’m a firm believer that the best recipes are born from simple ingredients and a little bit of kitchen alchemy. And that’s exactly what we’re doing today with this Brown Butter Banana Snack Cake. This isn’t just another banana bread (though I love a good banana bread!). This is a softer, richer, more deeply flavorful cake that lives in that beautiful space between a casual snack and a celebratory dessert. It’s the kind of treat you can whip up on a lazy Sunday afternoon and still feel proud serving to unexpected guests.
The secret weapon here is brown butter. If you’ve never browned butter before, get ready to have your mind blown. It’s a simple process of toasting the milk solids in the butter, which transforms it from a classic, creamy fat into a liquid gold with a rich, nutty, almost hazelnut-like aroma. When you combine that with the natural caramel sweetness of super-ripe bananas, you create a flavor base that is nothing short of extraordinary. So, tie on your favorite apron, and let’s turn those lonely bananas into the most talked-about cake of your week!
A Whiff of Nostalgia and Brown Butter
PrintBrown Butter Banana Snack Cake (Moist, Nutty & Perfectly Sweet)

This brown butter banana snack cake is soft, rich, and deeply flavorful—thanks to the magic of caramelized bananas and nutty brown butter. It’s the kind of cozy, crowd-pleasing treat that’s equally perfect for breakfast, dessert, or an afternoon pick-me-up.
- Prep Time: 15 minutes
- Cook Time: 35 minutes
- Total Time: 50 minutes
- Yield: 12 1x
Ingredients
½ cup unsalted butter
1 cup mashed ripe bananas (about 2–3 bananas)
½ cup brown sugar
¼ cup white sugar
2 eggs
½ cup Greek yogurt or sour cream
1½ cups all-purpose flour
1 tsp baking soda
½ tsp cinnamon
¼ tsp salt
Optional: chopped walnuts, mini chocolate chips, or a dusting of powdered sugar
Instructions
Preheat oven to 350°F (175°C). Grease or line an 8×8-inch pan.
In a saucepan, melt butter over medium heat, stirring until it foams and turns golden brown with a nutty aroma. Remove from heat and let cool slightly.
In a bowl, whisk together brown butter, mashed bananas, sugars, eggs, and yogurt until smooth.
Stir in flour, baking soda, cinnamon, and salt until just combined.
Fold in mix-ins if using. Pour batter into prepared pan.
Bake for 30–35 minutes or until a toothpick comes out clean. Cool before slicing.
Nutrition
- Calories: 210
- Fat: 9g
- Carbohydrates: 28g
- Protein: 4g
This recipe always takes me back to my grandma’s kitchen. She was a wizard with what she called her “humble ingredients.” I’d sit at her Formica table, swinging my legs, watching her move with a quiet confidence. She never measured vanilla—it was always a “glug.” And she had this sixth sense for knowing exactly when a banana was at its peak for baking. Her banana cake was legendary at family potlucks, always disappearing first from the table.
One rainy afternoon, I was “helping” her and saw her melting butter in a pan. I remember tugging on her apron and asking, “Grandma, why is the butter turning brown? Did you burn it?” She chuckled, gave me a whisk to lick, and said, “No, my love, that’s the magic. We’re just waking up the flavor.” That phrase has stuck with me forever. “Waking up the flavor.” That’s exactly what browning butter does. It takes a simple, everyday ingredient and unlocks its deepest, most soul-warming potential. My recipe is a loving nod to her—a little more refined with the Greek yogurt for tangy tenderness, but with that same magical, nutty heart she taught me to create.
Gathering Your Kitchen Cast
Here’s your grocery list for this bit of magic! Don’t worry, it’s all simple stuff you probably have on hand. The beauty is in how we use them.
- ½ cup unsalted butter: Using unsalted lets us control the salt level perfectly. This is our star player—we’re going to brown it and make it the flavor foundation of our entire cake.
- 1 cup mashed ripe bananas (about 2–3 bananas): The spottier, the better! Those black freckles mean maximum sweetness and flavor. Pro tip: mash them with a fork in a separate bowl until they’re nice and goopy.
- ½ cup brown sugar & ¼ cup white sugar: The brown sugar brings a deep molasses warmth that pairs beautifully with the brown butter and banana. The white sugar helps keep the texture light. Together, they create the perfect sweetness.
- 2 large eggs: Always best at room temperature! They incorporate into the batter more evenly, giving us a better rise and a tender crumb. If you forgot to take them out, just place them in a bowl of warm water for 5-10 minutes.
- ½ cup Greek yogurt or sour cream: This is our secret weapon for a supremely moist cake. The tanginess cuts through the richness, and the fat content ensures a decadent texture. I prefer full-fat Greek yogurt for a little protein boost, but sour cream works identically well!
- 1½ cups all-purpose flour: The trusty workhorse. No need for anything fancy here.
- 1 tsp baking soda: Our leavening agent. It’s the powerhouse that gives this cake its beautiful lift. Make sure it’s fresh for the best results!
- ½ tsp cinnamon: A warm, cozy whisper in the background. It complements the nutty butter without overpowering it.
- ¼ tsp salt: Crucial for balancing all the sweetness and making the other flavors pop. Don’t skip it!
- Optional: chopped walnuts, mini chocolate chips, or a dusting of powdered sugar: Walnuts add a fantastic crunch, chocolate chips make it a crowd-pleaser for kids (and kids-at-heart!), and a simple dusting of powdered sugar makes it look effortlessly elegant.
Let’s Bake! Your Step-by-Step Guide to Snacking Bliss
Ready to create some magic? Follow these steps, and you’ll have a perfect cake in no time. I’ve sprinkled in all my favorite chef hacks to make sure you feel confident every step of the way.
- Preheat and Prep: First things first, get that oven preheating to a cozy 350°F (175°C). This ensures a consistent temperature from the moment your cake goes in. Now, grab your 8×8-inch pan. My go-to is to line it with a sheet of parchment paper, leaving a little overhang on two sides. This creates a “sling” that lets you lift the entire cake out for flawless, crumble-free slicing! If you don’t have parchment, just give the pan a good greasing with butter or a spritz of baking spray.
- The Main Event: Browning the Butter: Place your ½ cup of unsalted butter in a light-colored saucepan. Why light-colored? So you can easily see the color change! Melt it over medium heat, swirling the pan occasionally. It will foam and crackle—that’s the water cooking off. Keep a watchful eye. After a few minutes, you’ll see little golden-brown specks forming at the bottom, and the aroma will shift from buttery to deeply nutty and irresistible. The second you smell those hazelnut notes and see the amber color, take it off the heat immediately and pour it into a heat-proof bowl to stop the cooking. Chef’s Hack: Scrape all those toasty brown bits from the pan—that’s pure flavor gold! Let it cool for about 10-15 minutes. We don’t want it to cook the eggs when we mix it in!
- Combining the Wet Ingredients: In a large mixing bowl, whisk together your slightly cooled brown butter, the mashed bananas, brown sugar, white sugar, eggs, and Greek yogurt. Whisk it until it’s smooth and beautifully emulsified. It might look a little curdled at first if your ingredients are different temperatures, but just keep whisking—it will come together into a lovely, homogenous mixture.
- Bringing It All Together: Now, sprinkle the flour, baking soda, cinnamon, and salt right over the wet ingredients. Use a spatula to gently fold everything together. The key word here is GENTLY. Stop folding the moment you no longer see streaks of dry flour. A few tiny lumps are absolutely fine! Overmixing is the enemy of a tender cake, as it develops the gluten in the flour and can make it tough.
- The Fun Part: Fold-Ins: This is where you make it your own! If you’re adding walnuts or chocolate chips, sprinkle them in now and fold just once or twice to distribute them evenly throughout the batter.
- Into the Pan and Oven: Scrape the beautiful, fragrant batter into your prepared pan and use your spatula to spread it into an even layer. A little jiggle of the pan helps it settle. Pop it into your preheated oven and set your timer for 30 minutes.
- The Golden Rule of Baking: Ovens can be sneaky, so start checking at the 30-minute mark. The cake is done when the top is springy to the touch, the edges are just pulling away from the sides of the pan, and a toothpick or skewer inserted into the center comes out clean or with a few moist crumbs attached (no wet batter!). If it needs more time, check in 2-3 minute increments.
- The Hardest Part: Let it Cool! I know, the temptation to dive right in is REAL. But trust me on this. Let the cake cool in the pan on a wire rack for at least an hour. This allows the structure to set, making it easier to slice and giving the flavors time to meld and deepen. Your patience will be rewarded, I promise!
How to Serve Your Masterpiece
This cake is a chameleon! For a simple afternoon treat, just slice it into squares and serve it straight from the pan. Feeling fancy? Place a square on a plate, give it a delicate dusting of powdered sugar, and maybe add a few fresh banana slices on the side. For the ultimate indulgence, warm a square slightly and top it with a scoop of vanilla bean ice cream. The contrast of warm cake and cold, creamy ice cream is a little slice of heaven. It’s perfect with a cup of strong coffee in the morning or a glass of cold milk before bed.
Make It Your Own: Delicious Twists & Swaps
Love this recipe? Try one of these fun variations next time!
- Chocolate Lover’s Dream: Swap out ¼ cup of the flour for ¼ cup of unsweetened cocoa powder for a chocolate-banana brown butter bliss.
- Gluten-Free Goodness: Use a 1:1 gluten-free all-purpose flour blend. The result is just as tender and delicious!
- Browned Butter Frosting: Take it over the top! Make a simple powdered sugar glaze with a tablespoon of reserved brown butter and a splash of milk, or go all out with a creamy brown butter cream cheese frosting.
- Tropical Vibes: Fold in ½ cup of shredded sweetened coconut along with the macadamia nuts for a tropical vacation in every bite.
- Spiced Up: Add ¼ teaspoon of nutmeg or cardamom along with the cinnamon for an even warmer, more complex spice profile.
Anna’s Extra Pinch of Advice
This recipe has been a staple in my kitchen for years, and it’s evolved in the best ways. I used to make it with regular melted butter, but the first time I tried it with brown butter, it was a true “where have you been all my life?!” moment. The depth it adds is just incredible.
One of my favorite kitchen memories involves this cake. I was testing it for my son’s birthday party (he’s not a big frosting fan), and I left the butter browning for just a *moment* too long while helping him with a Lego spaceship. I ended up with what I called “almost-black butter.” It was definitely past its prime! I had to start over, but it was a great reminder that brown butter goes from perfect to *oops* in a flash. So, stay vigilant by that stove! Now, that little near-miss is a funny story we tell, and it reminds me that even the “failures” in the kitchen are part of the journey.
Your Questions, Answered!
Here are answers to some common questions to ensure your baking success.
Q: I think I burned my butter. What should I do?
A: Oh, I’ve been there! If your butter has black specks and smells acrid or smoky, it’s best to start over. Burnt butter will make the whole cake taste bitter. The good news is, it only takes a few minutes! Remember, golden brown with a nutty aroma is the goal.
Q: My cake is dense and gummy. What happened?
A: This is almost always a case of overmixing! When you mix the batter after adding the flour, you’re developing the gluten, which leads to a tougher texture. Remember to fold gently until *just* combined. Another culprit could be overripe bananas that were too large, leading to too much moisture. Make sure you’re measuring your mashed bananas by the cup.
Q: Can I make this into muffins?
A: Absolutely! This batter makes fantastic muffins. Just line a muffin tin with papers, fill them about ⅔ full, and bake at the same temperature (350°F) for 18-22 minutes, or until a toothpick comes out clean. You’ll get about 12 perfect little snacks!
Q: How should I store this cake, and how long does it last?
A: Once completely cool, store the cake in an airtight container at room temperature for up to 3 days. For longer storage, you can wrap individual squares tightly in plastic wrap and freeze them for up to 3 months. Just thaw at room temperature whenever a craving strikes!
Nutritional Information*
*This is an estimate for 1 of 12 servings, calculated without optional add-ins.
- Calories: ~210 kcal
- Protein: 4g
- Carbohydrates: 28g
- Fat: 9g
Prep Time: 15 mins | Bake Time: 35 mins | Total Time: 50 mins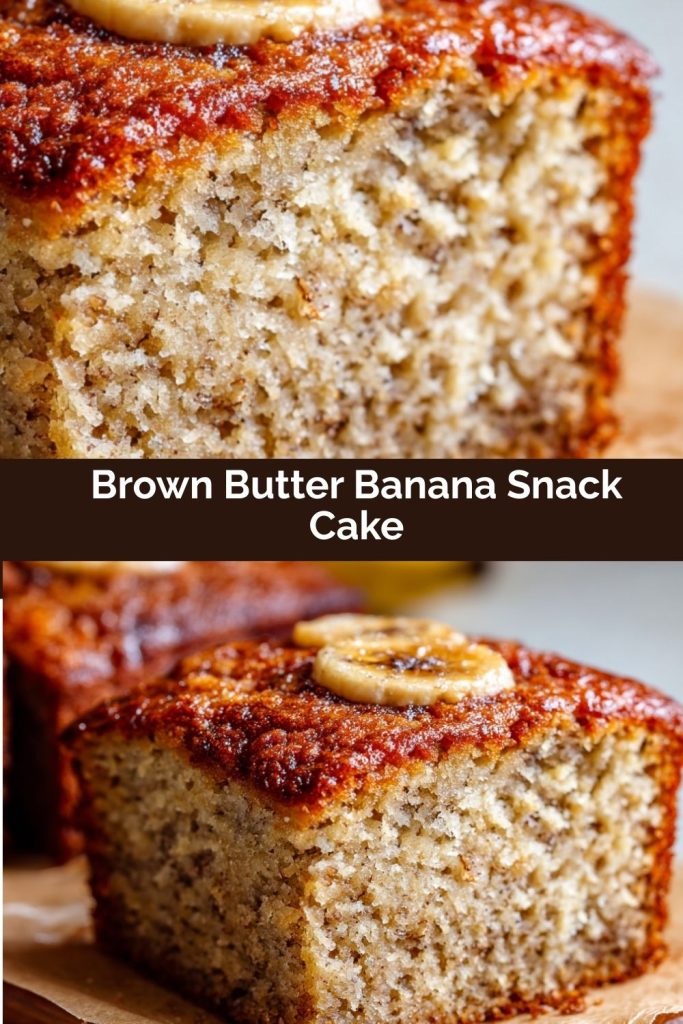
Final Thoughts
At the end of the day, these cookies are everything I love about spring baking — simple, sweet, and just a little bit magical. They’re the kind of treat that invites you to slow down, pull out the sprinkles, and make something that feels like sunshine you can eat. Whether you’re baking them for an Easter brunch, packing them into little baskets for the kids, or just treating yourself on a rainy afternoon, I hope they bring a little extra joy to your kitchen.
And hey — if your frosting drips or your bunnies look more “abstract expressionist” than Pinterest-perfect? That just means they were made with love. The best cookies always are.