Pink Oreo Truffles: Your Passport to No-Bake, Party-Ready Joy!
Hey there, friend! Come on in — I’ve got a bowl of something pink and magical waiting for us, and it involves exactly zero minutes of oven time. Have you ever had one of those days where you desperately need a hit of something sweet, something celebratory, but the thought of measuring flour and preheating anything sounds like a monumental task? Me too. More often than I’d like to admit, honestly.
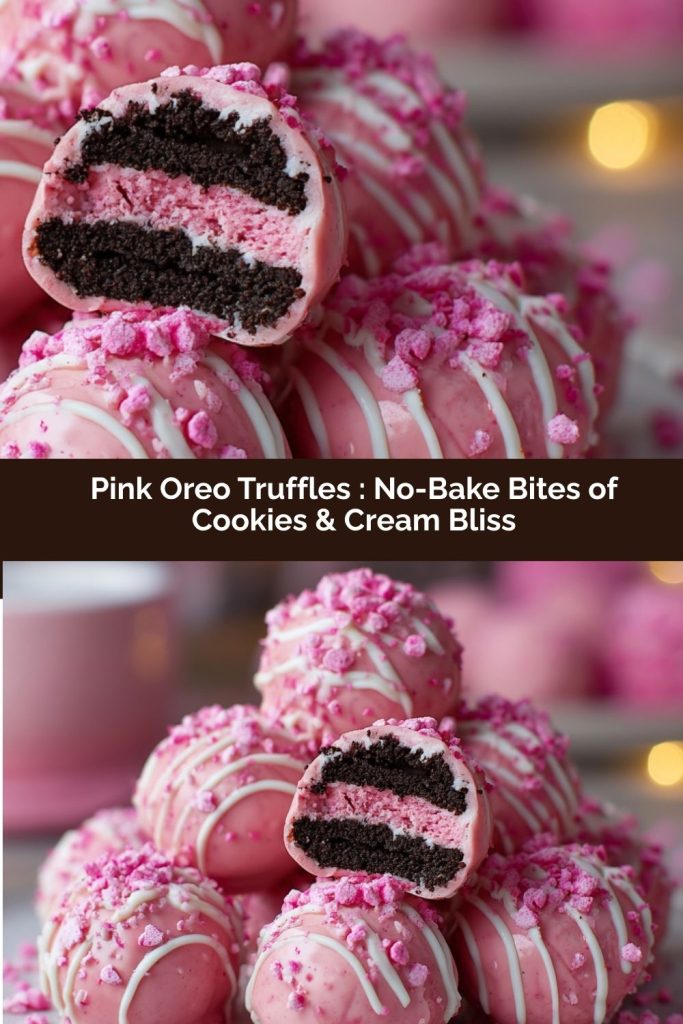
That’s exactly why I’m completely, utterly smitten with these Pink Oreo Truffles. They are my secret weapon for instant kitchen victory. We’re talking about a treat that looks like you fussed for hours, whispers “special occasion,” but truly comes together with a food processor, a bowl, and a whole lot of enthusiasm. Imagine the iconic cookies-and-cream flavor you love, hugged by a layer of smooth, pastel-pink chocolate. They’re creamy, they’re crunchy, they’re blissfully simple.
Whether you’re prepping for a baby shower, a Galentine’s Day bash, a birthday, or just because Tuesday deserves a pink treat, these truffles are your answer. They’re the ultimate edible gift, the perfect potluck contribution, and the kind of sweet little bite that makes people’s eyes light up. So, tie back your hair, clear a little counter space, and let’s turn some ordinary Oreos into extraordinary, bite-sized moments of happiness. Trust me, your future self (and your friends) will thank you!
The Happy Accident That Started It All
PrintPink Oreo Truffles : No-Bake Bites of Cookies & Cream Bliss

- Prep Time: 25 min
- chill time: 20 min
- Total Time: 45 min
- Yield: 24 truffles
Ingredients
-
36 Classic Oreo Cookies – whole cookies, cream filling included
-
8 oz (1 brick) Full-Fat Cream Cheese, softened
-
12 oz White Chocolate or Candy Melts – chopped if using bars
-
Pink Food Coloring or pre-tinted candy melts
-
Optional Decorations: Sprinkles, edible glitter, drizzle of chocolate
Instructions
Step 1: Crush the Oreos
-
Place Oreos in a food processor and pulse until fine crumbs form.
-
No processor? Use a zip-top bag and rolling pin to crush cookies manually.
Step 2: Make the Truffle Dough
-
Add softened cream cheese to the Oreo crumbs.
-
Pulse until mixture comes together in a smooth, cohesive dough.
-
Pinch a small amount: it should hold together without being sticky.
Step 3: Scoop and Roll
-
Using a small cookie scoop (~1 tbsp), form even balls.
-
Roll quickly between your palms to smooth.
-
Place on a parchment-lined baking sheet.
Step 4: Chill
-
Freeze the truffles for 20 minutes. This ensures smooth dipping and prevents melting.
Step 5: Melt and Color the Coating
-
Melt white chocolate or candy melts gently in the microwave (20-second bursts, stirring in between).
-
Add pink food coloring drop by drop until desired shade is achieved.
-
Pour melted chocolate into a narrow cup for easy dipping.
Step 6: Dip & Decorate
-
Dip each truffle in the pink coating using a fork or dipping tool.
-
Tap gently to remove excess.
-
Decorate immediately with sprinkles or glitter before the coating sets.
Step 7: Set & Serve
-
Let the truffles set at room temperature (or chill for 10 minutes in the fridge).
-
Store in an airtight container in the fridge for up to 5 days.
Nutrition
- Calories: 120
- Sugar: 10g
- Fat: 7g
This recipe’s origin story is pure, unplanned kitchen joy. A few years ago, my niece was helping me make classic Oreo truffles for a holiday party. You know how it is with kids in the kitchen — there’s a wonderful, chaotic energy. We had melted white chocolate leftover, and next to it sat a bottle of vibrant pink food gel from a previous cupcake adventure. Her eyes got huge. “Aunt Anna,” she whispered, as if proposing a grand conspiracy, “can we make them pink?”
Well, how could I say no? We dipped a few, showered them in sprinkles, and marveled at our creation. But the real magic happened when we brought them to the party. Those pink truffles disappeared first, sparking giggles and conversations. They weren’t just truffles anymore; they were a mood, a tiny burst of playful joy. That day, I learned that a simple twist of color could transform a familiar favorite into something that felt brand new and wonderfully festive. It reminded me that cooking isn’t just about following steps—it’s about being open to those sweet, colorful little detours.
Gathering Your Magical Ingredients
Here’s the beautiful part: the ingredient list is short and sweet. Each one plays a starring role, so let’s chat about them!
- 36 Classic Oreo Cookies: The heart and soul of the operation! We’re using the entire cookie—cream filling and all. That filling adds sweetness and helps bind our dough. No need for fancy flavors here; the classic is perfect. (Chef’s Insight: If you can find them, the “Double Stuf” Oreos will make for an even creamier, richer center. Just saying!)
- 8 oz (one brick) Full-Fat Cream Cheese, Softened: This is our magic binder, creating that luscious, rollable truffle dough. Full-fat is key for the best texture and flavor; low-fat varieties can make the mixture too wet. Softened is the operative word! Leave it on the counter for 30-60 minutes. A soft cream cheese blends seamlessly, avoiding lumpy dough. (Sub Tip: For a dairy-free version, a high-quality, firm vegan cream cheese works surprisingly well!)
- 12 oz High-Quality White Chocolate or Candy Melts: The gorgeous pink coat! White Chocolate Chips or Bars: They give a rich, true chocolate flavor. Chop bars finely for even melting. Candy Melts (or Almond Bark): These are formulated to melt smoothly, set firmly, and hold color beautifully. They’re my go-to for guaranteed easy dipping. You really can’t go wrong with either!
- Pink Food Coloring or Pink Candy Melts: Your color source! Gel or Oil-Based Food Coloring: Highly concentrated, so you only need a drop or two to achieve a beautiful pastel without thinning the chocolate. Liquid food coloring can cause seizing. Pre-Tinted Pink Candy Melts: The ultimate shortcut—just melt and dip! They come in gorgeous shades from soft ballet pink to hot pink.
- Optional Decorations (Sprinkles, Edible Glitter, etc.): This is where your personality shines! Have fun with it. Classic rainbow sprinkles, pretty pearlized ones, a drizzle of dark chocolate, or a dusting of edible glitter takes them from lovely to absolutely show-stopping.
Let’s Make Some Magic: Step-by-Step
Ready? Let’s do this. I’ll walk you through each step with all my favorite little hacks to ensure truffle success.
Step 1: The Perfect Crumb. Pop your Oreos (yes, the whole cookies!) into the bowl of a food processor. Pulse until you have a uniform, fine, dark crumb. No big chunks! You want it to look almost like dark sand. (No food processor? No panic! Place cookies in a heavy-duty zip-top bag and roll, smash, and crush with a rolling pin. It’s a great stress-reliever!).
Step 2: Create the Dreamy Dough. Add your beautifully softened cream cheese to the Oreo crumbs in the food processor. Pulse, then process until the mixture comes together into a cohesive, thick, black dough. It will look a bit like wet sand at first, then suddenly it’ll clump together. Stop and scrape down the sides once to make sure everything is evenly mixed. (Chef’s Test: Pinch a bit between your fingers. It should hold together firmly without being sticky. If it’s crumbly, pulse a bit more. If it’s very sticky, you can add a tablespoon of extra Oreo crumbs.)
Step 3: Scoop & Roll. Using a small cookie scoop (about 1 tablespoon size) is my #1 hack for evenly sized, professional-looking truffles. Scoop the dough, then roll it quickly between your palms to form a smooth ball. Place each one on a baking sheet lined with parchment paper. If your hands get sticky, dampen them slightly with water. Work relatively quickly—the warmth of your hands can soften the dough.
Step 4: The Strategic Chill. This step is NON-NEGOTIABLE and your best friend! Pop the whole tray into the freezer for a solid 20 minutes. Don’t skip this! A frozen-cold truffle center is the secret to a smooth, quick-drying chocolate shell that won’t slide off. It also prevents the truffle from melting into the warm coating.
Step 5: Create the Pink Pool of Glory. While the truffles chill, melt your coating. If using white chocolate, chop it finely and melt in a microwave-safe bowl in 20-second bursts, stirring vigorously between each burst. Never microwave for long stretches! Once melted and smooth, stir in your gel food coloring drop by drop. If using pink candy melts, melt them the same gentle way. (Chef’s Hack: Pour the melted coating into a narrow, deep cup or glass. This gives you a deep pool for easy, one-dip coverage!)
Step 6: The Dip & Decorate Dance. Take a few truffles out of the freezer at a time. Drop one into the pink coating. Use a fork or a dipping tool to gently roll it, then lift it out, tapping the fork firmly against the bowl’s rim to let the excess chocolate drip off. Use a second fork or a toothpick to gently push the dipped truffle back onto the parchment paper. IMMEDIATELY, while the coating is still wet, add your sprinkles or glitter! The coating sets fast. (The Two-Fork Method is a game-changer for a clean finish!).
Step 7: Set & Serve. Let the truffles set at room temperature if using candy melts, or pop them back in the fridge for 10 minutes if using chocolate. Once set, they’re ready to devour! Store them in an airtight container in the refrigerator.
How to Serve These Pretty Bites
Presentation is half the fun! For a party, arrange them on a tiered stand or a pretty platter lined with doilies. For gifting, place them in a clear cellophane bag tied with a ribbon, or nestle them in a small gift box between layers of parchment. They’re rich, so I love serving them alongside fresh berries or a pot of strong coffee to balance the sweetness. Just be warned: people will hover around the plate!
Get Creative! Flavor Twists & Swaps
The basic formula is your canvas! Try these fun variations:
- Minty Fresh: Use Mint Oreos and add a drop of peppermint extract to the dough. Coat in green-tinted chocolate.
- Peanut Butter Paradise: Substitute 4 oz of the cream cheese with creamy peanut butter. Roll finished truffles in crushed peanuts.
- Mocha Buzz: Add 2 tablespoons of instant espresso powder to the Oreo crumbs. Coat in dark chocolate.
- Funfetti Festive: Use Golden Oreos. Mix rainbow sprinkles into the dough and coat in pastel-colored chocolate.
- Gluten-Free/Dairy-Free: Use gluten-free chocolate sandwich cookies and vegan cream cheese & chocolate.
A Few Parting Thoughts From My Kitchen
This recipe has become a staple in my home, evolving with every batch. Sometimes I go for a deep fuchsia, other times a barely-there blush. I’ve learned that the size of the truffle matters—a one-inch ball is the perfect two-bite treat. One funny kitchen fail? I once tried to dip room-temperature truffles in a hurry. Let’s just say I ended up with more of a “pink Oreo soup puddle” than a truffle. The freezer is your co-pilot, I promise! The best part is how this recipe empowers new cooks. There’s no baking, no finicky techniques, just pure, delicious results that build serious kitchen confidence. That’s my favorite kind of magic.
Your Questions, Answered!
Q: My chocolate coating cracked after dipping! What happened?
A: This is usually a temperature shock. If your truffle centers are too cold (like, frozen solid for hours) and your coating is very hot, the contracting center can crack the shell as it sets. To fix: let the truffles sit in the fridge for 10-15 minutes instead of the freezer, or ensure your coating isn’t piping hot (let it cool slightly after melting).
Q: Can I make these ahead of time?
A: Absolutely! They are perfect for making ahead. Store the finished truffles in an airtight container in the fridge for up to 5 days, or freeze them (undecorated or decorated) for up to a month. Thaw in the fridge overnight.
Q: My truffle mixture is too sticky to roll! Help!
A: Two likely culprits: the cream cheese was too warm/soft, or the dough just needs a chill. Pop the whole bowl of mixture into the fridge for 20-30 minutes to firm up. You can also lightly dampen your hands with water or dust them with a tiny bit of cocoa powder to prevent sticking.
Q: Can I use milk or dark chocolate for the coating?
A: You can, but it will cover up the pretty pink color! If you don’t mind, go for it. For a cool effect, dip in pink first, let set, then drizzle with a contrasting dark or milk chocolate.
Quick Nutritional Notes*
*Approximate values per truffle, based on a yield of 24.
Prep Time: 25 min | Chill Time: 20 min | Total Time: 45 min
Calories: ~120 | Sugar: ~10g | Fat: ~7g
Remember, these are a treat meant to be savored and shared joyfully!
Well, that’s it, my friend! You are now officially a no-bake truffle wizard. I can’t wait to hear about your pink (or green, or minty, or peanut buttery) creations. Tag me if you share them, and always remember: the best meals (and treats) are the ones made with a dash of fun and a whole lot of heart. Happy cooking!
Final Thoughts
These Pink Oreo Truffles are proof that magic in the kitchen doesn’t always require an oven or hours of prep. Soft, creamy, and irresistibly sweet, each bite delivers that perfect balance of cookies-and-cream nostalgia and whimsical, pastel-pink charm. The beauty is in their simplicity: a few pantry staples, a food processor, and a little freezer time are all it takes to create a treat that looks impressive but feels effortless. Whether you’re gifting them, sharing at a party, or sneaking one (or three) for yourself, these truffles bring joy with every bite. They’re playful, customizable, and utterly addictive—your new go-to no-bake indulgence for every occasion.