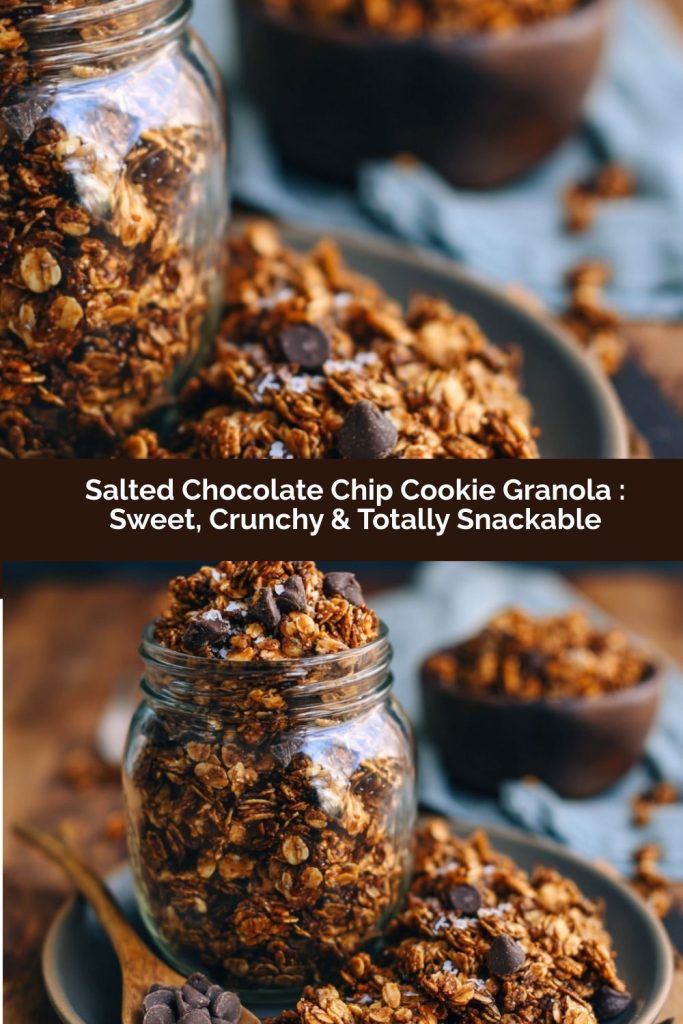
Salted Chocolate Chip Cookie Granola: Your New Favorite Snack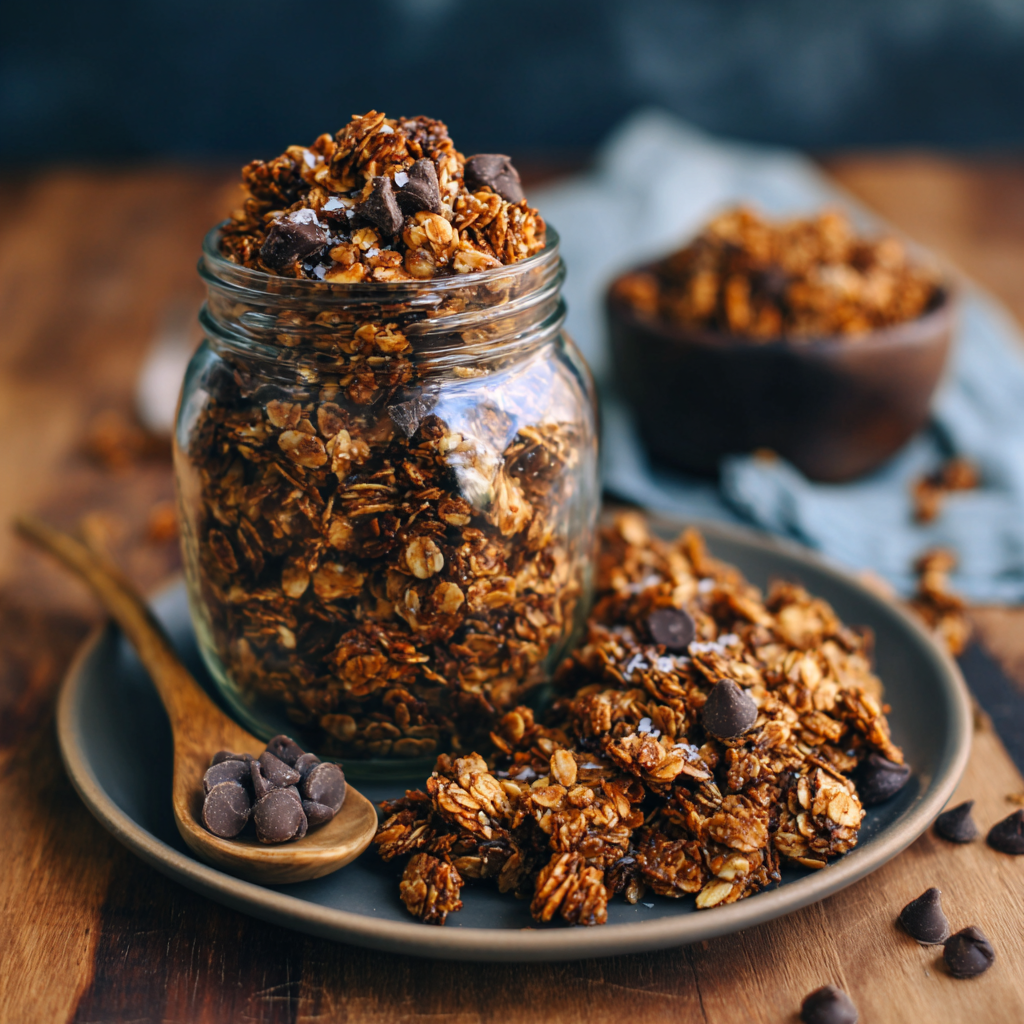
Hey friend! Tell me if this sounds familiar: you’re craving something sweet, but maybe it’s 10 am and a full-blown cookie feels like a lot. Or you’re staring into the fridge, willing your yogurt to be more exciting. Or perhaps you just need that perfect, crunchy-sweet-salty something to nibble on with your afternoon coffee.
Well, pull up a stool and get ready, because I’m about to change your snack game forever. I’m so incredibly excited to share this recipe for Salted Chocolate Chip Cookie Granola. This isn’t just any granola. This is the magical love child of your all-time favorite bakery-style chocolate chip cookie and the most addictive, cluster-filled homemade granola you’ve ever tasted. Imagine the toasty, nutty flavor of oats, the deep sweetness of brown sugar and maple, little pockets of melted dark chocolate, and a final, elegant kiss of flaky sea salt. It’s sweet, it’s salty, it’s crispy, it’s chewy in all the right places. It’s everything.
I make a batch of this nearly every single week. It fuels my writing mornings, gets packed into my kids’ lunchboxes (major win), and yes, I absolutely eat it by the handful straight from the jar. It turns basic yogurt into a decadent treat and ice cream into a next-level sundae. Best of all? It comes together in one bowl, bakes in about 25 minutes, and fills your kitchen with the most insanely good, warm, cookie-scented aroma. This is joyful, uncomplicated, magical cooking at its best. So, are you ready? Let’s make your kitchen smell amazing.
The Cookie That Started It All
PrintSalted Chocolate Chip Cookie Granola : Sweet, Crunchy & Totally Snackable

- Prep Time: 10 minutes
- Cook Time: 25 minute
- Total Time: 35 minutes
- Yield: 10 (1/3 cup each) 1x
Ingredients
Dry Ingredients:
-
2 cups old-fashioned rolled oats
-
1/2 cup almond flour or finely ground oats
-
1/3 cup brown sugar
-
1/2 tsp baking soda
-
1/4 tsp fine sea salt
Wet Ingredients:
-
1/2 cup melted coconut oil or unsalted butter
-
1/4 cup pure maple syrup or honey
-
1 tsp pure vanilla extract
Mix-Ins & Topping:
-
1/2 cup mini chocolate chips
-
Flaky sea salt (like Maldon), for sprinkling
Instructions
-
Preheat & Prep: Preheat oven to 325°F (160°C). Line a large rimmed baking sheet with parchment paper.
-
Mix Dry Ingredients: In a large bowl, whisk together oats, almond flour, brown sugar, baking soda, and 1/4 tsp salt.
-
Mix Wet Ingredients: In a separate bowl, combine melted coconut oil (or butter), maple syrup, and vanilla extract. Pour over the dry ingredients.
-
Combine & Fold in Chocolate: Stir until all oats are evenly coated. Fold in half of the chocolate chips (reserve the rest for after baking if desired).
-
Press for Clusters: Spread mixture onto prepared baking sheet and press down firmly into a compact layer (~1/4–1/2 inch thick).
-
Bake: Bake 20–25 minutes until edges are golden brown. Do not stir.
-
Cool & Finish: Remove from oven, sprinkle with flaky sea salt while still warm. Let cool completely on the pan before breaking into clusters.
-
Serve & Store: Enjoy on yogurt, ice cream, or by the handful! Store in an airtight container at room temperature for up to 2 weeks.
Nutrition
- Calories: 220 kcal
- Fat: 13 g
- Carbohydrates: 22 g
- Protein: 3 g
This recipe has a little bit of my heart baked right into it, and it all goes back to my Grandma Eleanor’s kitchen. Her chocolate chip cookies were legendary—crispy edges, soft centers, with just the tiniest sprinkle of salt on top that made you pause and go, “Wow, what is that?” It was her secret weapon.
One rainy afternoon, I was trying to recreate that specific nostalgic flavor but in a form I could justify eating for breakfast (hello, oats!). I was playing with granola bases, and the moment I added a pinch of baking soda (a classic cookie move), something magical happened. The granola developed this incredible, cookie-like chew and texture as it baked. When I folded in the chocolate chips and finished it with that familiar flaky salt, I literally did a little happy dance right there by the oven. It tasted like a memory, but in a fun, new, totally snackable form. It was the hug-in-a-bowl I didn’t know I needed, and now I get to share that hug with you.
Gathering Your Ingredients
Here’s what you’ll need to create this magic. Part of the joy here is how simple the list is—these are pantry staples with a purpose!
- 2 cups old-fashioned rolled oats: The hearty, chewy backbone of our granola. Don’t use quick oats or steel-cut here; we need the sturdy texture of old-fashioned to get those perfect clusters.
- 1/2 cup almond flour or finely ground oats: This is our secret cluster-maker! Almond flour adds a lovely, rich nuttiness and helps bind everything. No almond flour? Simply toss an extra 1/2 cup of oats into a blender or food processor and pulse until powdery.
- 1/3 cup brown sugar: For that deep, molasses-y, caramel-like sweetness that defines a great chocolate chip cookie. It’s non-negotiable for flavor and helps with crispness.
- 1/2 teaspoon baking soda: My little chef’s hack! This is what gives the granola that airy, crispy-yet-chewy texture reminiscent of a cookie. It’s a game-changer.
- 1/4 teaspoon fine sea salt: For balancing all the sweetness within the mix. We’ll add more fancy salt on top later!
- 1/2 cup melted coconut oil or unsalted butter: The fat that brings it all together and creates golden, crispy perfection. Coconut oil gives a subtly tropical note and keeps it dairy-free, while butter delivers that classic, rich cookie flavor. Use what you love!
- 1/4 cup pure maple syrup or honey: Liquid sweetener for shine, additional flavor, and helping to form those irresistible clusters. Maple is my favorite here.
- 1 teaspoon pure vanilla extract: The soul-warming aroma. It rounds out all the flavors beautifully.
- 1/2 cup mini chocolate chips: Mini chips distribute the chocolatey goodness more evenly than regular-sized ones. I prefer dark chocolate for a less-sweet bite, but milk chocolate is a nostalgic dream. Pro-tip: If you’re sensitive about melting, you can stir half in before baking and sprinkle the rest on after baking while it’s still warm.
- Flaky sea salt (like Maldon), for topping: The crowning glory. This final sprinkle makes the flavors pop and elevates this from a great snack to an unforgettable one.
Let’s Make It: Step-by-Step
Okay, apron on? Let’s do this. It’s incredibly simple, but I have a few key tips in the steps to ensure you get maximum cluster action.
Step 1: Preheat & Prep. Get your oven heating to 325°F (160°C). This is a slightly lower temp than some granolas, which helps us get golden without burning. Line a large, rimmed baking sheet with parchment paper. Don’t skip the parchment! It prevents sticking and makes cleanup a breeze.
Step 2: The Dry Team. In a large mixing bowl, whisk together the old-fashioned oats, almond flour (or ground oats), brown sugar, baking soda, and that 1/4 tsp of fine salt. Whisking helps to evenly distribute the baking soda and salt, which is key for consistent flavor and texture in every bite.
Step 3: The Wet Team. In a separate small bowl or measuring cup, combine the melted (and slightly cooled) coconut oil or butter, maple syrup, and vanilla. Give it a good stir until it’s a smooth, glossy liquid. Pour this over the dry ingredients.
Step 4: Bring It Together. Using a sturdy spatula or wooden spoon, mix everything together until every single oat is thoroughly, glisteningly coated. The mixture will be thick and slightly shiny. This is the foundation of our clusters! Now, gently fold in the mini chocolate chips. If you want to prevent any melting, you can hold back half of them for after baking.
Step 5: Press for Success! This is the MOST important step for big, beautiful clusters. Dump the mixture onto your prepared baking sheet. Use your spatula or clean hands to press it down firmly and evenly into one compact layer, about 1/4 to 1/2-inch thick. The more you press, the better it will hold together as it bakes.
Step 6: Bake to Golden Perfection. Slide the pan into your preheated oven. Bake for 20-25 minutes. You’re looking for the edges to be a deep, golden brown and the center to look set. It will still be soft when you take it out—that’s okay! It crisps up as it cools. Do not stir it during baking! We are not making loose granola; we are baking one giant granola “cookie” that we’ll break apart.
Step 7: The Patient Cool & Final Flourish. Take the pan out of the oven. While it’s still warm, immediately sprinkle the top with that gorgeous flaky sea salt. Then, let it cool completely on the pan. I know, the wait is torture! But breaking it while warm will give you crumbs instead of clusters. Once it’s totally cool, use your hands to break it up into beautiful, chunky pieces.
How to Enjoy Your Masterpiece
Now for the fun part! Transfer your clusters to a big, beautiful jar (it looks so pretty on the counter!). This granola is a superstar multitasker. My favorite way is layered in a parfait with thick Greek yogurt and fresh berries. It’s incredible sprinkled over a bowl of vanilla ice cream or apple slices with peanut butter. Toss a handful into your lunch bag for a perfect pick-me-up, or honestly, just grab the jar and a spoon. I won’t tell.
Make It Your Own: Fun Variations
Love the base recipe? Try one of these easy twists!
- “Everything But the…” Mix-In: After baking and cooling, stir in 1/4 cup each of toasted coconut flakes and chopped walnuts or pecans.
- Peanut Butter Cup: Replace 2 tablespoons of the coconut oil with creamy peanut butter when mixing the wet ingredients. Use peanut butter chips instead of chocolate chips.
- Double Chocolate: Add 2 tablespoons of unsweetened cocoa powder to the dry ingredients for an intensely chocolatey experience.
- Seasonal Spice: Add 1 tsp of cinnamon and a pinch of nutmeg to the dry ingredients for a cozy fall/winter vibe.
- Nut-Free & Vegan: Use ground oats instead of almond flour, coconut oil, and ensure your chocolate chips are dairy-free.
Anna’s Chef Notes & Kitchen Stories
This recipe has become such a staple in my house that my kids now call it “Cookie Crunch.” I’ve lost count of how many batches I’ve made, and I still get excited every time. One funny story: I once brought a giant jar of this to a neighborhood potluck, labeling it simply “Snack Granola.” Within 20 minutes, it was completely gone, and three people came up to me asking, “What WAS that? It tasted like I was eating cookies for breakfast!” Mission accomplished.
The recipe has evolved a bit—I started with just honey, but found maple syrup gives a more complex flavor. I also learned the hard way that stirring it halfway through baking results in sad, oatmealy bits, not clusters. The press-and-leave-it method is truly the way. This granola is a testament to my core belief: the best recipes are the ones that feel like a treat, are easy to make, and fill your home with love and delicious smells.
Your Questions, Answered
Q: My granola didn’t form big clusters! What did I do wrong?
A: The two most common culprits are not pressing the mixture firmly enough onto the pan before baking, or moving/stirring it while it’s still warm after baking. Press it down like you mean it, bake it, salt it, and then walk away until it’s completely cool. It will be worth the wait!
Q: Can I use quick oats instead of old-fashioned rolled oats?
A: I don’t recommend it. Quick oats are cut smaller and will result in a denser, less cluster-y, and potentially mushy texture. Old-fashioned oats give the perfect chew and structure.
Q: Why did my chocolate chips melt everywhere?
A> This can happen, especially with certain brands! If you want perfectly distinct chips, you can try one of two tricks: 1) Use a higher-quality chocolate chip labeled for baking (they often have stabilizers to hold shape), or 2) Stir in only half the chips before baking, and sprinkle the rest on top immediately after it comes out of the oven. They’ll set into the warm granola as it cools.
Q: How do I store this, and how long does it last?
A> Store it in an airtight container at room temperature for up to 2 weeks. It rarely lasts that long in my house! For the crunchiest texture, make sure the lid is sealed tight.
Quick Nutrition & Prep Facts
Prep Time: 10 mins | Cook Time: 25 mins | Total Time: 35 mins
Servings: About 10 (1/3 cup servings)
Estimated per serving: 220 calories, 3g protein, 22g carbohydrates, 13g fat
Final Thoughts from My Kitchen to Yours
And there you have it, friend—a granola that’s equal parts sweet, salty, crunchy, and utterly snackable. Salted Chocolate Chip Cookie Granola isn’t just a recipe; it’s a little hug in a bowl, a sprinkle of nostalgia, and a celebration of the joy that comes from turning simple ingredients into something magical.
Whether you’re spooning it over yogurt, sneaking handfuls straight from the jar, or sharing it with loved ones, I hope it brings a little spark to your day. Remember: the secret isn’t just in the baking—it’s in pressing down those clusters, letting them cool, and enjoying every single bite with a big smile.