Corned Beef Hash: Your New Secret Weapon for a Seriously Good Morning
Hey there, friend! Let’s talk about one of life’s simple, glorious pleasures: a skillet sizzling with crispy potatoes, savory bits of corned beef, and sweet, golden onions. That’s right, we’re making Corned Beef Hash today—and I promise, it’s about to become your go-to move for turning humble ingredients into a breakfast (or brunch, or dinner… no judgment here) that feels like a warm hug.
This isn’t just a recipe; it’s a revelation. It’s about resourcefulness (hello, brilliant leftovers!), texture (CRISPINESS IS NON-NEGOTIABLE), and that incredible moment when you break a silky fried egg yolk over the top and watch it cascade into every nook and cranny. Whether you’ve got leftover St. Patrick’s Day corned beef hanging out in your fridge or you’re grabbing a trusty can from the pantry, this one-pan wonder is your ticket to a deeply satisfying, magically easy meal. So, tie on that apron, grab your favorite well-seasoned skillet, and let’s cook up some magic together. This is the kind of dish that makes everyone wander into the kitchen asking, “What smells so amazing?” And you get to smile and say, “Just a little hash I whipped up.”
The Hash That Built a Weekend Tradition
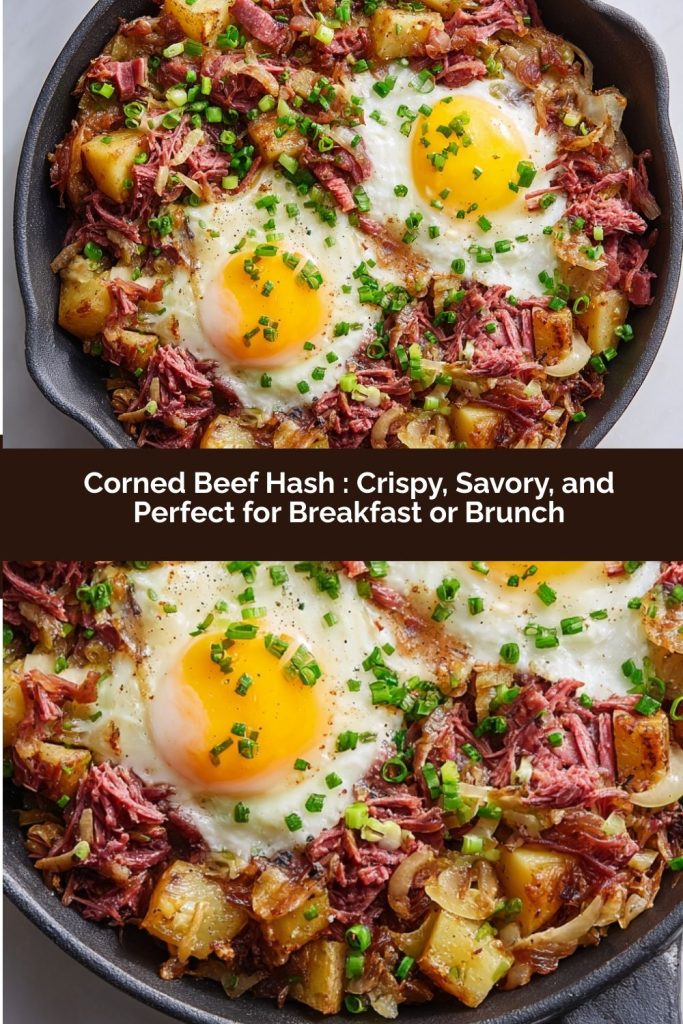
PrintCorned Beef Hash : Crispy, Savory, and Perfect for Breakfast or Brunch
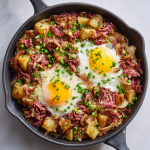
Corned beef hash is the ultimate comfort food—crispy potatoes, tender corned beef, and golden onions all fried up in one pan. Whether you’re using leftovers from a corned beef dinner or a can from the pantry, this recipe turns simple ingredients into a flavorful, filling meal. Top it with a fried egg for a breakfast that hits every craving, or serve it as a savory side for brunch or dinner.
- Prep Time: 10 minutes
- Cook Time: 20 minutes
- Total Time: 30 minutes
- Yield: 4 1x
Ingredients
2 cups cooked corned beef, chopped (or one 12 oz can, diced)
2 cups cooked potatoes, diced (Yukon Gold or russets work best)
1 small onion, diced
2 tablespoons butter or oil
Salt and pepper to taste
Optional: chopped parsley, garlic powder, paprika, or hot sauce
Optional Toppings:
Fried or poached eggs
Shredded cheese
Green onions
Instructions
Prep Ingredients: Use pre-cooked potatoes and corned beef for best texture. Leftovers or canned corned beef both work.
Heat the Skillet: In a large skillet, melt butter or heat oil over medium heat.
Sauté Onions: Add diced onion and cook until soft and lightly golden, about 5 minutes.
Add Beef & Potatoes: Stir in corned beef and potatoes. Press down slightly into an even layer.
Cook Until Crispy: Let cook undisturbed for 5–7 minutes to form a crust. Stir, flip, and repeat on the other side. Season with salt, pepper, and spices to taste.
Serve Hot: Top with fried eggs or herbs, and serve immediately.
Nutrition
- Calories: 350
- Fat: 22g
- Carbohydrates: 20g
- Protein: 18g
My love affair with hash started not in a fancy restaurant, but in my Grandpa Joe’s tiny, always-warm kitchen on sleepy Sunday mornings. After a big Saturday night family dinner, he’d appear like a culinary wizard, surveying the leftovers with a twinkle in his eye. A few boiled potatoes, some remnants of a roasted meat, a lone onion—nothing was safe from his hash-making mission. His version was always a surprise, but his corned beef hash was the undisputed champion.
The sound was the first thing I’d notice: the steady, comforting sizzle coming from his cast iron skillet. Then, the smell—salty, savory, peppery—would weave through the house, a scent more effective than any alarm clock. We’d crowd around his small table, and he’d serve us plates piled high with crispy, golden-brown hash, always with a perfectly fried egg on top. He’d tell us stories, we’d laugh, and for that hour, the world felt perfectly contained within those four walls. That’s the spirit I bring to this recipe. It’s more than food; it’s a feeling of home, of making something wonderful out of what you have, and of sharing it with people you love. Every time I make it, I get a little glimpse of that magic.
Gathering Your Hash-Making Heroes
Here’s the beautiful part: the ingredient list is short, sweet, and flexible. This is where we can get creative!
- 2 cups cooked corned beef, chopped – This is your star! Leftover homemade corned beef is fantastic, bringing its own unique spice blend. Chef’s Insight: No leftovers? A 12-ounce can of corned beef works beautifully in a pinch. Just drain it well and break it up with a fork. The canned version gives a softer, more dispersed texture that’s utterly delicious.
- 2 cups cooked potatoes, diced – I’m a Yukon Gold girl for their buttery texture and creamy interior that gets so fluffy. Russets are the crispiness king, giving you those amazing shatter-crisp edges. Pro Tip: Parboil your diced potatoes for 5-7 minutes until just tender if starting with raw. Or, use last night’s boiled or roasted potatoes—they fry up even better!
- 1 small onion, diced – Yellow onion is my workhorse here, offering a sweet, mellow flavor when cooked. A red onion adds a nice color pop and a slightly sharper bite if that’s your jam.
- 2 tablespoons butter or oil – Ah, the great debate! I use a combination: one tablespoon of butter for its unmatched flavor and one tablespoon of a neutral oil (like avocado or canola) with a higher smoke point. The butter tastes amazing, and the oil helps prevent burning. Win-win!
- Salt and black pepper to taste – Go easy on the salt at first, especially if your corned beef is already quite salty. Freshly cracked black pepper is a must.
- Optional Flavor Boosters: This is your playground! A minced garlic clove added with the onions, a teaspoon of smoked paprika for depth, a dash of Worcestershire sauce for umami, or a few shakes of your favorite hot sauce can take this from great to “OH WOW.”
- For Serving: Fried or poached eggs (the runny yolk is essential, in my opinion), chopped fresh parsley or chives for a bright finish, and maybe a sprinkle of sharp cheddar cheese if you’re feeling extra indulgent.
Let’s Make Some Crispy Magic: Step-by-Step
Ready? Let’s transform these simple ingredients into a skillet of golden, crispy perfection. I’ll walk you through every step with my favorite little hacks.
- The Prep Work is Key. Dice your onions and potatoes into even, ½-inch pieces. You want them all to be friends and cook at the same rate. If using canned corned beef, open it and break it into rough chunks with a fork. If using leftover, chop it into similar-sized pieces. Having everything ready to go (this is called your mise en place, fancy chef talk for “get organized”) makes the cooking process smooth and stress-free.
- Heat Your Pan Properly. Place your largest, heaviest skillet (cast iron is the absolute champion for this) over medium heat. Let it get warm for a minute, then add your butter-oil combo. You should see the butter melt and foam slightly. If it immediately smokes, your pan is too hot—just pull it off the heat for a sec to cool down. Chef’s Hack: A properly heated pan prevents sticking and is the secret to that initial sear.
- Sauté the Onions to Sweetness. Add the diced onions. We’re not just cooking them until they’re translucent; we’re going for a light golden color. This takes about 5-7 minutes, stirring occasionally. That caramelization builds a fantastic flavor foundation. If using garlic or dried spices (like paprika), add them in the last 30 seconds of cooking the onions so they become fragrant but don’t burn.
- Introduce the Beef & Potatoes. Now, add your corned beef and potatoes to the skillet. Gently stir everything to combine and get those onions distributed. Here’s the crucial part: PRESS IT DOWN. Use your spatula to firmly press the whole mixture into an even layer across the bottom of the pan. We’re creating contact! That contact equals crisping.
- The Art of the Crisp (Patience is a Virtue!). This is where you must resist the urge to constantly stir! Let the hash cook, undisturbed, for a good 5-7 minutes. Peek at the edges—you should see a beautiful golden-brown crust forming. Now, use your spatula to flip sections over (don’t worry about flipping it like a pancake; just turn large portions). Press down again and let it cook for another 5-7 minutes to crisp up the other side. You can do this a few times. Biggest Tip: If it’s not crisping, your heat might be too low. Don’t be afraid to nudge it up to medium-high.
- Season & Serve Immediately. Once you’re happy with the golden-brown crispiness all over, give it a final stir. Taste it! Now is the time to season with pepper and a little salt if needed. Spoon it onto plates while it’s piping hot and top with your fried eggs and herbs. The sizzle should be music to your ears.
Plating Your Masterpiece
Presentation is part of the fun! I love serving this family-style right in the skillet at the table (just remember the trivet!). For individual plates, use a wide, shallow bowl. Pile the hash generously on one side, letting it be rustic and textured. Carefully place your fried or poached egg right on top. Finish with a flurry of bright green chopped chives or parsley and a final crack of black pepper. The contrast of the golden hash, white egg, and green herbs is just beautiful. Serve with toast points for scooping or a simple side of juicy tomatoes.
Make It Your Own: Delicious Twists
Once you master the classic, the world is your hash-filled oyster! Try these fun variations:
- Root Vegetable Hash: Swap half the potatoes for diced sweet potato, parsnip, or carrot. Add a pinch of thyme.
- “Reuben” Hash: Stir in a cup of shredded Swiss cheese during the last minute of cooking and serve with a drizzle of Thousand Island dressing and a sprinkle of caraway seeds.
- Spicy Southwest Hash: Use a diced red bell pepper with the onions, add a minced jalapeño, and season with cumin and chili powder. Top with avocado and a dollop of sour cream.
- Breakfast “Shepherd’s Pie”: After crisping, make four little wells in the hash. Crack an egg into each well, cover the skillet, and cook until the eggs are set to your liking.
- Vegetarian “Corned Beef” Hash: Replace the corned beef with diced, seasoned tempeh or extra mushrooms sautéed until very brown and hearty.
Anna’s Corner: More Thoughts & Stories
This recipe has evolved so much in my kitchen. I used to stir it constantly, wondering why I never got those big, crispy bits. My Grandpa’s voice in my head (“Let it be, Anna!”) finally got through, and it was a game-changer. Don’t fear the crisp!
I also learned that the type of potato really does matter. A russet will give you a diner-style hash with super crisp edges, while Yukon Golds give a softer, more cohesive patty-like hash. Both are wonderful—it just depends on your mood. And a funny story: I once tried to “healthy it up” by using no oil in a non-stick pan for my husband. It steamed more than fried, and we looked at the sad, pale result and immediately started over. Some traditions, like a good glug of butter and oil, are worth keeping. Life’s too short for steamed hash!
Your Hash Questions, Answered!
Q: My hash is sticking to the pan! What did I do wrong?
A: This usually means the pan wasn’t hot enough before adding the fat, or you tried to flip it too early. Make sure your butter/oil is shimmering before adding ingredients. And that initial crust needs time to form; it will naturally release from the pan when it’s ready. A well-seasoned cast iron or carbon steel pan is your best friend here.
Q: Why is my hash soggy and not crispy?
A> Three likely culprits: 1) The potatoes were too wet. Make sure boiled potatoes are drained well and patted dry. 2) The pan was overcrowded. If your skillet is too small, the hash steams instead of fries. Use the biggest one you have! 3) Not enough patience! Let it cook undisturbed for those full 5-7 minutes per side to build that crust.
Q: Can I make this ahead of time?
A> You can prep the components ahead (dice onions, cook potatoes, chop beef), but for the best texture, cook it fresh. Leftover cooked hash reheats decently in a skillet over medium heat to re-crisp, but it’s truly magical right out of the pan.
Q: What’s the best way to get those perfect, runny-yolk fried eggs for on top?
A> I cook my eggs separately while the hash rests for a minute. Heat a little butter in a non-stick pan over medium-low. Crack the eggs in, let the whites set slightly, then add a tiny splash of water to the pan and cover it with a lid. The steam will cook the top of the whites while keeping the yolk gloriously runny, about 2-3 minutes.
Nutritional Information (Approximate, per serving without egg)
This is a hearty, satisfying dish! Estimates are based on using 2 tbsp oil and homemade corned beef. Values can vary widely based on specific ingredients, especially sodium content in canned vs. homemade corned beef.
- Calories: ~350
- Protein: 18g
- Carbohydrates: 20g
- Fat: 22g
- Fiber: 2g
Remember, food is about nourishment AND joy. This dish is packed with both.
Final Thoughts
This Corned Beef Hash isn’t just a recipe—it’s a little piece of nostalgia, comfort, and culinary magic all in one skillet. The crisped edges, tender potatoes, and savory, flavorful beef create a harmony of textures and tastes that makes every bite feel like home. Whether you’re using leftovers, pantry staples, or making it fresh from scratch, this dish proves that simple ingredients can deliver big satisfaction.
Serve it for breakfast, brunch, or even a cozy dinner, and don’t forget that runny fried egg on top—it’s the crown jewel that turns this hash into something truly unforgettable. Play with add-ins, swap in your favorite spices, or layer in veggies; the beauty of this recipe is that it’s flexible, forgiving, and endlessly delicious.
Ultimately, Corned Beef Hash is proof that comfort food doesn’t need to be complicated—it just needs heart, a little patience, and maybe a skillet that can handle all the golden, crispy goodness you’re about to create.