Let’s Crack Into the Ultimate Dessert: Classic Crème Brûlée
Hey there, friend! Grab your favorite mixing bowl and pull up a chair. Today, we’re diving into one of my all-time, hands-down, make-you-swoon favorite desserts: Classic Crème Brûlée. Now, I know what you might be thinking. “Anna, that sounds so fancy. Isn’t that something only restaurants make?” I’m here to tell you, with a sparkle in my eye and a whisk in my hand, that this dreamy dessert is not only possible in your kitchen—it’s an absolute joy to create.
At its heart, crème brûlée is a beautiful contradiction: a dessert of stunning sophistication built on humble, simple principles. Silky, cool, vanilla-speckled custard hiding under a shield of audibly crisp, caramelized sugar. That moment when your spoon cracks through that perfect top? Pure magic. It’s a theatrical finish to any meal that makes everyone feel special.
The best part? You only need a handful of pantry staples and a little bit of patient love. No fancy culinary degree required, just a willingness to follow a few key steps. I promise, the process is as satisfying as the result. We’ll walk through it together, step-by-step, with all my favorite chef hacks and reassuring whispers. So, let’s turn off the outside noise, preheat the oven, and create something truly, deliciously amazing. Your inner pastry chef is waiting to shine.
A Cracked Top & A Full Heart: My First Brûlée
PrintClassic Crème Brûlée Recipe : Silky, Creamy, and Perfectly Caramelized
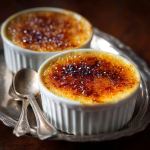
Crème Brûlée is the ultimate elegant dessert—rich vanilla custard with a crisp, crackly sugar top. This classic French treat is surprisingly simple to make at home with just a few ingredients and a little patience. Whether you’re serving guests or treating yourself, this creamy, crunchy, melt-in-your-mouth dessert always impresses.
- Prep Time: 15 minutes
- chill time: 2+ hours
- Cook Time: 40 minutes
- Total Time: 3 hours
- Yield: 4–6 1x
Ingredients
2 cups heavy cream
5 large egg yolks
1/2 cup granulated sugar (plus more for topping)
1 tsp pure vanilla extract or 1 vanilla bean
Pinch of salt
Instructions
Preheat oven to 325°F (160°C).
Heat cream: In a saucepan, heat heavy cream until just steaming—not boiling. If using a vanilla bean, split and scrape it into the cream, then add the pod too. Let steep.
Mix yolks & sugar: In a bowl, whisk egg yolks, sugar, salt, and vanilla extract until pale and smooth.
Temper yolks: Slowly pour warm cream into the yolk mixture while whisking constantly.
Strain custard through a fine sieve into a large measuring cup or bowl to remove any cooked bits or foam.
Pour into ramekins: Divide mixture into 4–6 ramekins. Place them in a deep baking dish.
Create a water bath: Pour hot water into the baking dish halfway up the sides of the ramekins.
Bake for 30–40 minutes until custard is set but slightly jiggly in the center.
Cool & chill: Remove ramekins from water bath, let cool to room temp, then refrigerate for at least 2 hours (or overnight).
Caramelize sugar: Before serving, sprinkle 1–2 teaspoons of sugar on top of each custard and torch until golden and crisp. No torch? Use the broiler for 2–3 minutes (watch carefully!).
Nutrition
- Calories: ~320
- Fat: 28g
- Carbohydrates: 20g
- Protein: 5g
My love affair with crème brûlée started a little… lopsided. I was in my early twenties, determined to impress a date by cooking a “grown-up” dinner. The main course was forgettable, but I decided to go all out on dessert. I found a crème brûlée recipe, bought my first set of ramekins, and proceeded with a mix of bravado and sheer terror.
Everything felt precarious. Tempering the eggs felt like a high-wire act. My water bath sloshed ominously as I shoved the pan into the oven. But the real drama came with the torch. I didn’t have a kitchen torch (who did?), so I used my dad’s heavy-duty hardware store blowtorch. Let me tell you, the vibe was less “French patisserie” and more “construction site.” I hovered over those ramekins, blue flame roaring, sugar blackening in spots before it even melted in others. The results were… varied. One was perfect, one was burnt, and two were just warm custard with sad, granular sugar.
But you know what? When we cracked into the one good one, that sound—that definitive, satisfying crack—and the contrast of textures made us both laugh with delight. It wasn’t perfect, but it was fun and made with heart. That’s the spirit I want to bring to you today. Forget perfection. Let’s aim for delicious, joyful, and maybe just a little bit magical. I’ve traded the blowtorch for a proper kitchen one, but the feeling of triumph is exactly the same.
Gathering Your Magic: The Crème Brûlée Lineup
See? I told you it was simple! Just five core ingredients come together to create this masterpiece. Quality matters here, but don’t stress—I’ve got swaps and insights for you.
- 2 cups heavy cream: This is the foundation of our lush, luxurious custard. Don’t be tempted to use half-and-half or milk; the high fat content in heavy cream (or double cream) is what gives crème brûlée its signature mouthfeel. For a slightly lighter version, you can use 1 cup heavy cream and 1 cup whole milk, but know the texture will be a touch less rich.
- 5 large egg yolks: Our natural thickeners and the source of that glorious golden color. Save the whites for a fluffy omelet or pavlova tomorrow! Pro tip: Have your eggs at room temperature for easier blending and a smoother final custard.
- 1/2 cup granulated sugar, plus more for topping: The sugar in the custard sweetens and tenderizes. For the crackly top, you’ll need extra—about 1-2 tsp per ramekin. Superfine sugar caramelizes beautifully and evenly, but regular granulated works great too.
- 1 tsp pure vanilla extract OR 1 whole vanilla bean: This is where the flavor sings. A real vanilla bean, split and scraped, gives those beautiful little specks and a deep, complex aroma. If using extract, ensure it’s pure, not imitation. In a pinch, you could use vanilla bean paste—it’s a fantastic middle ground!
- A tiny pinch of salt: Trust me on this. It’s not enough to taste “salty,” but it heightens all the other flavors and balances the sweetness perfectly. It’s the secret weapon in most desserts.
Let’s Make the Magic: Step-by-Step Guide
Ready? Aprons on. Let’s transform these simple ingredients into something extraordinary. Read through once, then join me in the kitchen!
- Preheat & Prep: Preheat your oven to 325°F (160°C). Place 4-6 ramekins (each about 4-5 oz) in a deep baking dish—a roasting pan or 9×13″ cake pan works perfectly. This is our future water bath station. Chef’s Whisper: Putting them in now saves you from juggling hot, liquid-filled dishes later.
- Heat the Cream: In a medium saucepan, pour the heavy cream. If using a vanilla bean, slice it lengthwise, scrape the sticky seeds into the cream, and toss in the pod too. Heat over medium heat until it’s just beginning to steam and you see small bubbles forming around the edges. Do not let it boil. Remove from heat, cover, and let it steep for 15-20 minutes if you used the bean. If using extract, you’ll add it later—just heat the cream until steaming.
- Whisk Yolks & Sugar: In a separate medium bowl, whisk together the egg yolks and 1/2 cup of sugar. Whisk vigorously for a good 1-2 minutes until the mixture is pale yellow, slightly thickened, and falls from the whisk in a ribbon. This step incorporates air and helps ensure a smooth texture. Whisk in the salt and vanilla extract (if using instead of a bean).
- The Tempering Tango: This is the only “scary” part, and I’m here to demystify it! Slowly, and I mean in a very thin stream while whisking the yolk mixture CONSTANTLY, pour the warm cream into the bowl. The goal is to raise the temperature of the eggs gradually without scrambling them. If you just dump it in, you’ll get sweet scrambled eggs—not what we want! Once about half the cream is incorporated, you can pour the rest in a bit faster.
- Strain for Silk: Place a fine-mesh sieve over a large measuring cup or bowl (something with a spout makes pouring easier). Pour the custard mixture through the strainer. This catches any tiny bits of cooked egg or the vanilla bean pod, guaranteeing a flawlessly silky texture. Give the strainer a little tap to help it through.
- Pour & Bath: Divide the strained custard evenly among your waiting ramekins. Now, carefully transfer the baking dish with the ramekins to the oven rack. Using a kettle or a measuring cup, pour very hot or boiling water into the baking dish until it comes halfway up the sides of the ramekins. Chef’s Hack: Do this with the oven rack pulled out to avoid dangerous sloshing. The water bath (or bain-marie) ensures gentle, even heat so our custard sets without curdling or cracking.
- Bake to Perfection: Bake for 30-40 minutes. The custards are done when the edges are set but the center still has a slight, gentle jiggle—like Jell-O—when you nudge the pan. They will firm up as they cool. Overbaking leads to a grainy texture, so when in doubt, err on the side of underdone.
- The Patient Chill: Using tongs or a dry kitchen towel, carefully remove the ramekins from the water bath and place them on a cooling rack. Let them come to room temperature, then cover each loosely with plastic wrap (to prevent fridge smells) and chill for at least 2 hours, but preferably overnight. This chilling time is non-negotiable—it allows the custard to fully set and the flavors to marry beautifully.
- The Grand Finale: Caramelize! Right before serving, blot the tops of the chilled custards with a paper towel to remove any condensation. Sprinkle an even, thin layer (about 1-2 teaspoons) of sugar over each one. Tilt and tap to spread it evenly. Using a kitchen torch, hold the flame about 2 inches away and move it in slow, circular motions until the sugar melts, bubbles, and turns a deep amber brown. Let it sit for a minute to harden into that perfect glass-like shell. No Torch? Place ramekins on a baking sheet and broil on high for 2-4 minutes, watching like a hawk, until sugar caramelizes.
Serving Your Masterpiece
Serve your crème brûlée immediately after torching, while the top is still dramatically warm and the custard is cool. I love placing each ramekin on a small dessert plate, maybe with a few fresh berries on the side for a pop of color and a hint of tartness. Provide a dessert spoon and encourage your guests to tap the top to hear that glorious crack. It’s all part of the experience! It pairs beautifully with a glass of late-harvest dessert wine, a cup of strong coffee, or just the simple pleasure of a quiet evening.
Play With Your Food! Delicious Twists
Once you’ve mastered the classic, the world is your custard! Here are a few fun ways to mix it up:
- Citrus Dream: Add the zest of one orange or lemon to the cream while heating. Strain it out with the vanilla bean for a bright, sunny flavor.
- Lavender Honey: Steep 1 tablespoon of culinary lavender buds in the hot cream (strain well!). Replace 2 tablespoons of the sugar in the custard with honey.
- Chocolate Indulgence: Whisk 3 ounces of finely chopped dark chocolate into the hot cream until melted and smooth before tempering with the eggs.
- Coconut Bliss (Dairy-Free): Replace heavy cream with full-fat canned coconut milk. The flavor and texture are wonderfully rich and tropical.
- Espresso Shot: Dissolve 1 tablespoon of instant espresso powder in the warm cream for a delicious mocha brûlée.
Anna’s Kitchen Notes
This recipe has been my steadfast friend for years—it’s the dessert I make when I want to show love without saying a word. It’s evolved from my blowtorch fiasco into a reliable, joyful ritual. I’ve learned that the chill time is your best friend; a brûlée chilled overnight is always superior to one rushed after 2 hours. I also keep a dedicated notebook by my oven to jot down bake times, as every oven has its own personality. My current oven takes 37 minutes exactly for my favorite ramekins. Find your sweet spot! And remember, even if a crack forms in the custard (it happens to the best of us!), that sugary top will hide a multitude of sins. The taste will still be incredible. Cooking, like life, is about embracing the delicious imperfections.
Your Questions, Answered!
Q: My custard turned out grainy/watery. What went wrong?
A: Graininess usually means the eggs were overcooked. Next time, bake for a few minutes less—remember the jiggle! Wateriness can happen if the custard wasn’t baked long enough to set properly, or if the eggs and cream weren’t fully incorporated. Ensure you’re whisking thoroughly during tempering and straining.
Q: Can I make this ahead of time?
A: Absolutely! In fact, I encourage it. The baked and chilled custards (without the sugar topping) will keep beautifully in the fridge, well-covered, for up to 3 days. Caramelize the sugar just before serving.
Q: My sugar topping is getting soggy/won’t stay hard.
A> First, make sure you blot the custard tops completely dry before sugaring. Moisture is the enemy of a crisp shell. Second, use enough sugar to create a thin, even layer. Too little won’t form a proper shell. Lastly, ensure you caramelize it thoroughly to a deep amber—pale gold sugar stays sticky.
Q: I don’t have ramekins. What can I use?
A: Any oven-safe ceramic dish of a similar size will work! Small coffee cups, ceramic pinch bowls, or even wide mason jars (ensure they are heat-safe for baking) can be charming alternatives. Just adjust the bake time if the depth of the custard changes.
Nutritional Information (Per Serving, approx.)
Note: This is an estimate for 1 of 6 servings. For precise dietary needs, use a nutritional calculator with your exact ingredients.
Calories: ~320 | Protein: 5g | Carbohydrates: 20g | Fat: 28g | Saturated Fat: 16g | Cholesterol: 245mg | Sodium: 45mg | Sugar: 18g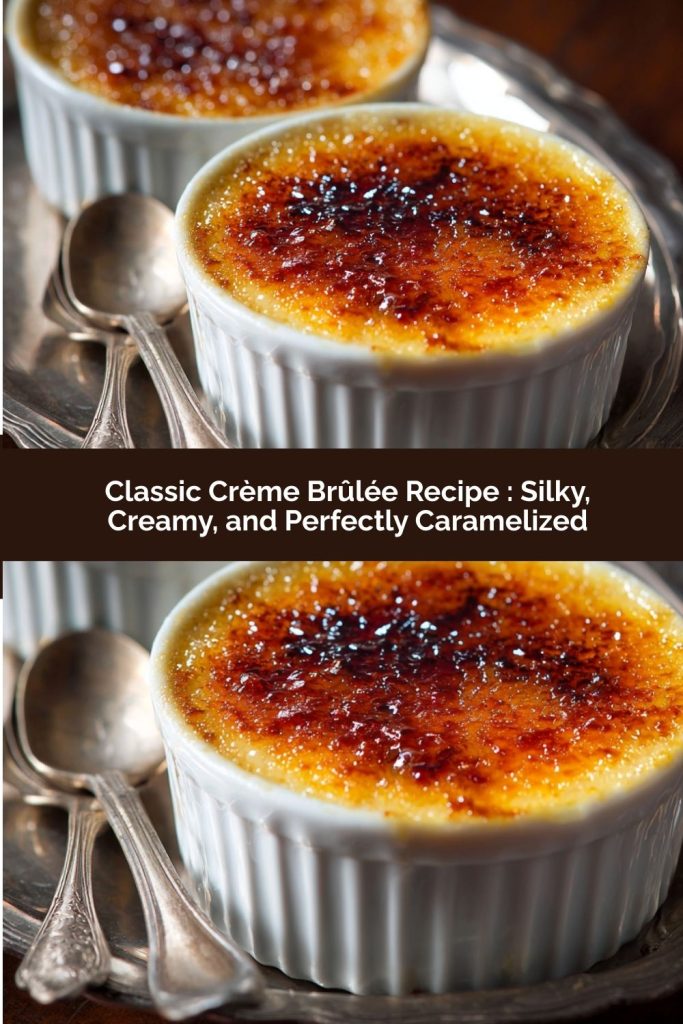
Final Thoughts: A Little Spoonful of Magic
There are desserts that taste good… and then there are desserts that feel like something. Crème brûlée is one of those rare little miracles that turns an ordinary evening into an occasion. That gentle crack of caramelized sugar, the cool velvet custard underneath, the quiet smiles around the table—it’s simple food, made special by a bit of care.
I love that this recipe asks us to slow down just a touch. To warm the cream patiently. To whisk with intention. To let the custards chill while life hums along in the background. It’s not rushed food. It’s the kind you make when you want to show love without saying a word.
Whether this is your first brûlée or your fiftieth, whether your sugar top is perfectly glassy or charmingly rustic, I hope it brings you that same small thrill it still gives me—the one that says, I made this… and it’s beautiful.