When Taco Night and Pasta Night Fall in Love: Meet Your New Family Favorite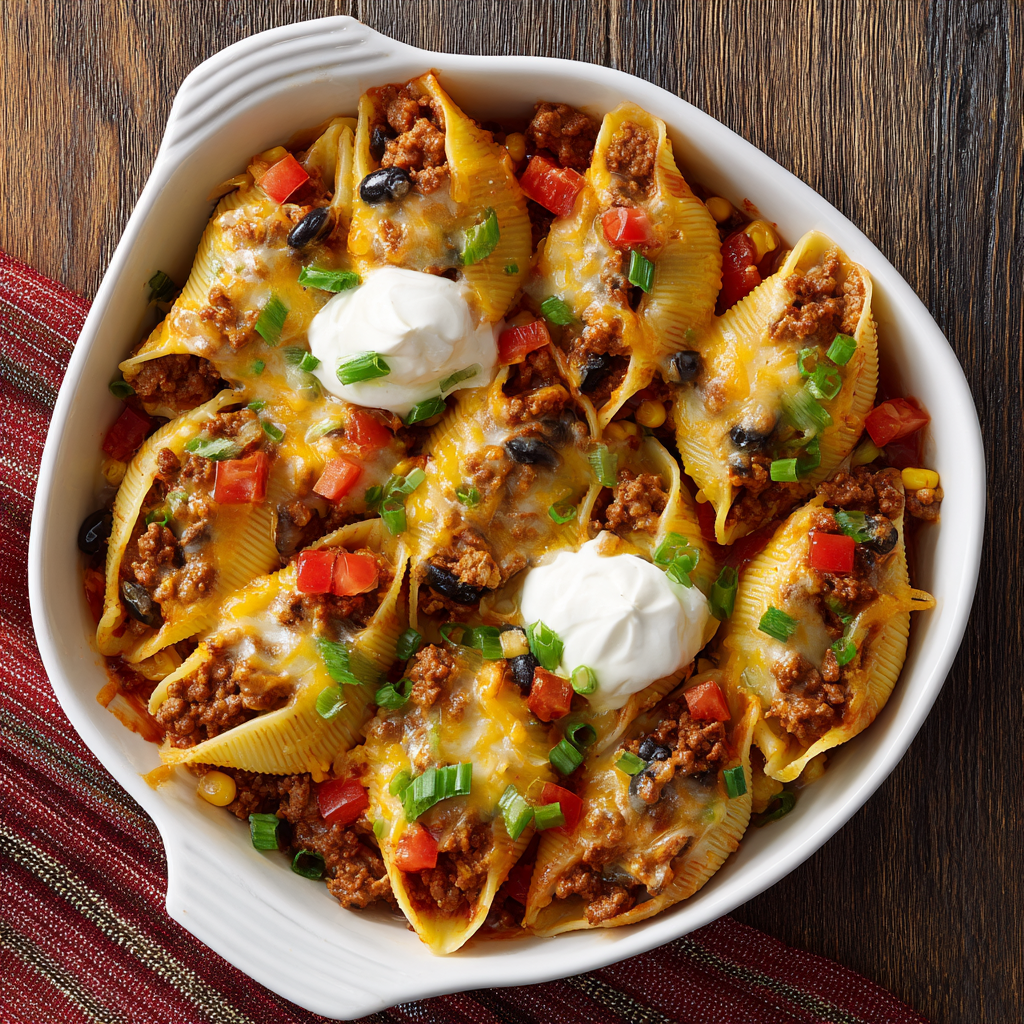
Hey there, friend! Have you ever stood in front of the fridge or scrolled through dinner ideas, totally torn between two culinary cravings? One part of your soul is whispering, “Cozy, carb-y pasta bake…” while the other is boldly declaring, “Spicy, festive taco night!” For the longest time, I felt like I had to choose. That is, until a particularly chaotic Tuesday night when my kids were lobbying for tacos and I was dreaming of a bubbling, cheesy casserole. Instead of playing referee, I had a lightning-bolt idea: what if we didn’t choose? What if we married them?
And just like that, Taco-Stuffed Jumbo Shells were born in my kitchen. This isn’t just a recipe; it’s a dinner truce, a celebration, and the ultimate comfort food mashup. Imagine all the bold, smoky flavors of your favorite taco—seasoned ground beef, melted cheese, a hint of salsa—tucked inside tender jumbo pasta shells, then baked until the whole dish is golden, bubbly, and irresistible. It’s the cozy hug of pasta night wearing a sombrero, and let me tell you, it’s a guaranteed crowd-pleaser. Whether you’re feeding a hungry family, prepping meals for the freezer, or just want to treat yourself to something wonderfully fun and delicious, this dish is your answer. So, tie on that apron, and let’s turn dinner into the best part of your day!
The Tuesday Night Truce: A Kitchen Story
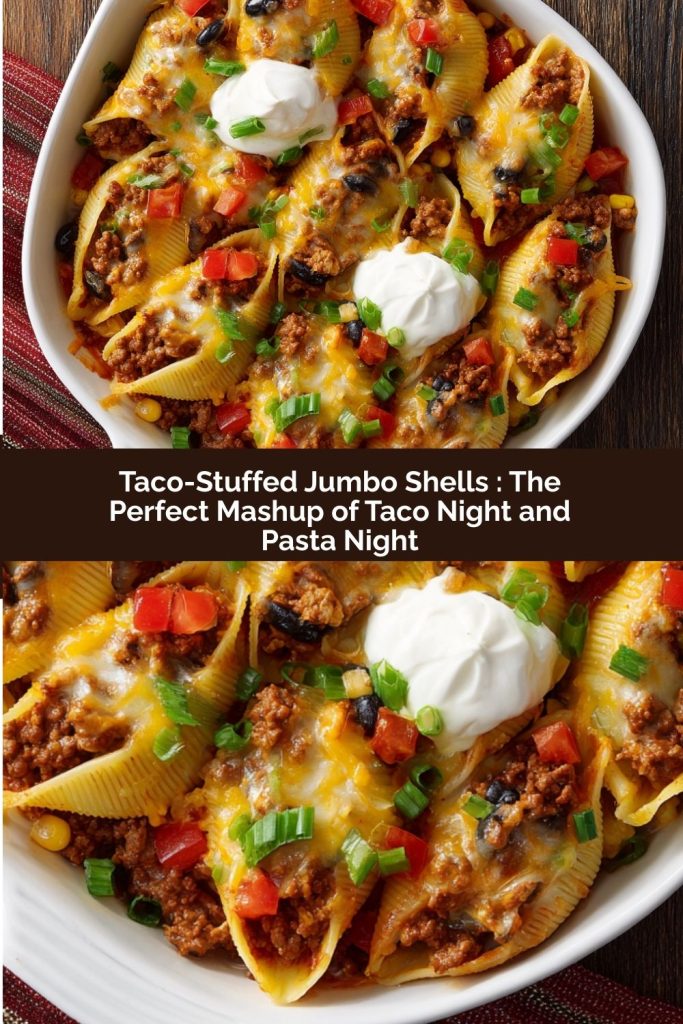
PrintTaco-Stuffed Jumbo Shells : The Perfect Mashup of Taco Night and Pasta Night

Taco-Stuffed Jumbo Shells are the ultimate dinner truce—bold taco flavors wrapped in tender pasta shells, baked with melty cheese and topped with all your favorite fixings. It’s family-friendly, freezer-friendly, and always a hit. Think of it as taco night meets pasta bake, bringing the best of both worlds to the table in one cheesy, craveable dish.
- Prep Time: 20 minutes
- Cook Time: 25 minutes
- Total Time: 45 minutes
Ingredients
20–24 jumbo pasta shells, cooked al dente
1 lb ground beef or turkey
2 tablespoons taco seasoning
½ cup salsa (plus extra for topping)
1 cup shredded cheddar or Mexican blend cheese
1 cup shredded mozzarella cheese
½ cup black beans or corn (optional mix-in)
Sour cream, diced tomatoes, green onions, or avocado (for topping)
Instructions
Cook the Shells
Boil shells in salted water until just tender. Drain and cool.
Make the Filling
Brown ground meat in a skillet. Drain fat, then stir in taco seasoning and salsa. Simmer for 2–3 minutes. Mix in half the cheese and optional beans or corn.
Stuff the Shells
Spoon the taco filling into each shell. Arrange in a greased baking dish.
Top and Bake
Spoon extra salsa over the shells and sprinkle with remaining cheeses. Cover with foil and bake at 375°F for 20 minutes. Uncover and bake 5–10 more until bubbly and golden.
Serve
Top with sour cream, tomatoes, avocado, or green onions. Serve warm.
Nutrition
- Calories: 470
- Fat: 27g
- Carbohydrates: 30g
- Protein: 28g
This recipe lives in my heart as the “Peace Treaty of 2022.” Picture it: my daughter, then 7, was adamant. “It’s Tuesday! We always have tacos on Tuesday!” (A tradition I may have accidentally cemented). My husband, meanwhile, was eyeing a box of pasta on the counter with a hopeful sigh. The “what’s for dinner” debate was reaching peak decibel levels. In a moment of inspired desperation, I held up a single jumbo shell I’d been testing for another recipe. “What,” I asked them, “if we put the taco… inside the pasta?” The silence was immediate, followed by intrigued giggles. We became a kitchen assembly line—my son carefully spooning the filling, my daughter arranging the shells in the dish like a puzzle, all of us sprinkling cheese with abandon. The smell that filled the kitchen as it baked was pure magic: familiar, but excitingly new. That night, there were no debates, just empty plates and the unanimous vote: “This is our new favorite.” It reminded me that the best meals aren’t just about flavor; they’re about the joy of creating something together, turning a routine dinner into a little adventure.
Gathering Your Flavor Party: Ingredients & Why They Work
Here’s everything you’ll need to bring this fusion feast to life. I’ve included my favorite tips and swaps so you can make it your own with what you have on hand!
- 20–24 jumbo pasta shells: The edible vessels for our taco joy! Cook them al dente (just tender) because they’ll soften more in the oven. Chef’s Insight: Salting your pasta water generously is your first chance to build flavor—it should taste like the sea!
- 1 lb ground beef or turkey: I use 85/15 beef for a great balance of flavor and not too much grease. Lean ground turkey is a fantastic, lighter alternative. Pro Tip: Blending half beef, half pork sausage is a next-level move for incredible depth.
- 2 tablespoons taco seasoning: The flavor powerhouse! Use your favorite store-bought packet or make your own blend (equal parts chili powder, cumin, paprika, garlic & onion powder, plus a pinch of oregano and cayenne).
- ½ cup salsa (plus extra for topping): This adds moisture and a tangy kick. I love a classic tomato-based medium salsa, but a smoky chipotle or fruity mango salsa can take it in a fun new direction!
- 1 cup shredded cheddar or Mexican blend cheese: For that sharp, melty goodness. Chef’s Hack: Buy a block and shred it yourself! Pre-shredded cheese has anti-caking agents that can make it less smooth when melted.
- 1 cup shredded mozzarella cheese: The perfect melty, creamy counterpart to the cheddar. It creates that irresistible golden-brown top we all love.
- ½ cup black beans or corn (optional mix-in): Want to stretch the filling or add more texture? A drained can of black beans or corn (or both!) is perfect. It’s also an easy way to add more veggies.
- Sour cream, diced tomatoes, green onions, avocado (for topping): The “fresh bar” is non-negotiable! It adds coolness, crunch, and brightness that cuts through the rich, cheesy bake. Don’t skip it!
Let’s Build Some Magic: Your Step-by-Step Guide
Follow these simple steps, and you’ll have a masterpiece in no time. I’ve tucked my favorite kitchen hacks right in there with you!
Step 1: Cook the Shells. Bring a large pot of well-salted water to a rolling boil. Gently add your jumbo shells. Cook them for about 1-2 minutes less than the package suggests for al dente. They’ll finish cooking in the oven, and this prevents them from becoming mushy. Drain carefully and let them cool in a single layer on a baking sheet or foil. Little Chef Hack: Drizzle them with a tiny bit of oil and give them a gentle toss to prevent sticking while they cool.
Step 2: Make the Filling. While the pasta cooks, brown your ground meat in a large skillet over medium-high heat, breaking it up with a spoon. Once it’s no longer pink, drain off any excess fat. Reduce the heat to medium-low and stir in the taco seasoning and ½ cup of salsa. Let it simmer together for 2-3 minutes—this wakes up the spices! Take it off the heat and stir in the black beans or corn (if using) and HALF of your combined cheeses. Let this mixture cool for a few minutes; it makes the stuffing process much easier (and less messy!).
Step 3: Stuff the Shells. Preheat your oven to 375°F (190°C). Lightly grease a 9×13 inch baking dish. Now, for the fun part! Using a spoon or a small cookie scoop, generously fill each cooled shell with the taco meat mixture. Don’t be shy—pack it in! Arrange them snugly, open-side up, in your prepared dish. They can be cozy; it helps them stay upright.
Step 4: Top and Bake. Spoon a few extra tablespoons of salsa over the tops of the stuffed shells—this keeps everything moist. Now, shower them with the remaining cheese! Cover the dish tightly with aluminum foil. Bake covered for 20 minutes. This essentially steams the shells, making them perfectly tender. Then, remove the foil and bake for another 5-10 minutes, or until the cheese is gloriously melted, bubbly, and just starting to get those golden-brown spots.
Step 5: The Grand Finale – Rest & Top! I know it’s tempting to dive right in, but let the bake rest for 5-10 minutes after pulling it from the oven. This allows the filling to set slightly, making serving much cleaner. This is when you get to be an artist! Dollop with sour cream, scatter with fresh tomatoes and green onions, add creamy avocado slices… make it as colorful and festive as your taco night dreams!
How to Serve It Up (The Fun Part!)
Presentation is part of the joy! I love serving this right from the baking dish at the center of the table, with all the topping options in little bowls around it. Let everyone build their own perfect plate. It’s fabulous with a simple side salad dressed with a lime-cilantro vinaigrette (to keep the theme going!) or just some crispy tortilla chips for scooping up any runaway fillings. It’s a complete, satisfying meal that turns dinner into an interactive, happy event.
Make It Your Own: Delicious Twists & Swaps
The beauty of this recipe is its flexibility! Here are a few ways to mix it up:
- Chicken Fajita Style: Swap the ground beef for shredded rotisserie chicken or diced sautéed chicken breasts. Use a fajita seasoning blend and mix in sautéed bell peppers and onions.
- Fully Loaded Vegetarian: Use a plant-based ground “meat” or a mixture of rinsed lentils and finely chopped mushrooms. Add black beans, corn, and diced zucchini to the filling.
- Spicy Tex-Mex: Kick up the heat! Use hot taco seasoning, add a diced jalapeño to the meat while browning, and top with pickled jalapeños and a drizzle of crema.
- Breakfast-for-Dinner Shells: Fill with scrambled breakfast sausage, a bit of scrambled egg, and cheese. Top with salsa and avocado for the ultimate brunch bake!
Anna’s Chef Notes & Kitchen Confessions
This recipe has become a beloved staple in my home, and it’s evolved in the best ways. I once accidentally used a whole jar of extra-chunky salsa (reading is fundamental, folks!). The result was a saucier, almost enchilada-style dish that we now request on purpose! I also highly recommend making a double batch. Assemble a second dish, cover it tightly, and freeze it before baking. On a future busy night, just pop it in the oven straight from the freezer (adding 20-30 extra minutes to the bake time, covered). It’s like giving your future self a delicious high-five. And my biggest kitchen confession? I always “test” at least one shell straight from the pan before it’s topped and baked. A little chef’s treat for quality control, of course!
Your Questions, Answered: FAQs & Troubleshooting
Q: My shells tore while cooking/stuffing. Help!
A: No worries! This happens to everyone. First, ensure you don’t overcook them initially. If a few tear, just arrange them in the dish so the torn side is facing down—they’ll still hold most of the filling. The cheese and sauce will glue everything together in the oven.
Q: Can I make this ahead of time?
A: Absolutely! You can assemble the entire dish, cover it, and refrigerate it for up to 24 hours. When you’re ready to bake, you may need to add 5-10 minutes to the covered baking time since it’s starting from cold. The freezer option (mentioned above) is also a lifesaver.
Q: The filling seems dry. What did I do wrong?
A: The two main culprits are over-draining the meat (leave a tiny bit of moisture) or not using enough salsa. The salsa is key for sauciness! If your mix looks dry, don’t hesitate to stir in an extra couple of tablespoons of salsa, enchilada sauce, or even a splash of broth before stuffing.
Q: What’s the best way to reheat leftovers?
A: To keep the shells from getting soggy, reheat individual portions in the oven at 350°F (covered with foil) or in an air fryer for a few minutes until hot. The microwave works in a pinch, but the texture of the pasta won’t be quite as perfect.
Nutritional Information*
*This is an approximate estimate per serving (based on 6 servings, using 85/15 ground beef and including optional black beans). For precise counts, use your preferred calculator with specific brand ingredients.
- Calories: ~470
- Protein: 28g
- Carbohydrates: 30g
- Fat: 27g
- Sodium: Varies based on seasoning and salsa used. Using low-sodium versions is an easy way to control this.
Preparation Time: Prep: 20 mins | Cook: 25 mins | Total: 45 mins
Final Thoughts
This recipe is proof that sometimes the best ideas come from a little kitchen chaos—and a willingness to break the “rules” of dinner. Taco night and pasta night don’t have to compete; they can join forces in the most delicious way possible. Every bite of these stuffed shells delivers that perfect balance of cheesy, saucy, and slightly spicy goodness, with just enough texture from the beans, corn, or whatever mix-ins you love.
Beyond flavor, this dish is a reminder that cooking can be playful, collaborative, and joyful. Whether your kids are helping stuff the shells, your partner is sprinkling cheese like it’s confetti, or you’re secretly sneaking bites while assembling, it’s a recipe that brings everyone together around the table. And the best part? It reheats beautifully, freezes perfectly, and keeps the magic alive long after that first batch disappears.
Keep this one in your rotation. Make it for busy weeknights, family gatherings, or when you just need a little culinary happiness on a plate. It’s not just dinner—it’s comfort, creativity, and a little spark of fun all rolled into one. 🌮🧀💛