Chicken Parmesan Sliders: The Ultimate Family-Friendly Feast (in Miniature!)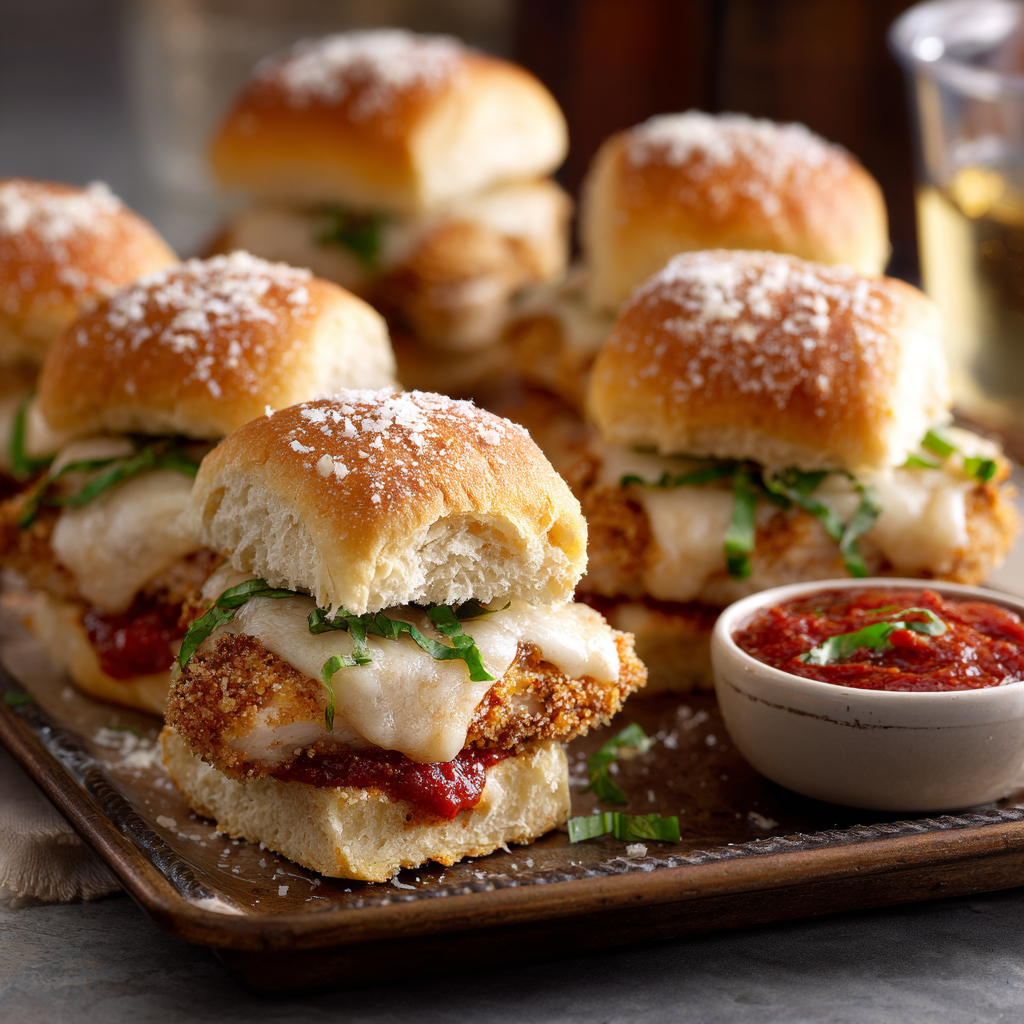
Hey there, friend! Anna here. Can I tell you a secret? The recipes I get most excited about aren’t the complicated, fancy-pants ones. Nope. They’re the ones that land squarely in the middle of the Venn diagram where “utterly delicious,” “ridiculously easy,” and “makes everyone at the table happy” all overlap. That magic intersection? That’s where these Chicken Parmesan Sliders live, and trust me, they are about to become your new weeknight hero.
We all love the glorious, crispy, saucy, cheesy wonder that is classic Chicken Parmigiana. But let’s be real—sometimes we don’t have time for the whole breading-station, multiple-pan, individual-plating production. And sometimes, okay often, we need a meal that feels like a fun treat, especially if we’ve got little (or big!) kiddos to feed. That’s the genius of the slider. It takes all that iconic flavor—the savory chicken, the tangy marinara, the ooey-gooey mozzarella—and stuffs it into a perfectly poppable, handheld package.
These aren’t just tasty; they’re protein-packed powerhouses, clocking in at about 18 grams of protein per serving. They’re fantastic for dinner, yes, but also for game day, casual parties, or stashing in lunchboxes (hello, coolest parent award!). They come together in about 45 minutes, and the process is so straightforward, it’s practically therapeutic. So, tie on your favorite apron, crank up some good tunes, and let’s transform your kitchen into the happiest little Italian bistro this side of Tuesday night.
Why This Recipe Has a Permanent Spot in My Rotation
PrintChicken Parmesan Sliders : Kid-Friendly, Protein-Packed Mini Sandwiches
These Chicken Parmesan Sliders bring the crispy, cheesy comfort of chicken parm into a handheld version that’s perfect for kids and adults alike. With about 18 grams of protein per serving, they make a great dinner, party snack, or lunchbox favorite. Easy to prep and fun to eat—this is a recipe everyone can rally around.
- Prep Time: 15 minutes
- Cook Time: 25–30 minutes
- Total Time: 40–45 minutes
Ingredients
4 boneless, skinless chicken breasts, pounded thin
1 cup breadcrumbs
1/2 cup grated parmesan cheese
2 eggs, beaten
12 slider buns
1 cup marinara sauce
12 slices mozzarella cheese
Optional: fresh basil or parsley for garnish
Instructions
Prep the Chicken
Preheat oven to 400°F (200°C). Slice each pounded chicken breast in thirds to make 12 small cutlets.
Bread and Bake
Mix breadcrumbs with parmesan in one bowl, and beat eggs in another. Dip chicken pieces in egg, then coat in breadcrumb mixture. Place on a baking sheet lined with parchment. Bake for 20–25 minutes, flipping once, until golden and cooked through.
Assemble the Sliders
Place bottom buns in a baking dish. Top each with a piece of chicken, a spoonful of marinara, and a slice of mozzarella. Add the top buns.
Melt and Serve
Bake assembled sliders for 5–7 minutes, until cheese is melted and buns are slightly toasted. Serve warm with a sprinkle of herbs if desired.
Nutrition
- Calories: 400
- Carbohydrates: 30g
- Protein: 18g
This recipe was born out of pure, unadulterated chaos—the beautiful, noisy, wonderful chaos of a family dinner with my nephew, Leo. Leo, at age five, had declared a personal war on anything that required a fork and knife. Spaghetti? A splash-zone hazard. Whole chicken cutlets? Forget it. But the kid loved flavors, especially the “pizza chicken” (his name for chicken parm).
One frantic evening, I was trying to get dinner on the table and had an epiphany. What if I made the chicken parm… but smaller? And what if we could just… pick it up? I chopped the cutlets into slider-sized pieces, baked them, piled them on soft buns, and watched as a miracle unfolded. Leo devoured two, sauce happily smeared across his cheeks, with zero battle. My sister looked at me like I’d discovered fire. The best part? The adults loved them just as much. They were messy in the best way, interactive, and absolutely delicious. It was a reminder that sometimes, the best recipes aren’t about reinventing the wheel, but just giving it a fun, new spin that brings everyone together.
Gathering Your Flavor Arsenal
Here’s everything you’ll need to build these flavor-packed mini sandwiches. I’ve included some insider tips and swaps to make this recipe work seamlessly for you!
- 4 boneless, skinless chicken breasts, pounded thin: This is our blank canvas! Pounding them ensures even cooking and tender results. Chef’s Insight: No meat mallet? Use a rolling pin, a heavy skillet, or even a wine bottle. Place the chicken between two sheets of plastic wrap or parchment paper first.
- 1 cup breadcrumbs: The crispy jacket for our chicken. Substitution Tip: Use Italian-seasoned breadcrumbs for an instant flavor boost, panko for extra crunch, or gluten-free breadcrumbs to make this recipe celiac-friendly.
- 1/2 cup grated parmesan cheese: We’re mixing this right into the breadcrumbs. It adds a salty, nutty, umami depth that is absolutely non-negotiable. Freshly grated from a block is always best for flavor and meltiness!
- 2 eggs, beaten: Our edible glue. This is what helps the crispy coating stick beautifully to the chicken.
- 12 slider buns: The soft, pillowy vessel. Hawaiian rolls are a famously delicious choice for their hint of sweetness, but any soft dinner roll or slider bun works perfectly.
- 1 cup marinara sauce: The heart and soul! Use your favorite jarred brand for ease, or your own homemade sauce if you’re feeling fancy. Chef’s Insight: Warm the sauce slightly before assembling—it helps everything melt together faster in the final bake.
- 12 slices mozzarella cheese: For that iconic, stretchy, milky cheese pull. Pre-sliced is a time-saver, but you can also tear fresh mozzarella balls.
- Optional: fresh basil or parsley for garnish: A pop of green color and fresh flavor that makes the whole dish sing. Highly recommended if you have it!
Let’s Build Some Deliciousness: Step-by-Step
Don’t let the multiple steps fool you—this process is a breeze and flows like a kitchen dance. I’ll be right here with tips for every move.
Step 1: Prep the Chicken & Oven. First, preheat your oven to 400°F (200°C). Line a large baking sheet with parchment paper—this is for easy cleanup, and it prevents sticking. Now, take your pounded chicken breasts. Using a sharp knife, slice each one into three even pieces. You should end up with 12 slider-sized cutlets. Little Chef Hack: If the pieces are slightly uneven, don’t sweat it! Just place the smaller ones on the baking sheet first so they don’t overcook.
Step 2: Create Your Breading Station & Bake. This is my favorite kind of kitchen organizing. In one shallow bowl (a pie plate works great), beat your two eggs with a fork until smooth. In another bowl, mix the breadcrumbs and grated parmesan together. Now, for the assembly line: using one hand for “wet” and one for “dry,” dip a chicken piece fully into the egg, let the excess drip off, then dredge it in the breadcrumb mixture, pressing gently to adhere. Place it on your prepared baking sheet. Repeat with all pieces, giving them a little space on the sheet. Bake for 20-25 minutes, flipping them halfway through, until they’re golden brown, crispy, and cooked through. Pro-Tip: Flipping ensures even browning on both sides for maximum crunch!
Step 3: Assemble the Sliders. While the chicken bakes, lightly grease a 9×13 baking dish. Place the bottom halves of all your slider buns in the dish, snugging them in close together. When the chicken is done, place one beautiful, crispy piece right on each bun bottom. Then, the saucy part: spoon a generous tablespoon of warmed marinara over each chicken piece. Top that with a slice of mozzarella. Crown it all with the top bun halves. Story Time: I sometimes sprinkle a little extra parmesan or a tiny pinch of garlic powder over the sauce before the mozzarella for an extra flavor punch.
Step 4: The Final Melt & Serve. Pop the whole assembled dish back into the oven for just 5-7 minutes. We’re not cooking anything now, just warming the buns, melting the cheese into the sauce, and letting all the flavors become best friends. You’ll know it’s ready when the cheese is gloriously melted and the tops of the buns are just barely toasted. Pull them out, and if you’re using them, sprinkle with chopped fresh basil or parsley. The smell will be incredible.
How to Serve These Crowd-Pleasing Sliders
Presentation is part of the fun! I like to serve the whole baking dish right in the middle of the table, letting everyone dig in family-style. The sliders are a full meal on their own, but for a real feast, pair them with a simple side salad with a bright Italian vinaigrette to cut through the richness, or some oven-roasted broccoli or zucchini. For a kid-friendly plate, add some carrot sticks and apple slices. Don’t forget napkins—the good, juicy kind of mess is guaranteed and half the fun!
Make It Your Own: Delicious Twists & Swaps
- Spicy Arrabbiata Twist: Use a spicy arrabbiata sauce instead of marinara and add a slice of pepper jack cheese under the mozzarella.
- Pesto Party: Swap half the marinara for a smear of basil pesto on the bun before adding the chicken. Incredibly fresh flavor!
- Eggplant Parmesan Version: Vegetarian friends, rejoice! Use thin slices of breaded, baked eggplant in place of the chicken.
- “Meatball Sub” Style: Replace the chicken cutlets with 12 small, cooked meatballs. Spoon over sauce and cheese as directed.
- Low-Carb Friendly: Ditch the buns and serve the baked, sauced, and cheesed chicken cutlets over a bed of zucchini noodles or spaghetti squash.
Anna’s Extra Kitchen Confessions & Notes
This recipe has evolved in my kitchen more times than I can count. Originally, I was pan-frying the chicken, which is delicious but splattery. Baking is my preferred method now—it’s hands-off, cleaner, and still gets that perfect crunch. I’ve also learned that while assembling and baking the whole tray is perfect for a crowd, you can also set up a “slider bar” for casual gatherings. Just keep the components (baked chicken, warm sauce, cheese, buns) in separate dishes and let everyone build their own. It’s a huge hit! The most common note I get from readers who try this? “My kids ate them without complaining!” and that, my friend, is the highest praise a recipe can get in my book.
Your Questions, Answered!
Q: Can I make these ahead of time?
A: Absolutely! You can bread and bake the chicken pieces up to a day ahead. Let them cool, store them in the fridge, and then just assemble and do the final melt when you’re ready to serve. You can also fully assemble the unbaked sliders, cover tightly, and refrigerate for a few hours. You may need to add 2-3 minutes to the final bake time if starting from cold.
Q: My breading is falling off! What did I do wrong?
A> Don’t worry, this is a common hiccup. The key is in the dredging: make sure you let the excess egg drip off before moving to the breadcrumbs. Too much egg creates a slippery layer. Also, press the breadcrumbs on firmly. And always pat your chicken dry with a paper towel before you start the breading process—moisture is the enemy of adhesion!
Q: Can I use chicken tenders instead of breasts?
A: Yes! Chicken tenders are a fantastic shortcut here. You likely won’t even need to pound or cut them. Just bread and bake them as directed, adjusting the time slightly (they may cook a bit faster). One large tender or two small ones per slider is perfect.
Q: The bottom bun got a bit soggy. How do I prevent that?
A> Great question! A light shield is the trick. You can spread a very thin layer of softened butter or mayonnaise on the bottom bun before placing the chicken. This creates a tiny barrier. Also, ensuring your baked chicken is nice and crispy (not underdone) helps, and don’t let the assembled sliders sit for too long before the final bake.
Nutritional Info (Approximate per serving – 2 sliders)
Calories: ~400 | Protein: ~18g | Net Carbs: ~30g | Prep Time: 15 minutes | Cook Time: 25–30 minutes | Total Time: 40–45 minutes
***Remember, these are estimates and can vary based on specific ingredients and brands used.***

Final Thoughts
These Chicken Parmesan Sliders are the perfect reminder that sometimes, the best meals are the ones that combine comfort, flavor, and fun in one bite. They’re crispy, cheesy, saucy, and completely poppable—making them a guaranteed crowd-pleaser for kids, adults, and everyone in between.
The beauty of this recipe isn’t just in the ingredients—it’s in the memories it creates. Whether it’s a hectic weeknight dinner, a game-day spread, or a casual family gathering, these sliders bring people together with minimal fuss and maximum smiles. Plus, the mini format makes them easy to customize, swap, or even meal-prep ahead of time.
So, grab those buns, pile on the cheesy, saucy chicken, and serve them up with a side of laughter (and maybe some extra napkins). Delicious, hands-on, and endlessly versatile, these sliders are proof that comfort food doesn’t have to be complicated—it just needs to bring people to the table.