***
Big Fat Peanut Butter Oatmeal Chocolate Chip Cookies: Your New Kitchen Hero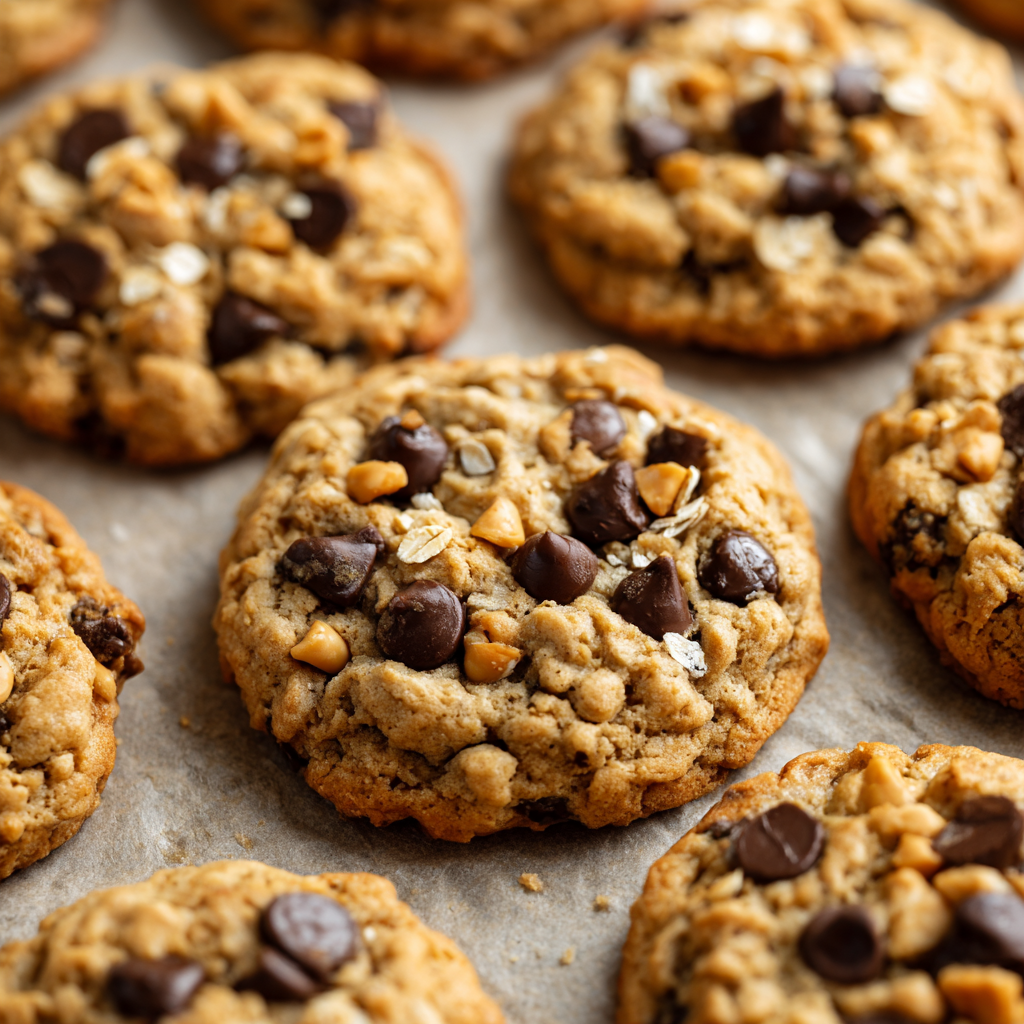
Hey there, friend! Let’s talk about cookies for a second. Not just any cookies. I’m talking about the kind of cookies that make your entire house smell like a warm, nutty, chocolate-filled hug. The kind that are so thick and chewy they require a glass of cold milk on standby. The kind that disappear from the cooling rack so fast you’d think they grew legs and walked away. If you’re nodding your head with a little smile, then you, my friend, are in exactly the right place.
Today, we’re making my absolute favorite: Big Fat Peanut Butter Oatmeal Chocolate Chip Cookies. This isn’t just a recipe; it’s a blueprint for pure, unadulterated joy. We’re combining the hearty, wholesome goodness of oats with the rich, creamy magic of peanut butter and the melty, glorious pockets of chocolate chips. It’s the ultimate trifecta of texture and flavor, all baked into one perfect, bakery-style cookie that’s deceptively simple to make. I promise, this recipe is about to become your go-to for potlucks, bad days, good days, and every “just because” day in between. So, are you ready to preheat that oven and create a little magic together? Let’s do this!
The Cookie Jar That Built a Friendship
PrintBig Fat Peanut Butter Oatmeal Chocolate Chip Cookies

Thick, chewy, and loaded with texture, these cookies are everything you want in a bakery-style treat. The combo of creamy peanut butter, hearty oats, and melty chocolate chips makes each bite rich, nutty, and unforgettable. They’re the kind of cookies that never last long on the counter.
- Prep Time: 15 mins
- Cook Time: 12 mins
- Total Time: 30 mins
- Yield: 20 cookies 1x
Ingredients
½ cup unsalted butter, softened
½ cup creamy peanut butter
½ cup granulated sugar
½ cup packed brown sugar
1 large egg
1 tsp vanilla extract
1 cup all-purpose flour
1 tsp baking soda
¼ tsp salt
1 cup rolled oats
1 cup semisweet chocolate chips
Instructions
Preheat oven to 350°F (175°C). Line a baking sheet with parchment paper.
Cream butter, peanut butter, and both sugars until smooth.
Beat in egg and vanilla.
In another bowl, whisk flour, baking soda, and salt. Gradually add to wet ingredients.
Stir in oats and chocolate chips.
Scoop large spoonfuls of dough onto the baking sheet, spacing 2 inches apart.
Bake for 10–12 minutes, until edges are golden and centers are soft.
Cool on sheet for 5 minutes, then transfer to a wire rack.
Nutrition
- Calories: 190
- Sugar: 14g
- Fat: 10g
- Carbohydrates: 22g
- Fiber: 1g
- Protein: 3g
This recipe always takes me back to my first apartment after college. My next-door neighbor, Sarah, and I became fast friends, and our kitchen was the unofficial headquarters for solving all of life’s problems. Our currency? Cookies. One particularly rainy, gloomy Tuesday, we were both feeling a bit defeated by “adulting.” I rummaged through our nearly bare pantry—a lone stick of butter, some oats, a jar of peanut butter, and the last of a bag of chocolate chips. It felt like a sign.
I started throwing things into a bowl, not following any recipe, just going on instinct and a serious craving for comfort. What emerged from the oven 12 minutes later were these puffy, golden, imperfectly perfect cookies. We sat on the floor of my kitchen, still in our work clothes, devouring them straight off the baking sheet. The rain kept falling, but our moods had completely lifted. That’s the power of a great cookie. It’s not just dessert; it’s a memory maker, a mood booster, and a tangible piece of love. This is that exact recipe, refined over the years but always carrying the spirit of that rainy Tuesday rescue.
Gathering Your Cookie Crew: The Ingredients
Here’s the dream team of ingredients that makes these cookies so incredibly special. I’ve included my little chef insights and substitutions so you can bake with confidence, no matter what’s in your pantry!
- ½ cup unsalted butter, softened: This is our flavor and texture foundation. Unsalted lets us control the salt level. Chef’s Tip: “Softened” means cool to the touch but your finger can leave a gentle indent. Too melty? Your cookies will spread. Too cold? They won’t cream properly!
- ½ cup creamy peanut butter: Use a standard, no-stir kind like Jif or Skippy for the best consistency and sweetness. Natural peanut butter (the kind that separates) can make the dough oily and alter the texture.
- ½ cup granulated sugar: This sweetens our cookies and helps them spread slightly and get those delicious crispy edges.
- ½ cup packed brown sugar: The molasses in brown sugar is the secret to a chewy, soft, and moist cookie. Packing it firmly into your measuring cup is non-negotiable for that perfect chew!
- 1 large egg: Our binding agent! It brings everything together and adds structure. Make sure it’s at room temperature to blend seamlessly into the creamed butter and sugars.
- 1 tsp vanilla extract: The flavor enhancer. It deepens all the other flavors. If you have it, vanilla bean paste is a gorgeous upgrade here.
- 1 cup all-purpose flour: The main structural ingredient. For a slightly more tender cookie, you can swap it 1:1 with a good-quality gluten-free 1:1 baking blend.
- 1 tsp baking soda: Our leavening agent! This is what gives these cookies their wonderful lift and that big, fat, bakery-style puff.
- ¼ tsp salt: The flavor hero! Salt balances the sweetness and makes the chocolate and peanut butter flavors pop. If you only have salted butter, just reduce this to a pinch.
- 1 cup rolled oats: Also called old-fashioned oats. They give the cookies incredible heartiness and chew. Do not use quick oats or instant oats; they absorb moisture differently and can make the cookies dry and dense.
- 1 cup semisweet chocolate chips: My personal favorite for balance, but feel free to use milk chocolate for a sweeter cookie or dark chocolate for a richer one. Chopped chocolate bars also create amazing, melty pockets!
Let’s Get Baking: The Step-by-Step Magic
Okay, team! Aprons on. Let’s transform these simple ingredients into cookie legends. Read through these steps first—I’ve packed them with all my best tips to ensure your cookie success!
- Preheat oven to 350°F (175°C). Line a baking sheet with parchment paper. Preheating is crucial for even baking. The parchment paper is my #1 kitchen hack for no-stick cookies and easy clean-up. Silicone baking mats work great, too!
- Cream butter, peanut butter, and both sugars until smooth. This is the MOST important step! Creaming means beating them together on medium-high speed for a good 2-3 minutes until the mixture is light, pale, and fluffy. This incorporates air, which is key for a soft, tender texture. Don’t rush it!
- Beat in egg and vanilla. Scrape down the sides of the bowl with a spatula to make sure everything is evenly incorporated. We want every bite to be perfect.
- In another bowl, whisk flour, baking soda, and salt. Whisking the dry ingredients separately ensures the baking soda and salt are evenly distributed, preventing any bitter bites. It’s a simple step that makes a huge difference!
- Gradually add the dry ingredients to the wet ingredients. Mix on low speed just until the flour disappears. Do not overmix at this stage! Overmixing develops gluten in the flour, which can lead to tough, cakey cookies. A few streaks of flour are okay—they’ll get mixed in during the next step.
- Stir in oats and chocolate chips. Switch to a sturdy spatula or wooden spoon for this. Fold them in gently until they’re evenly distributed throughout the dough. Look at that beautiful, chunky, promising dough!
- Scoop large spoonfuls of dough onto the baking sheet, spacing 2 inches apart. I use a #40 cookie scoop (which holds about 1.5 tablespoons) for perfectly uniform cookies. This ensures they all bake at the same rate. Giving them space is vital—these cookies need room to spread and become their big, beautiful selves!
- Bake for 10–12 minutes, until edges are golden and centers are soft. They will look slightly underdone in the middle, and that is exactly what we want! They will continue to cook on the hot baking sheet as they cool, setting into that dreamy, chewy texture. If you wait until the centers look fully cooked in the oven, you’ll end up with overbaked, crunchy cookies.
- Cool on the sheet for 5 minutes, then transfer to a wire rack. This is the final stage of cooking. Letting them rest on the sheet makes them firm enough to move without breaking, but transferring them to a rack stops the cooking process and prevents the bottoms from getting soggy.
Serving Up Smiles
These cookies are a masterpiece all on their own, but presentation is part of the fun! For the ultimate experience, serve them still slightly warm so the chocolate chips are gloriously gooey. Pile them high on a rustic wooden board or in a cheerful ceramic bowl. The only mandatory serving suggestion? A tall, ice-cold glass of milk for dunking. For a next-level treat, sandwich a scoop of vanilla ice cream between two cookies for an epic ice cream sandwich. Pure bliss!
Make It Your Own: Delicious Variations
This dough is a fantastic canvas for your creativity! Here are a few of my favorite twists:
- Kitchen Sink Cookies: Add ½ cup of chopped pretzels for salty crunch and ½ cup of butterscotch chips alongside the chocolate chips.
- Peanut Butter Cup Bliss: Fold in 1 cup of chopped Reese’s Peanut Butter Cups instead of chocolate chips. You’re welcome.
- Double Chocolate: Replace ¼ cup of the flour with ¼ cup of unsweetened cocoa powder for a rich, chocolatey base.
- Gluten-Free Goodness: Swap the all-purpose flour for a 1:1 gluten-free baking blend. Ensure your oats are certified gluten-free.
- Triple Nut Delight: Use chunky peanut butter and add ½ cup of chopped toasted walnuts or pecans for an extra nutty crunch.
Anna’s Chef Notes & Kitchen Stories
This recipe has been my trusty sidekick for years, and like any good friendship, it’s evolved. I once, in a frantic pre-holiday baking session, accidentally used baking POWDER instead of baking SODA. Let’s just say the resulting cookies were pale, cakey, and tragically flat. It was a hilarious (and delicious) failure that taught me to always, always double-check my labels! I’ve also learned that the dough freezes like a dream. I often scoop the dough balls onto a tray, freeze them solid, and then toss them into a zip-top bag. Then, I can bake off just two or three fresh, warm cookies whenever the craving hits—a dangerous and wonderful trick!
Your Cookie Questions, Answered!
Q: My cookies spread too much and got flat. What happened?
A: The most common culprits are butter that was too warm or melted, an under-measured or omitted flour, or an old baking soda that’s lost its potency. Also, make sure your baking sheet is cool before putting the next batch on it; placing dough on a warm sheet will cause it to spread prematurely.
Q: Can I make the dough ahead of time?
A: Absolutely! In fact, I highly recommend it. Chilling the dough for at least 30 minutes (or up to 48 hours) helps the flavors meld and results in a slightly thicker, chewier cookie. Just let the dough sit at room temperature for 10-15 minutes before scooping if it’s been chilled for a long time.
Q: My cookies are too cakey or puffy. How can I make them chewier?
A: This usually means you might have over-measured the flour. Next time, try fluffing your flour with a spoon before gently spooning it into your measuring cup and leveling it off with a knife. Also, ensure you’re not overmixing the dough once the flour is added.
Q: Can I use natural peanut butter?
A: You can, but the texture will be different. Natural peanut butters are often more oily and can make the cookies greasy and prone to spreading. If it’s all you have, try reducing the butter by a tablespoon and make sure you stir the natural peanut butter extremely well until it’s completely homogenous before measuring.
Nutritional Info*
Prep Time: 15 mins | Cook Time: 12 mins | Total Time: ~30 mins | Servings: 20 cookies
*This is an estimate provided by an online nutrition calculator. It will vary based on specific ingredients and portion sizes.
Calories per cookie: ~190 | Fat: 10g | Carbs: 22g | Sugar: 14g | Protein: 3g | Fiber: 1g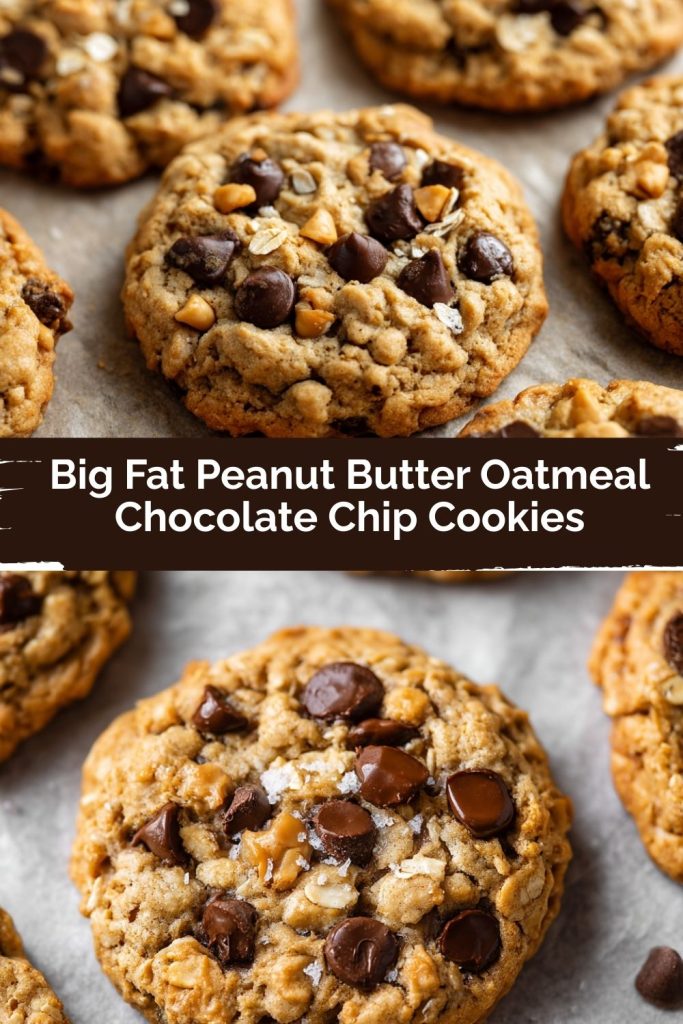
Final Thoughts
These Big Fat Peanut Butter Oatmeal Chocolate Chip Cookies aren’t just cookies—they’re little bundles of joy, packed with nutty depth, hearty oats, and pools of melty chocolate. They’ve carried me through rainy days, late-night cravings, and countless celebrations, and I know they’ll find their way into your own kitchen memories, too.
Whether you bake them exactly as written or add your own twist, these cookies are the kind that never stick around for long (unless you’ve got a secret freezer stash—highly recommended!). So grab that mixing bowl, call in your favorite taste testers, and let the smell of warm peanut butter and chocolate do its magic.
Because let’s be honest—life is just a little sweeter when there’s a big, fat cookie waiting on the counter.