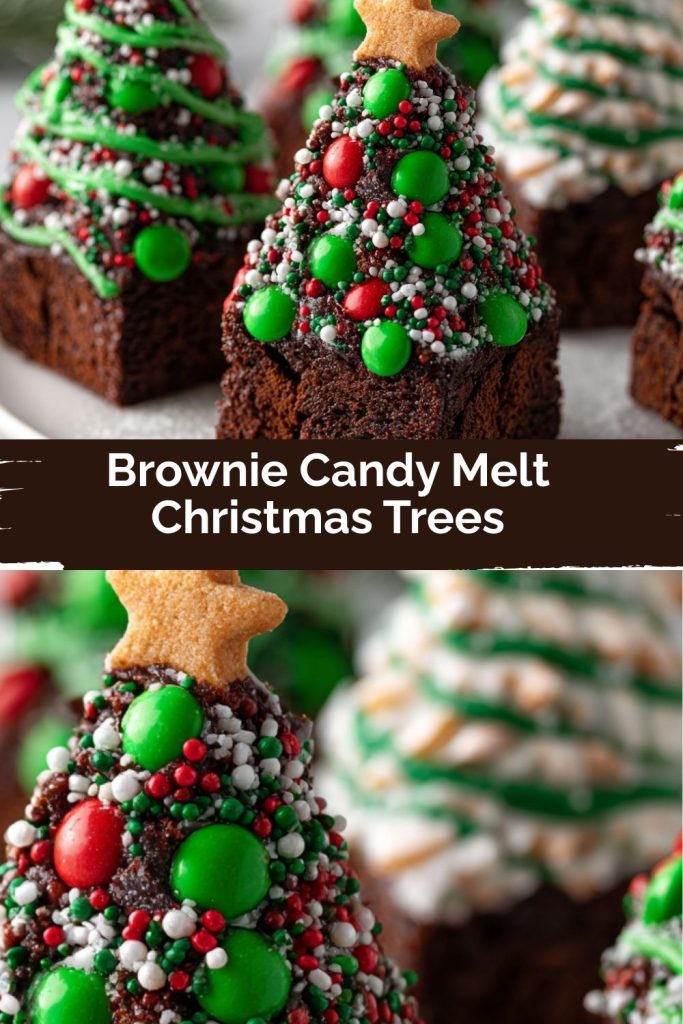
Brownie Candy Melt Christmas Trees: Your New Favorite Holiday Treat!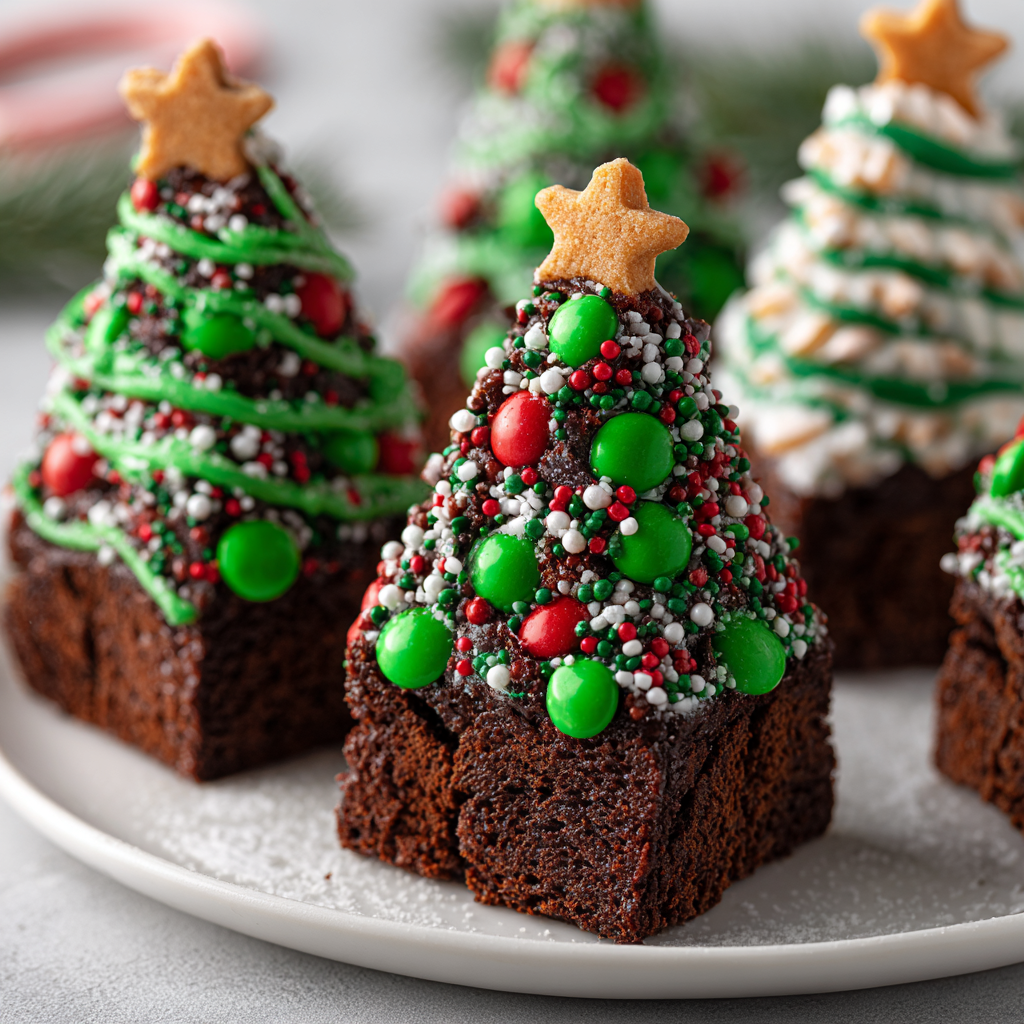
Hey there, friend! Anna here, coming to you from my kitchen, which currently looks like a festive sprinkle bomb went off—and I wouldn’t have it any other way. Is there anything better than the smell of chocolate brownies baking in the oven during the holidays? It’s pure, unadulterated joy, wrapped up in a warm, fudgy hug.
But what if we could take that classic, beloved brownie and turn it into something truly magical? Something that’s not only delicious but also a stunning, show-stopping centerpiece for your holiday dessert table? Enter these Brownie Candy Melt Christmas Trees! They are fudgy, festive, and TREE-mendously fun to make. I’m talking about rich, chocolatey brownies baked in a holiday mold, then lined with a crisp, colorful candy melt shell, and decked out with all the sprinkles your heart desires.
This recipe is the perfect project for a cozy afternoon, a blast to make with kids (hello, little decorators!), and an absolutely gorgeous homemade gift for neighbors, teachers, and friends. They look intricate and fancy, but I promise you, the process is wonderfully simple. We’re using a few smart shortcuts (hello, trusty boxed brownie mix!) and some clever chef tricks to create a treat that’s guaranteed to sparkle. So, let’s put on our favorite holiday playlist, pour ourselves a mug of something warm, and cook up some Christmas magic together!
A Sprinkle of Nostalgia: My First Kitchen Christmas
PrintBrownie Candy Melt Christmas Trees
This bowl brings all the best Mediterranean flavors together in one easy, feel-good meal. I made it on a whim one afternoon and was blown away—juicy herbed chicken, crisp veggies, creamy tzatziki, and fluffy rice or quinoa… it’s like a vacation in every bite. Perfect for lunch, dinner, or meal prep, this bowl is fresh, balanced, and downright delicious!
- Prep Time: 15 mins
- Cook Time: 15 mins
- Total Time: 30 minutes
- Yield: 4 1x
Ingredients
For the Chicken:
1 lb boneless, skinless chicken thighs or breasts
2 tbsp olive oil
Juice of 1 lemon
2 garlic cloves, minced
1 tsp dried oregano
Salt & pepper to taste
For the Bowl:
2 cups cooked rice or quinoa
1 cup cherry tomatoes, halved
1 cucumber, diced
1/4 cup red onion, thinly sliced
1/4 cup Kalamata olives
1/4 cup crumbled feta cheese
1/2 cup tzatziki sauce
Fresh parsley for garnish
Instructions
Marinate the chicken: Combine olive oil, lemon juice, garlic, oregano, salt, and pepper. Marinate chicken for 30 minutes.
Cook the chicken: Grill or pan-sear chicken for 5–6 minutes per side until cooked through. Slice into strips.
Assemble bowls: Start with a base of rice or quinoa. Top with veggies, olives, feta, and sliced chicken. Add a dollop of tzatziki and sprinkle with fresh parsley.
Serve: Warm or chilled—it’s delicious either way!
Notes
Marinate the chicken: Combine olive oil, lemon juice, garlic, oregano, salt, and pepper. Marinate chicken for 30 minutes.
Cook the chicken: Grill or pan-sear chicken for 5–6 minutes per side until cooked through. Slice into strips.
Assemble bowls: Start with a base of rice or quinoa. Top with veggies, olives, feta, and sliced chicken. Add a dollop of tzatziki and sprinkle with fresh parsley.
Serve: Warm or chilled—it’s delicious either way!
Nutrition
- Calories: 450 kcal
- Protein: High-protein
This recipe always takes me right back to my first Christmas in my own apartment. I was fresh out of college, my budget was… let’s call it “creative,” but my desire to host a proper holiday party was enormous. I wanted to create something that felt special and homemade, without requiring the skills of a pastry chef or a fortune in ingredients.
I’d inherited a weirdly shaped silicone mold from my grandma—stars, trees, all sorts of shapes. That mold became my inspiration. I whipped up a batch of my go-to box-mix brownies (no shame in that game!), poured the batter in, and crossed my fingers. What emerged from the oven were these adorable, wobbly little Christmas trees. They were cute, but they needed… more. A little magic. I rummaged through my baking cupboard and found a half-used bag of green candy melts and a container of rainbow sprinkles. An idea was born! I lined the mold with the melted candy, popped the brownies back in, and after a nerve-wracking twenty minutes in the fridge, I turned the mold over. Out popped these perfect, glossy, sprinkle-studded edible ornaments. They were a massive hit at the party, and my friends couldn’t believe I’d “made them from scratch.” That little triumph, that moment of creating something beautiful and joyful on a budget, is the exact feeling I hope this recipe brings to your kitchen.
Gathering Your Merry Ingredients
Here’s everything you’ll need to create these festive wonders. The beauty of this recipe is its simplicity and flexibility! This makes 6 beautiful trees.
- 1 box brownie mix (plus the ingredients listed on the box) – This is our fabulous shortcut! I typically go for a family-size mix labeled “fudgy” or “chocolatey.” The oil, eggs, and water called for on the box are all you need. Using a mix ensures a consistent, delicious brownie base every single time, so we can focus on the fun decorating part.
- 1½ cups green candy melts – This is the secret to that gorgeous, glossy tree shell! Candy melts (also called confectionery coating or melting wafers) are designed to melt smoothly and set firmly. Chef’s Insight: You can absolutely use red or white melts for a different festive look! If you can’t find melts, you can use high-quality white chocolate chips mixed with a teaspoon of coconut oil and green food coloring gel (not liquid, as it can seize the chocolate!).
- Non-stick baking spray – Absolutely essential for getting our brownies out of the mold cleanly. Give that silicone a good, even coating!
- Holiday sprinkles or edible glitter – This is where your personality shines! Use classic red and green, go for a winter wonderland with white and silver, or use a fun mix. The sprinkles stick to the melted candy coating, creating that gorgeous decorated effect.
- Optional: Small candy stars for the toppers – The perfect finishing touch! A little yellow candy star on the top of each tree is just *chef’s kiss*. If you don’t have stars, a dab of extra melted candy and a single sprinkle works beautifully too.
Let’s Build Our Christmas Trees! Step-by-Step
Ready to create some magic? Follow these steps, and you’ll have a forest of delicious treats in no time. I’ve packed each step with my best tips to ensure your success!
- Preheat and Prep: First things first, preheat your oven to 350°F (175°C). Now, grab your Christmas tree silicone mold. This is key—it must be silicone to withstand both the oven and the freezer. Place the mold on a sturdy baking sheet. This makes it so much easier to move in and out of the oven without the mold flopping around. Give the inside of each tree cavity a generous spray with non-stick baking spray. Get into all the little nooks and crannies!
- Brownie Batter Up: Prepare your brownie mix according to the package directions. I like to whisk mine by hand just until the ingredients are combined and no dry streaks remain. Chef’s Hack: A slightly under-mixed brownie batter actually leads to a fudgier texture, which is exactly what we want! Now, using a spoon or a small scoop, fill each mold cavity about ¾ of the way full. You want to leave a little room for them to rise.
- Bake to Fudgy Perfection: Carefully slide the baking sheet with the mold into your preheated oven. Bake for 12-15 minutes. Now, here’s the most important tip: you want to under-bake them just a touch! We’re going for a fudgy, dense texture. Insert a toothpick into the center of a brownie tree—it should come out with some moist crumbs attached, but not wet batter. If it’s completely clean, they might be over-baked and dry. Once they’re done, pull them out and let the mold cool on a wire rack for a solid 15 minutes.
- The Great Unmolding: After 15 minutes, the brownies are still warm but firm enough to handle. Gently push on the bottom of each mold cavity to pop the brownie trees out. They should release easily if you sprayed well! Let them cool completely on the wire rack. Patience is key here! If they’re even slightly warm, they’ll melt the candy shell later.
- Clean Slate: Once the brownies are out, wash and thoroughly dry your silicone mold. We need it completely clean and grease-free for the candy coating to set properly.
- Create the Candy Shell: Time for the magic! Place your candy melts in a microwave-safe bowl. Microwave them in 20-second bursts, stirring vigorously between each burst. This prevents them from overheating and seizing. Keep going until they are completely smooth and fluid. Now, using a spoon, pour a thin, even layer of the melted candy into the bottom of each clean mold cavity. You want it to cover the bottom and creep up the sides just a little—this will become the beautiful outer shell of your tree.
- The Assembly: Working relatively quickly before the candy sets, take your completely cooled brownie trees and press them, flat-side down, back into the mold on top of the melted candy. Press down gently so the candy coating squishes up the sides a tiny bit. This seals the deal!
- Chill Out: Pop the entire mold (on the baking sheet again) into the refrigerator for about 20 minutes. This allows the candy coating to set completely and become firm and snappy.
- The Grand Finale: Decorate! This is the best part! Remove the mold from the fridge. Now, you should be able to easily pop the finished candy-coated brownie trees out by flexing the mold. They will look gorgeous already! Now, melt a small remaining amount of candy melts, put it in a small zip-top bag, snip a tiny corner off, and drizzle it over the trees like festive icing. Immediately shower them with your chosen sprinkles and add a candy star topper. Let the drizzle set, and you’re done!
How to Serve Your edible Evergreens
Presentation is half the fun! Arrange these sparkling trees on a beautiful platter or a cake stand lined with a dusting of powdered sugar “snow.” They are the star of the show all on their own. For a extra-special touch, place each one in a clear cellophane bag, tie it with a festive ribbon, and gift it to everyone on your list. They’re a homemade gift that looks and tastes like it came from a fancy bakery!
Mix It Up! Fun Recipe Variations
Feel like experimenting? Here are a few ways to make this recipe your own:
- Peppermint Twist: Add ¼ teaspoon of peppermint extract to your brownie batter. Use white candy melts for the shell and crush up candy canes for a festive, crunchy decoration.
- Cookies & Cream Forest: Fold ½ cup of crushed Oreo pieces into the brownie batter. Use white candy melts and black and white sprinkles.
- Nutty Wonderland: Fold ½ cup of chopped toasted pecans or walnuts into the brownie batter for a wonderful textural contrast.
- “Nice” List Gluten-Free: Simply use your favorite gluten-free brownie mix! The process is exactly the same.
- Dark Chocolate Delight: Use a dark chocolate brownie mix and pair it with a rich, dark chocolate candy melt coating for the ultimate chocolate lover’s treat.
Anna’s Chef Notes & Kitchen Stories
This recipe has evolved so much since that first apartment Christmas! I’ve learned that the quality of your silicone mold makes a difference—a sturdier one holds its shape better. I also used to try and drizzle the extra candy coating before chilling, which was a messy disaster! Now I know chilling first is non-negotiable.
One of my favorite kitchen memories is of my niece and nephew “decorating” these trees. Let’s just say there were more sprinkles on the floor and in their hair than on the brownies, but their faces were lit up with pure joy. That’s what holiday baking is all about. Don’t stress about them being perfect. Embrace the mess and the fun. The most lopsided, sprinkle-heavy tree made with love will always taste better than a perfect one made without it.
Your Questions, Answered!
Q: My candy melts are thick and clumpy, not smooth! What happened?
A: Ah, they’ve likely seized from overheating. The best way to fix this is to add a tiny amount of solid vegetable shortening or coconut oil (about ½ teaspoon at a time) and stir vigorously. This can often bring them back to a smooth consistency. Remember, low and slow when melting!
Q: My brownie stuck to the mold! How do I prevent this?
A: The two biggest culprits are not enough non-stick spray and trying to remove the brownies before they’ve cooled enough. Make sure you’re using a good coating of spray and let them rest for the full 15 minutes. If a piece does break off, don’t panic! It will be completely hidden by the candy coating later.
Q: Can I make these ahead of time?
A: Absolutely! These are fantastic make-ahead treats. Once fully decorated, store them in a single layer in an airtight container in the refrigerator for up to 5 days. The candy shell helps keep the brownie nice and moist.
Q: I don’t have a microwave. How can I melt the candy?
A: No problem! You can use a double boiler. Simply place the candy melts in a heatproof bowl set over a pot of simmering water (make sure the bottom of the bowl isn’t touching the water). Stir constantly until melted and smooth.
Nutritional Information*
Prep Time: 15 minutes | Bake Time: 15 minutes | Chill Time: 20 minutes | Total Time: 50 minutes (+ cooling) | Servings: 6 trees
*Please note: This is an estimate based on the ingredients used and will vary significantly with specific product choices, especially the brownie mix.
Per Tree (Approximate): Calories: 280 | Fat: 12g | Saturated Fat: 5g | Carbohydrates: 38g | Sugar: 30g | Protein: 3g
Allergy Info: Contains dairy, eggs, gluten, and soy. Always check your specific brownie mix and candy melt labels for allergens.
 Final Thoughts: Baking Joy, One Tree at a Time
At the heart of it, these Brownie Candy Melt Christmas Trees aren’t just about fudgy brownies or glossy candy shells—they’re about creating joy. They’re the kind of treat that makes kids’ eyes light up, neighbors feel appreciated, and your holiday table look like something out of a winter wonderland.
So whether you’re gifting them in shiny bags, serving them at a party, or simply making a sprinkle-studded mess with your little helpers, know this: you’re not just baking, you’re making memories. And that, my friend, is the sweetest holiday magic of all.