“`html
Your New Favorite Party Hero: Cheeseburger Sliders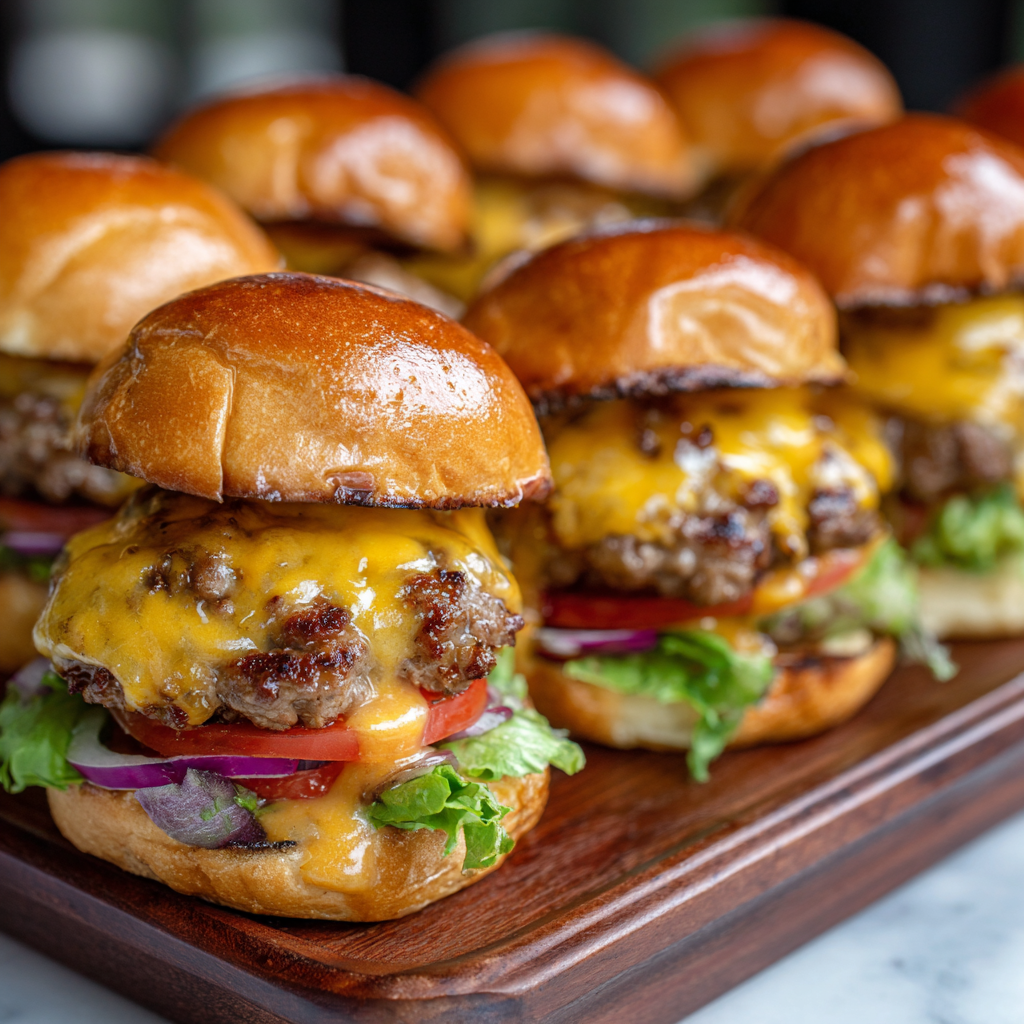
Picture this: the big game is on, friends are gathered, and a wave of hungry cheers fills the air. Or maybe it’s a hectic Tuesday night, and the thought of making a “proper” dinner feels like one chore too many. In both of these very real, very relatable moments, a hero emerges from the oven, golden-brown and smelling like pure, unadulterated joy. I’m talking about Cheeseburger Sliders, my friends, and they’re about to become your secret weapon.
These aren’t just mini burgers. Oh no. This is the entire glorious, messy, satisfying experience of a classic cheeseburger, baked into one irresistible, sliceable, shareable masterpiece. We’re talking juicy, seasoned beef, a river of melty cheese, soft, buttery buns, and all the fixings, baked until everything is warm, cozy, and fused into pure deliciousness. The best part? They come together in about 30 minutes with minimal fuss, and they reheat like an absolute dream. Whether you’re feeding a crowd, prepping for a week of easy dinners, or just treating yourself to something wonderfully simple, these sliders are a guaranteed win. So, let’s ditch the stress and cook up some magic together. Your kitchen is about to get very popular.
Why Sliders Have My Heart: A Tale of Family & Flavor
PrintCheeseburger Sliders : Juicy, Cheesy, and Crowd-Pleasing

All the flavor of a classic cheeseburger, packed into mini slider buns—these Cheeseburger Sliders are juicy, beefy, and loaded with melty cheese. Perfect for parties, game days, or easy weeknight dinners, they’re quick to assemble, make-ahead friendly, and reheat like a dream. Serve them hot and watch them vanish.
- Prep Time: 10 minutes
- Cook Time: 20 minutes
- Total Time: 30 minutes
- Yield: 12 sliders 1x
Ingredients
1 ½ lbs ground beef (80/20 for best flavor)
1 teaspoon salt
1/2 teaspoon black pepper
1/2 teaspoon garlic powder
1/2 teaspoon onion powder
12 slider buns or dinner rolls
6–8 slices American or cheddar cheese
1/4 cup mayonnaise (optional spread)
1 tablespoon mustard or ketchup (optional spread)
1 tablespoon butter, melted (for brushing)
Optional toppings: diced pickles, onions, shredded lettuce
Instructions
In a large skillet, brown ground beef over medium heat with salt, pepper, garlic powder, and onion powder. Drain excess fat.
Slice slider buns in half horizontally (keep tops and bottoms intact). Place bottom halves in a 9×13-inch baking dish.
Spread optional mayo or mustard on the bottom buns.
Evenly distribute the cooked beef over the buns.
Lay cheese slices over the beef. Add diced pickles or onions if using.
Place the top halves of the buns on top. Brush lightly with melted butter.
Cover with foil and bake for 10 minutes, then uncover and bake 5 more minutes until tops are golden and cheese is melted.
Slice and serve hot.
Nutrition
- Calories: 270
- Fat: 17g
- Carbohydrates: 18g
- Protein: 13g
My love affair with sliders started not in a fancy restaurant, but in my grandma’s bustling kitchen during family reunions. She was the queen of “feeding the masses with grace,” and her secret was always a giant pan of something baked, cheesy, and impossible to resist. I remember being little, perched on a stool, watching her assemble what she called her “Party Loaf.” The scent of browning beef and onion would fill the air, and she’d let me be in charge of placing the cheese slices—a job I took with the utmost seriousness.
When that pan came out of the oven, the whole dynamic of the party shifted. Cousins, aunts, uncles—everyone would migrate toward the kitchen island. There was something about that shared pan, the way you’d lift out a perfectly portioned little square, that felt so communal and joyful. It wasn’t just food; it was the centerpiece of connection. That’s the spirit I try to bake into every batch I make today. It’s the food of togetherness, of easy laughter, and of making sure no one leaves the table hungry. Every time I make these, I think of her, and I hope this recipe becomes a part of your own family’s story, too.
Gathering Your Flavor Team: Ingredients & Insights
Great food starts with great ingredients, but let’s keep it simple and flexible! Here’s what you’ll need and my little chef notes on why each one matters.
- 1 ½ lbs ground beef (80/20 blend): This is our star! The 80/20 ratio (80% lean, 20% fat) gives you the perfect balance of flavor and juiciness without being greasy. Chef’s Tip: If you only have leaner beef, add a tablespoon of olive oil to the skillet. For a twist, try ground turkey or chicken—just bump up the seasonings a bit!
- 1 tsp salt, ½ tsp each black pepper, garlic powder, onion powder: This simple quartet is your flavor foundation. They season the beef deeply. Chef’s Insight: Don’t have onion powder? Finely mince a small fresh onion and sauté it with the beef. Instant upgrade!
- 12 slider buns or soft dinner rolls: The vessel! Hawaiian rolls add a touch of sweetness, while classic potato rolls are pillowy and perfect. Key Point: Keep the tops and bottoms connected—we’re building a sandwich casserole!
- 6-8 slices American OR cheddar cheese: The glorious glue. American melts into that iconic, creamy sauce. Cheddar gives a sharper bite. My Rule: Use what you love! A mix of both is divine.
- ¼ cup mayonnaise & 1 tbsp mustard/ketchup (optional spreads): This is your secret layer of moisture and tang. Mayo keeps the bottom bun from getting soggy, while mustard or ketchup adds a classic burger vibe. Highly recommended!
- 1 tbsp butter, melted: For that beautiful, golden, slightly crisp top. A brush of butter is a brush of love.
- Optional Toppings (diced pickles, onions, shredded lettuce): Customize! I love adding pickles right under the cheese for a briny punch. Add onions now if you want them softened, or serve fresh on the side for crunch.
Let’s Build the Magic: Step-by-Step Instructions
Ready? Apron on, music playing—let’s do this! It’s a simple process, and I’m with you for every step.
Step 1: Preheat & Brown. Fire up your oven to 375°F (190°C). Now, grab your favorite skillet and set it over medium heat. Add your ground beef and all those seasonings—salt, pepper, garlic and onion powder. Break it up and cook it until it’s no longer pink. Chef’s Hack: Don’t just drain the fat in the sink! Pour it into an old jar or can to avoid clogging your pipes. Once drained, set your beautifully seasoned beef aside.
Step 2: Assemble Your Base. Take your whole package of slider buns and, without separating them, slice the entire block in half horizontally with a long serrated bread knife. You should have one giant “top” and one giant “bottom.” Place the bottom half snugly into a 9×13-inch baking dish. Now, spread on that optional (but oh-so-worthy) layer of mayo and mustard or ketchup. This creates a flavor barrier and adds moisture.
Step 3: Load It Up! Evenly distribute all of that warm, cooked beef over the bottom buns. Press it down gently. This is your canvas! Now, drape your cheese slices over the beef in a glorious, overlapping blanket. If you’re using pickles or onions, scatter them over the cheese layer right now.
Step 4: The Hat & The Glaze. Carefully place the top half of the buns over your cheesy beef mountain. It’s starting to look like the dream, right? Melt your butter and, using a pastry brush (or just the back of a spoon), gently brush it all over the top bun surfaces. This will give you that irresistible, golden-brown, slightly crispy finish.
Step 5: Bake to Perfection. Cover the entire dish tightly with aluminum foil. This initial steamy bake melts the cheese and heats everything through without drying out the buns. Bake covered for 10 minutes. Then, remove the foil—hello, gorgeous!—and bake for another 5-7 minutes, just until the tops are perfectly golden. Your kitchen will smell incredible.
Step 6: Slice & Serve! Take the pan out (use oven mitts!). Let it sit for just 2-3 minutes—this makes slicing cleaner. Then, use a sharp knife to cut along the bun lines, creating 12 perfect, pull-apart sliders. Watch the cheese stretch. Listen for the “oohs” and “aahs.” You did it!
Serving Up the Good Times
Presentation is part of the fun! I love placing the whole baking dish right in the middle of the table with a stack of napkins (trust me, you’ll need them). Let everyone grab their own. For a more plated look, slide a spatula under a few sliders and serve them on a platter with a big bowl of crispy potato chips, a tangy pasta salad, or a simple green salad to balance the richness. Don’t forget little bowls of extra ketchup, mustard, and pickles for those who want to customize their bite!
Make It Your Own: Delicious Variations
The basic recipe is a winner, but the playground is open! Try these twists:
- BBQ Bacon Ranch: Mix ¼ cup BBQ sauce into the cooked beef. Top with cheddar, crispy crumbled bacon, and a drizzle of ranch dressing after baking.
- Pizza Sliders: Swap beef for seasoned Italian sausage. Use mozzarella cheese and pepperoni slices. Brush tops with garlic butter mixed with a pinch of Italian seasoning.
- Breakfast Sliders: Use cooked breakfast sausage, top with scrambled eggs and a mix of cheddar and American cheese. Perfect for brunch!
- Turkey Club Twist: Use ground turkey seasoned with smoked paprika. Top with Swiss cheese, thin slices of deli turkey, and a smear of thousand island dressing.
- Spicy Southwest: Add a diced jalapeño and 1 tsp cumin to the beef. Use pepper jack cheese and serve with a side of cool avocado crema.
Anna’s Chef Notes & Kitchen Stories
This recipe has evolved so much since my grandma’s day! I’ve learned that adding that layer of mayo or sauce on the bottom bun is a total game-changer—no more sad, soggy bottoms. Another funny lesson? The first time I made these for my husband, I was so excited I forgot to cover them with foil for the first bake. We ended up with slightly crispy tops before the cheese had fully melted! We ate them anyway (because, cheese), but now I never skip the foil-steam step. It makes all the difference. These sliders are also the ultimate make-ahead friend. You can assemble the entire pan (up to the butter brush), cover it tightly, and refrigerate it for up to 24 hours. Just add 5-10 minutes to the covered bake time if you’re starting from cold. They also freeze beautifully before baking. See? Magic, and practically foolproof.
Your Questions, Answered (FAQs & Troubleshooting)
Q: My sliders turned out a bit soggy on the bottom. What happened?
A: The most common culprit is not draining enough fat from the beef. Make sure to drain it well! Also, that optional mayo/mustard layer acts as a moisture barrier—it helps more than you think. Finally, don’t let the assembled, unbaked pan sit for too long; get it into the oven.
Q: Can I make these ahead of time?
A: Absolutely! This is one of their best features. Assemble the entire pan (through Step 4), cover tightly with plastic wrap and then foil, and refrigerate for up to a day. When ready, bake as directed, adding maybe 5-10 extra minutes since it’s starting cold. You can also freeze the assembled, unbaked pan for up to 2 months. Bake from frozen, adding 20-25 minutes covered, then 5-10 uncovered.
Q: What’s the best cheese for maximum meltiness?
A: For that iconic, creamy, “burger joint” melt, American cheese is unbeatable. Good cheddar melts well too, especially if you buy block cheese and slice it thinly yourself (pre-shredded cheese has anti-caking agents that can hinder melting). A combo of one slice American and one slice cheddar per row is my personal heaven.
Q: Can I use frozen slider buns?
A: You can, but thaw them completely first. If you try to slice and assemble with frozen or partially frozen buns, they can tear and won’t absorb the flavors the same way. Let them come to room temperature for the best texture.
Nutritional Information*
*Please note: This is an approximate estimate calculated using standard ingredients and includes optional spreads. Values will vary based on specific brands and toppings used.
Per Slider (1 of 12): Calories: ~270 | Protein: 13g | Carbohydrates: 18g | Fat: 17g | Saturated Fat: 7g | Cholesterol: 50mg | Sodium: 520mg | Fiber: 1g | Sugar: 3g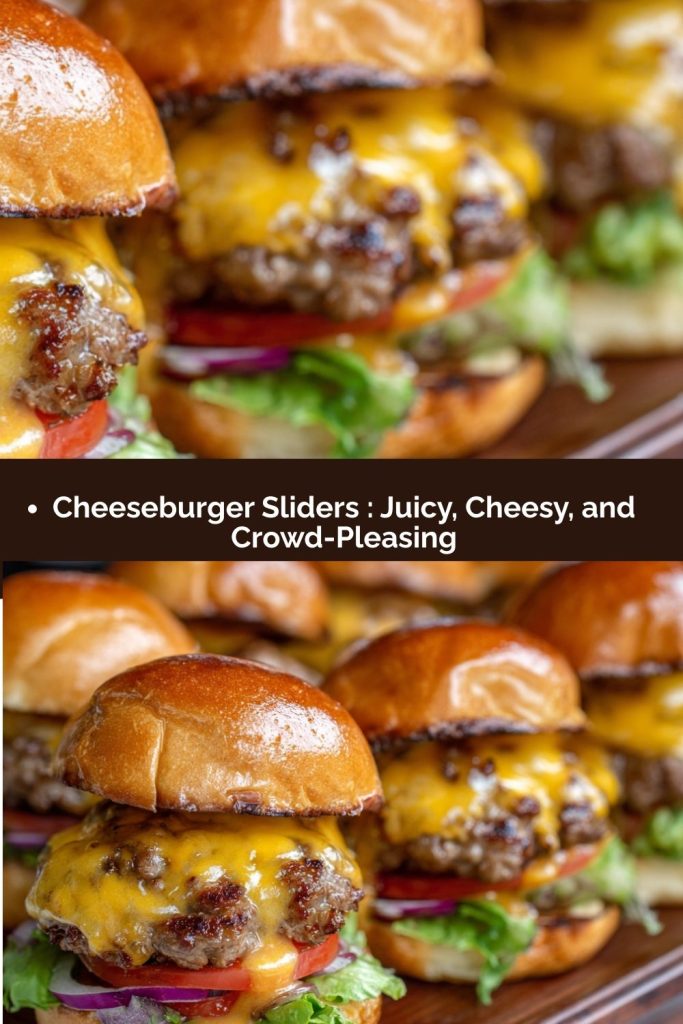
Final Thoughts — Option 1 (Warm, Full-Circle, Family-Focused)
At the end of the day, these Cheeseburger Sliders are so much more than a quick dinner or a party trick—they’re the kind of recipe that brings people together without you even trying. They have that same magical energy my grandma’s “Party Loaf” had all those years ago: simple ingredients, big flavors, and a whole lot of love baked right in. Whether you’re feeding a crowd, wrangling a busy week, or just craving something comforting and familiar, this pan delivers every time. I hope they find a place in your own rotation of feel-good favorites, the way they have in mine. Here’s to full bellies, happy tables, and food that makes memories.