Chinese Lemon Chicken and Rice Bowls – Sweet, Tangy & Better Than Takeout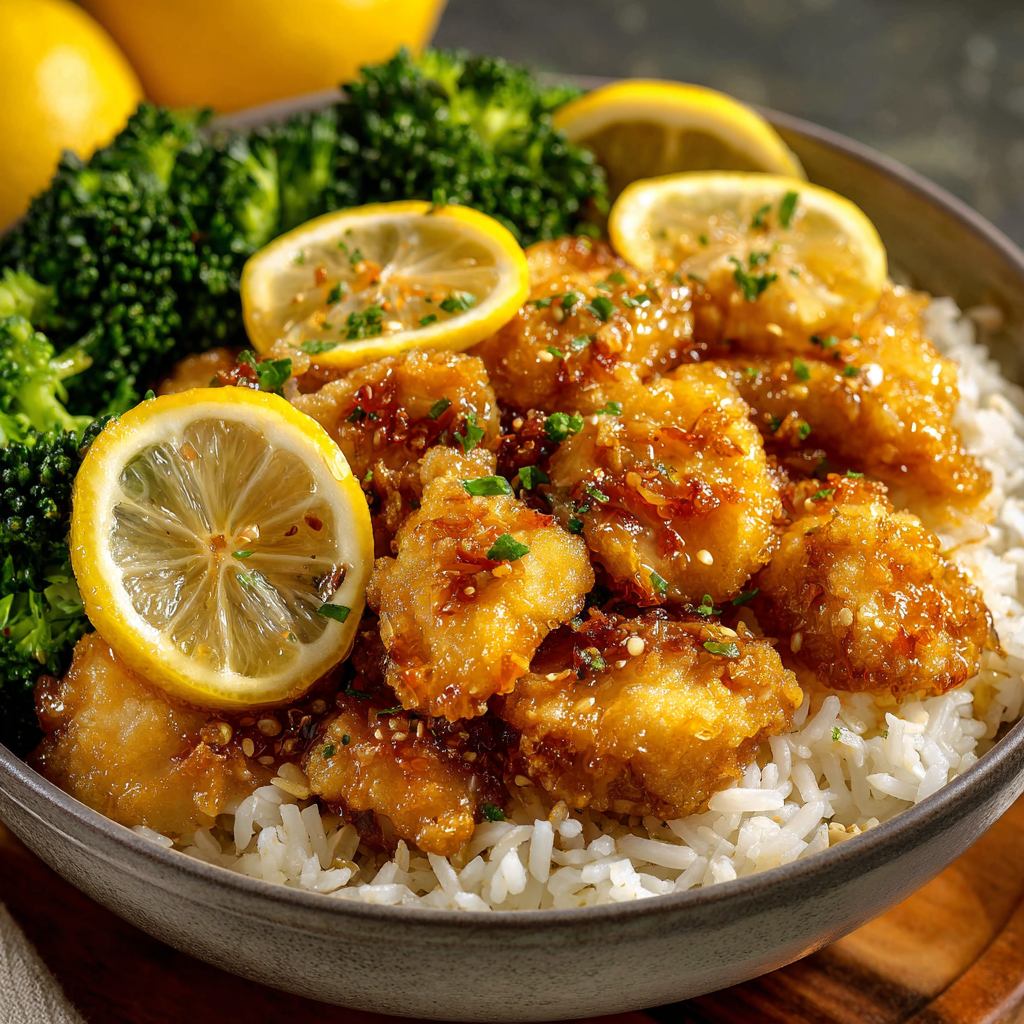
Hey there, friend! Let’s talk about cravings. You know the one: that specific, urgent desire for something crispy, something saucy, something that perfectly walks the line between sweet and lip-puckeringly tangy. For me, that’s almost always Chinese Lemon Chicken. But here’s the thing—while I love the convenience of takeout, I often find myself wishing the chicken was a bit crispier, the sauce a bit brighter, and the whole experience a little… lighter. Sound familiar?
That’s exactly why I created these Chinese Lemon Chicken and Rice Bowls. We’re taking everything we adore about that classic takeout dish and making it even more magical right in our own kitchens. Imagine: golden, outrageously crispy bites of chicken (no deep fryer required!), tossed in a glossy, vibrant lemon sauce that you can actually taste the fresh citrus in. We’ll pile it all over fluffy jasmine rice with some tender-crisp veggies on the side. It’s a complete, satisfying meal that comes together faster than delivery, and I promise, the flavor will blow you away.
This isn’t about complicated techniques or hard-to-find ingredients. It’s about joyful, confident cooking that ends with you doing a happy dance by the stove. So, if you’re ready to turn an ordinary weeknight into a delicious celebration, grab your favorite bowl and let’s get cooking. Your new go-to dinner is waiting!
The Takeout Box That Started It All
PrintChinese Lemon Chicken and Rice Bowls : Sweet, Tangy & Better Than Takeout
These Chinese Lemon Chicken and Rice Bowls bring that irresistible sweet-tangy flavor straight to your kitchen. Crispy golden chicken is coated in a bright, glossy lemon sauce that’s perfectly balanced between sweet and citrusy. Served over fluffy rice with tender vegetables, this bowl is satisfying, high in protein, and perfect for easy weeknight dinners or meal prep.
- Prep Time: 20 minutes
- Cook Time: 20 minutes
- Total Time: 40 minutes
- Yield: 4 1x
Ingredients
Crispy Chicken
1½ lbs boneless, skinless chicken breasts, cubed
½ cup all-purpose flour
2 eggs, beaten
1 cup panko breadcrumbs
½ tsp salt
½ tsp garlic powder
Olive oil spray (for baking or air frying)
Lemon Sauce
½ cup chicken broth
¼ cup fresh lemon juice
2 tbsp honey or sugar
1 tbsp soy sauce
1 tsp lemon zest
1 tbsp cornstarch + 2 tbsp water (slurry)
For the Bowls
3 cups cooked jasmine rice
2 cups steamed broccoli or snap peas
2 green onions, sliced
Sesame seeds (optional)
Instructions
Coat chicken in flour, dip in egg, then press into seasoned panko.
Air fry at 400°F for 12–15 minutes (or bake at 425°F for 18–20 minutes) until golden and internal temperature reaches 165°F.
In a saucepan, combine broth, lemon juice, honey, soy sauce, and zest. Bring to a simmer.
Stir in cornstarch slurry and cook until thick and glossy.
Toss crispy chicken in lemon sauce until evenly coated.
Assemble bowls with rice, lemon chicken, and steamed vegetables. Garnish with green onions and sesame seeds.
Nutrition
- Calories: Approximately 550 per bowl
- Protein: 42g
My love affair with lemon chicken began in the most unassuming way. It wasn’t in a fancy restaurant, but in a small, always-bustling takeout spot near my college apartment. My roommate and I, surviving on a dubious diet of instant noodles and cafeteria food, would splurge every other Friday on one glorious shared order. We’d spread the white cardboard containers on our tiny living room floor, the scent of soy and citrus cutting through the perpetual smell of textbooks and laundry.
We’d always get the same thing: extra crispy lemon chicken, fried rice, and a mountain of steamed broccoli we pretended balanced everything out. That first bite was pure magic—the crackle of the coating, the rush of that bright, sweet-sour sauce. It felt like a reward, a tiny celebration of making it through another week. Years later, the memory of those Friday nights still sparks a deep sense of comfort and joy. Recreating that feeling at home, but on my own terms—with a little more freshness, a little less grease, and a whole lot of love—is what this recipe is truly about. It’s nostalgia, served in a bowl, and made even better because you made it yourself.
Gathering Your Flavor Arsenal
Here’s everything you’ll need to build these incredible bowls. Don’t stress if you need to make a swap or two—I’ve got your back with plenty of tips!
For the Crispy Chicken:
- 1½ lbs boneless, skinless chicken breasts, cubed: I like breasts for their lean, quick-cooking nature. For even more tender, juicy bites, you can use boneless, skinless thighs. Just trim any excess fat.
- ½ cup all-purpose flour: Our first coating layer! It helps the egg stick, which in turn holds the panko. For a gluten-free version, a 1:1 GF flour blend works perfectly.
- 2 eggs, beaten: The essential “glue” for our crispy crust. A little splash of water or milk beaten in can make them easier to dip.
- 1 cup panko breadcrumbs: The secret to insane crunch! Panko is airier and flakes more than regular breadcrumbs, giving you that fantastic, shattery texture. Gluten-free panko is widely available now, too.
- ½ tsp salt & ½ tsp garlic powder: We’re seasoning the breading itself. This is a chef’s little hack to ensure every layer is packed with flavor.
- Olive oil spray (for baking or air frying): The key to golden brown perfection without deep frying! A high-heat oil spray gives us that all-over crisp factor.
For That Gorgeous Lemon Sauce:
- ½ cup chicken broth: Forms the savory base of our sauce. Vegetable broth works great for a vegetarian version (just use tofu or cauliflower instead of chicken!).
- ¼ cup fresh lemon juice: Non-negotiable, my friend! Bottled juice just doesn’t have the same vibrant, sunny flavor. You’ll need about 2 large lemons.
- 2 tbsp honey or sugar: Honey adds a lovely floral note, while granulated sugar keeps it classic. Adjust to your preferred level of sweetness.
- 1 tbsp soy sauce: Adds depth, saltiness, and that classic umami backbone. Use tamari or coconut aminos for a gluten-free or soy-free option.
- 1 tsp lemon zest: This is where the big, bold lemon aroma comes from! Always zest your lemons before you juice them.
- 1 tbsp cornstarch + 2 tbsp water (slurry): Our magical thickening duo. Mixing the cornstarch with cold water first prevents lumps and gives us that beautiful, glossy coating.
For Assembling Your Bowls:
- 3 cups cooked jasmine rice: Fragrant and slightly sticky, it’s the perfect bed for our saucy chicken. Brown rice or quinoa are fantastic hearty alternatives.
- 2 cups steamed broccoli or snap peas: A pop of color and freshness! I love the crunch of snap peas, but broccoli florets are classic. Use whatever green veggie makes you happy.
- 2 green onions, sliced & Sesame seeds (optional): The finishing touches! The green onion adds a fresh bite, and sesame seeds give a subtle nutty crunch and look gorgeous.
Let’s Build Some Magic: Step-by-Step
Ready to see how this all comes together? Follow these steps, lean into the process, and remember—cooking is supposed to be fun!
- Prep Like a Pro: Start by cubing your chicken into 1-inch pieces. Pat them very dry with paper towels—this is crucial for getting the coating to stick properly! Set up your breading station: one shallow bowl with the flour (mixed with the salt and garlic powder), one with the beaten eggs, and one with the panko. Line a baking sheet with parchment paper for your coated chicken. This “mise en place” (everything in its place) makes the process smooth and enjoyable.
- The Breading Ballet: Now for the fun part! Take a few chicken pieces and toss them in the flour, shaking off any excess. Next, give them a full dip in the egg, letting the excess drip back into the bowl. Finally, press them firmly into the panko, turning to coat all sides. The firm press is key—it ensures the panko really adheres. Place the breaded pieces on your prepared sheet. Repeat with all the chicken, and don’t worry if your fingers get a little messy—it’s part of the experience!
- Getting Crispy (Your Choice of Method!): Here’s where you decide your path to crunch town! For Air Frying: Arrange the chicken in a single layer in your air fryer basket (work in batches if needed). Spray generously with oil. Cook at 400°F for 12-15 minutes, flipping halfway through, until deeply golden and the internal temperature hits 165°F. For Baking: Place the baking sheet in a 425°F preheated oven. Spray the tops of the chicken generously with oil. Bake for 18-20 minutes, flipping once, until equally golden and cooked through. Both methods deliver fantastic results!
- Whisk Up the Sunshine Sauce: While the chicken cooks, let’s make that show-stopping sauce. In a small saucepan, combine the chicken broth, fresh lemon juice, honey (or sugar), soy sauce, and lemon zest. Give it a good whisk and bring it to a lively simmer over medium heat. In a separate small bowl, stir the cornstarch and cold water together until completely smooth. Once the sauce is simmering, slowly whisk in the cornstarch slurry. Keep whisking! In about 1-2 minutes, you’ll see it transform from thin and watery to beautifully thick and glossy. Remove it from the heat immediately.
- The Grand Toss: This is the best part. Place your beautifully crispy, hot chicken into a large mixing bowl. Pour that glorious, glossy lemon sauce all over it. Using a gentle folding motion, toss the chicken until every single piece is lovingly coated in that bright, tangy sauce. The sound of the crispy chicken meeting the sauce is pure kitchen music.
- Bowl Assembly Time: Divide your fluffy rice among four bowls. Top with a generous pile of saucy lemon chicken. Add a hearty scoop of your steamed veggies on the side. Finally, garnish with a flourish of sliced green onions and a sprinkle of sesame seeds. Step back and admire your creation—you did it!
Plating Up Your Masterpiece
Presentation is part of the joy! I love using wide, shallow bowls so you can see all the gorgeous components. For a real restaurant-style touch, pack the warm rice into a small bowl or measuring cup, then invert it into the center of your serving bowl to create a perfect rice dome. Arrange the gleaming lemon chicken around it, letting some sauce pool onto the rice. Nestle the bright green veggies alongside for that pop of color. The final sprinkle of green and sesame seeds isn’t just pretty—it adds fresh flavor and texture. Serve immediately while everything is hot and the chicken is at its peak crispiness!
Make It Your Own: Delicious Twists
- Spicy Lemon Chicken: Add 1-2 teaspoons of sriracha or a few dried chili flakes to the sauce while it simmers for a sweet-heat-tangy trifecta.
- “Orange” You Glad You Tried This? Swap the lemon juice and zest for fresh orange. Use 1/3 cup orange juice and add a teaspoon of rice vinegar for balance. Hello, Orange Chicken!
- Go Veggie-Powered: Replace the chicken with extra-firm tofu (pressed and cubed) or even large cauliflower florets. Follow the same breading and cooking process.
- Nutty Crunch: Mix 1/4 cup of finely chopped almonds or cashews into the panko breadcrumbs for an incredible nutty, textured crust.
- Grain Swap: Instead of rice, try quinoa, farro, or even rice noodles for a completely different base that soaks up the sauce beautifully.
Anna’s Kitchen Notes
This recipe has become a true workhorse in my kitchen, and it’s evolved in the best way. I originally tried pan-frying the chicken, which was delicious but a bit fussy. Switching to the oven or air fryer method was a game-changer—less mess, less oil, and consistently perfect crunch. My family now calls it “Friday Night Fakeout,” because it feels like a treat without the takeout guilt.
A funny lesson learned: the first time I made the sauce, I got distracted and added the cornstarch directly to the hot liquid. Let’s just say I ended up with a saucepan full of little flavorless gelatinous blobs! Now, I always pre-mix my slurry in a separate bowl, a ritual that has saved many a sauce. Remember, cooking is full of little lessons, and each one makes you a more confident chef. Don’t be afraid to make it your own!
Your Questions, Answered!
Q: My sauce didn’t get very thick. What happened?
A: No worries! This usually means the cornstarch slurry wasn’t fully activated or the sauce wasn’t at a full simmer when it was added. For a quick fix, mix another tablespoon of cornstarch with a tablespoon of cold water and whisk it into the simmering sauce. It should thicken up in no time.
Q: Can I make this ahead for meal prep?
A> Absolutely! Cook the chicken and sauce separately. Store the crispy chicken (without sauce) in an airtight container in the fridge for up to 3 days. Store the sauce separately. When ready to eat, reheat the chicken in the air fryer or oven to re-crisp, warm the sauce, and then toss them together. This keeps the chicken from getting soggy.
Q: Baking vs. Air Frying—which is truly better?
A> Honestly, both are winners! The air fryer gets a slight edge in speed and can yield a *touch* more crunch because of the powerful circulating air. But my oven-baked version is still incredibly crispy and golden. Use whichever appliance you’re most comfortable with—you can’t lose.
Q: How do I keep the breading from falling off?
A> The holy trinity for perfect breading: 1) Dry chicken (pat it thoroughly!), 2) Shake off excess flour after the first coat, and 3) Press firmly when applying the panko. This creates a solid, adhered layer that stays put through cooking and saucing.
Nutritional Information*
Per Serving (1 bowl): Calories: Approximately 550 | Protein: 42g | Carbohydrates: 60g | Fat: 16g | Fiber: 3g | Sugar: 12g
*Please note: Nutritional information is an estimate provided by an online calculator. Values can vary based on specific ingredients used, portion sizes, and substitutions (e.g., using more or less sauce, different oils, etc.).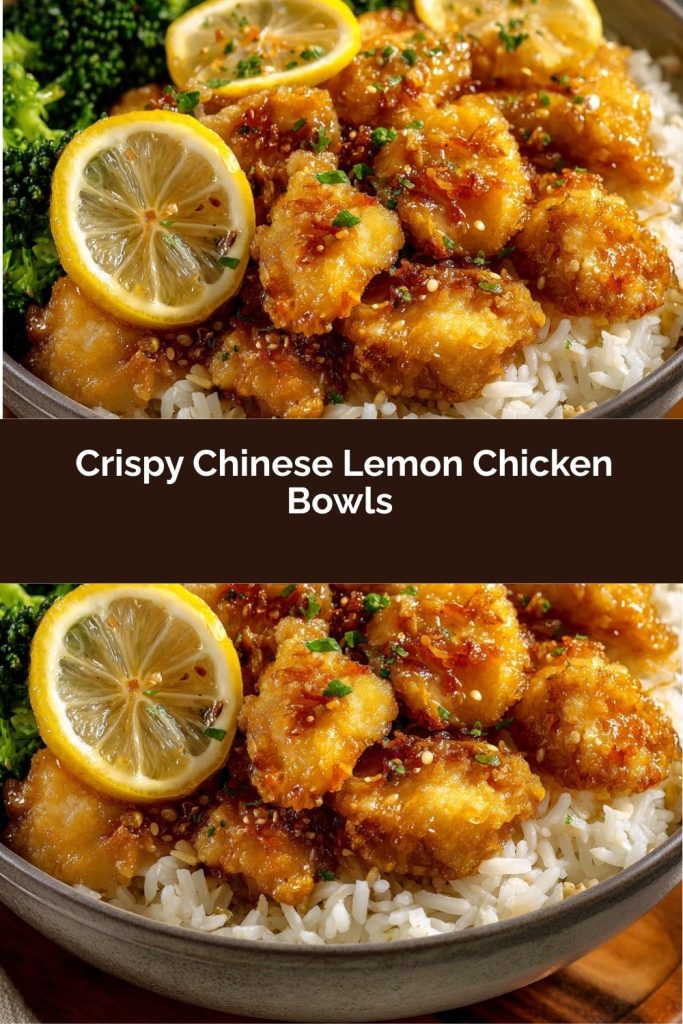
Final Thoughts
Chinese Lemon Chicken doesn’t have to live behind a takeout box. With a few simple steps, a little crisping magic, and a bright, glossy sauce, you can recreate that sweet-tangy, crave-worthy experience right in your own kitchen. The combination of golden, crispy chicken, fresh citrus punch, and a fluffy bed of rice makes every bite feel like a mini celebration—and the bonus? You get to control the flavor, the freshness, and the fun.
The beauty of this recipe is its flexibility. Oven, air fryer, or even a quick skillet—each method delivers that satisfying crunch. Mix in veggies, swap the grains, or add a little spice; it’s a bowl that bends to your creativity. Most importantly, it proves that comfort food can be bright, bold, and homemade, without the takeout guilt.
So grab a bowl, dig in, and savor every bite. Because sometimes the most memorable meals aren’t just about flavor—they’re about the joy of making them yourself.