Chocolate Chip Cookie Bread: Your New Favorite Sweet Slice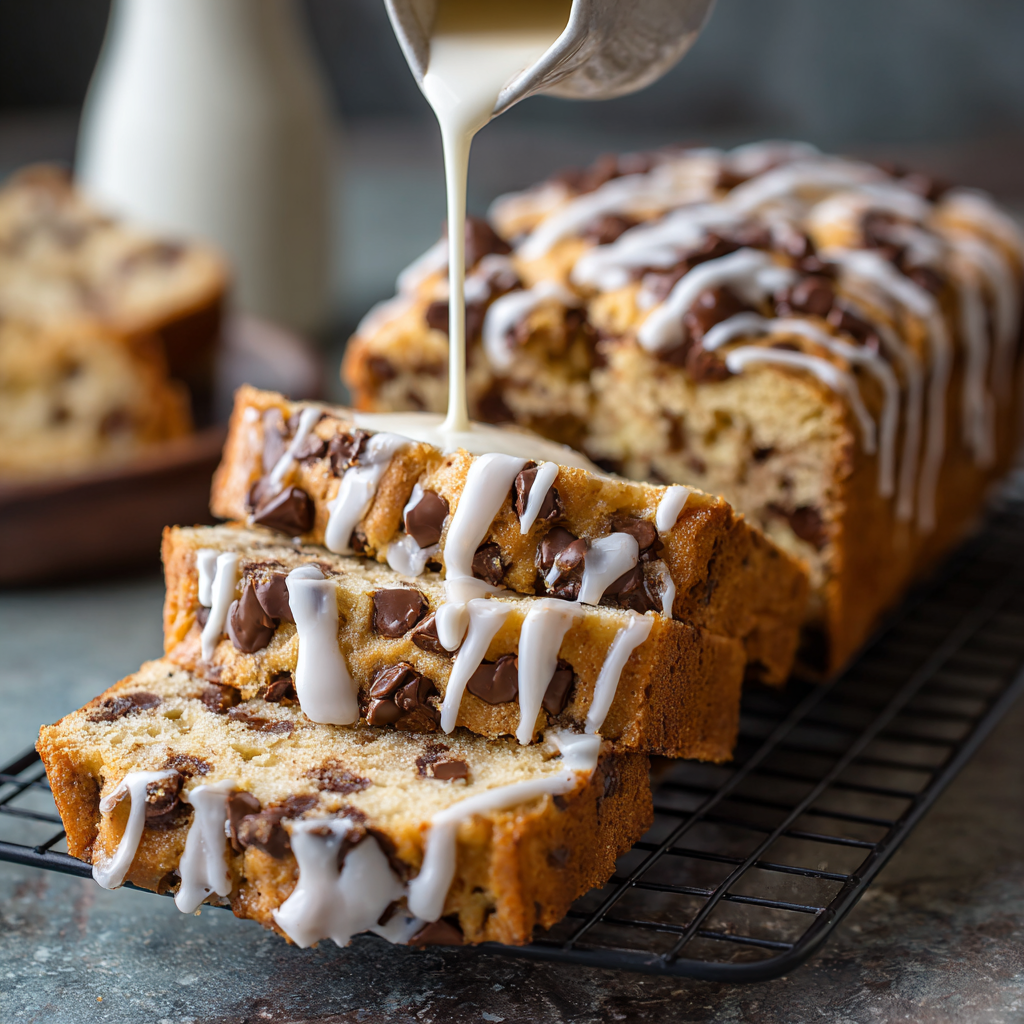
Hey friend! Have you ever been stuck in that delicious dilemma between wanting a warm, gooey chocolate chip cookie and a slice of tender, buttery cake? I’ve been there more times than I can count, usually standing in front of the pantry at 3 PM, craving something sweet that feels a little special but doesn’t require a whole production. That’s exactly why I want you to meet your new kitchen bestie: Chocolate Chip Cookie Bread.
Imagine, if you will, the soul of a perfect chocolate chip cookie—crispy-edged, soft-centered, packed with melty chocolate—deciding to get cozy inside the moist, sliceable body of a rich pound cake. That’s what we’re baking today. It’s the ultimate hybrid dessert that’s dressed up enough for a weekend brunch table but simple enough to whip up on a random Tuesday because, well, you deserve it. This loaf is pure, uncomplicated joy. It’s the edible equivalent of your favorite cozy sweater, and I can’t wait for you to experience the magic. So, preheat that oven, grab your favorite mixing bowl, and let’s turn an ordinary afternoon into something sweetly memorable.
The Story Behind the Slice: Grandma’s Cookie Jar, Reimagined
PrintChocolate Chip Cookie Bread : Soft, Sweet & Drizzled with Icing
- Prep Time: 15 minutes
- Cook Time: 45–55 minutes
- Total Time: 1 hour 5 minutes
- Yield: 10 slices 1x
Ingredients
For the Bread:
½ cup (1 stick) butter, softened
½ cup granulated sugar
¼ cup packed brown sugar
2 large eggs, room temperature
1 tsp vanilla extract
½ cup sour cream or plain Greek yogurt
1½ cups all-purpose flour
1 tsp baking powder
¼ tsp baking soda
½ tsp salt
¾ cup mini chocolate chips
For the Glaze:
1 cup powdered sugar
1–2 tbsp milk
Extra mini chocolate chips for topping
Instructions
-
Preheat Oven & Prepare Pan:
Preheat oven to 350°F (175°C). Grease a 9×5-inch loaf pan and line with parchment paper, leaving overhang for easy removal. -
Cream Butter & Sugars:
In a large bowl, beat softened butter, granulated sugar, and brown sugar for 2–3 minutes until pale and fluffy. -
Add Wet Ingredients:
Beat in eggs one at a time, then mix in vanilla and sour cream/yogurt. Batter may look curdled—this is normal. -
Combine Dry Ingredients:
In a separate bowl, whisk together flour, baking powder, baking soda, and salt. Gradually mix into wet ingredients on low speed until just combined. -
Fold in Chocolate Chips:
Use a spatula to gently fold in mini chocolate chips. Pour batter into prepared pan and smooth the top. -
Bake:
Bake 45–55 minutes. Check doneness with a toothpick—it should come out with a few moist crumbs but no wet batter. Loaf edges should pull slightly away from pan. -
Cool & Glaze:
Cool in pan 20 minutes, then lift out using parchment handles and cool completely on a wire rack. Whisk powdered sugar with 1 tbsp milk (add extra if needed) to make a thick glaze. Drizzle over loaf and top with extra chocolate chips. Let set 15 minutes before slicing.
Nutrition
- Calories: ~280 kcal
- Sugar: 20 g
- Carbohydrates: 36 g
- Protein: 3 g
This recipe always takes me back to my grandma’s kitchen. Her signature move was a ceramic cookie jar that was never, ever empty. It was usually filled with the most phenomenal classic chocolate chip cookies. The rule was you could have one after school, but my sister and I would always scheme to sneak a second, still-warm-from-the-oven treasure when she wasn’t looking. That smell of brown sugar, butter, and chocolate is my ultimate nostalgia trigger.
Years later, as a mom with kids of my own running in after school, I wanted to recreate that magic but in a form that could last a little longer (and maybe avoid the “who took the last cookie?” debate!). I started playing with my favorite cookie dough, adding a little more tenderness, baking it in a loaf pan, and a beautiful thing happened. The classic cookie flavor transformed into this incredible, shareable, sliceable treat. It was an instant hit. Now, the smell of this bread baking is my family’s new “welcome home” scent. It’s my little way of keeping Grandma’s cookie jar spirit alive, just in a new, loaf-shaped package.
Gathering Your Ingredients: A Little Chat About Each One
Here’s everything you’ll need. I’ve added my little chef notes next to each one because knowing the “why” makes you a more confident baker!
- 1/2 cup (1 stick) butter, softened – This is our flavor foundation. Softened is key here! It should be cool to the touch but yield easily when pressed. This creates the perfect texture for creaming. No microwave melting, please—it changes the game entirely.
- 1/2 cup granulated sugar – For sweetness and that lovely, slight crisp on the crust.
- 1/4 cup packed brown sugar – The secret weapon! This adds a deep, caramel-like moisture and that classic cookie flavor we all love. Use light or dark—dark will give you a richer, more molasses-y note.
- 2 large eggs – Our binders and structure-builders. Make sure they’re at room temperature to blend seamlessly into the batter. A quick tip: pop cold eggs in a bowl of warm water for 5-10 minutes.
- 1 teaspoon pure vanilla extract – The flavor enhancer. It rounds out all the other flavors. Splurge on the good stuff if you can; it makes a difference.
- 1/2 cup sour cream or plain Greek yogurt – This is the magic ingredient for an unbelievably moist, tender crumb that stays that way for days. Sour cream gives a richer tang, while Greek yogurt is a slightly lighter option. Both are fantastic.
- 1 1/2 cups all-purpose flour – The backbone. For a foolproof measure, fluff your flour with a spoon, lightly spoon it into your measuring cup, and level it off. No packing!
- 1 teaspoon baking powder – Our rising agent for a nice, even lift.
- 1/4 teaspoon baking soda – Works with the acidity of the sour cream/yogurt to give us a tender texture.
- 1/2 teaspoon salt – Do not skip this! Salt makes all the flavors pop and balances the sweetness perfectly.
- 3/4 cup mini chocolate chips – Minis are my go-to here because they distribute more evenly in every single bite. You can use standard chips, but minis are the pro move.
- For the Glaze: Just 1 cup powdered sugar and 1-2 tablespoons of milk (any kind). We’ll whisk it into a thick, drizzle-able icing. Plus, more mini chocolate chips for topping because more is more when it comes to chocolate.
Let’s Bake! Your Step-by-Step Guide to Cookie Bread Bliss
Ready? Let’s do this together. I’m walking you through each step with all my favorite tips to ensure your loaf is absolutely perfect.
- Prep Your Stage. Preheat your oven to 350°F (175°C). Grease a 9×5-inch loaf pan generously with butter or non-stick spray, then line it with a strip of parchment paper so that it hangs over the two long sides. This creates little “handles” that will let you lift the entire loaf out cleanly after baking. It’s a game-changer for beautiful slices!
- Cream Like a Dream. In a large bowl, using a hand mixer or stand mixer fitted with the paddle attachment, beat the softened butter, granulated sugar, and brown sugar together on medium speed for about 2-3 minutes. We’re not just mixing; we’re creaming. You’ll know it’s ready when the mixture turns pale, fluffy, and looks almost like a smooth frosting. This step incorporates air, which is crucial for texture.
- Bring in the Wet Team. Beat in the eggs, one at a time, making sure each is fully incorporated before adding the next. Then, mix in the vanilla and the sour cream (or yogurt). The batter might look a little curdled at this point—don’t panic! That’s totally normal and will all come together when we add the dry ingredients.
- Gently Does It with the Dry. In a separate bowl, whisk together the flour, baking powder, baking soda, and salt. This ensures our leaveners are evenly distributed. Now, with your mixer on low speed, gradually add the dry ingredients to the wet ingredients. Mix just until the flour disappears. Seriously, stop the second you don’t see any more dry flour. Overmixing is the #1 cause of tough, dense bread. We want tender!
- The Best Part: Chocolate. Take the bowl off the mixer. Sprinkle in your mini chocolate chips and use a flexible spatula to fold them in gently. This final hand-mixing ensures you don’t overwork the batter. Pour the glorious batter into your prepared pan and smooth the top with the spatula.
- Bake to Golden Perfection. Slide the pan into your preheated oven. Bake for 45-55 minutes. Start checking at the 45-minute mark by inserting a toothpick or thin skewer into the very center of the loaf. It should come out with just a few moist crumbs, but no wet batter. Another sign: the top will be a beautiful golden brown, and the edges will just be pulling away from the sides of the pan.
- The Patience Test (The Hardest Part!). Once baked, let the loaf cool in the pan on a wire rack for at least 20 minutes. Then, use those parchment paper handles to carefully lift it out onto the rack to cool completely. I know it’s tempting, but glazing a warm loaf will cause the icing to just melt and slide right off. Let it cool—it’s worth the wait!
- Finish with a Sweet Drizzle. When the loaf is completely cool, make your glaze. In a small bowl, whisk the powdered sugar with 1 tablespoon of milk. Add the second tablespoon only if needed to reach a thick but pourable consistency. Drizzle it artfully (or enthusiastically!) over the top of the loaf. Immediately sprinkle with a handful of extra mini chocolate chips so they stick to the glaze. Let the glaze set for about 15 minutes before slicing.
How to Serve This Sweet Masterpiece
Presentation is part of the fun! I love placing the whole loaf on a simple wooden board or a pretty cake stand. Slice it thick—this is a generous bread. It’s sublime all on its own with a glass of cold milk or a hot cup of coffee. For an extra-special treat, warm a slice for 10 seconds in the microwave and maybe add a tiny scoop of vanilla ice cream on the side. It also makes the most incredible next-day French toast—just saying!
Make It Your Own: Delicious Twists & Swaps
This recipe is a fantastic canvas for creativity! Here are a few of my favorite ways to mix it up:
- Brown Butter Bliss: Take your butter one step further by browning it first. It adds a deep, nutty, toffee-like flavor that’s absolutely insane.
- Chip Swap: Try using dark chocolate chips, white chocolate chips, or even peanut butter chips. A mix of semi-sweet and milk chocolate is also a winner.
- Add Some Crunch: Fold in 1/2 cup of chopped toasted walnuts, pecans, or even toffee bits along with the chocolate chips.
- Gluten-Free Friendly: Use a 1:1 gluten-free all-purpose flour blend (I love the ones with a bit of xanthan gum already included).
- “Blondie” Bread: Omit the chocolate chips and fold in 3/4 cup of butterscotch chips instead. Top the glaze with a sprinkle of flaky sea salt.
Anna’s Chef Notes & Kitchen Stories
This recipe has seen many iterations in my kitchen! The first time I made it, I was so eager I tried to slice it way too soon, and it just smooshed (still tasted amazing, though). The cooling lesson was learned the hard way! I’ve also found that this bread gets even more flavorful on day two, as the flavors really meld. It keeps beautifully wrapped at room temperature for up to 3 days, if it lasts that long. One funny memory: my youngest once “helped” by dumping in what felt like an entire bag of chocolate chips. The loaf was basically solid chocolate, and it was a huge hit with the neighborhood kids. So, don’t stress—this recipe is incredibly forgiving and full of love, no matter what.
Your Questions, Answered!
Q: My bread is dense/gummy in the middle. What happened?
A: This is almost always due to one of two things: overmixing the batter after adding the flour (which develops too much gluten), or underbaking. Next time, mix just until combined and use the toothpick test. If the toothpick has wet batter, it needs more time, even if the top looks brown.
Q: Can I use full-fat yogurt instead of sour cream?
A> Absolutely! Plain, full-fat Greek yogurt is my go-to substitute. It works exactly the same way. Just avoid non-fat varieties, as they can change the texture and moisture level.
Q: How do I store this, and can I freeze it?
A> Once cooled and glazed, store it wrapped tightly in plastic wrap or in an airtight container at room temp for 3 days. For longer storage, you can freeze it! Wrap the unglazed, cooled loaf tightly in plastic wrap and then in foil. Freeze for up to 3 months. Thaw overnight at room temp, then add the fresh glaze before serving.
Q: I only have a 8.5×4.5 inch loaf pan. Will that work?
A> Yes, but your loaf will be taller and may need a slightly longer baking time (add 5-10 minutes). Keep a close eye on it and use the trusty toothpick test to determine doneness.
Nutritional Information (Approximate, per slice)
Prep Time: 15 minutes | Bake Time: 50 minutes | Total Time: 1 hour 5 minutes | Servings: 10 slices
Per Slice: ~280 calories | 3g protein | 36g carbohydrates | 14g fat | 1g fiber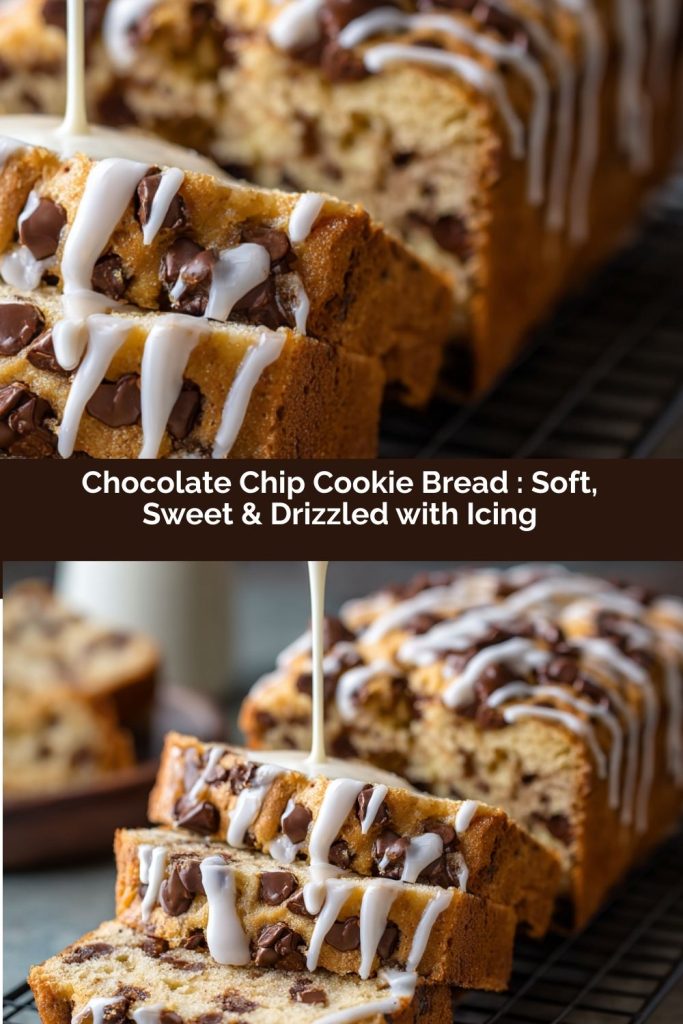
Final Thoughts:
This Chocolate Chip Cookie Bread isn’t just a recipe—it’s a hug in loaf form. It’s got the best of both worlds: the nostalgia of a classic chocolate chip cookie and the sliceable, shareable joy of a soft, buttery cake. Whether you’re baking it for an afternoon snack, a weekend brunch, or a last-minute sweet fix, it’s easy, forgiving, and endlessly comforting. The smell alone will fill your kitchen with that warm, homey magic that makes everyone gather around the table. Don’t rush it—let it cool, drizzle on that glaze, and savor every slice. Trust me: once you try it, this loaf will become your new go-to sweet treat.