Chocolate Sourdough Bread: Your New Favorite Baking Adventure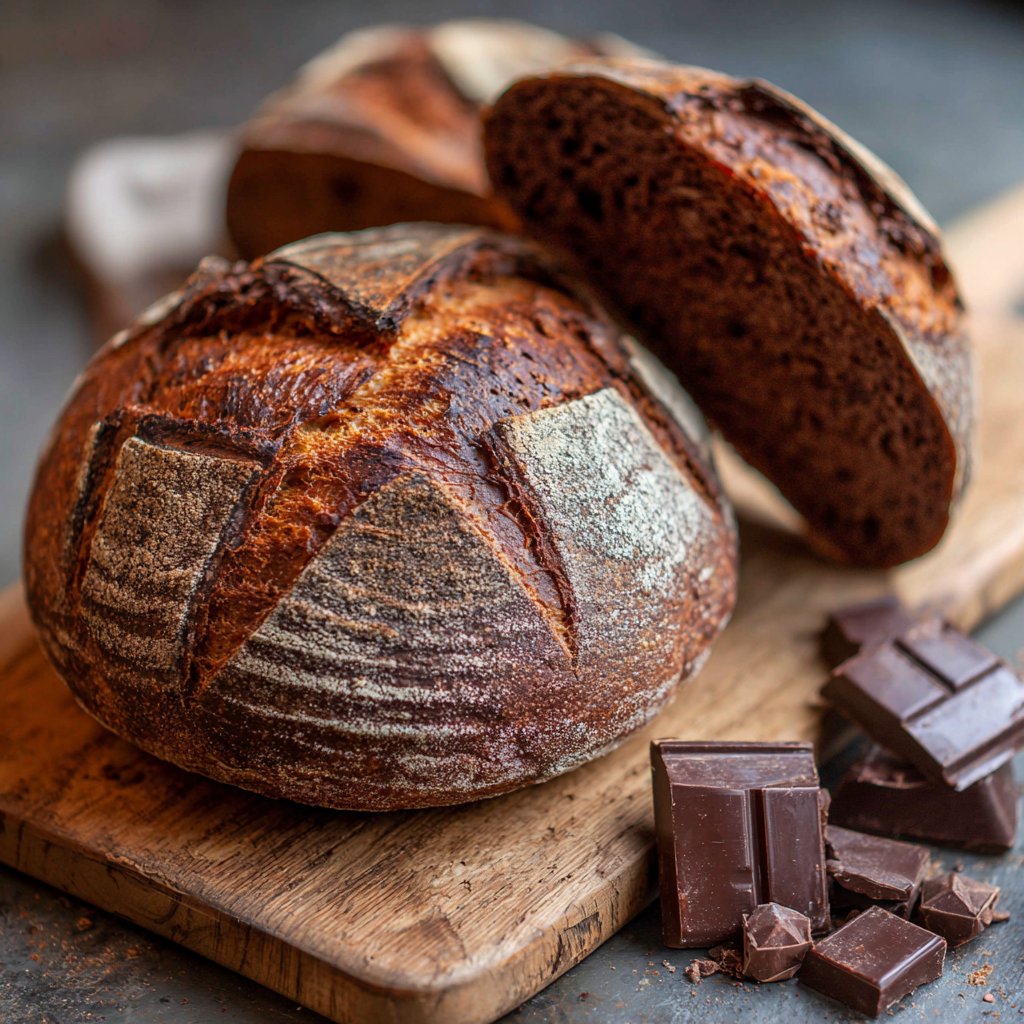
Hey there, friend! Come on in and pull up a stool. I’ve got something absolutely magical bubbling away on the counter, and I cannot wait to share it with you. Today, we’re merging two of life’s greatest comforts: the deep, soul-satisfying art of sourdough and the pure, unadulterated joy of chocolate. The result? This incredible Chocolate Sourdough Bread.
Now, I can see that spark of curiosity in your eyes. Chocolate… in bread? Oh, trust me on this one. This isn’t a cakey, overly sweet loaf. This is a seriously baker-worthy, rustic bread with a deep cocoa flavor, a subtle tang from the sourdough, and gooey pockets of melted dark chocolate in every single slice. It’s the kind of project that fills your kitchen with the most heavenly aroma and fills your heart with a major sense of accomplishment. Whether you’re a sourdough veteran with a bustling starter or a beginner with a jar of discard you’re not sure what to do with, this recipe is your invitation to play, to experiment, and to create something truly memorable. So, let’s tie on our aprons, dust our hands with flour (and maybe a little cocoa), and turn an ordinary day into a deliciously extraordinary one. This is going to be fun!
The Loaf That Started It All: A Happy Kitchen Accident
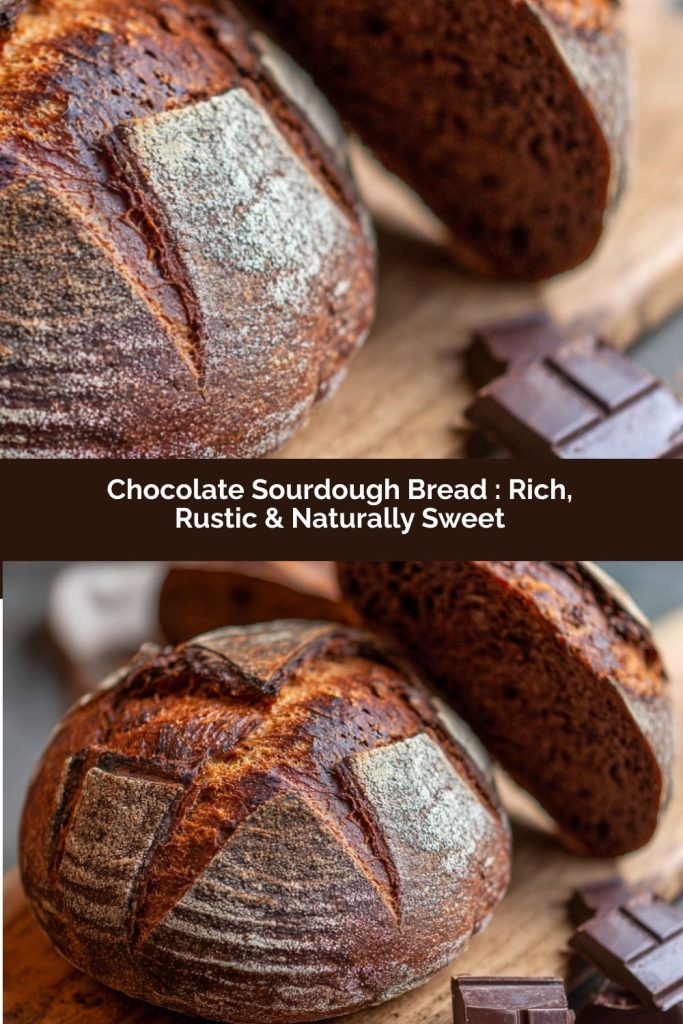
PrintChocolate Sourdough Bread : Rich, Rustic & Naturally Sweet
This chocolate sourdough bread is where artisan baking meets dessert vibes. With a deep cocoa flavor, a hint of sourdough tang, and chunks of dark chocolate throughout, it’s rich but not too sweet—perfect for breakfast toast, snacking, or an indulgent twist on your favorite loaf. Naturally leavened with sourdough starter or discard, it bakes up with a chewy crust and tender, chocolatey crumb that smells like heaven.
- Prep Time: 25 mins
- rise time: 12–18 hours
- Cook Time: 45 mins
- Total Time: 13–19 hours
Ingredients
1 cup sourdough starter or discard (unfed)
¾ cup warm water
2 ½ cups bread flour
¼ cup unsweetened cocoa powder
2 tbsp honey or maple syrup
1 tsp salt
½ cup dark chocolate chunks or chips
Optional: ¼ tsp instant yeast (for faster rise)
Instructions
In a large bowl, mix starter, warm water, honey, and cocoa powder. Stir until smooth.
Add flour and salt. Mix until a sticky dough forms. Let rest 30 minutes (autolyse).
Knead or stretch and fold dough for 5 minutes. Cover and let rise at room temperature for 4–6 hours or until doubled.
Gently fold in chocolate chunks. Shape dough into a round or oval loaf.
Place into a floured banneton or bowl. Cover and cold-proof in the fridge overnight (8–12 hours).
Preheat oven to 450°F (230°C) with Dutch oven inside.
Score the loaf, bake covered for 20 minutes, then uncovered for 20–25 more until deep brown.
Cool completely before slicing.
Nutrition
- Calories: 180
- Sugar: 5g
- Fat: 4g
- Carbohydrates: 28g
- Protein: 5g
I have to confess, this magnificent bread started not with a grand plan, but with a happy little accident. It was a rainy Sunday, and my sourdough starter, Felix, was bursting at the seams, begging to be used. I was mid-way through mixing my standard loaf when my youngest, covered in flour and wearing a mixing bowl as a hat, pointed to the cocoa powder on the shelf and declared, “Chocolate bread, Mama. Make it!”
In that moment, my baker’s brain shifted from “follow the rules” to “why the heck not?” I scooped a generous amount of rich cocoa powder right into the dough, and for good measure, I stirred in the last of a bar of dark chocolate I’d been hiding from myself. The dough transformed into this beautiful, earthy brown. The bake was an experiment filled with anticipation. When I pulled the lid off the Dutch oven, the smell was unreal—like the best bakery crossed with a cozy chocolatier. That first warm slice, slathered with salted butter, was a revelation. It was complex, not-too-sweet, and utterly delightful. It turned a simple baking day into a core family memory, and now, it’s my absolute favorite way to use sourdough discard. It’s proof that the best recipes often begin with a dash of whimsy and a willing heart.
Gathering Your Chocolate Sourdough Ingredients
Here’s your shopping list for chocolatey magic! Remember, the quality of your ingredients shines through, so use the best you have on hand.
- 1 cup (about 240g) sourdough starter or discard – This is the soul of your loaf! Use it straight from the fridge (discard) or at peak rise (active starter). Chef’s Insight: If your discard is very old or smells strongly of alcohol, it’s still fine to use—the tang will just be more pronounced.
- ¾ cup (180ml) warm water – Aim for baby-bottle warm, around 85-95°F (30-35°C). This helps wake up the wild yeast without killing it.
- 2 ½ cups (about 325g) bread flour – Bread flour has a higher protein content, which gives our loaf that wonderful, chewy structure. Substitution Tip: All-purpose flour works in a pinch, but your crumb might be slightly less open and chewy.
- ¼ cup (25g) unsweetened cocoa powder – This is where the deep chocolate flavor comes from! Use natural, not Dutch-process, for the best tangy-sour pairing with the levain.
- 2 tbsp honey or maple syrup – A touch of sweetness to balance the cocoa’s bitterness and give the yeast a little snack. Chef’s Insight: I love the floral note of honey, but maple syrup makes this loaf beautifully vegan-friendly!
- 1 tsp salt – Non-negotiable! Salt controls yeast activity and heightens all the other flavors. Add it after the initial mix.
- ½ cup dark chocolate chunks or chips – The glorious pockets of joy! I chop a bar of 70% dark chocolate for irregular, melty bits. Chips hold their shape more. You do you!
- Optional: ¼ tsp instant yeast – A little “insurance policy” if your starter isn’t super active or you’re in a time crunch. It ensures a good rise without affecting the sourdough flavor much.
Let’s Bake! Step-by-Step Chocolate Sourdough Magic
Ready to get your hands dirty? Follow these steps, and don’t forget to read my little hacks along the way. We’re not just making bread; we’re building flavor and texture.
Step 1: The Chocolatey Base. In a large mixing bowl, combine your sourdough starter, warm water, honey (or maple syrup), and cocoa powder. Use a sturdy spoon or Danish dough whisk to whisk it until you have a smooth, chocolaty liquid. It will look like rich chocolate milk! Little Chef Hack: If your honey is stiff, warm it slightly so it blends in easily.
Step 2: Bring in the Flour. Add all of the bread flour to the bowl. Stir with your spoon until you have a shaggy, stiff dough with no dry flour patches. It will be sticky and look a bit messy—that’s perfect! Now, sprinkle the salt over the dough. Cover the bowl with a damp kitchen towel or plastic wrap and let it rest for 30 minutes. This rest period, called the autolyse, allows the flour to fully hydrate and starts developing gluten naturally, making our kneading easier.
Step 3: Building Strength. After the rest, it’s time to develop the dough’s structure. You can knead on a lightly floured surface for 5-7 minutes until smoother. But my preferred, no-mess method is the stretch and fold. With wet hands, grab one side of the dough, stretch it up, and fold it over the center. Rotate the bowl a quarter turn and repeat 4-5 times until you’ve gone around the bowl. Do this set 3-4 times, resting the dough for 30 minutes between each set. You’ll feel the dough transform from sticky to strong and elastic.
Step 4: The First Rise (Bulk Fermentation). Once your dough feels strong and bouncy, cover it and let it rise at room temperature (ideally 70-75°F) for 4-6 hours. It should look puffy and roughly doubled. Key Tip: Time is flexible! In a cooler kitchen, it may take longer. Look for the dough to be full of air bubbles, not just the clock.
Step 5: Add the Chocolate & Shape. Gently turn your risen dough out onto a lightly floured surface. Press it gently into a rectangle. Sprinkle the dark chocolate chunks evenly over the surface, then fold the dough over itself a few times to incorporate them. Be gentle to keep those precious air bubbles! Shape into a tight round or oval loaf by pulling the edges to the center and creating surface tension.
Step 6: The Overnight Chill (Cold Proof). Generously flour a banneton or a medium bowl lined with a floured kitchen towel. Place your shaped loaf seam-side UP into it. Cover and pop it in the fridge for 8-12 hours (up to 24 is okay!). This slow, cold rise develops incredible flavor and makes the dough easier to score.
Step 7: Bake to Perfection. Place your Dutch oven (with lid) into your regular oven and preheat to 450°F (230°C) for a full 30 minutes. Carefully take your cold loaf from the fridge, turn it out onto parchment paper, and score the top with a sharp blade or lame. Use the parchment as a sling to lower the loaf into the scorching-hot Dutch oven. Cover and bake for 20 minutes. This creates steam for a great “oven spring” and crust. Remove the lid, lower the heat to 425°F (220°C), and bake for another 20-25 minutes until the crust is a deep, crackly brown.
Step 8: The Hardest Part: Waiting. Transfer your gorgeous loaf to a wire rack and let it cool COMPLETELY before slicing—at least 2-3 hours. I know it’s torture, but slicing too soon traps steam and makes the crumb gummy. Trust me, it’s worth the wait!
How to Serve Your Masterpiece
This bread is a star all on its own! For breakfast, toast a slice until the chocolate bits get melty and schmear with good butter, mascarpone, or almond butter. As an afternoon snack, it needs nothing at all. To elevate it into dessert territory, serve it slightly warm with a dollop of crème fraîche or a scoop of vanilla bean ice cream. It also makes the most unforgettable bread pudding or French toast you’ll ever have. Get creative!
Mix It Up! Fun Recipe Variations
- Orange Zest & Hazelnut: Add the zest of one orange when mixing and fold in ⅓ cup chopped toasted hazelnuts with the chocolate.
- Cherry & Almond: Swap half the chocolate chunks for dried tart cherries and add ½ tsp almond extract with the wet ingredients.
- Spiced Mocha: Add 1 tsp instant espresso powder and ½ tsp each of cinnamon and cardamom to the dry ingredients.
- Seeded Crunch: For the topping, brush the scored loaf with water and press in a mix of sesame, pumpkin, and flax seeds before baking.
- Vegan & Rich: Use maple syrup, ensure your chocolate is vegan, and brush the top with aquafaba (chickpea water) instead of an egg wash for extra shine.
Anna’s Chef Notes & Kitchen Stories
This recipe has become a living, breathing thing in my kitchen! I’ve made it in the height of summer and the dead of winter, and the rise times always keep me on my toes—it’s a great reminder to bake with your senses, not just a timer. One time, I accidentally used Dutch-process cocoa, and the loaf was richer and milder—still delicious, but a different vibe! My biggest evolution was learning to be bold with the chocolate chunks; more is truly more here. And a funny story: I once forgot the salt. Just once. The loaf was flat, sad, and tasted strangely sweet. We still ate it (it was chocolate bread, after all), but it was a powerful lesson in how salt is the quiet hero that makes everything else sing. So don’t skip it!
Your Questions, Answered
Q: My dough didn’t rise much during bulk fermentation. What went wrong?
A: Don’t panic! This usually means your starter wasn’t active enough or your kitchen is cool. For next time, make sure your starter floats in water before using (if using active). For this batch, that optional ¼ tsp of instant yeast is a great rescue. You can also let it bulk ferment longer—even overnight in a cool spot (65°F).
Q: Can I bake this without a Dutch oven?
A: Yes! Preheat a baking sheet or pizza stone. When ready to bake, place your loaf on a parchment-lined sheet. Create steam by placing a pan of boiling water on the bottom oven rack. Bake as directed, but keep an eye on crust browning.
Q: My bread is very dense and gummy. Why?
A: Two common culprits: 1) You sliced it while it was still warm. The crumb needs time to set. 2) The dough was under-proofed. Next time, let it rise until it’s truly puffy and passes the “poke test”: a gentle poke should slowly fill back in, leaving a slight indent.
Q: How do I store it?
A: For the best crust, store it cut-side down on a board for 1-2 days. For longer, wrap tightly in foil and keep at room temp for up to 4 days, or slice and freeze for up to 3 months. Toast frozen slices straight from the freezer!
Nutritional Information (Approximate)
Per slice (based on 12 slices per loaf): Calories: ~180 | Total Fat: 4g | Saturated Fat: 2g | Cholesterol: 0mg | Sodium: 195mg | Total Carbohydrates: 28g | Dietary Fiber: 2g | Sugars: 5g | Protein: 5g
Final Thoughts
This Lemon-Garlic Roasted Chicken is more than just a recipe—it’s a celebration of simple, fresh flavors that make any meal feel special. From the golden, crispy skin to the fragrant, juicy meat, it’s proof that you don’t need hours in the kitchen to create a show-stopping dinner. Whether it’s a weeknight lift, a casual weekend gathering, or a small celebration, this chicken delivers comfort, freshness, and that little wow factor we all crave.
Don’t be afraid to make it your own—swap herbs, add seasonal vegetables, or try a zesty twist with extra lemon or garlic. And remember, the best meals are the ones shared around the table, full of laughter, love, and a little extra pan juice drizzled over everything. Serve it with your favorite sides, enjoy the aroma as it comes out of the oven, and savor every golden, juicy bite.