***
Your New Favorite Holiday Showstopper is Here!
Hello, my friend! Anna here, ready to dive into one of my all-time favorite holiday traditions: building a dessert that’s as much a joy to look at as it is to eat. If you’ve ever felt that pang of panic when you think about making a complicated, fussy holiday dessert, I’m here to tell you to take a deep, calming breath. This Christmas Trifle is your secret weapon. It’s the dessert that looks like you spent all day in the kitchen, but secretly comes together with so much ease and joy.
We’re talking about layers of rich, cocoa-kissed red velvet cake, cheerful green-tinted white cake, and a cloud of the most luscious, creamy, no-bake cheesecake filling you’ve ever whipped up. Every spoonful is a perfect bite—moist cake, velvety cream, and a festive look that will have your guests grabbing their phones for a picture before they even take a bite. It’s the ultimate centerpiece for your holiday table, and I promise you, it’s the first bowl that will be scraped clean at any potluck or family dinner.
So, if you’re ready to create a little magic, to turn a simple dessert into a memory, grab your favorite glass bowl and let’s get layering. This isn’t just about following a recipe; it’s about creating a moment of pure, unadulterated holiday joy.
The Year of the Trifle Mishap (And Why It’s Now a Tradition)
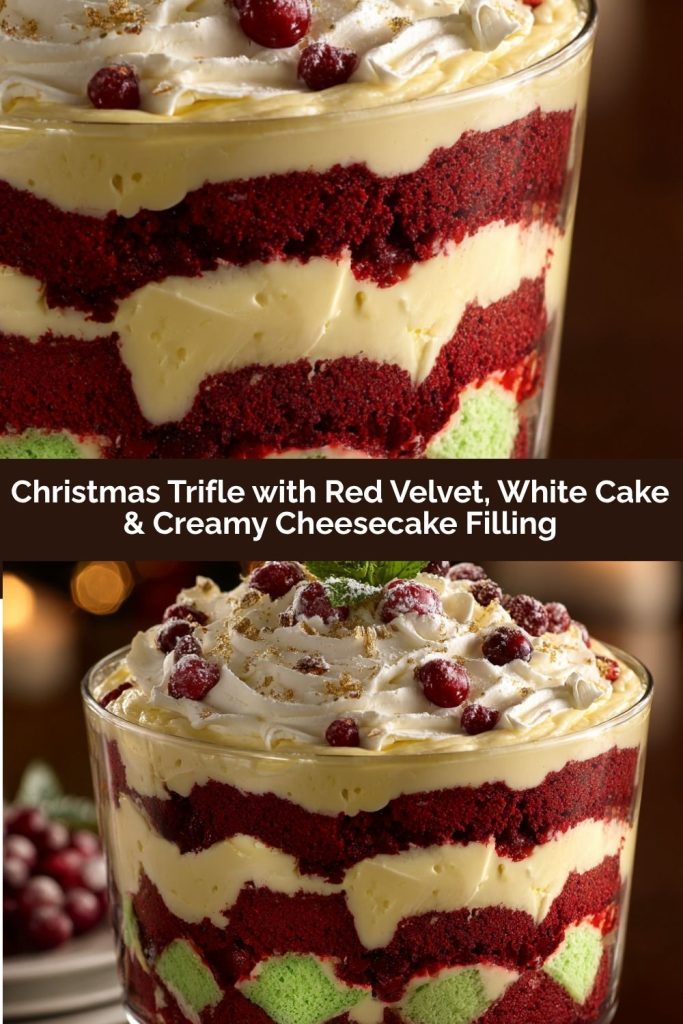
PrintChristmas Trifle with Red Velvet, White Cake & Creamy Cheesecake Filling

Bring the wow to your holiday table with this festive Christmas Trifle — a stunning, no-fuss dessert layered with red velvet cake, green-tinted white cake, and a luscious cheesecake-like filling. It’s creamy, colorful, and guaranteed to be the first thing to disappear at any gathering. Make it ahead and serve it up in a glass bowl to show off those merry layers.
- Prep Time: 25 min
- chill time: 2 hrs
- Total Time: 2 hrs 25 min
- Yield: 10–12 1x
Ingredients
1 box white cake mix (prepared as directed)
1 box red velvet cake mix (prepared as directed)
Green food coloring (about 10 drops, or to desired color)
Creamy Filling:
8 oz cream cheese, softened
14 oz can sweetened condensed milk
1 tub (8 oz) whipped topping (like Cool Whip)
Instructions
Prepare both cakes according to box instructions.
Add green food coloring to the white cake batter before baking.
Once baked and cooled, cut both cakes into cubes.
In a large bowl, beat cream cheese until smooth. Mix in sweetened condensed milk until creamy. Fold in whipped topping.
In a trifle dish or clear bowl, layer red velvet cubes, a layer of cream, green cake cubes, and more cream. Repeat until filled.
Finish with a swirl of whipped topping or crushed peppermint for garnish.
Chill for at least 2 hours before serving.
Nutrition
- Calories: 380
- Sugar: 30g
- Fat: 20g
- Carbohydrates: 40g
- Protein: 5g
I have to share a little story with you. My love for this trifle started a few years back, during what I now fondly call “The Great Christmas Kitchen Fiasco.” I had ambitiously decided to make a classic, from-scratch Yule Log. Well, let’s just say my beautiful sponge cake decided it wanted to be a jigsaw puzzle instead of a roll. There were crumbs everywhere, and my frosting was… not cooperating. With guests arriving in an hour, I felt that familiar flutter of chef’s panic.
But then, I remembered my grandma’s wisdom: “When in doubt, make a trifle. It hides a multitude of sins.” I looked at my cake disaster, grabbed a big glass bowl, and started layering those broken pieces with whatever creamy, delicious things I had in the fridge. I tossed in some berries, a little custard, and lots of whipped cream. What emerged from the fridge was a stunning, layered masterpiece. My family raved about it, declaring it the best dessert I’d ever made! They had no idea it was my brilliant save. That’s the beauty of a trifle—it’s forgiving, flexible, and always, always delicious. This red and green version is my polished, holiday-spirited homage to that happy accident.
Gathering Your Trifle’s Building Blocks
Here’s the beautiful part: we’re using some fantastic shortcuts to make our lives easier without sacrificing an ounce of flavor. Let’s break down what you’ll need and why each ingredient is a star player in our festive creation.
For the Cake Layers:
- 1 box white cake mix (plus the ingredients listed on the box): This is our blank canvas! We’re going to tint it a beautiful, festive green. Using the box mix means a reliably soft, fluffy cake every single time. Chef’s Insight: I like to use the milk instead of water hack for a richer flavor, but water works perfectly, too!
- 1 box red velvet cake mix (plus the ingredients listed on the box): The deep, dramatic red layer that brings that classic, slightly chocolatey flavor. It’s the perfect partner to our green cake. Substitution Tip: If you can’t find red velvet, a devil’s food chocolate cake mix works wonderfully!
- Green food coloring (about 10 drops, or to your desired color): Don’t be shy! Go for a vibrant, Christmas-tree green. Gel food coloring will give you a more intense color without thinning the batter.
For the Creamy Cheesecake Filling:
- 8 oz cream cheese, softened: This is the foundation of our creamy layer, giving it that tangy, cheesecake-like depth. Chef’s Hack: Truly softened cream cheese is non-negotiable. Leave it on the counter for a good hour before you start. This prevents lumpy filling and makes for a silky-smooth blend.
- 1 can (14 oz) sweetened condensed milk: This magical ingredient adds sweetness and an incredibly smooth, rich body to our filling. It’s what makes the texture so dreamy.
- 1 tub (8 oz) whipped topping (like Cool Whip), thawed: This lightens everything up, making the filling fluffy and cloud-like. Substitution Tip: You can absolutely use an equal amount of freshly whipped heavy cream sweetened with a little powdered sugar for a from-scratch feel.
For the Garnish (Optional but So Pretty!):
- Extra whipped topping or whipped cream
- Crushed candy canes or peppermints: Adds a lovely crunch and a pop of festive flavor.
- White chocolate shavings or festive sprinkles: Because more sparkle is always a good thing!
Let’s Build Some Magic: Your Step-by-Step Guide
Okay, friend, here’s where the fun really begins. We’re going to walk through this together, step-by-step. I’ll be right here with my little chef hacks and words of encouragement. You’ve got this!
- Bake Your Cakes with Love. First, preheat your oven according to the directions on both cake mix boxes. Prepare the white cake batter as directed. Now, for the fun part: stir in your green food coloring until you achieve a color that makes your heart happy. A vibrant, Christmas-y green is what we’re after! Prepare the red velvet cake batter separately. Bake both cakes according to the package directions, usually in two 8-inch or 9-inch round pans. Chef’s Tip: I always line my pans with parchment paper rounds for foolproof removal. Let the cakes cool completely on a wire rack. I know it’s tempting to rush this, but warm cake will melt our creamy filling!
- The Great Cube-Up. Once your cakes are completely cool, it’s time to get a little geometric. Using a serrated knife, cut both the green and red velvet cakes into roughly 1-inch cubes. Don’t worry about perfection! Rustic, uneven cubes give the trifle wonderful texture and a homemade charm. Little Chef Hack: If the cakes are a bit crumbly, pop them in the freezer for 15-20 minutes. They’ll firm up and be much easier to cut cleanly.
- Whip Up the Dreamy Filling. In a large mixing bowl, beat the softened cream cheese with an electric mixer on medium speed until it’s completely smooth and lump-free. This is the most important step for a silky filling! Now, slowly pour in the sweetened condensed milk and continue to beat until the mixture is creamy and perfectly combined. Chef’s Pep Talk: Scrape down the sides of the bowl a few times to make sure everything is incorporated. Finally, grab a spatula and gently fold in the thawed whipped topping. Folding, rather than stirring, keeps all that lovely air in the mixture, ensuring your filling stays light and fluffy.
- The Art of the Layer. Now, for the main event! Grab your most beautiful trifle dish or a large, clear glass bowl. We’re going to create stunning layers. Start by scattering a layer of red velvet cake cubes at the bottom, covering it completely. Next, dollop and spread a generous layer of the creamy cheesecake filling over the cake. Then, add a layer of the green cake cubes, followed by another layer of the cream. Repeat the layers—red velvet, cream, green, cream—until you’ve used up all your components, finishing with a final, beautiful swoosh of the creamy filling on top. Pro Presentation Tip: You can gently press the cake layers down a bit as you go to create distinct, clean lines against the glass.
- The Patient Wait. This might be the hardest part. Cover the trifle with plastic wrap and refrigerate it for at least 2 hours, but ideally 4-6 hours or even overnight. This chilling time is crucial! It allows the flavors to meld together beautifully and the cake to soften into that iconic, melt-in-your-mouth trifle texture.
- Garnish and Serve with a Flourish! Just before serving, add your final touches. A fresh swirl of whipped topping, a shower of crushed peppermint, or a dusting of white chocolate shavings turns it from a dessert into a celebration.
How to Serve Your Stunning Creation
The beauty of this trifle is in the presentation! Place it right in the center of your holiday table so everyone can admire those gorgeous red and green layers. To serve, use a large, deep spoon or a trifle server to dig all the way down to the bottom, ensuring everyone gets a perfect scoop with every single layer in it. I love serving it in pretty glass bowls or cups to really showcase the festive stripes. It’s a dessert that truly serves itself, leaving you free to enjoy the party and accept all the compliments coming your way!
Make It Your Own: Delicious Twists & Swaps
One of the best things about this recipe is how easily you can adapt it. Feel like mixing it up? Here are a few of my favorite variations:
- Berry Bliss: Add a layer of fresh or thawed frozen berries (raspberries or a berry mix are perfect) between the cake and cream layers for a fruity, tangy twist.
- Chocolate Lover’s Dream: Fold mini chocolate chips into the creamy filling and drizzle the top with a rich chocolate ganache before serving.
- Gluten-Free & Happy: Simply use your favorite gluten-free cake mixes! The texture and flavor work beautifully.
- Peppermint Perfection: Add a teaspoon of peppermint extract to the creamy filling and garnish exclusively with crushed candy canes for the ultimate Christmas-in-a-bowl experience.
- From-Scratch Pride: If you have a favorite homemade white cake and red velvet cake recipe, by all means, use them! This trifle is the perfect vehicle for your signature bakes.
Anna’s Final Whispers from the Kitchen
This Christmas Trifle has become as much a part of our holiday as hanging stockings. It’s evolved from that first “save-the-day” version into this beloved red and green classic. My kids now fight over who gets to add the food coloring to the white cake batter, and I love that it’s a recipe that gets the whole family involved.
A funny note: one year, I was so proud of my perfectly distinct layers that I didn’t want anyone to ruin it by serving it! My husband finally had to gently remind me that the point of food is to be enjoyed, not just admired. He was right, of course. The real magic happens when everyone digs in.
So, please, don’t stress about perfection. Embrace the process, have fun with the layers, and know that no matter how it looks, it’s going to taste absolutely incredible. This trifle is a testament to the fact that the best food is often the most joyful and shared with the people you love.
Your Trifle Questions, Answered!
Over the years, I’ve gotten some wonderful questions about this recipe. Here are the answers to the most common ones to ensure your trifle is a total success.
Q: Can I make this trifle ahead of time?
A: Absolutely, and I highly recommend it! This is the ultimate make-ahead dessert. You can assemble the entire trifle the day before, cover it tightly, and let it chill overnight in the fridge. The flavors have even more time to become best friends, and it makes your Christmas Day so much easier. Just add the final garnish right before serving.
Q: My creamy filling is a little lumpy. What did I do wrong and can I fix it?
A: This almost always happens when the cream cheese isn’t soft enough. To avoid it, make sure your cream cheese has been out of the fridge for a good hour. If you’re already in a lumpy situation, you can try to beat it vigorously with your mixer, or for a last resort, press the filling through a fine-mesh sieve. It’s a bit of a hassle, but it will save the texture!
Q: The cake seems a bit dry. Is my trifle ruined?
A: Not at all! A trifle is actually the perfect solution for slightly dry cake. The creamy filling and the chilling time will work their magic, soaking into the cake and making it beautifully moist. If you’re worried, you can lightly brush the cake layers with a simple syrup (equal parts sugar and water, heated until dissolved) or even a little milk or cream before adding the creamy filling.
Q: I don’t have a trifle bowl. What can I use instead?
A: No problem! Get creative. A large, clear glass salad bowl, a pretty glass pitcher, or even individual parfait glasses or mason jars work wonderfully. The goal is just to see those beautiful layers, so any clear vessel is your friend.
Nutritional Information (Approximate)
Per Serving (based on 12 servings): Calories: 380 | Carbohydrates: 40g | Fat: 20g | Sugar: 30g | Protein: 5g
Please note: This is an estimate based on the specific ingredients listed and can vary based on the brands of cake mix and other components you use.
This Christmas Trifle is the ultimate holiday showstopper—layers of festive red and green cake, creamy no-bake cheesecake filling, and optional peppermint or chocolate garnishes make it as joyful to behold as it is to eat. Easy to assemble, forgiving, and endlessly adaptable, it’s perfect for making ahead, sharing with loved ones, and creating lasting holiday memories. Whether served in a grand trifle dish or individual glasses, this dessert brings color, cheer, and indulgent flavor to any holiday table—guaranteed to be the first dish everyone reaches for!