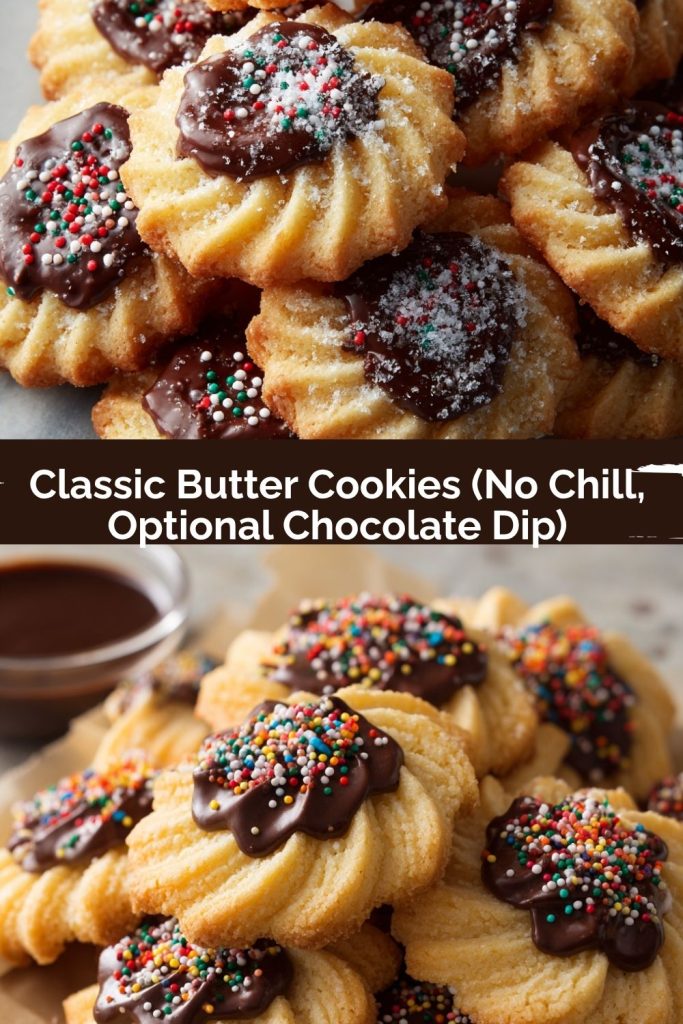
Classic Butter Cookies (No Chill & Optional Chocolate Dip!)
Hey there, friend! Can you smell it? That warm, sweet, and utterly irresistible scent of butter and sugar caramelizing in the oven? It’s the smell of happiness, if you ask me. It’s the smell of my kitchen when I’m whipping up a batch of these absolute classic, melt-in-your-mouth butter cookies.
Now, I know what you might be thinking: “Anna, cookie recipes are a dime a dozen.” And you’re right! But this one? This one is different. This is my secret weapon, my go-to, my never-fail recipe that I’ve tweaked and loved into perfection. We’re talking crisp edges, a tender, almost sandy center that dissolves on your tongue, and a buttery richness that makes you close your eyes and just sigh with contentment. And the best part? We skip the chilling time entirely. That’s right—no waiting! You can go from a craving to a cookie in your hand in less than 30 minutes.
Whether you’re a baking newbie looking for a confidence boost or a seasoned pro who needs a reliable, delicious staple, this recipe is for you. We’ll pipe them into gorgeous little swirls that look like they came from a fancy bakery, and then, because I believe more is more when it comes to joy, we’ll give them an optional (but highly recommended) dunk in dark chocolate and a shower of sprinkles. So, tie on your favorite apron, put on some happy music, and let’s make some kitchen magic together.
A Tin Full of Love
PrintClassic Butter Cookies (No Chill, Optional Chocolate Dip)
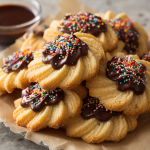
Crisp edges, buttery richness, and that melt-in-your-mouth center—these Classic Butter Cookies are a holiday must and year-round winner. With just six simple ingredients and no chilling required, they come together fast and bake up beautifully. Pipe them for that classic swirl look, and dip in chocolate and sprinkles for extra flair.
- Prep Time: 25 minutes
- Cook Time: 10–12 minutes
- Total Time: 56 minute
- Yield: 26 cookies 1x
Ingredients
1 cup (226 g) unsalted butter, softened
¾ cup (150 g) granulated sugar
1 large egg yolk
2 teaspoons vanilla extract
¼ teaspoon salt
2 cups + 2 tablespoons (265 g) all-purpose flour
Optional Chocolate Coating
1 cup (170 g) dark chocolate chips
½ teaspoon vegetable shortening
Nonpareil sprinkles (optional)
Instructions
Preheat oven to 350°F (175°C). Line baking sheets with parchment.
In a large bowl, cream softened butter and sugar until light and fluffy (about 1–2 minutes).
Mix in egg yolk and vanilla extract until fully combined.
Gradually add flour and salt, mixing just until a soft dough forms.
Transfer dough to a piping bag fitted with a large star tip (like Ateco 827). Pipe swirls onto baking sheets, spacing cookies apart.
Bake for 10–12 minutes, or until edges are lightly golden. Cool on sheet for 5 minutes, then transfer to a rack.
For Chocolate Dip (Optional)
Melt chocolate chips and shortening in the microwave in 20-second bursts, stirring between each, until smooth.
Dip half of each cooled cookie in chocolate, then add sprinkles. Place on parchment until set.
Nutrition
- Calories: 146
- Sugar: 7g
- Fat: 9g
- Carbohydrates: 16g
- Protein: 1g
This recipe always takes me right back to my Grandma Eleanor’s kitchen. She wasn’t a fancy cook, but she was a great one. Her cookie tins were legendary. Every Christmas, a massive, slightly dented tin would appear on the counter, and inside, nestled in wax paper, would be these beautiful, swirled butter cookies. Some were plain, some were dipped in chocolate, but they all tasted like pure love.
I remember standing on a stool, watching her strong hands pipe perfect swirl after perfect swirl. She’d let me add the single dragée on top of each one, a task I took with the utmost seriousness. She never wrote the recipe down, of course—it was all in her head and in her hands. It took me years of testing and tasting to finally capture that exact texture and flavor. This cookie is my homage to her, to those afternoons filled with flour and laughter, and to the simple, powerful truth that the best recipes are the ones that come with a story.
Your Simple, Starring Ingredients
One of the things I love most about this recipe is its beautiful simplicity. Each ingredient has a very specific job to do, and when they all come together, it’s pure harmony. Here’s what you’ll need:
- 1 cup (226 g) unsalted butter, softened – This is the heart and soul of the cookie! Using unsalted butter lets you control the salt level. And “softened” is key here—it should be pliable but not melty. A quick test? Press your finger into it. It should leave an indent without sinking all the way through. Pro tip: if you forgot to take it out of the fridge, you can cube it and give it a quick 15-second blast in the microwave, but watch it like a hawk!
- ¾ cup (150 g) granulated sugar – This sweetens the cookies and, when creamed with the butter, creates tiny air pockets that give our cookies their lovely light texture.
- 1 large egg yolk – The yolk adds richness, tenderness, and helps bind everything together. Save the white for a healthy omelet or a shiny meringue cookie another day!
- 2 teaspoons vanilla extract – Don’t be shy! A good quality vanilla adds a beautiful depth of flavor that complements the butter so well.
- ¼ teaspoon salt – This is our flavor enhancer! It cuts the sweetness and makes the buttery taste really pop. If you only have salted butter, just omit this extra salt.
- 2 cups + 2 tablespoons (265 g) all-purpose flour – I highly recommend using a kitchen scale for the flour. If you’re using cups, fluff your flour with a spoon, spoon it into your measuring cup, and level it off with a knife. This prevents over-packing, which can lead to dry cookies.
For the Fancy Chocolate Dip (Optional, but oh-so-good!)
- 1 cup (170 g) dark chocolate chips – I love the contrast of dark chocolate with the sweet cookie, but semi-sweet or milk chocolate work beautifully too.
- ½ teaspoon vegetable shortening – This little secret weapon makes the chocolate smoother, shinier, and helps it set with a perfect snap. You can use a tiny bit of coconut oil instead if you prefer.
- Nonpareil sprinkles (optional) – Because sprinkles spark joy. It’s a fact.
Let’s Bake! Your Step-by-Step Guide
Ready to create some magic? Follow these steps, and you’ll have a tray of gorgeous, bakery-worthy cookies in no time. I’ve sprinkled in all my best chef hacks to set you up for success.
Step 1: Preheat and Prep. First things first, get that oven preheating to a toasty 350°F (175°C). This gives your cookies the instant heat they need to bake up perfectly. Line your baking sheets with parchment paper. This is my number one trick for easy cleanup and for preventing any sticking. No parchment? A silicone baking mat works wonders too.
Step 2: The Creaming Magic. In a large bowl, combine your softened butter and granulated sugar. Now, here’s where the real alchemy happens. Using an electric mixer (hand-held or stand mixer both work great), beat them together on medium-high speed for a good 1-2 minutes. We’re not just mixing; we’re “creaming.” You’ll know it’s ready when the mixture turns noticeably paler in color and becomes light and fluffy. This step incorporates air, which is the key to our cookie’s tender texture. Don’t rush it!
Step 3: Bringing in the Team. Scrape down the sides of the bowl with a spatula to make sure everything is incorporated. Now, add in the egg yolk and vanilla extract. Mix on medium speed just until everything is beautifully combined and smooth. The vanilla will make your kitchen smell amazing already!
Step 4: The Gentle Merge. With your mixer on low speed, gradually add the flour and salt. I like to add it in two or three additions to prevent a flour cloud from erupting in my kitchen! Mix only until the flour disappears and a soft dough forms. Do not overmix! Overworking the dough after the flour is added can develop the gluten and make the cookies tough. As soon as you don’t see any dry spots of flour, you’re done. Perfect.
Step 5: The Piping Party. Now for the fun part! Fit a piping bag with a large open star tip—my absolute favorite is an Ateco 827 or any similar large star tip. Spoon the dough into the bag. No fancy piping bag? A large zip-top bag with the corner snipped off works in a pinch! Pipe 1.5 to 2-inch swirls onto your prepared baking sheets, leaving about an inch of space between them. They don’t spread a ton, but they need their personal space to bake evenly. If you get a little point at the top of your swirl, just dampen your finger and gently press it down.
Step 6: Bake to Golden Perfection. Slide those beautiful cookies into your preheated oven and bake for 10-12 minutes. Ovens can be quirky, so start checking at 10 minutes. You’re looking for the very edges to just barely start turning a light golden brown. The centers might still look a little soft, and that’s okay! They will continue to firm up as they cool. This is the secret to a crisp edge and a melt-in-your-mouth center.
Step 7: The Patient Cool-Down. When they’re perfectly golden, take them out of the oven and let them cool on the baking sheet for 5 minutes. This allows them to set up so they don’t fall apart when you move them. Then, carefully transfer them to a wire rack to cool completely. I know it’s hard to wait, but for the chocolate dip, they MUST be completely cool. Otherwise, you’ll have a melty chocolate puddle (which, to be fair, still tastes good, but isn’t as pretty!).
Serving Up the Joy
Presentation is part of the fun! For a simple, elegant look, arrange these pretty swirled cookies on a vintage cake stand or a simple white platter. If you went the chocolate-dip route, stack them artfully on a wooden board. They are the perfect companion to a hot cup of coffee, a cold glass of milk, or a mug of spicy chai tea. Honestly, they’re a welcome treat any time of day. I love putting them out when friends come over—they always disappear fast and are guaranteed to bring a smile.
Make Them Your Own! Fun Variations
The beauty of this base recipe is that it’s a fantastic canvas for your creativity! Here are a few of my favorite twists:
- Lemon Zest Delight: Add the zest of one large lemon to the dough when you add the vanilla for a bright, sunny, citrusy kick.
- Almond Elegance: Swap the vanilla extract for almond extract (just 1 teaspoon, as it’s stronger) and top the piped cookies with a slivered almond before baking.
- Chocolate Chip Swirl: Gently fold in ½ cup of mini chocolate chips into the dough at the end. The chips can sometimes clog the piping tip, so you might need to use a slightly larger opening.
- Sparkling Sugar Sprinkle: Before baking, give your piped cookies a light brush with a wet pastry brush and a generous sprinkle of coarse or sanding sugar for a beautiful, sparkly crunch.
- Gluten-Free Friend: You can use a 1:1 gluten-free all-purpose flour blend with great success! I’ve had fantastic results with the Bob’s Red Mill and King Arthur blends.
Anna’s Chef Notes & Kitchen Stories
This recipe has been a living, evolving thing in my kitchen. The “no-chill” aspect was a happy accident born from a serious cookie craving and a lack of patience one rainy afternoon. I discovered that as long as your butter is perfectly softened (not melted!) and you don’t overmix, the dough is perfectly pipeable right away. It was a game-changer!
One of my favorite kitchen fails-turned-win involved these cookies. I once decided to double the recipe and my piping bag burst at the seam, sending buttery dough all over my cabinet and, tragically, my dog’s head. We had a good laugh, cleaned up (the dog got a bath), and I learned to not overfill my piping bags and to always have a spare. The cookies we salvaged were just as delicious. It’s a good reminder that even when things get messy, the result is almost always worth it. Don’t strive for perfection, strive for joy and deliciousness!
Your Questions, Answered!
I’ve made these cookies a thousand times and have answered just as many questions from readers. Here are the most common ones to help you out!
Q: My cookies spread too much! What happened?
A: The most common culprit is butter that’s too warm or even melted. You want it softened, not greasy. Another cause could be over-creaming the butter and sugar (which incorporates too much air that then collapses), or not using enough flour. Try weighing your flour for the most accurate result!
Q: My dough is too thick to pipe! It’s really hard to squeeze.
A: This usually means the dough was slightly overmixed, or your butter might have been a bit too cold. You can let the dough sit in the piping bag in your warm hands for a few minutes to soften slightly. If it’s still a struggle, you can always roll the dough into small logs or balls and press them with a fork for a classic peanut butter cookie look! They’ll still taste incredible.
Q: Can I make these cookies without a piping bag and tip?
A: Absolutely! While the star tip gives that classic look, you don’t need one. You can use a cookie scoop or a spoon to portion the dough, roll it into balls, and then gently press them down with the bottom of a glass. If the glass sticks, dip it in a little sugar first.
Q: How do I store these, and can I freeze them?
A: Once completely cool, store them in an airtight container at room temperature for up to 5 days. They also freeze beautifully! Place them in a single layer in a freezer-safe container, with parchment between layers, for up to 3 months. Thaw at room temperature. You can also freeze the piped, unbaked dough on a sheet pan and then transfer to a bag. Bake straight from frozen, adding a minute or two to the baking time.
Nutritional Information*
*This is an estimated nutritional breakdown per cookie (without the chocolate dip).
- Servings: 26 cookies
- Prep Time: 25 minutes
- Bake Time: 10-12 minutes
- Calories per cookie: ~146
- Carbs: 16g | Fat: 9g | Sugar: 7g | Protein: 1g
Final Thoughts
There’s just something timeless about a simple butter cookie. No matter how many fancy desserts come and go, these little swirls of joy always have a place at the table—and in the cookie tin. They’re quick enough for a weeknight baking session, pretty enough for a holiday platter, and comforting enough to feel like a hug from someone you love.
Whether you leave them plain, dress them up with a glossy dip in chocolate, or add your own creative twist, these cookies are proof that sometimes the simplest recipes are the ones that bring the most happiness. They carry with them the spirit of tradition, the laughter of family kitchens, and the kind of flavor that never goes out of style.
So go ahead—bake a batch, pour a cup of something cozy, and share them with the people who make your world a little sweeter. After all, a cookie this good is too special to keep to yourself.