Your New Favorite Potato Obsession (And They’re Adorably Stacked!)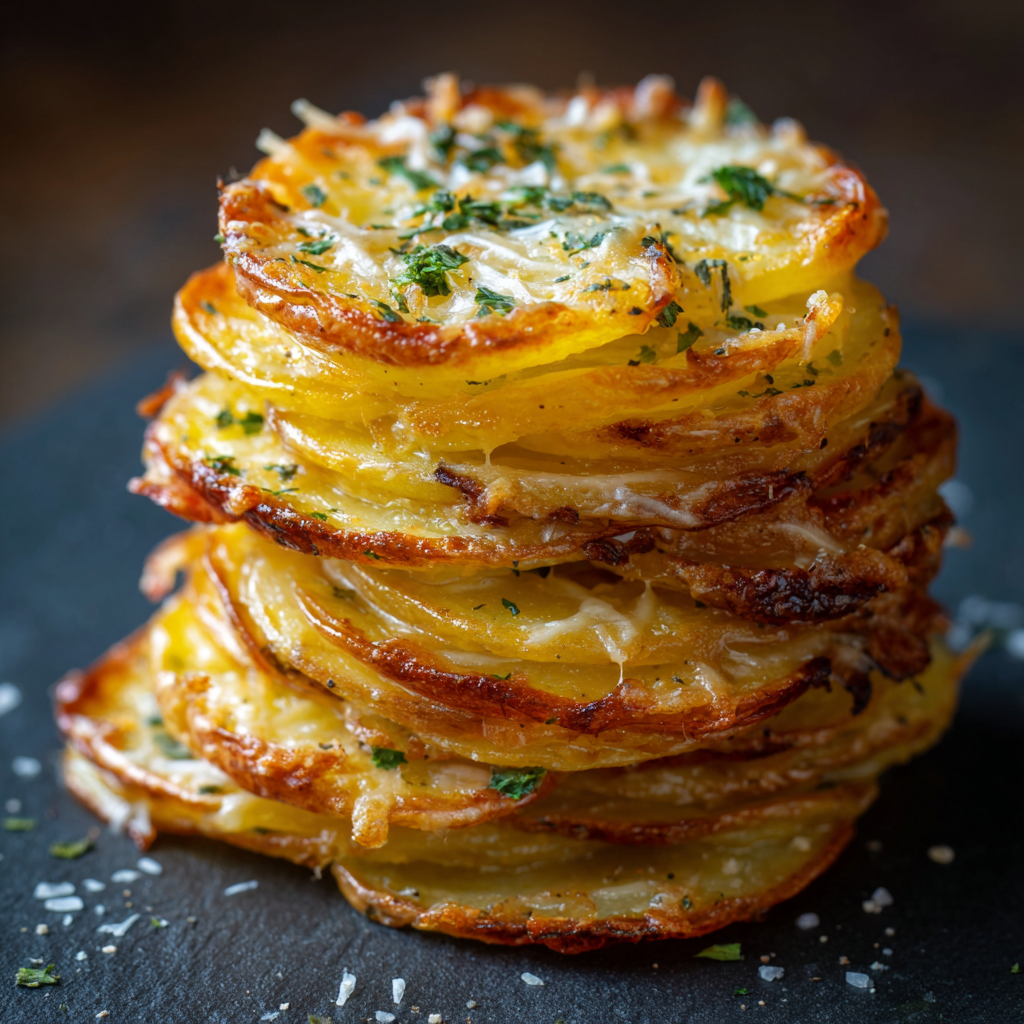
Hey there, potato pals! Anna here, apron tied tight and cheese grater at the ready. Can we talk about how sometimes the simplest ingredients create the most fireworks? Today we’re transforming humble potatoes into show-stopping Crispy Cheesy Potato Stacks – little edible towers of golden crunch giving way to tender, melty layers that’ll make you close your eyes and sigh. Seriously, these aren’t just a side dish; they’re conversation starters that disappear faster than cookies at a bake sale! Perfect for Sunday roasts, holiday tables, or when you simply need a hug on a plate. The magic? No fancy skills needed – just layering, baking, and the glorious alchemy of heat, potatoes, and cheese. Ready to turn taters into tiny triumphs? Your fork is waiting!
Why do I adore these stacks? They’re the ultimate crowd-pleaser disguised as a humble muffin-tin wonder. Imagine: russet potatoes sliced whisper-thin, each layer kissed with garlicky butter and hugged by sharp cheddar, baked until the edges shatter like autumn leaves and the centers turn cloud-soft. They’re portion-controlled cuteness with maximum flavor impact. Whether you’re feeding picky kiddos, impressing your in-laws, or treating yourself to a solo feast (zero judgment!), these stacks deliver joy in every bite. Let’s ditch the stress and cook up some cozy magic together!
The Snowed-In Supper That Started It All
PrintCrispy Cheesy Potato Stacks

These golden potato stacks are crispy on the edges, tender inside, and layered with rich, cheesy flavor in every bite. Perfect as a side dish, appetizer, or the star of your next dinner spread — they’re easy to love and hard to resist.
- Prep Time: 15 mins
- Cook Time: 50 mins
- Total Time: 1 hour 5 mins
- Yield: 12 stacks 1x
Ingredients
4 large russet potatoes, peeled and thinly sliced
4 tbsp melted butter
2 tbsp olive oil
1 tsp garlic powder
1 tsp fresh thyme leaves (or ½ tsp dried)
1 tsp salt
½ tsp black pepper
1½ cups shredded cheddar cheese (or Gruyère/parmesan mix)
Optional: chopped fresh parsley, for garnish
Instructions
Preheat oven to 400°F (200°C). Grease a 12-cup muffin tin generously.
In a large bowl, toss sliced potatoes with melted butter, olive oil, garlic powder, thyme, salt, and pepper until well coated.
Layer 6–8 potato slices in each muffin cup, sprinkling a little cheese between layers. Finish with cheese on top.
Cover with foil and bake 30 minutes. Remove foil and bake another 15–20 minutes until crispy and golden.
Let cool 5 minutes before removing from the pan. Garnish with parsley if desired and serve hot.
Nutrition
- Calories: 180
- Fat: 11g
- Carbohydrates: 18g
- Fiber: 2g
- Protein: 5g
Picture this: A blizzard swirling outside, my tiny Brooklyn kitchen warm with the smell of roasting potatoes, and my husband jokingly begging for “anything but mashed potatoes again.” We were snowed in, the pantry was bare-ish, but we had potatoes, cheese, and hope! I started slicing potatoes paper-thin on a whim, layering them haphazardly in a muffin tin with whatever cheese nubs lurked in the fridge. What emerged from the oven were these adorable, crispy-edged stacks that made us both gasp. We devoured them straight from the pan, fingers burning, laughing at our accidental brilliance. That snowy night, these humble stacks became our comfort food legend – proof that magic often happens when you’re just playing around with what you’ve got. Now, every time I make them, I get that same warm, “we’ve got this” feeling, snow or shine.
Your Potato Stack Toolkit (Flexibility is Key!)
Gather these simple stars – and remember, cooking is an adventure, not a rulebook!
- 4 large russet potatoes, peeled & thinly sliced: Russets are starch champions, giving us that perfect crispy-tender contrast. Chef’s Tip: Use a mandoline (carefully!) or sharp knife for 1/16″ slices – consistency is key for even cooking! Too thick? They won’t soften enough. Too thin? They might vanish! Swap: Yukon Golds work if you prefer creamier centers (less crispy edges).
- 4 tbsp melted butter: Our flavor conductor! Butter makes those layers rich and helps the seasonings cling. Chef’s Insight: Brown your butter first for a nutty, next-level twist! Swap: Vegan butter works beautifully.
- 2 tbsp olive oil: Helps the butter coat evenly and boosts crispiness. Why Both? Butter burns; olive oil raises the smoke point. Teamwork!
- 1 tsp garlic powder: Concentrated, mellow garlic goodness without burning. Fresh Fix: Swap for 2 minced garlic cloves sautéed in the butter/oil mix.
- 1 tsp fresh thyme leaves (or ½ tsp dried): Earthy, fragrant notes that sing with potatoes. Herb Happy: Rosemary or oregano are fabulous substitutes!
- 1 tsp salt, ½ tsp black pepper: The essential flavor boosters! Season Smart: Taste your butter mix – it should be slightly salty. Potatoes need seasoning love!
- 1½ cups shredded cheddar cheese (or Gruyère/Parm mix): The glorious glue! Sharp cheddar gives classic punch. Chef’s Secret: Gruyère adds sophistication, Parmesan brings salty umami. Blend them! Must: Shred it yourself! Pre-shredded cheese has anti-caking agents that hinder melting.
- Optional: Chopped fresh parsley: A bright, green pop of freshness and color right before serving. Pretty Alternatives: Chives, dill, or a pinch of paprika.
Building Your Edible Potato Towers (Step-by-Step Fun!)
Let’s turn those spuds into edible architecture! Grab your muffin tin and let’s get stacking:
- Heat Things Up & Prep the Stage: “Preheat your oven to 400°F (200°C). Generously grease a standard 12-cup muffin tin with butter or non-stick spray – get into every nook! Why Hot Oven? We need that initial blast of heat to start crisping the edges fast! Hack: Place the tin on a baking sheet for easier handling and to catch any rogue cheese drips.”
- Potato Spa Time (The Toss!): “In a large bowl, combine the melted butter and olive oil. Whisk in the garlic powder, thyme, salt, and pepper. Add all those beautiful potato slices! Use your clean hands (the best tools!) to gently toss and massage the mixture until every single slice is lovingly coated. Chef’s Secret: Let them sit for 5 minutes – the starch releases slightly, helping the layers stick together better. Watch Out: Don’t break the slices!”
- The Artful Stack: “Time to build! Take 6-8 potato slices per muffin cup. Layer them vertically like dominoes slightly fanned out, sprinkling about ½ teaspoon of cheese between every few layers. Aim for height! Press down gently as you go. Pro Tip: End with the prettiest slices facing up! Crown each stack with a final generous pinch of cheese (about 1 tsp per stack). Hack: Slightly overlap slices around the edges to form a ‘wall’ for maximum crispiness.”
- Steam & Scream (The Bake!): “Cover the muffin tin tightly with foil. Bake covered for 30 minutes. This steams the potatoes, making them tender all the way through. Why Cover? Trapping steam ensures the centers cook perfectly before the edges over-brown. Then, the grand reveal! Remove the foil (hello, gorgeous cheese tops!). Bake uncovered for another 15-20 minutes. Watch them like a hawk near the end – you want deeply golden, crispy edges and bubbling, melted cheese. Doneness Test: Pierce the center with a knife – it should slide in easily.”
- The Grand Release: “CRUCIAL STEP! Let the stacks cool in the tin for at least 5 minutes. This lets them set and firm up, making removal much easier. Use a small offset spatula or butter knife to gently loosen and lift them out. Patience Pays: Rushing = crumbled stacks! Place them on a serving platter, sprinkle with fresh parsley if using, and serve immediately while they’re gloriously hot and crispy! Chef’s Whisper: That sizzle when they hit the plate? Pure music.”
Showtime! Serving Your Golden Gems
These stacks are versatile superstars! For a stunning appetizer, arrange them on a slate board with small forks – watch them vanish. As a side dish, they pair magically with roasted chicken, juicy steak, or a simple green salad for contrast. Feeling decadent? Top a stack with a dollop of sour cream and caviar (or smoked salmon!) for a fancy bite. The key? Serve them HOT! That crispy-cheesy magic is best straight from the oven. Garnish simply – a sprinkle of fresh parsley or chives adds the perfect fresh finish against that golden cheese. No need for fancy plating; their adorable stacked shape does all the work!
Mix It Up! Endless Stack Possibilities
Once you master the basics, the stack world is your oyster! Try these fun twists:
- Italian Stallion: Swap cheddar for mozzarella & grated Parmesan. Add 1 tsp dried oregano and a pinch of red pepper flakes to the butter. Garnish with basil!
- Loaded Baked Potato: Mix ¼ cup crumbled cooked bacon and 2 tbsp finely chopped green onions into the potato slices before stacking. Top baked stacks with a dollop of sour cream.
- Garlic-Herb Bliss: Use Gruyère cheese. Add 1 tbsp finely chopped fresh rosemary and 1 extra minced garlic clove to the butter mix. Heavenly!
- Vegan Victory: Use vegan butter and olive oil. Swap cheese for 1 cup nutritional yeast + ½ tsp smoked paprika mixed into the potatoes, and top with vegan parm.
- Sweet Potato Swap: Use half russet, half thinly sliced sweet potatoes. Add a pinch of cinnamon or cayenne to the butter for a sweet-savory kick!
Anna’s Stack Chronicles (Lessons from the Trenches!)
Oh, the stories these little stacks could tell! The first time I made them for my book club, I was so nervous I forgot the salt – lesson learned: ALWAYS taste your seasoning mix! My biggest evolution? Embracing the mandoline (with a cut-proof glove, safety first!). Uniform slices are non-negotiable for perfect stacks. Over the years, I’ve learned patience is truly the secret ingredient – rushing the cooling step once led to a tragic “Potato Avalanche” incident (RIP dinner party centerpiece). Now, I use that 5-minute wait to pour a glass of wine and admire the golden bubbles. Funny thing? These started as a pantry scramble, but they’ve become my most requested recipe. They’ve graced baby showers, consoled broken hearts, and even starred as “fancy fries” for my nephew. That’s the real magic of cooking, isn’t it? Turning simple spuds into little edible memories.
Your Stack Questions, Answered!
Let’s tackle those common kitchen curiosities:
- Q: Help! My stacks fell apart when I tried to take them out!A: Deep breaths! This usually means: 1) Not enough resting time (that 5-minute cool is sacred!), 2) Insufficient greasing of the tin, or 3) Overloading the stacks or not pressing layers firmly enough. Next time, grease like you mean it, press gently as you layer, and let them rest. A small offset spatula is your best friend for removal!
- Q: Can I prep these ahead of time?A: Partially! You can slice the potatoes and keep them submerged in cold water in the fridge for up to 24 hours (prevents browning). Drain and pat SUPER dry before tossing with the butter mix. Assemble the stacks in the tin, cover tightly, and refrigerate for up to 4 hours before baking. Add 2-3 minutes to the covered bake time if starting cold.
- Q: Why aren’t my stacks crispy enough?A: Crispiness culprits: 1) Slices were too thick (mandoline is key!), 2) Not enough fat coating the potatoes, 3) Overcrowded oven lowering the temp, or 4) Didn’t bake uncovered long enough. Ensure slices are thin, toss thoroughly, bake in the middle of the oven, and let them go until truly golden – don’t under-bake that final uncovered step!
- Q: Can I use pre-shredded cheese? It’s so convenient!A: I know, it’s tempting! But please, shred your own. Pre-shredded cheese has starches and cellulose to prevent clumping, which also prevents it from melting into that smooth, gooey perfection we crave. The extra 2 minutes shredding makes a HUGE difference in texture and meltiness!
Nutritional Nibbles (Per Stack)
Calories: ~180 | Carbohydrates: 18g | Fat: 11g | Protein: 5g | Fiber: 2g | *Note: Values are estimates and can vary based on specific ingredients used.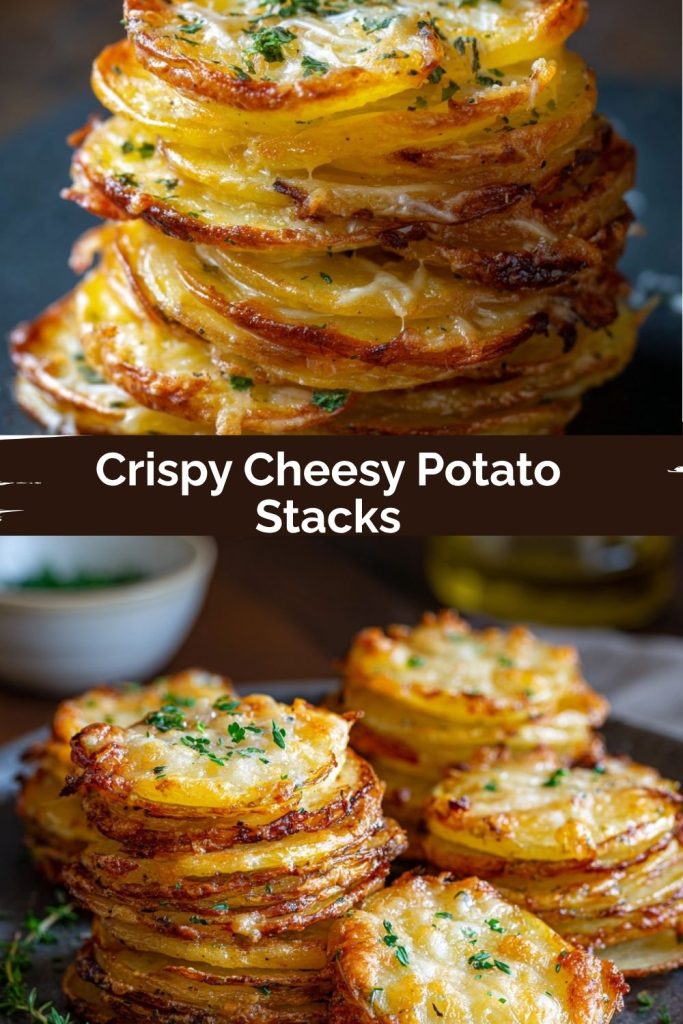
Final Thoughts:
If you’re craving comfort food with a little flair, these Crispy Cheesy Potato Stacks hit all the right notes—crispy edges, gooey centers, and layers of rich, herby flavor. They’re simple enough for a weeknight dinner but fancy-looking enough to impress at a holiday table. Whether you serve them beside a roast, with brunch, or sneak a few straight from the muffin tin (no judgment here), one thing’s for sure: these little stacks will disappear fast.