***
Your New Go-To Showstopper: Decadent No-Bake Chocolate Mousse Pie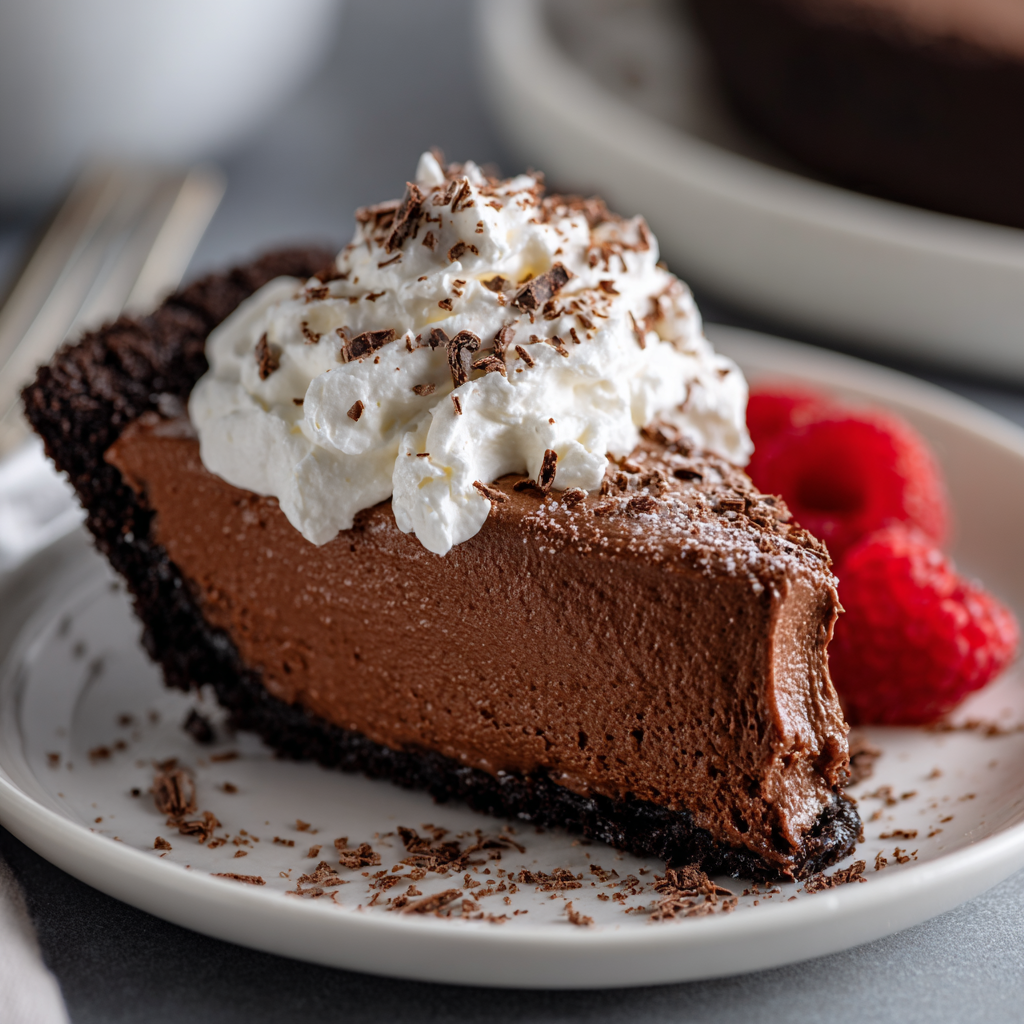
Hey there, friend! Anna here. Can I let you in on a little secret? Some of the most impressive, soul-soothing, “did-you-really-make-that?!” desserts are also the simplest. They’re the ones that don’t require you to battle with finicky pastry dough or nervously peer through the oven door, praying your cake doesn’t fall. They’re the recipes that feel like a warm hug from your kitchen—and this Decadent Chocolate Mousse Pie is exactly that.
Imagine this: a crisp, buttery chocolate cookie crust that gives way to a cloud of the silkiest, richest, most velvety chocolate mousse you’ve ever tasted. It’s intensely chocolatey without being overly sweet, light as air yet deeply satisfying. This pie is pure elegance, the kind of dessert you’d be proud to serve at a dinner party, but it’s also unbelievably simple to whip up on a lazy Sunday just because you deserve a treat.
And the best part? There’s zero baking involved. We’re letting the fridge do all the hard work for us. So, if the thought of making a pie crust from scratch usually sends you into a panic, you can breathe a massive sigh of relief. This is your stress-free ticket to dessert superstardom. We’re going to create some kitchen magic together, one simple, joyful step at a time. So, tie on your favorite apron, put on some good music, and let’s make something truly amazing.
A Slice of Memory: The Pie That Started It All
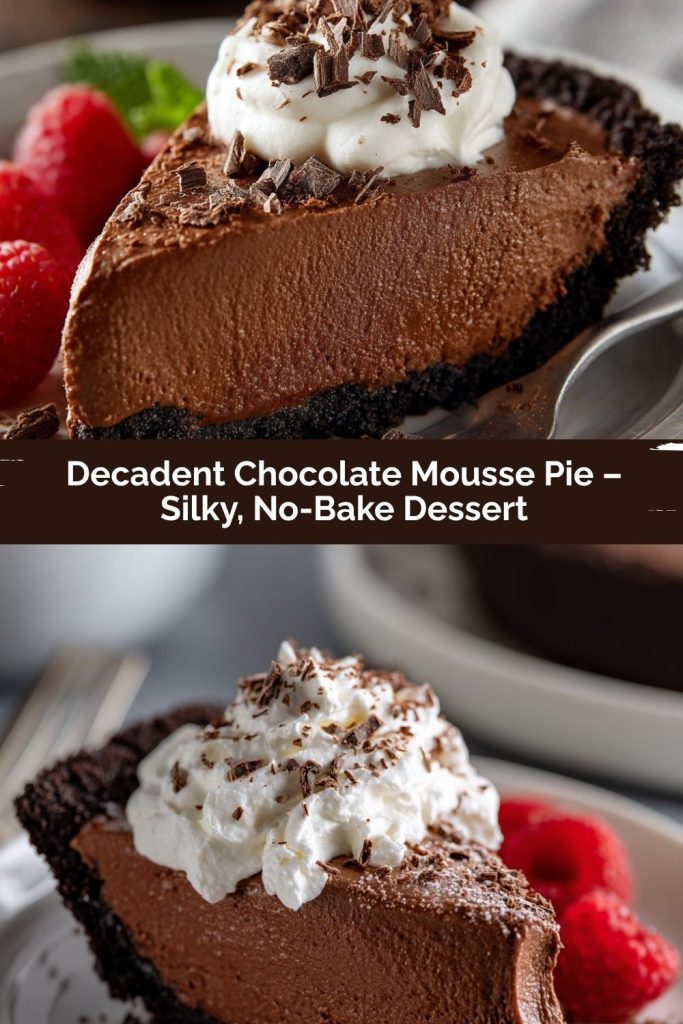
PrintDecadent Chocolate Mousse Pie – Silky, No-Bake Dessert

This Chocolate Mousse Pie is rich, velvety, and incredibly simple to make. With a crisp cookie crust and a cloud-like mousse filling, it’s the kind of dessert that feels fancy but takes surprisingly little effort. No baking required—just deep chocolate flavor, whipped cream lightness, and a melt-in-your-mouth experience.
- Prep Time: 30 minutes
- chill time: 4 hours
- Total Time: 4 hours 30 minutes
- Yield: 10 slices 1x
Ingredients
For the Crust:
1 ½ cups chocolate cookie crumbs (like Oreo, without filling)
5 tablespoons unsalted butter, melted
2 tablespoons granulated sugar
For the Mousse Filling:
8 oz semisweet or bittersweet chocolate, chopped
2 tablespoons unsalted butter
2 teaspoons vanilla extract
1/4 teaspoon salt
3 large eggs, separated
1/4 cup granulated sugar
1 ½ cups heavy whipping cream
Optional Toppings:
Whipped cream
Chocolate shavings or cocoa powder
Fresh raspberries or strawberries
Instructions
Make the Crust: Combine cookie crumbs, sugar, and melted butter. Press into the bottom and sides of a 9-inch pie dish. Chill for 20 minutes.
Melt the Chocolate: In a heatproof bowl, melt chocolate and butter over a double boiler or in the microwave. Stir in vanilla and salt. Let cool slightly.
Egg Yolks: Whisk egg yolks with 2 tbsp sugar until thick. Slowly stir into cooled chocolate mixture.
Whip Egg Whites: In a clean bowl, beat egg whites until foamy. Gradually add remaining sugar and beat until stiff peaks form.
Whip Cream: In another bowl, whip the cream until soft peaks form.
Assemble: Fold whipped cream into the chocolate mix, then gently fold in the egg whites.
Fill & Chill: Pour mousse into crust and smooth the top. Chill for at least 4 hours or overnight.
Top with whipped cream and garnish just before serving.
Nutrition
- Calories: 420
- Sugar: 20 g
- Sodium: 170 mg
- Fat: 30 g
- Carbohydrates: 32 g
- Protein: 5 g
This recipe takes me right back to my grandmother’s kitchen, a place that always smelled like melted butter and happy chaos. She wasn’t a fancy pastry chef; she was a “a little of this, a pinch of that” kind of cook. But once a year, for my birthday, she’d make her famous chocolate mousse pie. To my childhood self, it was pure wizardry. How did those simple ingredients in her yellow mixing bowls transform into this ethereal, cloud-like pie that made everyone at the table go completely silent after the first bite?
I remember standing on a stool, “helping” by carefully sprinkling chocolate shavings on top, most of which never made it to the pie and ended up in my mouth instead. She’d always wink and say, “That’s the chef’s treat, Anna.” That pie wasn’t just dessert; it was a celebration. It was the taste of being loved, of feeling special, of understanding that food has the power to create core memories. My version is a love letter to hers—a little more refined in technique, perhaps, but with the exact same soul. Every time I make it, I’m eight years old again, covered in chocolate, and feeling like the luckiest kid in the world.
Gathering Your Magical Ingredients
Great food starts with great ingredients, and the beauty of this recipe is that you don’t need anything obscure. Let’s break down what we’re using and why. I’ve also included some of my favorite swaps so you can make this work with what you have!
For the Crust:
- 1 ½ cups chocolate cookie crumbs: I use classic Oreo crumbs (the filling scraped out) for that deep, fudgy base. Chef’s Insight: You can use any chocolate wafer cookie! Graham cracker crumbs work in a pinch, too, for a s’mores-like vibe.
- 5 tablespoons unsalted butter, melted: This is the glue that holds our no-bake crust together. Using unsalted lets us control the salt level perfectly.
- 2 tablespoons granulated sugar: A little extra sweetness for the crust. If your cookies are already very sweet, you can reduce or omit this!
For the Mousse Filling:
- 8 oz semisweet or bittersweet chocolate, chopped: This is the star of the show! I prefer a good-quality semisweet (around 60% cacao) for the perfect balance of sweet and bitter. Substitution Tip: Feel free to use chocolate chips, but chopping a bar gives you more even melting and a silkier texture.
- 2 tablespoons unsalted butter: Added to the chocolate for extra richness and a gorgeous sheen.
- 2 teaspoons vanilla extract: The ultimate flavor enhancer. It deepens the chocolate flavor beautifully.
- ¼ teaspoon salt: Don’t skip this! Salt is a magical ingredient that makes the chocolate flavor pop and prevents the pie from tasting flat.
- 3 large eggs, separated: We use the whole egg, but in a clever way. The yolks add richness and body to the mousse, while the whipped whites give it that incredible, light-as-air texture. Important Note: This recipe uses raw eggs. Please see the FAQ for safe alternatives!
- ¼ cup granulated sugar, divided: We’ll use a bit with the yolks and a bit with the whites to help them form stiff, glossy peaks.
- 1 ½ cups heavy whipping cream: This is our second source of airy volume. Whipping it to soft peaks creates the luxurious, creamy base of our mousse.
Optional Toppings:
- Whipped cream: Because more cream is always a good idea. It adds a lovely visual contrast.
- Chocolate shavings or cocoa powder: For a professional, finished look.
- Fresh raspberries or strawberries: The bright, tart fruit cuts through the richness of the chocolate perfectly.
Let’s Create Some Magic: Step-by-Step Instructions
Ready to play with your food? This process is all about gentle folding and incorporating air. Don’t rush it—think of it as a relaxing kitchen meditation. You’ve got this!
Step 1: Make the Crust
Combine the chocolate cookie crumbs, sugar, and melted butter in a medium bowl. Mix it with a fork until it looks like wet sand and all the crumbs are moistened. Chef’s Hack: Pour the mixture directly into your 9-inch pie dish. Use the bottom of a flat-bottomed measuring cup or a glass to press the crumbs firmly and evenly into the bottom and up the sides. This little trick gives you a perfect, compact crust every single time. Pop it in the fridge to chill and set for at least 20 minutes.
Step 2: Melt the Chocolate
While the crust is chilling, place your chopped chocolate and 2 tablespoons of butter in a heatproof bowl. You can melt this over a pot of gently simmering water (a double boiler), making sure the bottom of the bowl doesn’t touch the water. Or, you can use the microwave! Heat in 30-second bursts, stirring well after each, until the chocolate is smooth and glossy. Chef’s Tip: Be patient! Burnt chocolate is bitter, and we don’t want that. Once melted, stir in the vanilla extract and salt. Let this cool slightly—we don’t want it so hot that it cooks the egg yolks in the next step.
Step 3: Whisk the Egg Yolks
In a separate bowl, whisk the 3 egg yolks with 2 tablespoons of the sugar. Whisk them vigorously until they become pale, thick, and fall off the whisk in a lazy ribbon. This is called the “ribbon stage,” and it means you’ve incorporated enough air to give your mousse extra body. Slowly and gradually, stir this yolk mixture into your slightly cooled chocolate. You’ll end up with a thick, pudding-like base.
Step 4: Whip the Egg Whites to Stiff Peaks
Now, for the first part of our “airy” magic! In a spotlessly clean, dry bowl, beat the 3 egg whites. This is crucial: Any trace of grease or yolk will prevent the whites from whipping properly. Start on low speed until they’re foamy, then increase the speed to medium-high. Gradually add the remaining 2 tablespoons of sugar and continue beating until the whites are glossy, thick, and hold stiff peaks when you lift the beaters. This means the tips stand straight up.
Step 5: Whip the Cream to Soft Peaks
In another bowl (yes, we’re using all the bowls!), beat the heavy whipping cream. Whip it until it just holds soft peaks. You’ll know it’s ready when the peaks gently curl over when you lift the beaters. Chef’s Insight: Be careful not to overwhip it into butter! We want it pillowy and soft so it folds in easily.
Step 6: The Grand Assembly (Fold, Don’t Stir!)
This is the most important step. Take about one-third of the whipped cream and stir it into the chocolate mixture to lighten it up. Now, gently fold in the remaining whipped cream. Use a spatula and a “figure-8” motion, cutting through the center and folding it over itself. Be patient and gentle to keep all that air we just whipped in. Once the cream is incorporated, repeat the process with the whipped egg whites, folding just until no white streaks remain.
Step 7: Fill, Chill, and Dream
Pour this beautiful, airy mousse into your waiting crust. Smooth the top with your spatula. Cover the pie loosely with plastic wrap and chill it in the refrigerator for at least 4 hours, but honestly, overnight is even better. This patience-testing wait allows the mousse to set perfectly, so every slice is firm and dreamy.
Step 8: The Grand Finale
Right before serving, add your toppings! A dollop of fresh whipped cream, a shower of chocolate shavings, or a crown of fresh berries makes it absolutely stunning.
Serving Your Masterpiece
Presentation is part of the fun! For clean slices, dip your sharp knife in hot water and wipe it dry between each cut. Serve this pie on its own for pure chocolate bliss, or alongside a handful of fresh raspberries for a burst of tartness that complements the rich mousse beautifully. A small cup of strong coffee or a glass of dessert wine turns this into a truly sophisticated end to any meal.
Make It Your Own: Delicious Recipe Variations
Once you’ve mastered the classic, have fun playing with flavors! Here are a few of my favorite twists:
- Orange Zest Dream: Add the zest of one orange to the chocolate as it melts for a bright, citrusy note.
- Mocha Madness: Dissolve 1-2 teaspoons of instant espresso powder into the vanilla before adding it to the melted chocolate.
- Mint Chocolate Chip: Swap the vanilla for ½ teaspoon of peppermint extract and fold in ¼ cup of mini chocolate chips at the very end.
- Boozy & Grown-Up: Fold 1-2 tablespoons of your favorite liqueur (Grand Marnier, Chambord, or Baileys are fantastic) into the mousse along with the whipped cream.
- Dairy-Free Delight: Use vegan butter for the crust, and swap the heavy cream for full-fat, chilled coconut cream. (Omit the raw eggs for this version).
Anna’s Chef Notes & Kitchen Stories
This recipe has been my trusty companion for years, and it’s evolved in little ways. I used to be terrified of folding in the egg whites, convinced I’d deflate the whole thing. My grandma’s advice? “Just be confident, like you’re tucking a cloud into bed.” It’s the best advice I’ve ever gotten in the kitchen. One time, I was so distracted telling a story to a friend that I accidentally added the sugar to the cream instead of the egg whites. The world didn’t end! The cream was a touch sweeter, but the pie was still a hit. It just goes to show that cooking is about joy, not perfection. This pie is incredibly forgiving. As long as you get that mousse into the crust and give it time to set, you are guaranteed a spectacular dessert.
Your Questions, Answered!
Q: I’m nervous about using raw eggs. Are there any alternatives?
A: This is the #1 question, and it’s a very valid one! For a completely egg-free version, you can simply omit the egg yolks and whites. Increase the heavy whipping cream to 2 ½ cups, whip it with the sugar, and fold it all into the chocolate mixture. The texture will be slightly denser but still incredibly delicious and creamy. Alternatively, you can use pasteurized eggs, which are heat-treated to eliminate bacteria.
Q: My mousse filling is a bit runny/soft after chilling. What happened?
A> Don’t worry, we can troubleshoot! This usually happens for one of three reasons: 1) The whipped cream or egg whites were under-whipped, so they couldn’t provide enough structure. 2) The chocolate was still too warm when everything was folded together, melting the air bubbles. Or 3) It just needs more time! Pop it back in the fridge for a few more hours, or even overnight. It will continue to firm up.
Q: Can I make this pie ahead of time?
A: Absolutely! In fact, I highly recommend it. This pie is the perfect make-ahead dessert. It needs at least 4 hours to set, but it holds beautifully in the fridge for up to 2 days. Just wait to add any whipped cream or fresh berry toppings until right before you serve it.
Q: My crust is crumbling when I cut the pie. How can I fix this?
A: This usually means the crust wasn’t pressed firmly enough into the pan. Next time, really use some muscle with that measuring cup! For now, just serve it with a smile—it will taste just as wonderful. You can call it a “deconstructed” chocolate mousse pie. 😉
Nutritional Information*
*Please note: This is an estimate for informational purposes only and may vary based on specific ingredients used.
Per Slice (serves 10): Calories: 420 | Fat: 30g | Carbohydrates: 32g | Sugar: 20g | Protein: 5g | Sodium: 170mg
Final Thoughts
If ever there were a dessert that could stop time — or at least make you forget the world for a moment — this Decadent No-Bake Chocolate Mousse Pie is it. Every silky, chocolatey bite feels like a little love letter to simplicity, nostalgia, and pure joy. It’s elegant enough for dinner parties, yet easy enough to whip up on a quiet night when you just need something sweet and soothing.
What I love most about this recipe is how effortlessly it bridges the gap between “impressive” and “approachable.” It’s proof that you don’t need fancy tools or complicated steps to create something truly special — just good chocolate, a little patience, and a whisk full of love.
So whether you’re recreating a family memory, celebrating something big, or just treating yourself (because why not?), this pie has your back. One forkful in, and you’ll understand why it’s become my forever favorite — light as air, rich as velvet, and guaranteed to make anyone who tastes it fall a little bit in love. 🍫✨