Easter Egg Kataifi Nests: A Crispy, Chocolatey Spring Dessert!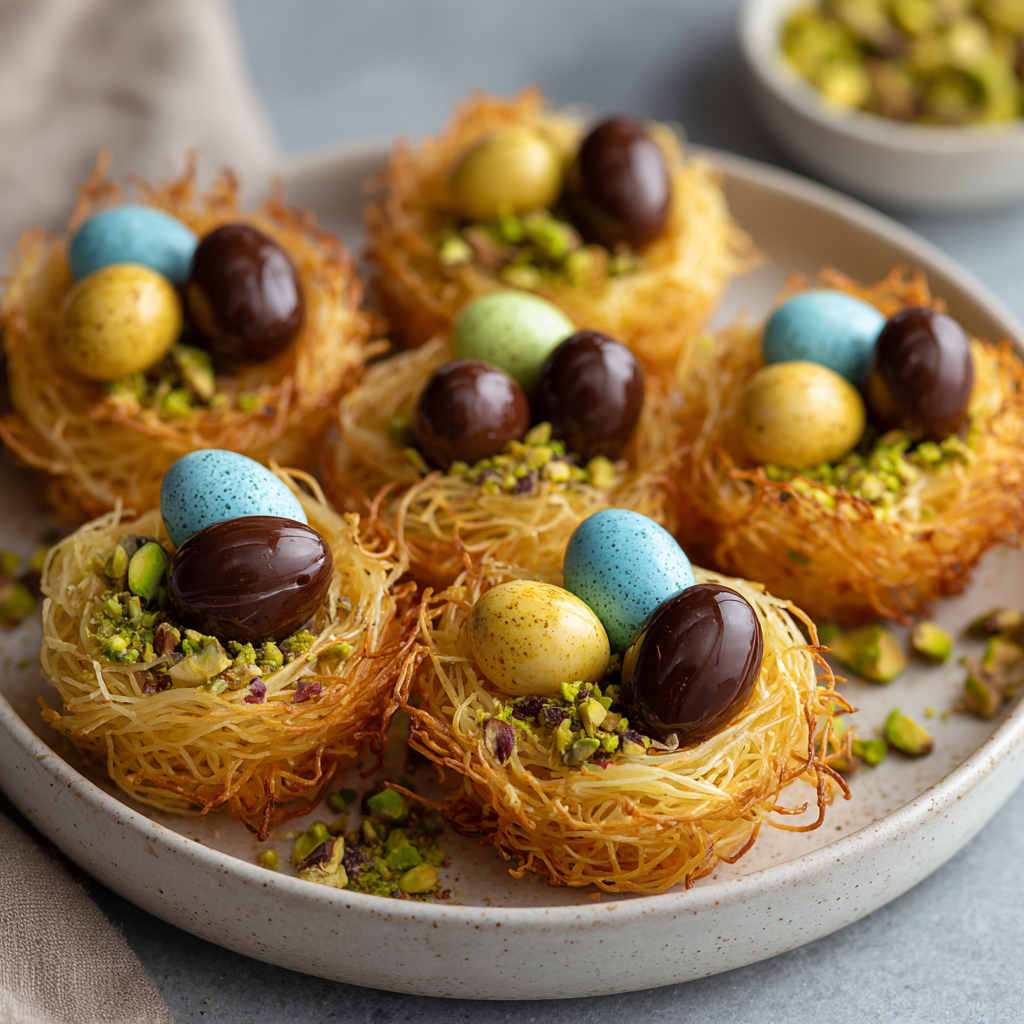
Hey there, friend! Anna here, apron on and ready to dive into one of my all-time favorite spring projects in the kitchen. Is there anything more delightful than Easter desserts? They’re playful, colorful, and just brimming with that feeling of new beginnings. But let’s be honest: between dyeing eggs, planning a meal, and maybe even hosting family, you don’t need a fussy, complicated sweet taking over your whole afternoon.
That’s exactly why I’m so excited to share these Easter Egg Kataifi Nests with you. Imagine this: nests of impossibly crispy, golden, shredded pastry cradling a pool of rich, dreamy chocolate-hazelnut spread, each one topped with a trio of cheerful mini eggs. They look like you fussed for hours, whisper a secret of exotic pastry, and yet, I promise you, they are an absolute joy to put together. They’re the kind of treat that makes everyone at the table – from wide-eyed kids to discerning dessert lovers – light up with pure delight.
This recipe is a perfect example of my kitchen philosophy: great food doesn’t have to be complicated to be memorable. We’re using a magical ingredient called kataifi (don’t worry, I’ll tell you all about it!) to create stunning texture with minimal effort. So, if you’re looking for a show-stopping dessert that won’t stress you out, you’ve come to the right place. Let’s turn some simple ingredients into a little basket of spring magic, together.
The Story Behind the Nests: A Happy Kitchen Accident
PrintEaster Egg Kataifi Nests : A Crispy, Chocolatey Spring Dessert

These crispy, golden Easter Egg Kataifi Nests are the ultimate spring treat! Made with shredded kataifi pastry, rich Nutella, and topped with colorful chocolate Easter eggs, they’re playful, easy to assemble, and guaranteed to impress at your Easter table. Whether you’re hosting brunch or packing a sweet gift box, these nests are a festive favorite that both kids and adults will love.
- Prep Time: 15 min
- Cook Time: 25 min
- Total Time: 40 min
Ingredients
200g kataifi pastry (shredded phyllo, thawed if frozen)
½ cup melted butter
½ cup Nutella or chocolate hazelnut spread
36 mini chocolate Easter eggs (3 per nest)
Optional: chopped pistachios or shredded coconut for garnish
Instructions
Preheat oven to 350°F (175°C).
Prep kataifi: Gently separate kataifi strands and toss with melted butter until evenly coated.
Shape nests: Press small amounts of kataifi into greased muffin tins, forming little nests with a slight well in the center.
Bake for 20–25 minutes, until golden and crisp. Let cool completely in the tin.
Add filling: Spoon about 1 tsp of Nutella into each nest.
Decorate: Place 3 mini chocolate eggs in each nest. Add optional garnishes if desired.
Nutrition
- Calories: 190
- Sugar: 10g
- Fat: 12g
- Carbohydrates: 18g
This recipe has its roots in a wonderfully happy kitchen accident a few Easters ago. My then-toddler goddaughter, Lily, was “helping” me in the kitchen (which mostly meant enthusiastically rearranging my measuring cups). I was planning to make a traditional baklava with kataifi pastry, but life, as it does, intervened. A sudden phone call left the thawed kataifi sitting on the counter, and a little helper saw her chance.
I came back to find Lily had pulled off several clumps of the shredded dough, proudly squishing them into her play-doh molds. Instead of shapeless strands, she’d created these perfect, chaotic little nests. The lightbulb went off! I brushed her creations with butter, baked them up, and filled the crispy results with some lemon curd I had on hand. They were a hit! The next year, I refined the idea for Easter, swapping the lemon for chocolate and adding the eggs. Now, making these nests is a spring ritual that always makes me smile, remembering that the best ideas often come from a bit of chaos and a lot of heart.
Gathering Your Ingredients
Part of the magic here is the short, sweet ingredient list. Each one plays a key role in creating our crispy, chocolatey masterpiece. Here’s what you’ll need to make about 12 delightful nests:
- 200g Kataifi Pastry (Shredded Phyllo): This is our star! Kataifi (pronounced kah-tah-EE-fee) looks like a box of shredded wheat or angel hair pasta, but it’s actually a delicate, pre-shredded phyllo dough. You’ll find it in the freezer section of well-stocked grocery stores, Middle Eastern markets, or online. Chef’s Insight: The key is to thaw it slowly in the fridge overnight. Rushing it will make the strands gummy.
- ½ Cup (1 stick / 113g) Unsalted Butter, melted: This is what transforms those pale strands into golden, shatteringly crisp nests. Using unsalted butter lets you control the seasoning. Substitution Tip: For a slightly different flavor, try using clarified butter (ghee) – it browns beautifully and has a wonderful nutty aroma.
- ½ Cup Nutella or Chocolate-Hazelnut Spread: Our cozy nest filling! Nutella brings its iconic creamy, nutty sweetness. Substitution Tip: No Nutella? No problem! Use any chocolate spread you love, a thick chocolate ganache, or even a dollop of high-quality lemon curd for a bright, sunny twist.
- 36 Mini Chocolate Easter Eggs (3 per nest): The festive topper! I love using the classic candy-coated chocolate eggs for maximum color. Chef’s Insight: For an extra-special touch, look for mini eggs with different fillings or flavors to create a surprise in every bite.
- Optional Garnishes: A sprinkle of finely chopped pistachios adds a gorgeous green pop and a lovely crunch. A dusting of shredded coconut can look like fresh straw in the nest! A tiny pinch of flaky sea salt on the chocolate filling is a game-changer for adult palates.
Let’s Build Our Nests: Step-by-Step
Ready to see the magic happen? Put on some cheerful music, clear your counter, and let’s get crafting. This process is as fun as it is easy.
- Preheat & Prep: First, get your oven humming at 350°F (175°C). This is our crisp-maker. While it heats, generously grease all 12 cups of a standard muffin tin with a little extra butter or non-stick spray. Trust me, this makes releasing your golden nests a dream later.
- Unleash the Kataifi: Take your thawed kataifi dough out of its package. Place it in a large, wide bowl. Now, here comes the fun, slightly therapeutic part: using your fingers, gently separate and fluff the strands. Don’t aim for perfection! You just want to break up any big clumps so the butter can coat everything evenly. Think of it as untangling delicate jewelry. Chef’s Hack: If the strands feel dry or are breaking, spritz them very lightly with water from a spray bottle to add a touch of pliability.
- Butter Up: Pour that glorious melted butter all over the fluffed kataifi. Now, toss, toss, toss! I like to use my hands (clean, of course!) to really massage the butter into every nook and cranny of the shredded dough. You want every strand to have a light, glossy coat. This is what guarantees that irresistible, all-over crunch.
- Shape Your Masterpieces: Grab a small handful of the buttered kataifi—about the size of a golf ball. Gently press it into one of the prepared muffin cups. Use your fingers to push the dough up the sides and create a well in the center, just like a real bird’s nest. The shape should be rustic, not perfect! Repeat until all 12 cups are filled. Pro-Tip: Don’t pack the dough down too tightly. A light press allows for hot air to circulate, creating more layers of crispiness.
- Bake to Golden Perfection: Slide the tray into your preheated oven. Bake for 20-25 minutes. You’re looking for a deep, golden brown color and a dry, crisp texture. Peek in at the 20-minute mark—ovens vary! The nests will firm up as they cool, so a deep gold is your goal.
- The All-Important Cool Down: This might be the hardest step: patience! Let the nests cool completely in the muffin tin on a wire rack. If you try to remove them while warm, they can be fragile and may lose their shape. I use this time to clean up and get my fillings ready.
- Fill & Decorate: Once the nests are completely cool, carefully pop them out of the tin. Spoon about a teaspoon (or a little more if you’re feeling generous!) of Nutella into the center of each nest. Now, for the grand finale: artfully place 3 mini chocolate eggs in each chocolate pool. Sprinkle with pistachios or coconut if you like. Behold! Your edible, adorable Easter basket is complete.
How to Serve These Little Treasures
Presentation is half the fun! I love arranging these nests on a beautiful cake stand or a simple wooden board lined with a piece of fresh parchment or a pastel napkin. They’re perfect as the grand finale to your Easter brunch or dinner, but they also make incredible gifts. Pack a few into a cellophane bag tied with a ribbon for a sweet, homemade treat that will absolutely delight your friends and neighbors. Serve them with cups of strong coffee, pots of herbal tea, or even a glass of cold milk for the ultimate nostalgic pairing.
Get Creative: Recipe Variations
Once you master the basic nest, the flavor world is your oyster! Here are a few of my favorite twists:
- Sunshine Lemon: Fill cooled nests with lemon curd and top with a few blueberries or a delicate candied lemon peel.
- PB&J Birdie: A dollop of peanut butter topped with a small spoonful of your favorite jam and a few peanut butter chips.
- White Chocolate Berry: Fill with melted white chocolate, let it set slightly, then top with fresh raspberries or dried cranberries.
- Savory Twist: Skip the sugar! Add a pinch of garlic powder and grated Parmesan to the buttered kataifi. Bake, then fill with herbed goat cheese and a cherry tomato “egg.”
- Nut-Free: Use a sunflower seed butter or a simple chocolate ganache (just cream and chocolate) as the filling.
Anna’s Chef Notes & Kitchen Stories
This recipe has truly become a living thing in my kitchen, changing a little each year. One year, I drizzled the finished nests with a little salted caramel. Another time, I added a tiny bit of orange zest to the butter for a subtle fragrance. That’s the beauty of a great template recipe—it welcomes your own personal touch.
A funny note: the first time I made these for a big family gathering, my uncle was so convinced they were impossibly difficult that he refused to believe I’d made them from scratch! It took me pulling out the box of kataifi to prove it. Now that’s my kind of compliment—a dessert that looks impressively complex but is secretly a breeze. Remember, your nests don’t need to be identical. Their rustic, handmade charm is what makes them so special. If one looks a little wilder than the others, just call it the “free-spirit bird’s nest.” It’ll probably be the first one eaten.
Your Questions, Answered!
Q: I can’t find kataifi pastry. What can I use instead?
A: You have a couple of great options! 1) Use very fine shredded wheat cereal (the plain kind). Break it up, toss with butter, and proceed. The texture will be different but still wonderfully crisp. 2) You can use regular phyllo dough (filo). Simply take 2-3 sheets, lightly crumple them into a loose ball, place in the muffin tin, and brush *generously* with butter before baking.
Q: My kataifi seems dry and is cracking when I try to shape it. Help!
A> No worries – this happens if it’s thawed in a dry environment. The fix is easy: lightly mist the strands with water from a spray bottle and let it sit for 5-10 minutes. The water will help the dough become more pliable without making it soggy, especially since you’ll be adding butter next.
Q: Can I make these ahead of time?
A> Absolutely! You have two great paths: 1) Make the nests ahead: Bake and cool the nests completely. Store them unfilled in an airtight container at room temperature for up to 2 days. Fill them with Nutella and add the eggs just before serving to keep the pastry crisp. 2) Freeze them: Baked, unfilled nests freeze beautifully for up to a month. Thaw at room temperature before filling.
Q: The bottoms of my nests seem a bit soggy after filling.
A> This usually means the nests weren’t 100% cool before filling, or the filling was very warm. Ensure the nests are completely cool to the touch—the butter needs to re-solidify to maintain the crisp structure. Also, make sure your Nutella or other spread is at room temperature, not warm.
Nutritional Information*
*Please note: This is an estimate for 1 nest, calculated with Nutella and standard mini eggs. Values will vary based on specific brands and optional garnishes.
Per Serving (1 nest): Calories: ~190 | Total Fat: 12g | Saturated Fat: 7g | Carbohydrates: 18g | Sugar: 10g | Protein: 2g
Prep Time: 15 minutes | Bake Time: 20-25 minutes | Total Time: 40 minutes, plus cooling | Makes: 12 Nests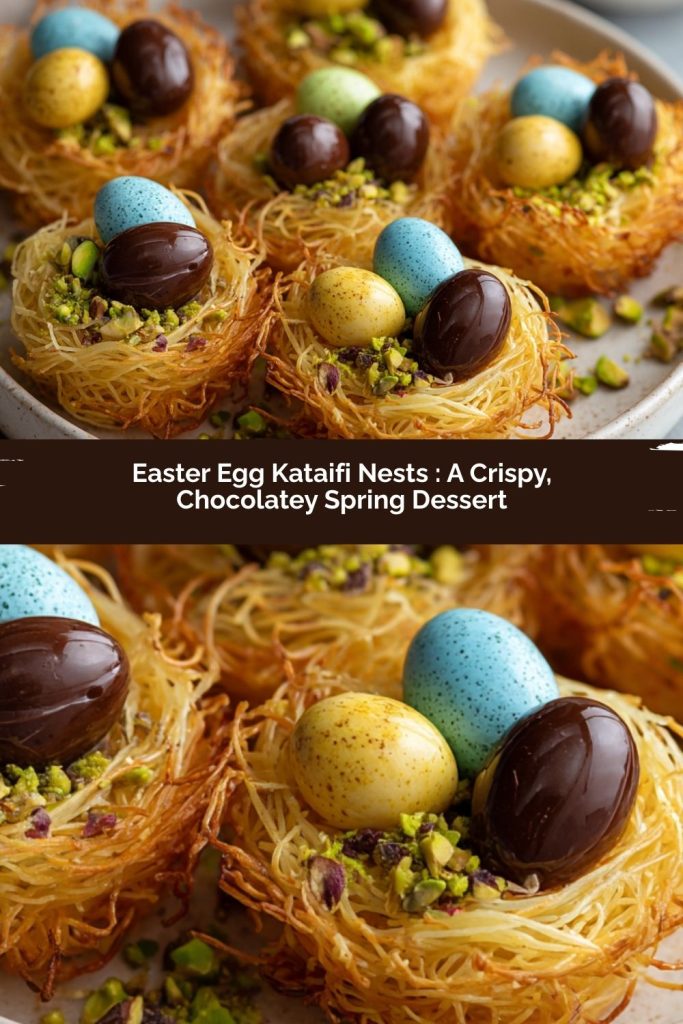
Final Thoughts
These Easter Egg Kataifi Nests are the kind of dessert that remind me why I love spring baking so much. They’re playful without being fussy, beautiful without being intimidating, and filled with just enough chocolatey joy to make everyone smile. Every crispy bite feels like a little celebration of the season—fresh, lighthearted, and full of charm.
What makes them extra special is how much room they leave for creativity. Whether you stick with the classic chocolate-and-egg combo or try one of the fun variations, these nests invite you to make them your own. They don’t have to be perfect to be wonderful—in fact, their rustic, handmade look is part of their magic.
So if you’re looking for an Easter dessert that brings a sense of delight to your table without adding stress to your day, this is it. Bake them, share them, and enjoy the sweet moments that come with slowing down and creating something joyful. That’s what these little nests are really about—springtime sweetness, made with love. 🌷🍫
.