***
Your New Favorite No-Bake Dessert is Here!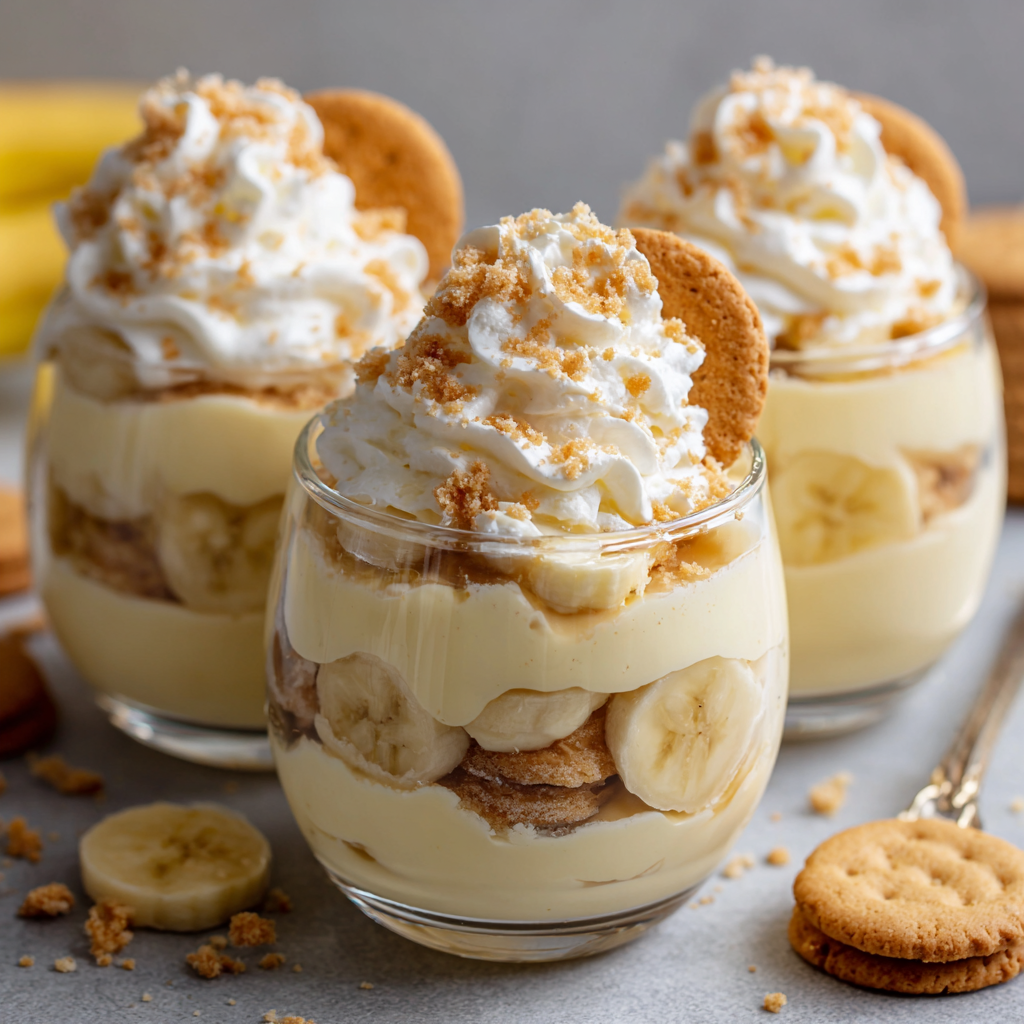
Hey there, friend! Can we talk for a second about the magic of a perfect dessert? I’m not talking about a five-layer cake that requires an engineering degree and a whole weekend to make. I’m talking about the kind of dessert that feels like a hug in a bowl—the kind that’s simple, soul-satisfying, and guaranteed to make everyone at the table smile. The kind that, for me, always comes back to classic banana pudding.
But here’s the thing: sometimes you don’t need a whole big trifle bowl. Sometimes, you need a little bit of that magic all to yourself, or you want to create something adorable and shareable for a party, a picnic, or just because it’s Tuesday. That’s where these Easy Banana Pudding Cups come in! We’re taking everything we adore about the Southern staple—the creamy vanilla pudding, the soft, cakey cookies, the sweet slices of fresh banana—and packing it into perfect, personal portions.
This is a no-bake wonder, my friend. It comes together in about 15 minutes flat, and the fridge does the rest of the work, transforming these simple layers into a dessert that’s far greater than the sum of its parts. It’s the ultimate “make-ahead” hero for busy days. So, if you’re ready to create a little bit of creamy, dreamy joy with minimal effort, grab your favorite little cups and let’s get layering!
A Spoonful of Sunshine and Nostalgia
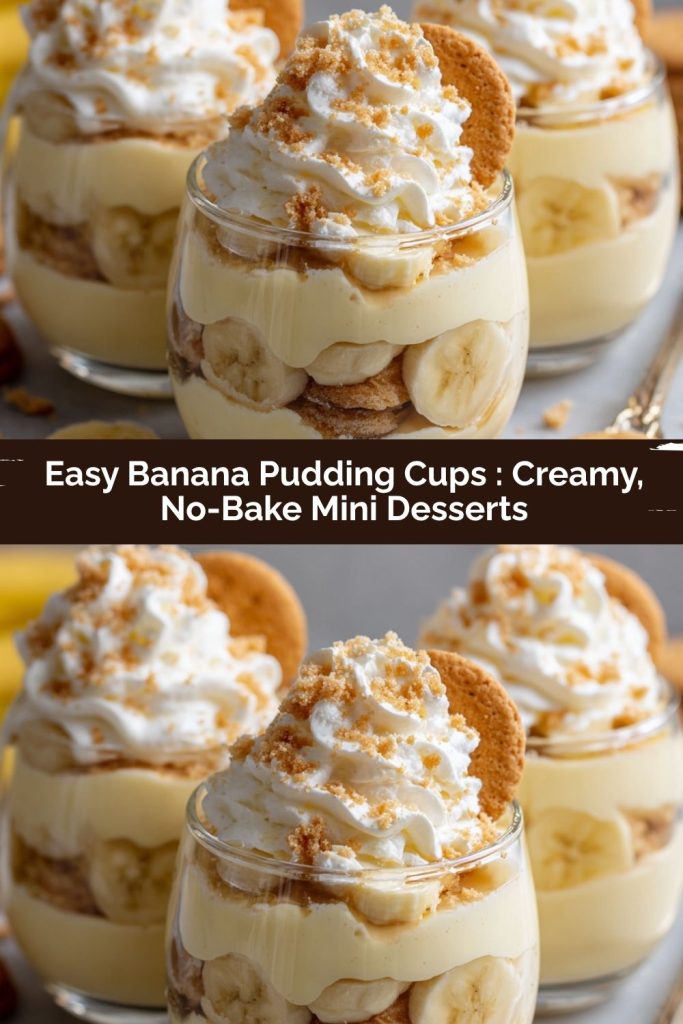
PrintEasy Banana Pudding Cups : Creamy, No-Bake Mini Desserts

These Banana Pudding Cups are everything you love about the classic Southern dessert—layered vanilla pudding, fresh bananas, and soft cookies—served in individual portions perfect for parties, brunches, or a cozy night in. No baking required, and they come together in minutes with a luscious texture that only gets better as it chills. Make them your own with whipped cream, crushed cookies, or caramel drizzle.
- Prep Time: 15 minutes
- chill time: 1 hour
- Total Time: 1 hour 15 minutes
- Yield: 6 to 8 pudding cups 1x
Ingredients
1 box instant vanilla pudding mix (4-serving size)
2 cups cold milk (2% or whole milk works best)
1 cup heavy whipping cream, whipped to stiff peaks
1 teaspoon vanilla extract
3–4 ripe bananas, sliced
30–40 vanilla wafers (or graham crackers, crushed)
Optional: whipped cream, crushed cookies, caramel, or chocolate shavings for topping
Instructions
In a bowl, whisk pudding mix with cold milk until thickened (about 2 minutes).
Fold in vanilla extract and the whipped cream gently until smooth and airy.
In small jars or clear cups, layer vanilla wafers, banana slices, and pudding mixture. Repeat layers as desired.
Chill for at least 1 hour to allow flavors to meld and cookies to soften.
Before serving, top with more whipped cream and your choice of garnishes.
Nutrition
- Calories: 280
- Sugar: 22 g
- Sodium: 220 mg
- Fat: 13 g
- Carbohydrates: 38 g
- Protein: 4 g
I can’t even think about banana pudding without being instantly transported to my Grandma Eleanor’s sun-drenched kitchen. She wasn’t a fancy cook, but she was a *great* one. Her banana pudding was legendary, always served in a big, scratched glass bowl that had seen decades of family gatherings. The ritual was always the same: after a Sunday supper of pot roast and mashed potatoes, she’d pull this glorious creation from the fridge, the top blanketed with a mountain of golden, toasted meringue.
My brother and I would watch with bated breath as she’d scoop out giant portions, making sure each one had a perfect cross-section of creamy filling, soft bananas, and wafers that had melded into cake-like perfection. It tasted like pure, unadulterated love. This recipe is my playful, personal-sized tribute to her. I’ve swapped the meringue for a quicker whipped cream topping (though I’ll give you the meringue option below!), but the heart of it—that joyful, comforting combination—is exactly the same. It’s a taste of my childhood, and now, I get to share it with you.
Gathering Your Banana Pudding Brigade
One of the best things about this recipe is its beautiful simplicity. You likely have most of these ingredients hanging out in your pantry and fridge right now! Here’s what you’ll need to create this little jars of happiness:
- 1 box (4-serving size) Instant Vanilla Pudding Mix: This is our secret weapon for a quick, consistently creamy base. I know some purists might gasp, but for a no-bake dessert that comes together in minutes, it’s unbeatable! Chef’s Insight: The pudding mix needs to be “instant” or “quick-set” to thicken properly without cooking.
- 2 cups Cold Milk (2% or Whole works best): The cold temperature is non-negotiable! It helps the pudding set up quickly and beautifully. Using a higher-fat milk will give you a richer, more luxurious pudding texture.
- 1 cup Heavy Whipping Cream: We’re going to whip this into soft, billowy peaks and fold it into the pudding. This is the magic step that transforms a simple pudding mix into an airy, mousse-like cloud of deliciousness.
- 1 teaspoon Vanilla Extract: A little extra vanilla always makes everything better, adding a warm, aromatic depth to the pudding. If you have vanilla bean paste, a half-teaspoon would be gorgeous here!
- 3–4 Ripe Bananas: Look for bananas that are yellow with a few brown speckles—they’re at their peak of sweetness and flavor. Substitution Tip: If you’re not serving these immediately, you can toss your banana slices in a tiny bit of lemon or orange juice to prevent browning, though it will slightly alter the classic flavor.
- 30–40 Vanilla Wafers (Nilla Wafers are classic!): The cornerstone of the texture! They soften into a lovely, cake-like layer as they chill. Substitution Tip: No vanilla wafers? No problem! Graham crackers, shortbread cookies, or even crushed animal crackers work wonderfully.
- Optional Toppings: This is where you can shine! More whipped cream, crushed cookies, a drizzle of caramel or chocolate sauce, or even a few chocolate shavings. Make it your own!
Let’s Build Some Pudding Cups!
Alright, the fun part! This is less about precise cooking and more about joyful assembly. Put on some music, line up your cups, and let’s create something beautiful together.
- Whip the Cream: In a chilled bowl, use a hand mixer or a whisk to beat the heavy whipping cream until it forms stiff peaks. You’ll know it’s ready when you can turn the bowl upside down and nothing moves! Chef’s Hack: For best results, pop your bowl and beaters in the freezer for 10-15 minutes before you start. Cold tools are a whipper’s best friend!
- Make the Pudding Base: In a separate, larger bowl, whisk the instant pudding mix with the two cups of cold milk. Start whisking as soon as the milk hits the powder, and keep going for a full 2 minutes. You’ll see it thicken up right before your eyes into a lovely, smooth pudding.
- Create the Dreamy Filling: Now, gently fold the whipped cream and the teaspoon of vanilla extract into the pudding base. “Folding” is key here—we want to keep all that air we just whipped into the cream! Use a spatula and cut through the center of the mixture, then fold it over itself, turning the bowl as you go. Repeat until no white streaks remain. You’ll be left with a light, fluffy, and incredibly creamy filling.
- The Grand Layering: Time for the assembly line! Grab your clear cups, jars, or glasses—seeing the layers is half the fun. Start with a layer of vanilla wafers at the bottom. Follow with a layer of banana slices. Then, spoon a generous layer of your creamy pudding mixture on top. Repeat the process: cookies, bananas, pudding. I usually get two full layers in most cups. Chef’s Tip: For the top layer, I love to press a few cookie halves or crumbs against the side of the glass for a pretty, professional look!
- The Patience Game (a.k.a. Chilling): This is the most difficult step because it requires waiting! Cover your cups and refrigerate them for at least 1 hour, but if you can manage 3-4 hours, that’s even better. This chill time is magical. It allows the cookies to soften and absorb the flavors, turning them into a tender, cake-like layer that melds perfectly with the bananas and cream. Trust me, it’s worth the wait.
- The Finishing Touch: Right before serving, top your cups with an extra dollop of whipped cream and any of your chosen garnishes. A final sprinkle of crushed cookie or a caramel drizzle makes them absolutely irresistible!
How to Serve Your Mini Masterpieces
Presentation is part of the joy! I love serving these pudding cups on a large platter or a wooden board, each with its own little spoon tucked down the side. They are the star of the show, so let them shine! They’re perfect for a buffet-style brunch, a potluck where you need something portable, or as a make-ahead dessert for a dinner party. Handing a friend their very own personal cup of banana pudding feels so special and thoughtful—it’s a little gift of sweetness.
Make It Your Own! Fun Flavor Twists
The classic version is perfection, but don’t be afraid to play with your food! Here are a few of my favorite ways to mix it up:
- Peanut Butter Paradise: Swirl ¼ cup of creamy peanut butter into the pudding mixture before folding in the whipped cream. Layer with chocolate wafer cookies for a “peanut butter cup” vibe!
- Tropical Escape: Use coconut milk beverage for the pudding liquid and fold in ½ cup of toasted coconut with the whipped cream. Layer with bananas and crushed ginger snaps for a tropical twist.
- Salted Caramel Swirl: Drizzle caramel sauce between the layers and finish the top with a pinch of flaky sea salt. The sweet and salty combo is divine.
- Chocolate-Hazelnut Dream: Swap the vanilla wafers for Biscoff cookies and add a few tablespoons of Nutella to the pudding base. You’re welcome.
- Meringue-Topped (Grandma’s Way): Skip the whipped cream in the filling (just use the pudding mix and milk). Top each cup with a big spoonful of meringue (3 egg whites whipped with ¼ cup sugar) and use a kitchen torch to toast it until golden.
Anna’s Extra Kitchen Confidence
This recipe has been my go-to for years, and it’s evolved in the most delightful ways. I once made a giant batch for a neighborhood block party and ran out of vanilla wafers halfway through. In a panic, I used a bag of chessman cookies for the remaining cups, and you know what? People raved about both versions! It was a great reminder that cooking is about spirit, not just strict rules.
I also highly recommend making a few extra cups to stash in the back of the fridge. My husband, Tom, knows that if he has had a tough day, there’s likely a “secret” banana pudding cup with his name on it waiting in the fridge. It’s our little unspoken tradition, and it turns an ordinary weeknight into something just a little bit sweeter. Don’t forget to create those little moments of joy for yourself and your people, friend.
Your Banana Pudding Questions, Answered!
I’ve made this recipe a hundred times, and I’ve answered just as many questions from friends and readers. Here are the most common ones to help you succeed!
Q: Can I make this recipe ahead of time?
A: Absolutely! This is a fantastic make-ahead dessert. You can assemble the cups completely (without the final whipped cream topping) up to 24 hours in advance. Just cover them tightly and keep them in the fridge. Add your final toppings right before serving to keep everything fresh and beautiful.
Q: My bananas turned brown! How can I prevent this?
A: This is the number one question! Bananas brown due to oxidation, which is totally natural. To minimize it, make sure your banana slices are fully encased in pudding, with no air pockets. You can also toss the slices in a tiny bit of acidic juice (like lemon, lime, or even pineapple juice), but this will add a slight tangy flavor. Honestly? For the best classic taste and texture, I just assemble and serve within the same day and embrace any slight browning—it doesn’t affect the flavor one bit!
Q: My pudding filling seems too runny. What happened?
A: A runny filling usually comes from one of two things: 1) The milk wasn’t cold enough, or 2) We didn’t whisk the pudding and milk for the full 2 minutes. The chilling time will also thicken it significantly. If it’s still too thin after chilling, don’t worry—it will still taste amazing! Next time, ensure everything is ice-cold and set a timer for that 2-minute whisk.
Q: Can I use homemade pudding instead?
A: Of course! If you have a favorite cooked vanilla pudding recipe, by all means, use it! Just make sure it’s completely cooled to room temperature before you fold in the whipped cream. This will prevent the cream from melting and deflating.
Nutritional Information*
*This is a rough estimate per serving (based on 8 servings) and can vary based on specific ingredients and toppings used.
- Calories: ~280
- Fat: 13g
- Carbohydrates: 38g
- Sugar: 22g
- Protein: 4g
- Sodium: 220mg
Prep Time: 15 minutes | Chill Time: 1 hour | Total Time: 1 hour 15 minutes | Yield: 6-8 Pudding Cups
Final Thoughts
If joy had a flavor, it would taste just like these Easy Banana Pudding Cups — creamy, dreamy, and loaded with nostalgia. Every spoonful is a little trip back to Grandma’s kitchen, wrapped in the soft sweetness of bananas, vanilla wafers, and that silky pudding cloud. They’re proof that comfort doesn’t have to be complicated — just made with love, a whisk, and a few minutes of your time.
What I adore most about these pudding cups is how effortlessly they bring people together. Whether you’re sharing them at a picnic, handing them out at a family gathering, or sneaking one from the fridge at midnight (no judgment here), they make even ordinary days feel like a celebration.
So go ahead — grab your spoons, gather your people, and dig into a dessert that’s as simple as it is special. Because sometimes, the sweetest moments in life come layered in pudding, cookies, and a whole lot of heart. 🍌💛