Fresh Strawberry Tartlets: Your New Favorite Way to Celebrate Spring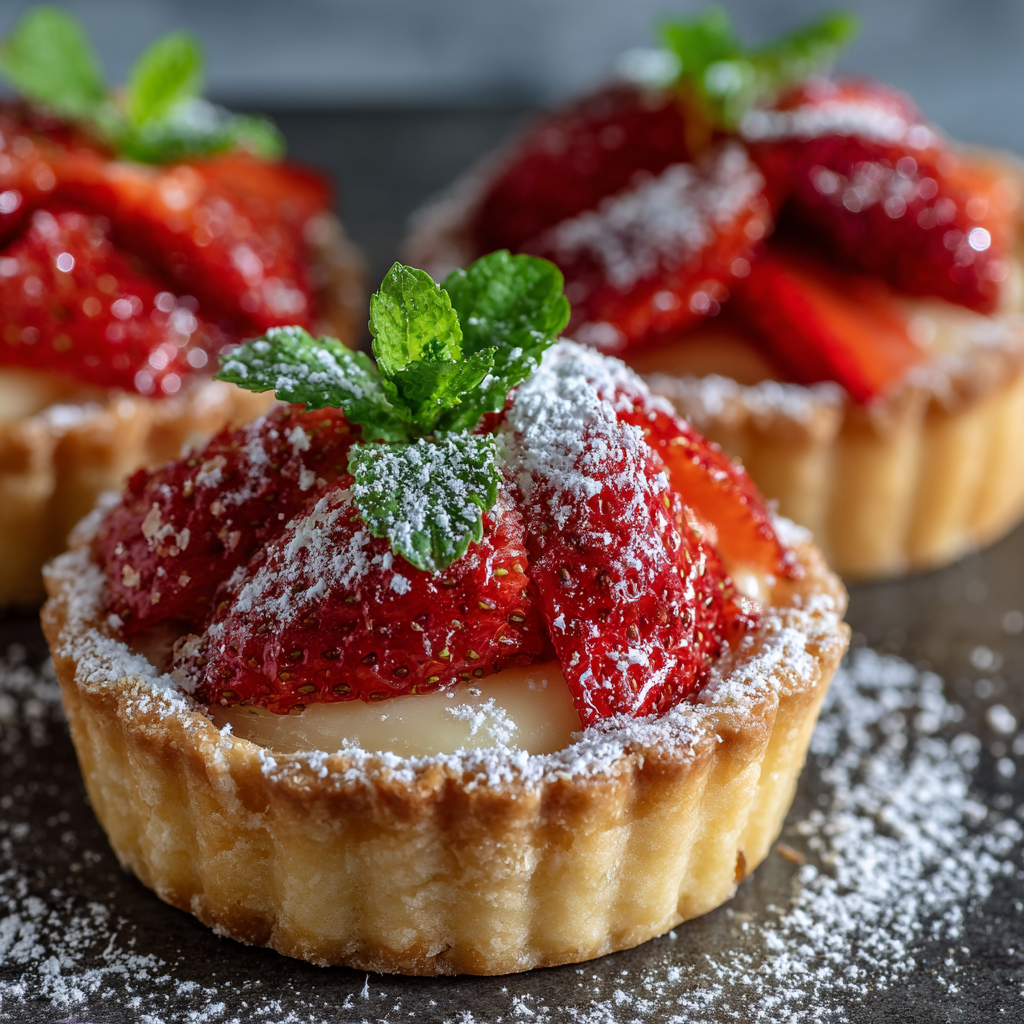
Hey there, friend! Can you smell it? That sweet, sun-warmed scent of ripe strawberries is officially floating on the breeze, and you know what that means. It’s time to roll up our sleeves, dust the counter with a little flour, and create something that captures the pure, joyful essence of the season. Today, we’re making Fresh Strawberry Tartlets, and trust me, they’re about to become your go-to showstopper.
Picture this: a buttery, crisp, melt-in-your-mouth tart shell that shatters with the lightest touch. It’s filled to the brim with the silkiest, dreamiest vanilla pastry cream you’ve ever tasted—creamy but not heavy, sweet but perfectly balanced. And crowning it all? Glossy, jewel-toned strawberries that taste like a sunbeam. A dusting of powdered sugar is the final snowy kiss that makes the whole thing look like it came from the chicest little patisserie.
I know what you might be thinking: “Anna, that sounds fancy and complicated.” But here’s my kitchen secret: it’s not! The magic of these tartlets is how simple, forgiving, and utterly satisfying they are to make. We’ll take it one happy step at a time. Whether you’re planning a Mother’s Day brunch, a weekend gathering with friends, or just want to turn a regular Tuesday into something special, these tartlets are your ticket. So, let’s put on our favorite playlist, preheat the oven, and cook up some edible sunshine together. You’ve got this!
The Strawberry Stand & A Lesson in Sweetness
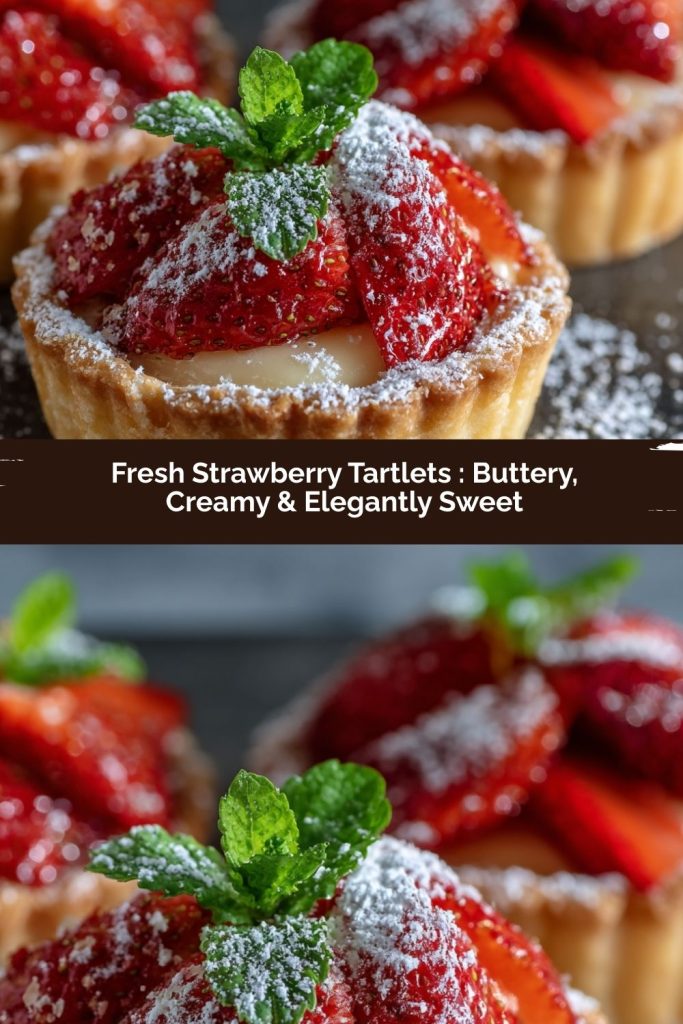
PrintFresh Strawberry Tartlets : Buttery, Creamy & Elegantly Sweet

These Strawberry Tartlets are as beautiful as they are delicious. Buttery, crisp tart shells are filled with silky vanilla pastry cream and topped with juicy fresh strawberries. Finished with a dusting of powdered sugar and a touch of mint, they’re perfect for spring gatherings, brunches, or when you want a dessert that looks as good as it tastes.
- Prep Time: 25 minutes
- chill time: 1 hour
- Cook Time: 25 minutes
- Total Time: 1 hour 50 minutes
- Yield: 6 1x
Ingredients
For the tartlet shells:
1 1/4 cups all-purpose flour
1/2 cup unsalted butter, cold and cubed
1/4 cup powdered sugar
1 egg yolk
1–2 tbsp cold water
For the pastry cream:
2 cups whole milk
1/2 cup sugar
1/4 cup cornstarch
4 egg yolks
1 tsp vanilla extract
2 tbsp unsalted butter
For topping:
Fresh strawberries, halved
Powdered sugar (for dusting)
Mint leaves (optional, for garnish)
Instructions
Make the Tart Shells:
Blend flour, powdered sugar, and butter in a food processor until crumbly. Add egg yolk and water, mixing until dough forms. Chill 30 minutes. Roll out, press into tartlet pans, and prick with a fork. Bake at 350°F (175°C) for 12–15 minutes or until golden. Cool completely.
Make the Pastry Cream:
In a saucepan, heat milk until steaming. In a bowl, whisk sugar, cornstarch, and egg yolks. Slowly whisk in the warm milk, return to the pan, and cook over medium heat until thickened. Remove from heat, stir in vanilla and butter. Chill before piping into shells.
Assemble:
Pipe or spoon chilled pastry cream into cooled tartlet shells. Top with fresh strawberries, dust with powdered sugar, and garnish with mint.
Nutrition
- Calories: 280
- Fat: 16g
- Carbohydrates: 28g
- Protein: 4g
My love affair with strawberry desserts started long before I had my own kitchen, on the side of a dusty country road. Every June, my grandma would pile us into her station wagon for the annual pilgrimage to Mr. Henderson’s farm stand. The air was thick with the smell of hot asphalt and ripe berries. We’d come home with flat after flat of strawberries, their scent filling the car, promising the goodness to come.
Back in her warm, flour-dusted kitchen, Grandma would make her famous “rustic berry pie.” I was her official (and very messy) assistant. But one summer, she surprised me with a miniature version—her own “baby pies,” she called them. They were individual tart shells, filled with her vanilla pudding and topped with a single, perfect strawberry half. To my eight-year-old eyes, they were the most elegant, grown-up things I’d ever seen. Making them felt like being let in on a glorious secret. That day, she taught me that a little extra care—making something individual, something personal—could transform simple ingredients into a moment of pure magic. These tartlets are my grown-up homage to those “baby pies,” a sweet reminder that the most memorable creations are often just simple things, made with love.
Gathering Your Sunshine: Ingredients & Insights
Here’s the beautiful part: the ingredient list is short, sweet, and simple. Using great quality basics here makes all the difference. Let’s break it down:
For the Buttery Tartlet Shells:
- 1 1/4 cups all-purpose flour: The backbone of our shell. Spoon it into your measuring cup and level it off for accuracy—no packing it down!
- 1/2 cup unsalted butter, cold and cubed: Cold is key! I pop mine in the freezer for 10 minutes before starting. This ensures those tiny butter pockets steam in the oven, creating the flakiest, most tender crust.
- 1/4 cup powdered sugar: This gives the shell a delicate sweetness and a lovely tender texture, unlike a gritty granulated sugar.
- 1 egg yolk: It adds richness, color, and helps bind our dough together beautifully.
- 1–2 tbsp cold water: Just enough to bring it together. I add it one tablespoon at a time.
For the Silky Vanilla Pastry Cream:
- 2 cups whole milk: Full-fat milk is non-negotiable for that luxuriously creamy mouthfeel. It’s the cozy blanket for our flavors.
- 1/2 cup granulated sugar: Sweetens the deal perfectly.
- 1/4 cup cornstarch: Our magic thickener! It gives the cream its signature pudding-like body that holds up in the shell.
- 4 egg yolks: Hello, richness and vibrant yellow color! They create the custard base. (Save the whites for a pavlova or morning omelet!)
- 1 tsp vanilla extract: Use the real stuff if you can! It makes the flavor sing. For a next-level twist, scrape the seeds from a vanilla bean pod into the milk as it heats.
- 2 tbsp unsalted butter: Stirred in at the end, it adds a gorgeous shine and an extra layer of flavor.
For the Topping & Final Flourish:
- Fresh strawberries, halved: The star of the show! Look for berries that are bright red, fragrant, and firm. Rinse and pat them completely dry before topping to prevent sogginess.
- Powdered sugar (for dusting): The elegant finishing touch. I use a fine-mesh sieve for that lovely, snowy drift.
- Mint leaves (optional, for garnish): A tiny pop of green makes the red berries look even more stunning. It’s a visual (and refreshing) high-five.
Let’s Build Some Magic: Step-by-Step Instructions
Ready? Aprons on! We’ll tackle this in three happy stages: the shells, the cream, and the grand (and easy) assembly.
Step 1: Making the Tartlet Shells
1. Pulse the Dry & Butter: In the bowl of a food processor, combine the flour and powdered sugar. Give it a quick pulse to blend. Scatter the cold, cubed butter over the top. Now, pulse in short bursts—about 8-10 times—until the mixture looks like coarse sand with a few pea-sized butter bits remaining. Chef’s Tip: No food processor? No sweat! Use a pastry cutter or even quickly rub the butter into the flour with your fingertips until you get that sandy texture. Just work fast so the butter stays cool.
2. Bring It Together: Add the egg yolk and 1 tablespoon of the ice-cold water. Pulse again until the dough just begins to clump together. Pinch a bit between your fingers. If it holds together, you’re golden! If it seems too dry, add the second tablespoon of water, pulse, and check again. The goal is a dough that holds together when pressed, not a wet ball.
3. Chill Out: Turn the dough out onto a piece of plastic wrap. Gently press it into a disc, wrap it tightly, and let it relax in the fridge for at least 30 minutes. This chill time is crucial—it re-solidifies the butter and relaxes the gluten, guaranteeing a tender, not tough, shell.
4. Roll & Shape: Preheat your oven to 350°F (175°C). Lightly flour your surface and rolling pin. Roll the chilled dough to about 1/8-inch thickness. Using a round cutter slightly larger than your tartlet molds, cut out circles. Gently press each circle into a mold, ensuring it snugs into the corners. Trim any excess. Prick the bottoms all over with a fork (this is called “docking” and prevents big air bubbles).
5. Bake to Golden Perfection: Bake for 12-15 minutes, or until the edges are lightly golden and the bottoms look dry and set. Let them cool completely in the pans on a wire rack. They’ll crisp up as they cool—patience is a virtue here!
Step 2: Whipping Up the Vanilla Pastry Cream
1. Heat the Milk: Pour the milk into a medium saucepan and place it over medium heat. Bring it just to a simmer—you’ll see little bubbles form around the edges. Then, immediately remove it from the heat.
2. Temper the Eggs (Don’t panic! It’s easy): In a separate, medium bowl, whisk together the sugar and cornstarch. Add the egg yolks and whisk vigorously for a good minute until the mixture is pale, thick, and smooth. This is your safety net. Now, while whisking the egg mixture constantly, slowly drizzle in about half of the hot milk. This gently raises the temperature of the eggs so they won’t scramble when you add them back to the pan.
3. Cook to Creamy Bliss: Pour the now-warm egg and milk mixture back into the saucepan with the remaining milk. Return it to medium heat and cook, whisking non-stop, until the mixture becomes very thick and large bubbles break the surface at the center—about 2-3 minutes. You must keep whisking to avoid lumps!
4. Finish & Chill: Remove from the heat. Whisk in the vanilla extract and butter until the butter is fully melted and the cream is silky. Pour it through a fine-mesh sieve into a clean bowl (this catches any potential cooked egg bits for the smoothest texture ever). Press plastic wrap directly onto the surface to prevent a skin from forming. Chill for at least 1 hour, or until completely cold and set.
Step 3: The Joyful Assembly
1. Fill ‘Em Up: Once shells and cream are completely cool, it’s go time! You can spoon the pastry cream into the shells, but for a super pro look, scoop the chilled cream into a piping bag fitted with a large round tip (or just a zip-top bag with the corner snipped off). Pipe a generous swirl into each shell.
2. Top with Berries: Take your dry strawberry halves and arrange them artfully on top. I love starting from the outside and working in concentric circles, or just piling them high for a rustic, abundant look.
3. The Final Touch: Just before serving, use a fine-mesh sieve to dust the tops with a graceful cloud of powdered sugar. Add a tiny mint leaf or two for that final pop of color. And voilà! You’ve just created edible art.
Presenting Your Masterpiece: Serving Suggestions
These tartlets are their own beautiful presentation! I love serving them on a simple white platter or a slate board to let their vibrant colors shine. They’re perfect for a spring or summer brunch alongside a pot of coffee or iced tea. For a more elegant evening dessert, plate them individually and pair with a glass of Prosecco or a sweet Moscato. The key is to serve them soon after assembling so the shell stays beautifully crisp. Watch your friends’ eyes light up—that’s the best part!
Make It Your Own: Delicious Variations
The fun doesn’t stop here! This recipe is a fantastic canvas. Try these twists:
- Lemon-Zested Joy: Add the zest of one lemon to the pastry cream along with the vanilla for a bright, sunny twist.
- Chocolate-Dipped Dream: Melt some dark chocolate and dip the tips of your strawberry halves before placing them on the tartlet. Decadence level: expert.
- Mixed Berry Bonanza: Swap the strawberries for a mix of raspberries, blueberries, and blackberries. It’s a summer festival in a tart shell!
- Dairy-Free Delight: Use a high-quality, creamy vegan butter (for the shell and cream) and full-fat coconut milk in place of the dairy milk. The result is wonderfully rich and just as delicious.
- Almond Crust: Replace 1/4 cup of the all-purpose flour in the shell with almond flour for a nutty, delicate flavor.
From My Kitchen to Yours: Chef’s Notes
I’ve made these tartlets more times than I can count, and they’ve been through a few fun evolutions. The first time I made pastry cream, I was so nervous about tempering the eggs I think I held my breath for three minutes straight! But you know what? It worked, and I felt like a kitchen wizard. My biggest lesson learned? Don’t skip the step of pressing the plastic wrap directly on the cream. I did once, and the “skin” that formed wasn’t the end of the world, but whisking it in made the cream a little less perfectly silky. Now I never skip it!
Also, these shells are wonderfully forgiving. If they shrink a little or crack when you’re pressing them in, just patch them with a little extra dough—they’ll bake up fine. Cooking is about joy, not perfection. Every time I make these, I think of my grandma and her “baby pies,” and it reminds me that the real secret ingredient is always, always the love you stir in.
Your Questions, Answered: FAQs & Troubleshooting
Q: My pastry cream turned out lumpy! What did I do wrong and can I fix it?
A: Lumps usually happen if the eggs scramble from too-rapid heat. First, prevention is key: whisk constantly and don’t rush the heating process. If you do get lumps, all is not lost! Immediately pour the cooked cream through a fine-mesh sieve, pressing it through with a spatula. This will catch almost all the lumps and salvage your creamy base.
Q: Can I make any parts ahead of time?
A> Absolutely! This is a great party trick. The tartlet shells can be baked up to 2 days ahead and stored in an airtight container at room temp. The pastry cream can be made up to 3 days ahead and kept tightly covered in the fridge. Assemble the tartlets the day you plan to serve them for the crispest shell experience.
Q: My tart shell got soggy after filling. Help!
A> The number one culprit is assembling while the shells or cream are still warm. Make sure everything is completely cooled. Also, ensure your strawberries are patted bone-dry. For extra insurance, you can brush the inside of your cooled, baked shells with a little melted white chocolate or even a thin layer of warmed apricot jam. It creates a moisture barrier.
Q: I don’t have individual tartlet pans. What can I use?
A> No problem! You can use a standard muffin tin! Just press the dough circles into the cups. You might get slightly deeper “nests,” which are also adorable. Alternatively, press all the dough into one 9-inch tart pan for a stunning full-sized tart. Just increase the baking time by 5-10 minutes for a full-size shell.
Nutritional Information (Per Tartlet – Makes 6)
Please note: This is an estimate provided for informational purposes. Actual values may vary based on specific ingredients used.
- Calories: ~280
- Protein: 4g
- Fat: 16g
- Carbohydrates: 28g
- Sugar: 14g
- Fiber: 1g
- Sodium: 60mg
Prep Time: 25 minutes | Cook Time: 25 minutes | Chill Time: 1 hour | Total Time: ~1 hour 50 minutes | Servings: 6
 Final Thoughts
These Fresh Strawberry Tartlets are one of those recipes that make you feel like a pastry chef in your own kitchen—without the stress. They’re bright, cheerful, and endlessly versatile, perfect for spring brunches, weekend gatherings, or just a little personal indulgence. The buttery shells, silky pastry cream, and jewel-toned strawberries come together in a way that’s both visually stunning and irresistibly delicious.
The beauty of this recipe is how forgiving it is. Even if your shells shrink a little, your cream has a tiny lump, or your strawberry arrangement isn’t perfect, the flavors will still shine. And honestly, that’s what makes homemade desserts so special—the love and effort you stir in is always the secret ingredient.
I hope these tartlets inspire you to slow down for a moment, savor a sweet bite, and maybe even share the joy with someone you love. After all, the best desserts aren’t just about taste—they’re about creating memories, just like my grandma taught me all those years ago.
So grab those strawberries, roll up your sleeves, and make a little edible sunshine today. You’ve got this!