Spooky Sweets That’ll Make Your Halloween Scream (With Joy!)
Hey there, friend! Anna here, your kitchen-storytelling pal, ready to turn ordinary baking into something delightfully spooky. Picture this: It’s a crisp October evening, your kitchen smells like vanilla and mischief, and you’re surrounded by a fleet of adorable little ghosties just begging to be devoured. That’s the magic of these Ghost Cake Pops! They’re not just treats—they’re edible happiness wrapped in creamy white chocolate and topped with a giggle-worthy grin. Perfect for Halloween parties, classroom surprises, or just because Tuesday needs more whimsy.
I’m all about keeping things joyful, not stressful. So trust me when I say these Boo Bites are foolproof. We’re doubling the batch because, let’s be real, 24 ghosts disappear faster than you can say “Boo!” in my house. Whether you’re a first-time baker or a seasoned pro, we’ll turn cake mix and frosting into edible art that’ll make everyone gasp (then grab). Ready to create some kitchen magic? Aprons on—let’s make memories that taste like childhood wonder and white chocolate!
When My Ghosts Caused a (Happy) Haunting
PrintGhost Cake Pops
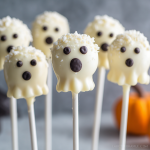
Light, sweet, and just spooky enough—these Ghost Cake Pops are hauntingly adorable! Doubled for a crowd and upgraded with flavor and flair, these little ghosties are made from moist vanilla cake, dipped in creamy white chocolate, and decorated with spooky expressions that’ll make anyone smile before they scream (with delight).
- Prep Time: 45 mins
- chill time: 45 mins
- Total Time: 1 hour 30 minutes
Ingredients
2 boxes vanilla cake mix (plus eggs, oil, and water as listed)
1 cup vanilla frosting
4 cups white chocolate melts
Black gel icing (for ghost faces)
Optional twists:
Add 1 tsp almond or coconut extract to cake batter for a flavor boost
Use edible glitter or shimmer spray for “ghost glow”
Crushed graham crackers or white sprinkles for texture
Mix in white chocolate chips or crushed cookies into the cake crumbles for extra magic
Instructions
Bake cakes as directed and let cool completely.
Crumble into fine crumbs in a large bowl and mix in vanilla frosting until smooth and moldable.
Roll into 24 even-sized balls and chill for 30 minutes.
Melt white chocolate until smooth.
Dip each cake ball into white chocolate to coat completely.
While the coating is still soft, gently shape the top of each pop into a soft ghostly wave or leave round for a classic look.
Once set, use black gel to draw ghost eyes, mouths, or spooky faces.
Add shimmer or sprinkles for a supernatural finish. Chill to firm up before serving.
Nutrition
- Calories: 215
- Sugar: 21g
- Sodium: 150mg
- Fat: 11g
- Carbohydrates: 27g
- Protein: 2g
Let me take you back to my very first batch of ghost cake pops. It was my son’s preschool Halloween bash, and I’d signed up to bring treats. “Go all out,” they said. Challenge accepted! I envisioned an army of perfect, ethereal spirits. Reality? My kitchen looked like a flour bomb went off, and my first ghost faces resembled surprised potatoes more than specters. My husband walked in, took one look at my “ghosts,” and deadpanned, “They’re… abstract.”
But here’s the twist: Those wonky-faced ghosts were the stars of the party. The kids adored their quirky expressions, naming them “Giggly Gary” and “Silly Steve.” One little girl whispered, “They look friendly, not scary!” That’s when it hit me: Imperfection is where the magic lives. Now, every October, my family gathers to create ghost pops with intentionally silly faces. We laugh, we drip chocolate, we tell stories—and those messy, joyful moments? That’s the real recipe. These little boos aren’t just dessert; they’re edible love notes to the silly, sweet chaos of life.
👻 Gathering Your Ghostly Crew (Ingredients)
Here’s what you’ll need to summon 24 adorable cake pops! Pro tip: Read the “why” notes—they’re your secret to ghost-making success.
- 2 boxes vanilla cake mix (plus eggs, oil & water as listed) – Why? Box mix keeps it easy and moist. Chef’s hack: Swap one box for chocolate mix if you want “dirt-covered” ghosts!
- 1 cup vanilla frosting – Why? It binds the crumbs. Insight: Use store-bought for speed, or homemade for extra love. Cream cheese frosting adds a tangy twist!
- 4 cups white chocolate melts – Why? Melts coat smoother than regular chocolate. Sub tip: Candy melts or almond bark work too. Avoid chocolate chips—they seize up!
- Black gel icing (for faces) – Why? Gel won’t run like liquid icing. Fun swap: Melt dark chocolate and pipe with a toothpick!
- Optional Twists:
- Add 1 tsp almond or coconut extract to the cake batter for a hauntingly delicious aroma.
- Use edible glitter or shimmer spray for an eerie “ghost glow” effect.
- Roll pops in crushed graham crackers or white sprinkles pre-dip for “ectoplasm” texture.
- Mix white chocolate chips or crushed Oreos into the cake crumbles for hidden surprises!
✨ Conjuring Your Ghosts: Step-by-Step Magic
Follow these steps, and you’ll be a cake-pop sorcerer in no time! I’ve packed each one with insider tricks to avoid “boo-boos.”
- Bake & Cool: Bake cakes as directed in two 9″ pans. Cool completely—seriously, warm cake crumbles into mush! Hack: Speed-cool by placing pans on wire racks. Tear a tiny corner to let steam escape.
- Crumble & Mix: Crumble cakes into a large bowl. Fine crumbs = smooth pops! Add frosting in ¼ cup increments. Key tip: Mix with hands—it’s messy but ensures no dry spots. Texture should feel like Play-Doh™.
- Roll & Chill: Use a cookie scoop for 24 even balls (golf-ball size). Roll gently—don’t compact! Game-changer: Chill balls 30 mins. Cold balls won’t crack when dipped!
- Melt Chocolate: Melt white chocolate in 30-sec microwave bursts, stirring between. Chef’s secret: Stir in 1 tsp coconut oil for extra fluidity. Keep melted chocolate warm in a mug for easy dipping.
- Dip & Decorate: Insert lollipop sticks (dipped first in chocolate) into balls. Dip each pop, tap off excess, and place upright in foam block. Ghost-shaping hack: While wet, gently pinch the top into a wavy “tail” with damp fingers.
- Face the Fun: Once chocolate sets (20 mins), use black gel to draw faces. Pro move: Test designs on parchment first! Go classic (ooOo) or silly (winky faces).
- Add Sparkle: Dust with edible glitter or sprinkle “ectoplasm” crumbs immediately after dipping. Boo-tiful touch: Spritz with pearl shimmer spray for phantom glow.
- Chill & Serve: Chill 15 mins to set completely. Share immediately or store (see FAQs)!
🎃 Serving Your Spooky Specters
Presentation is half the fun! Stick pops into a foam block covered with black tissue paper for a “haunted graveyard.” Scatter crushed Oreos as “dirt,” add candy tombstones, and watch guests grin! For party favors, wrap each ghost in clear bags tied with orange ribbon. Kids adore finding them “floating” in a cauldron centerpiece (use crumpled foil to prop them up). Pair with hot cocoa for a cozy Halloween movie night—their sweet vanilla charm is pure comfort!
👻 5 Boo-tiful Recipe Twists
Switch up your spooks with these fun variations:
- Chocolate Phantom: Use chocolate cake mix and dip in dark chocolate. Draw faces with white icing!
- Vegan Ghosties: Use plant-based cake mix, coconut oil frosting, and dairy-free chocolate.
- Pumpkin-Spiced Spirits: Add 1 tbsp pumpkin spice to cake batter. Dip in orange-tinted white chocolate!
- Gluten-Free Ghouls: Swap GF cake mix and ensure all toppings are GF-certified.
- Mummy Pops: Drizzle with extra chocolate in “bandage” stripes. Candy eyes optional!
👩🍳 Anna’s Ghostly Confessions
Over the years, these pops have seen it all! One Halloween, I tried piping intricate lace patterns on the ghosts… only to realize they looked like they were wearing tiny sweaters. Cute? Yes. Ghostly? Not so much! Now I embrace simplicity—a dot-eyed ghost makes everyone smile. Another evolution? The “double dip.” After a reader suggestion, I started dipping chilled pops twice for extra-thick “ectoplasm” that hides crumbs. Genius! My biggest lesson? Let kids decorate. Their wild faces (think three-eyed ghosts with fangs) always steal the show. These pops aren’t about perfection; they’re about sticky fingers, shared laughs, and the joy of making something silly-sweet together.
❓ Ghost Pop SOS: Your Questions, Answered!
Q: Why did my cake balls crack when dipping?
A: Temperature shock! Let chilled balls sit at room temp for 5-10 mins before dipping. Also, ensure your melted chocolate isn’t scalding hot—warm is perfect.
Q: Can I make these ahead of time?
A: Absolutely! Undecorated pops freeze beautifully for up to a month. Thaw overnight in the fridge, then dip. Decorated pops? Store in an airtight container in the fridge for 3 days. Add faces just before serving to prevent smudging.
Q: Help! My cake pops keep sliding off the stick!
A: Two tricks: 1) Dip the tip of your lollipop stick in melted chocolate before inserting it into the ball—it acts like glue. 2) Don’t overload pops; golf-ball size is ideal. Larger pops = gravity wins!
Q: How do I fix lumpy chocolate coating?
A: Stir in 1 tsp coconut oil while melting. If it seizes (gets clumpy), add a splash of vegetable oil and stir vigorously. And always microwave in short bursts!
🍬 Nutrition & Prep Info (Per Cake Pop)
Prep time: 45 mins | Chill & Decorate: 45 mins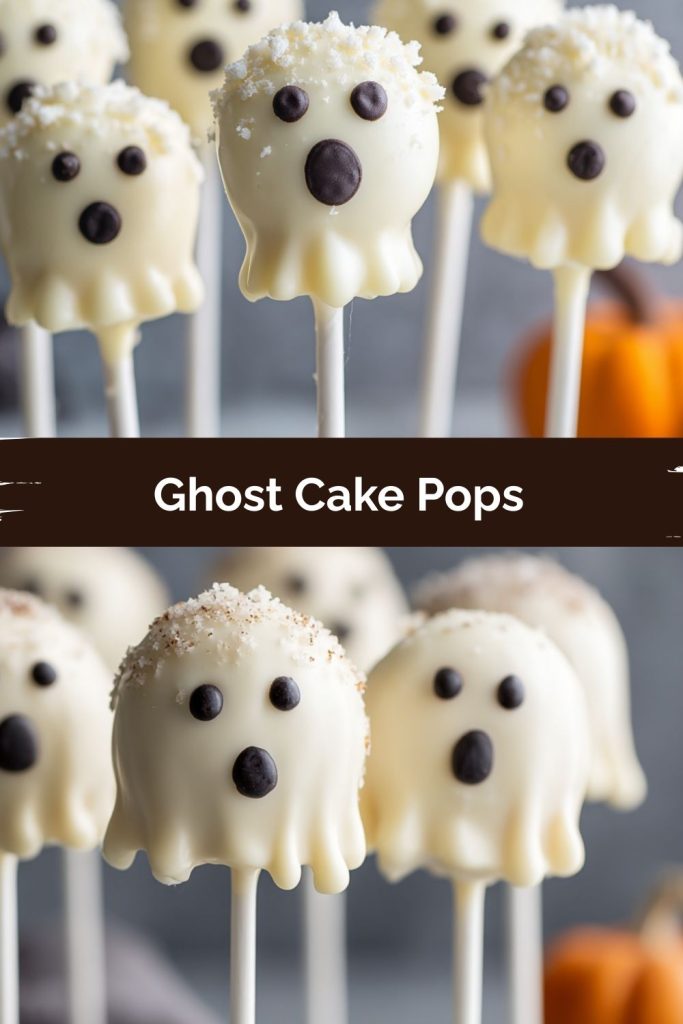
Final Thoughts
These Ghost Cake Pops prove that Halloween magic isn’t about perfect lines or Pinterest-level precision—it’s about the giggles, the sticky fingers, and the slightly wonky faces that somehow make each ghost unforgettable. They’re little bites of joy disguised as spooky sweets, perfect for sharing at parties, sneaking into lunchboxes, or nibbling while you watch your favorite not-too-scary movie. So embrace the smudged smiles, lean into the silly, and remember: in the kitchen (and in life), the best treats are the ones made with laughter and a little bit of mischief. Boo-tiful, every time.