Glazed Cherry Bars Recipe: Buttery, Fruity & Perfect for Sharing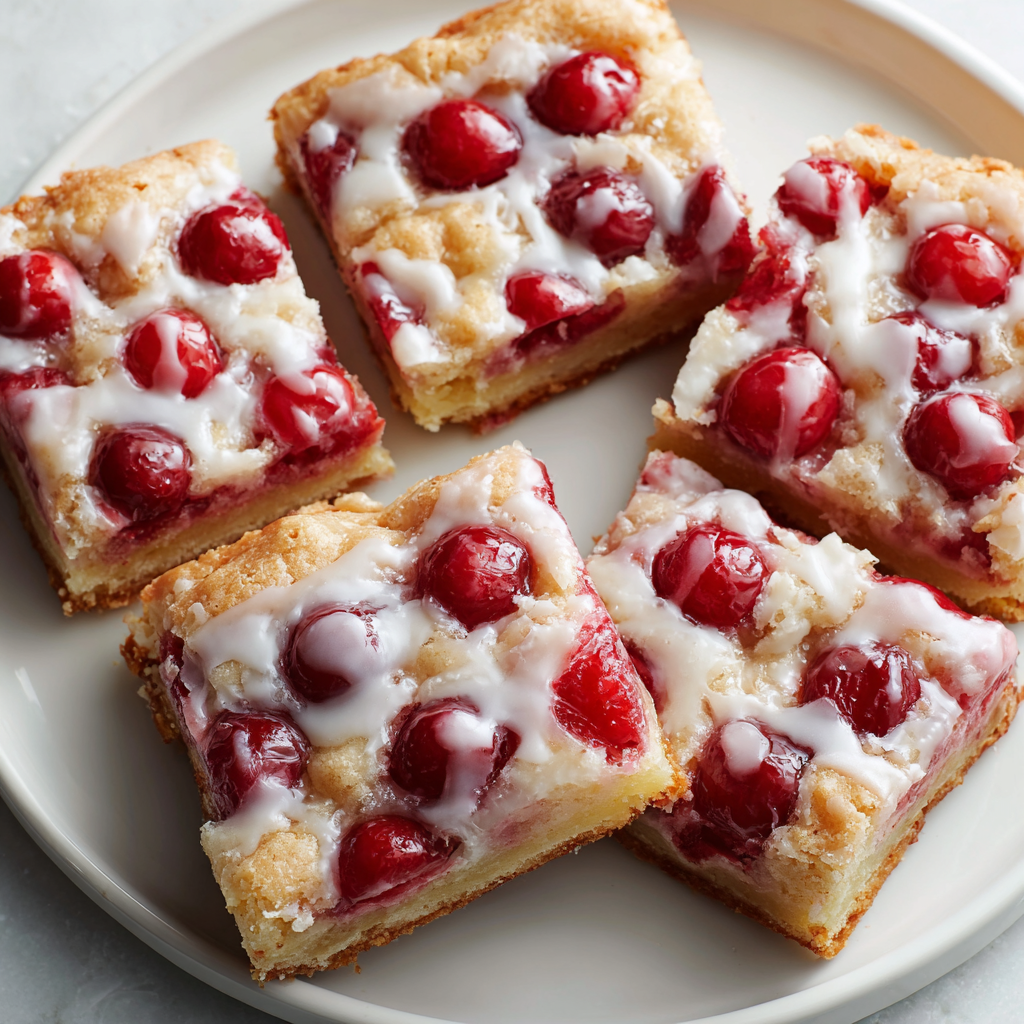
Hey there, friend! Let’s talk about one of life’s simple, glorious pleasures: a dessert you can eat with your hands that somehow feels fancier than a cookie. That’s the magic of a great bar cookie. And today, we’re making what might just be my all-time favorite: these incredibly easy, impossibly delicious Glazed Cherry Bars.
Picture this: a soft, buttery, almost shortbread-like crust. A generous layer of sweet-tart cherry pie filling that bubbles up just a bit in the oven. A crumbly, golden top that doesn’t quite cover the ruby-red fruit beneath—creating these gorgeous, jammy pockets. And to finish it all off? A simple, shimmering vanilla glaze that ties every single bite together with a ribbon of sweetness.
This is the dessert I turn to when I need a guaranteed crowd-pleaser. It’s the star of bake sales, the hero of potlucks, and the treat my family silently hopes is waiting on the counter when they walk in the door. The best part? It all comes together in one bowl (mostly!) and bakes in a simple sheet pan. No fussy layers, no complicated techniques—just pure, joyful, shareable flavor. So, preheat that oven, and let’s bake up a pan of happiness together.
The Cherry Bar That Sparked a Tradition
PrintGlazed Cherry Bars Recipe : Buttery, Fruity and Perfect for Sharing

These Cherry Bars are soft, buttery, and packed with sweet-tart cherry pie filling, all topped with a simple vanilla glaze. They’re baked in a sheet pan, making them easy to cut into perfect squares for parties, bake sales, or family desserts. Whether you serve them warm or chilled, each bite delivers a delicious mix of flaky crust, juicy fruit, and sugary glaze.
- Prep Time: 15 minutes
- Cook Time: 35 minutes
- Total Time: 50 minutes
- Yield: 24 bars 1x
Ingredients
For the Dough:
1 cup unsalted butter, softened
2 cups granulated sugar
4 large eggs
1 teaspoon vanilla extract
1/4 teaspoon almond extract (optional)
3 cups all-purpose flour
1 teaspoon salt
2 cans (21 oz each) cherry pie filling
For the Glaze:
1 cup powdered sugar
1/2 teaspoon vanilla extract
2 to 3 tablespoons milk
Instructions
Preheat oven to 350°F (175°C). Grease a 10×15-inch jelly roll pan.
In a large bowl, cream butter and sugar together until light and fluffy.
Add eggs one at a time, mixing well after each. Stir in vanilla and almond extract.
Gradually add flour and salt until combined.
Spread two-thirds of the dough into the prepared pan.
Spoon cherry pie filling evenly over the dough.
Drop spoonfuls of remaining dough over the top of the cherries. It won’t cover completely—that’s okay.
Bake for 30 to 35 minutes, or until golden brown. Let cool completely.
For the glaze, whisk powdered sugar, vanilla, and milk until smooth. Drizzle over cooled bars before slicing
Nutrition
- Calories: 210
- Fat: 8g
- Carbohydrates: 33g
My love for these bars is deeply rooted in my grandmother’s kitchen. She wasn’t a “fancy” baker, but she was a prolific one. Her counter was always home to a cake stand covered in foil, hiding something wonderful underneath. One particularly hot summer day, after we’d helped her pit what felt like a million cherries from her tree, she made her first pan of these. I remember the skeptical look from my cousin (“Cherries in a bar?”) and the collective, stunned silence that followed the first bite. The buttery dough, the bright fruit, the sweet glaze… it was a revelation.
From that day on, “Gram’s Cherry Squares” were a non-negotiable request for every family reunion, beach trip, and Sunday visit. They taste like nostalgia to me—like sticky fingers, sunny afternoons, and the warm, flour-dusted hug of a grandmother who knew that the best memories are often baked into a 10×15-inch pan. Making them now in my own kitchen feels like passing on a little piece of that magic, and I can’t wait for you to start your own tradition with them.
What You’ll Need to Make Cherry Bars
Here’s your shopping list! These ingredients are simple, and I’ve included my favorite chef-y insights and swaps to make this recipe work for you.
- 1 cup (2 sticks) unsalted butter, softened – This is the heart of our rich, tender crust. I use unsalted so we can control the salt level. Chef’s Tip: True “softened” butter should give slightly when pressed but still hold its shape. Don’t let it get oily or melted!
- 2 cups granulated sugar – Sweetens the dough and helps create that lovely texture.
- 4 large eggs – They bind everything together and add richness. Make sure they’re at room temperature for best mixing.
- 1 teaspoon pure vanilla extract – The classic flavor enhancer. Use the good stuff if you can!
- 1/4 teaspoon almond extract (optional but recommended!) – This is my secret weapon. It amplifies the cherry flavor beautifully, giving it a bakery-quality depth. If you’re allergic, just leave it out.
- 3 cups all-purpose flour – The structure-builder. For a lighter bar, you can sift it before measuring.
- 1 teaspoon salt – Crucial for balancing all the sweetness and making the flavors pop. Don’t skip it!
- 2 cans (21 oz each) cherry pie filling – The easy, vibrant star. I love the classic Comstock or Lucky Leaf brands. You can use homemade if you’re feeling ambitious, but the canned stuff works perfectly here.
For the Simple Vanilla Glaze:
- 1 cup powdered sugar – Also called confectioners’ sugar. It dissolves instantly for a smooth glaze.
- 1/2 teaspoon vanilla extract – A little extra vanilla love for the topping.
- 2 to 3 tablespoons milk – Any kind you have—whole, 2%, or even almond milk. We’ll add it slowly to get the perfect drizzling consistency.
Let’s Bake! Your Step-by-Step Guide
Ready? Aprons on! This process is wonderfully straightforward. I’ll walk you through each step with all my favorite tips to ensure perfect bars.
- Prep Your Stage: Preheat your oven to 350°F (175°C). Grease a 10×15-inch jelly roll pan (a rimmed baking sheet) really well with butter or non-stick spray. This is our canvas! Getting it well-greased ensures easy release later.
- Cream the Butter & Sugar: In a large mixing bowl, beat the softened butter and granulated sugar together on medium-high speed for 2-3 minutes. We’re not just mixing; we’re creaming. This incorporates air, which leads to a lighter, tenderer crust. You’ll know it’s ready when the mixture turns pale yellow and looks fluffy.
- Incorporate the Eggs & Flavor: Add the eggs one at a time, beating well after each addition. This helps them emulsify smoothly into the batter. Then, mix in the vanilla and that magical almond extract. The smell alone is worth it!
- Bring in the Dry Ingredients: With your mixer on low, gradually add the flour and salt. Mix just until the flour disappears and a soft dough forms. Overmixing at this stage can make the bars tough, so as soon as you don’t see white streaks, stop! The dough will be quite thick and sticky—that’s perfect.
- Layer the Base: This is the fun part! Take about two-thirds of the dough and drop it in dollops all over the bottom of your prepared pan. Then, using lightly floured fingers or a small offset spatula, press and spread it into an even layer. It might feel thin, but it will puff up as it bakes. A little flour on your fingers prevents sticking.
- Add the Cherry Heart: Open those cans of cherry pie filling and give it a gentle stir. Spoon it evenly over the dough layer, spreading it out gently with the back of your spoon. Try to get it as even as possible for consistent bars.
- Top it Off: Take the remaining one-third of dough and drop small spoonfuls (I use a teaspoon) randomly over the cherry filling. Here’s the key: Don’t try to cover it completely! The gaps are where the cherries will bubble up and peek through, creating that beautiful marbled look. Embrace the imperfection—it’s part of the charm.
- Bake to Golden Perfection: Slide the pan into your preheated oven and bake for 30-35 minutes. You’re looking for the top to be a light, golden brown, and the edges may just be starting to pull away from the pan. The cherry filling will be bubbly around those gorgeous gaps. Your kitchen will smell incredible.
- The All-Important Cool Down: Place the pan on a wire rack and let the bars cool completely. I know it’s tempting, but slicing into warm bars will result in a gooey mess. The glaze also needs a cool surface to set properly. This is the hardest part of the recipe—I believe in you!
- Drizzle & Shine: While the bars cool, make the glaze. In a small bowl, whisk the powdered sugar, vanilla, and 2 tablespoons of milk. You want a thick but pourable consistency—like heavy cream. Add the extra tablespoon of milk a teaspoon at a time if needed. Once the bars are totally cool, use a spoon or fork to drizzle the glaze back and forth in zig-zags over the entire pan.
- Slice & Celebrate: Once the glaze has set for about 10 minutes, use a sharp knife to cut into squares. For super clean cuts, wipe the knife blade clean between slices. Then, serve, share, and enjoy every buttery, fruity, glazed bite!
How to Serve These Cherry Bliss Bars
The beauty of these bars is their versatility! For a simple, everyday treat, just stack them on a pretty plate or in a lunchbox. For something a little more special, serve a square slightly warmed with a scoop of good vanilla ice cream or a dollop of freshly whipped cream. The contrast of warm bar and cold cream is divine. They’re also perfect for packing up—these travel like a dream for picnics, potlucks, or care packages. Just layer them in a container with parchment paper between layers.
Make It Your Own: Delicious Variations
Love the formula but want to mix it up? Go for it! Here are a few of my favorite spins:
- Berry Bliss: Swap the cherry pie filling for blueberry, raspberry, or apple pie filling. A dash of cinnamon in the dough with apple is fantastic.
- Chocolate-Cherry Twist: Sprinkle 1/2 cup of mini chocolate chips over the cherry layer before adding the top dough. Or, add a tablespoon of cocoa powder to the powdered sugar glaze.
- Citrus Zing: Add the zest of one lemon or orange to the dough for a bright, sunny flavor that pairs wonderfully with the cherries.
- Nutty Crunch: Mix 1/2 cup of chopped almonds or pecans into the crumbly top dough before scattering it over the filling.
- Gluten-Free Friendly: Use a 1:1 gluten-free all-purpose flour blend (like Bob’s Red Mill or King Arthur) in place of the regular flour. The texture will be slightly more crumbly but just as tasty.
A Few Final Notes from My Kitchen
Over the years, this recipe has become my baking “security blanket.” I’ve made it in a frenzy for last-minute school events, carefully for holiday cookie boxes, and lazily on a Sunday just because. The recipe as written is classic and foolproof, but don’t be afraid to play. I once accidentally used lemon extract instead of vanilla in the glaze, and it was a happy accident everyone loved!
The dough is forgiving. If it feels too sticky to press, dust your hands with a bit more flour. If you only have a 9×13 pan, you can use it—your bars will be thicker and may need 5-10 extra minutes of baking time. Just watch for that golden-brown top. Remember, baking is part science, part heart. These bars are full of both.
Your Questions, Answered
Q: Can I use fresh or frozen cherries instead of pie filling?
A: You can, but it’s a different process. For fresh/frozen, you’ll need to cook them down with some sugar and cornstarch to create a thickened filling first. The canned pie filling is the convenient shortcut that guarantees perfect consistency and sweetness every time.
Q: My bottom crust seems soggy. What happened?
A: This usually means the bars were cut before they were completely cool, or the dough layer was pressed too thin in one spot. Ensuring the pan is in the center of the oven (not too low) and letting the bars cool fully on a wire rack (which allows steam to escape) are the best guards against sogginess.
Q: How should I store these, and how long do they last?
A: Store them in an airtight container at room temperature for up to 3 days. For longer storage, you can keep them in the fridge for up to a week, or freeze them (unglazed is best for freezing) for up to 3 months. Thaw overnight in the fridge and add glaze before serving.
Q: Can I make these ahead of time?
A: Absolutely! They are actually even better the next day, as the flavors meld. Bake and cool completely, then cover the unglazed pan tightly with foil. Glaze on the day you plan to serve for the prettiest presentation.
Nutritional Information*
*Please note: These values are approximate estimates calculated using an online nutrition tool and will vary based on specific brands and portion sizes.
Per Serving (1 bar): Calories: ~210 | Fat: 8g | Saturated Fat: 5g | Carbohydrates: 33g | Sugar: 20g | Protein: 2g | Sodium: 105mg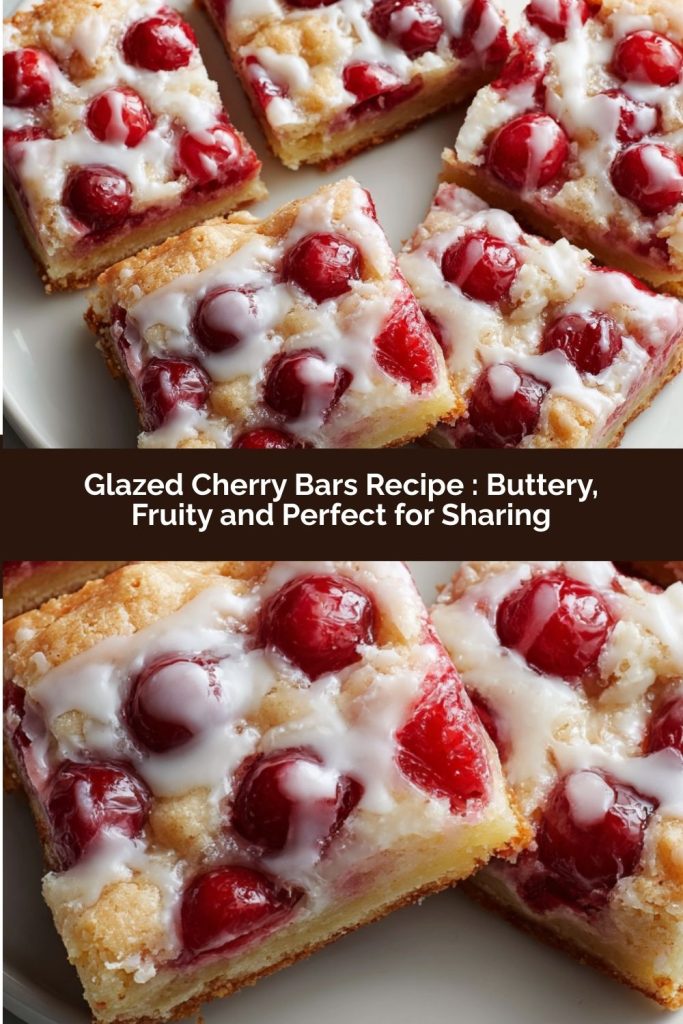
Final Thoughts
These Glazed Cherry Bars are the perfect intersection of buttery, fruity, and sweet—all in one glorious, handheld bite. They’re simple enough for a weekday treat, impressive enough for a potluck or bake sale, and comforting enough to feel like a hug from the oven. The buttery crust, jammy cherry pockets, and sweet vanilla glaze combine to create that magical “just-baked” moment every time.
What makes these bars truly special is their versatility. Swap in your favorite fruit fillings, add a sprinkle of nuts, or drizzle extra glaze for a showstopper. Even better? They’re forgiving and easy to prep ahead, which makes them a go-to recipe for busy schedules, holiday gatherings, or last-minute dessert emergencies.
Whether you serve them warm with ice cream, pack them for a picnic, or simply sneak one straight from the pan, these cherry bars are guaranteed to bring smiles. They’re a delicious reminder that sometimes the simplest desserts—full of buttery crust, bright fruit, and just a touch of glaze—are the ones that create the sweetest memories.