***
Your New Favorite Grilled Feast is Here!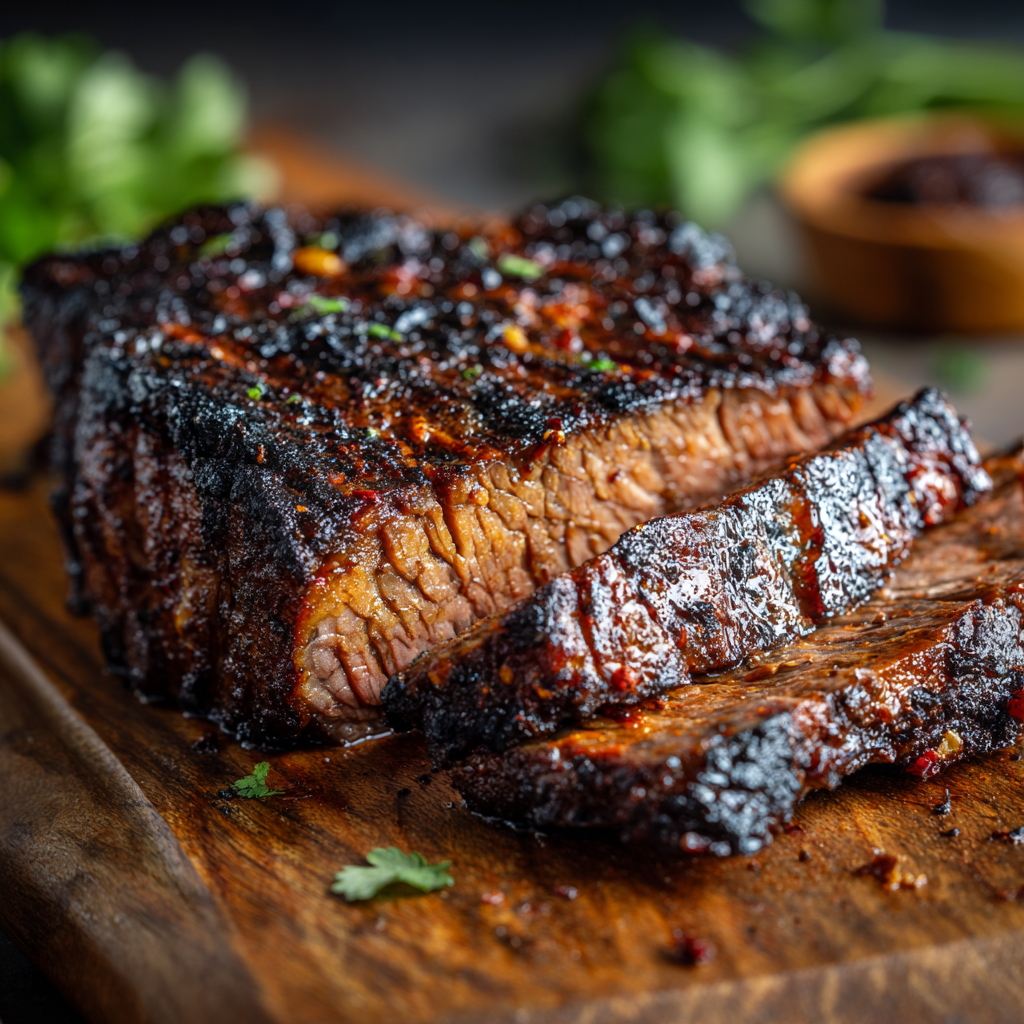
Hey there, friend! Is there anything that says “summer” quite like the sound of a sizzling roast hitting a hot grill, the smell of smoky char filling the air, and the promise of a seriously delicious meal shared with your favorite people? If your stomach just did a happy little dance, you’re in the right place. Today, we’re ditching the oven and taking one of the most flavorful, budget-friendly cuts of beef straight to the grates. We’re making a Grilled Chuck Roast that is guaranteed to become your new warm-weather hero.
Now, I know what you might be thinking. “Anna, a chuck roast? On the grill? Isn’t that a slow-cooker thing?” Traditionally, yes! But trust me on this—grilling transforms this humble cut into something spectacular. We get that incredible smoky crust on the outside while locking in every drop of juicy, beefy goodness on the inside. It’s like a steakhouse-quality experience without the eye-watering bill, and it’s perfect for feeding a hungry crowd at your next BBQ. This recipe is all about big flavor with minimal fuss, because I believe your time is better spent laughing with friends than slaving over a complicated recipe. So, fire up that grill, grab your tongs, and let’s turn an ordinary Wednesday (or a fabulous Saturday!) into a smoky, juicy, unforgettable feast.
The Backyard BBQ That Started It All
PrintGrilled Chuck Roast

This grilled chuck roast brings serious flavor with minimal effort. Charred on the outside, juicy and tender on the inside, it’s a crowd-pleaser for BBQs, weekend dinners, or anytime you want steakhouse vibes without the steakhouse price. This double batch serves a bigger crew—and we’ve added bold flavor twists to take it up a notch.
- Prep Time: 5 min
- Cook Time: 40 min
- Total Time: 45 min
Ingredients
2 beef chuck roasts (2–3 lbs each)
4 tbsp olive oil
2 tbsp Worcestershire sauce
2 tsp Italian seasoning
1 tsp salt
1 tsp black pepper
Optional flavor twists:
Add 1 tsp smoked paprika and ½ tsp crushed red pepper for a smoky-spicy edge
Rub with 1 tbsp Dijon mustard before seasoning for a subtle tang
Finish with a squeeze of lemon or a sprinkle of fresh herbs after grilling
Instructions
Pat the chuck roasts dry. In a small bowl, mix olive oil, Worcestershire sauce, and seasonings.
Rub the mixture generously over both roasts. Let sit at room temperature for 20–30 minutes.
Preheat grill to medium-high. Sear roasts for 4–5 minutes per side to develop a good crust.
Move to indirect heat, cover, and grill for 30–40 more minutes, flipping once, until internal temp reaches 135–145°F for medium-rare to medium.
Rest the meat for 10–15 minutes before slicing against the grain.
Nutrition
- Calories: 300 c
- Fat: 20g
- Carbohydrates: 1g
- Protein: 28g
This recipe honestly came from a happy accident, a classic “chef’s choice” moment born from a packed fridge and a last-minute dinner party. It was the Fourth of July a few years back. My husband had volunteered us to host, and I had grand plans for brisket. But, as life would have it, the brisket was still frozen solid in the depths of my freezer at 4 p.m., with guests arriving at 6. Cue the mild panic!
I rummaged through the fridge and found two beautiful chuck roasts I’d bought for stew. In a moment of “what’s the worst that could happen?” inspiration, I decided to treat them like giant steaks. I whipped up a simple rub, got the grill screaming hot, and went for it. The result? Pure magic. The char was incredible, the meat was shockingly tender and juicy, and our friends absolutely raved about it. No one missed the brisket. In fact, they begged for the recipe! It was a powerful reminder that some of the best kitchen creations come from a little spontaneity and a lot of love. Now, it’s my not-so-secret weapon for effortless entertaining.
Gathering Your Flavor Arsenal
Part of the beauty of this grilled chuck roast is the simplicity of the ingredients. We’re using a few pantry staples to create a flavor bomb that perfectly complements the natural richness of the beef. Here’s what you’ll need:
- 2 beef chuck roasts (2–3 lbs each): This is our star! Chuck roast is marbled with fat, which means it’s packed with flavor and stays incredibly juicy on the grill. Look for roasts that are well-marbled with a nice, deep red color. Don’t trim too much of the fat—it’s our best friend here!
- 4 tbsp olive oil: This acts as the glue for our seasoning paste, helping it stick to the meat and promoting that beautiful, crispy sear. A good extra virgin olive oil adds a lovely fruitiness.
- 2 tbsp Worcestershire sauce: Our secret umami weapon! It adds a deep, savory, slightly tangy base note that makes the beef taste even more “beefy.” If you need a substitute, tamari or coconut aminos work great.
- 2 tsp Italian seasoning: A convenient and delicious blend of herbs like oregano, thyme, and rosemary. It creates a classic, aromatic flavor profile that everyone loves.
- 1 tsp salt & 1 tsp black pepper: The essential building blocks of flavor. I use coarse kosher salt for seasoning meat and freshly cracked black pepper for the best aroma. Season confidently—this is a big piece of meat!
Pro-Tip: Take your roasts out of the fridge about 30-45 minutes before grilling. Letting them come closer to room temperature ensures they cook more evenly from edge to center, giving you that perfect juicy medium-rare throughout.
Let’s Fire Up the Grill! Your Step-by-Step Guide
Ready to work some grill magic? Follow these steps for a perfectly cooked, show-stopping chuck roast every single time. I’ve packed this section with all my favorite chef hacks to make you feel like a pro.
- Pat Dry and Prep: First things first, grab those chuck roasts and pat them completely dry with paper towels. This is a non-negotiable step for getting that restaurant-quality sear! Moisture is the enemy of browning, so be thorough. Place them on a rimmed baking sheet or a large plate.
- Make the Flavor Paste: In a small bowl, combine the olive oil, Worcestershire sauce, Italian seasoning, salt, and pepper. Stir it into a fragrant, cohesive paste. Don’t be shy here—get your hands in there and mix it well! This is where the flavor journey begins.
- Rub It In: Using your hands, massage the seasoning paste generously over every single surface of the chuck roasts. Get it on the top, bottom, and all sides. You want a nice, even coating. Think of it as a relaxing spa treatment for the meat—it makes all the difference! Let the seasoned roasts sit at room temperature for 20-30 minutes while you preheat the grill. This allows the salt to begin seasoning the meat deeper and helps with even cooking.
- Preheat for Success: Fire up your grill to medium-high heat (aim for about 400-450°F). For gas grills, this means turning on all the burners. For charcoal, you’ll want a hot, single layer of glowing coals. Here’s my biggest hack: create a two-zone fire. For a gas grill, turn off one burner after preheating. For a charcoal grill, push the coals to one side. This gives you a hot zone for searing and a cooler, indirect zone for gentle cooking—the key to a perfect crust without a burnt exterior!
- Sear to Perfection: Place the roasts directly over the hot side of the grill. Listen for that glorious sizzle! Sear, undisturbed, for 4-5 minutes per side, until you have a deep brown, crispy crust. Use tongs to sear the edges for a minute or two as well. This isn’t just for looks; it’s building layers of complex, caramelized flavor.
- Move and Cook: Once beautifully seared, move the roasts to the cooler, indirect heat side of the grill. If you’re using a gas grill, turn the heat down to medium. Cover the grill and let them cook for 30-40 minutes, flipping once halfway through. This gentle, indirect heat acts like an outdoor oven, cooking the roast through without burning the exterior.
- Trust the Thermometer: This is the most important step for nailing your preferred doneness. Please, I beg you, use a meat thermometer! Pull the roasts off the grill when the internal temperature reaches:
- 135°F for Medium-Rare (juicy and rosy pink)
- 145°F for Medium (a little less pink, but still very juicy)
The temperature will continue to rise about 5-10 degrees as it rests (this is called carryover cooking).
- The Sacred Rest: Transfer the roasts to a cutting board and tent them loosely with foil. Let them rest for a full 10-15 minutes. I know it’s tempting to slice right in, but this is critical! Resting allows the muscle fibers to relax and reabsorb all those incredible juices. If you skip this, the juices will run all over your cutting board, leaving you with drier meat.
- Slice and Serve: Finally, identify the direction of the muscle fibers (the “grain”) of the meat. Using a sharp knife, slice against the grain into ¼ to ½-inch thick slices. This cuts through the tough muscle fibers, making each bite incredibly tender. Pile those beautiful, juicy slices onto a platter and get ready for the compliments to roll in!
How to Serve Your Grilled Masterpiece
Presentation is part of the fun! I love serving this family-style on a large wooden board or a big, beautiful platter. Scatter some fresh herb sprigs like rosemary or thyme around the slices for a pop of color. The absolute best way to enjoy it is sliced thin, with all those delicious accumulated juices poured right back over the top. It’s the perfect centerpiece for a summer spread! Pair it with a crisp, green salad, some grilled corn on the cob, and a loaf of crusty bread to soak up every last bit. For a true steakhouse vibe, don’t forget a pat of compound butter melting on top—a mix of softened butter, garlic, and fresh parsley is divine.
Make It Your Own: Delicious Twists & Swaps
The basic recipe is a knockout, but feel free to play with the flavors! Here are a few of my favorite ways to mix it up:
- Smoky & Spicy: Add 1 tsp of smoked paprika and a ½ tsp of crushed red pepper flakes to the rub. It gives a wonderful warmth and a subtle kick that lingers deliciously.
- Herbaceous & Tangy: Rub the roasts with 1 tbsp of Dijon mustard before adding the oil and seasoning. The mustard creates a fantastic crust and adds a lovely tang that cuts through the richness.
- Bright & Fresh Finish: After slicing, finish the meat with a generous squeeze of fresh lemon juice and a sprinkle of chopped fresh herbs like parsley or chives. The acidity brightens everything up beautifully.
- Coffee-Chili Rub: For a deep, robust flavor, swap the Italian seasoning for a blend of 1 tbsp finely ground coffee, 2 tsp chili powder, 1 tsp brown sugar, and 1 tsp garlic powder.
- Low-Sodium Option: Simply reduce the salt by half and use a low-sodium Worcestershire sauce. The flavor from the sear and herbs will still be incredible.
Anna’s Chef Notes & Kitchen Stories
This recipe has become such a staple in our home that my husband now refers to it as “The Famous Mistake Roast.” I’ve made it dozens of times since that fateful Fourth of July, and I’ve learned a few things. First, don’t stress if your grill flares up a bit—a little char is good! Just move the roast away from the flames to avoid any bitter burning. Second, I’ve started making a double batch of the rub and keeping it in a jar—it’s amazing on everything from chicken thighs to grilled potatoes.
The funniest thing? I still never remember to fully defrost meat for parties. Some habits die hard! But now, instead of panicking, I just smile and know that another delicious “chef’s choice” moment is right around the corner. Cooking is an adventure, and this grilled chuck roast is proof that the best discoveries are often unplanned.
Your Questions, Answered!
Q: My roast is much thinner/thicker than 2-3 inches. How do I adjust the cooking time?
A: Great question! Thickness is more important than weight here. A thinner roast will cook much faster, so rely on your meat thermometer. Check it early and often after the sear. A very thick roast might need a few extra minutes on the indirect heat side. The thermometer is your best guide—don’t guess!
Q: I only have a charcoal grill. How do I set up a two-zone fire?
A: It’s easy! After your charcoal chimney is hot and ashed over, pour the coals onto one side of the grill grate only. This leaves the other side with no direct heat underneath, creating your perfect indirect zone for slower cooking.
Q: I grilled to 135°F, but after resting, it’s more well-done than I wanted. What happened?
A: Ah, carryover cooking can be powerful! The larger and denser the cut of meat, the more the temperature will rise while resting. If you prefer medium-rare, try pulling the roast off the grill at 130-132°F. It will confidently coast up to that perfect 135°F as it rests.
Q: Can I do this on a pellet grill?
A: Absolutely! A pellet grill is fantastic for this. Set it to 400°F for the sear, then after you’ve built your crust, simply reduce the temperature to 325-350°F to finish cooking with the lid closed until it reaches your desired internal temperature.
Nutritional Information*
*This is an estimate for informational purposes and will vary based on specific ingredients used.
Per Serving (approx., based on 14 servings): Calories: 300 | Protein: 28g | Carbohydrates: 1g | Fat: 20g | Saturated Fat: 7g | Cholesterol: 100mg | Sodium: 280mg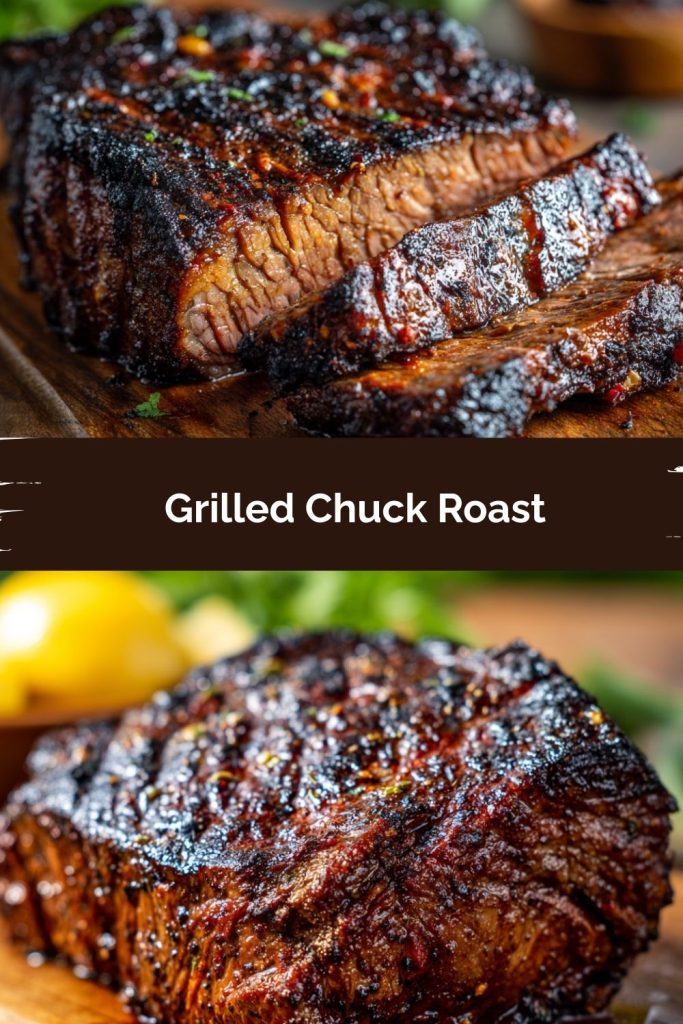
Final Thoughts
There’s just something magical about taking a humble chuck roast—usually destined for a slow cooker—and giving it the grill treatment. What was once “budget-friendly stew meat” suddenly transforms into a smoky, juicy, steakhouse-worthy centerpiece that begs to be shared. It’s proof that great food doesn’t have to be complicated—it just needs a little heat, some good seasoning, and people you love gathered around the table.
So next time your grill is calling, skip the steaks and surprise everyone with this bold, flavorful twist. Whether it’s a weekend cookout, a backyard birthday, or just a random Wednesday that needs a little extra spark, this grilled chuck roast is ready to shine. After all, the best meals aren’t just about feeding people—they’re about creating memories, one smoky slice at a time.