Introduction
Hey there, baking buddy! Can you smell it? That crisp autumn air mingling with the scent of cinnamon and caramel apples? Halloween’s creeping closer, and you know what that means—it’s time to whip up some spooktacular treats that’ll make your kitchen feel like a cozy haunted cottage! I’m Anna, your kitchen cheerleader, and today we’re making my absolute FAVORITE Halloween creation: Thumbprint Cookies that are equal parts adorable and delicious. Imagine buttery, tender cookie bases hugging bright candy centers like tiny edible cauldrons. They’re playful, they’re festive, and best of all? They’re SO easy that even little goblins can help make ’em! No fancy skills needed—just your hands, some sprinkles, and a dash of Halloween spirit. Whether you’re hosting a monster mash, packing treat bags, or just craving a sweet moment with your coffee, these cookies are your golden (orange?) ticket. So tie on that apron—we’re about to turn flour and sugar into pure magic! 👻
Personal Story: My First “Boo”-tiful Baking Disaster
PrintHalloween Thumbprint Cookies
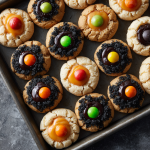
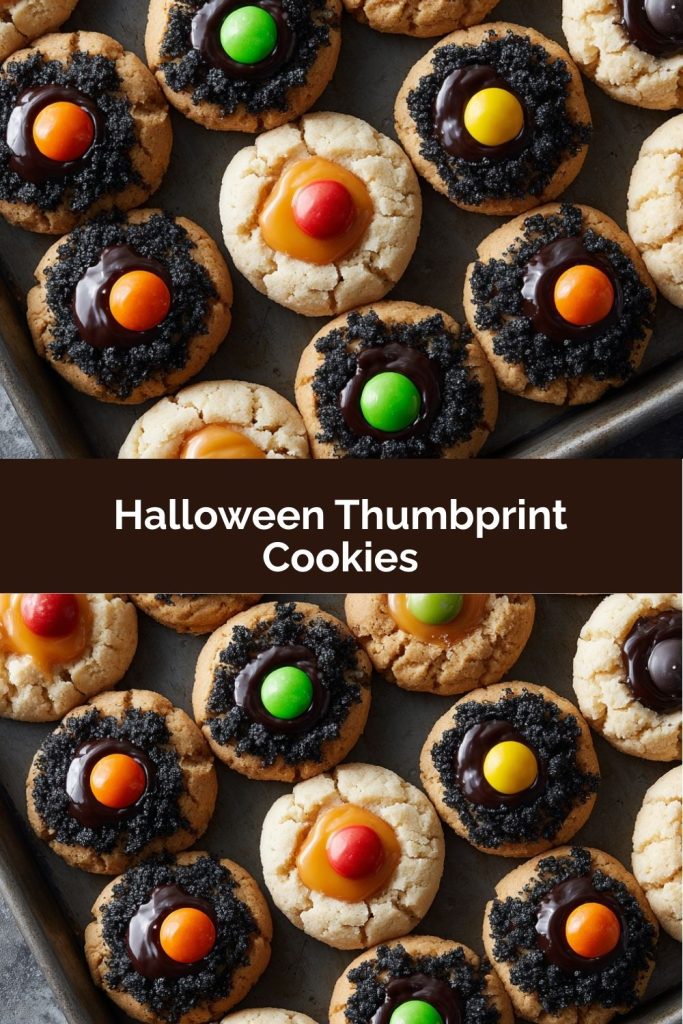
These thumbprint cookies bring classic flavors and a festive twist to your Halloween spread. Soft, chewy bases—sugar, chocolate, peanut butter, or molasses—get a playful press in the center and are filled with colorful candy for a treat that’s as fun to make as it is to eat. Perfect for kids’ baking parties or snack tables!
- Prep Time: 15 mins
- Cook Time: 8–10 mins
- Total Time: 51 minute
- Yield: 24 cookies 1x
Ingredients
Sugar Cookie:
1 cup butter, softened
1 cup sugar
1 egg
1½ tsp vanilla
2½ cups all-purpose flour
½ tsp baking powder
¼ tsp salt
Peanut Butter:
1 cup peanut butter
½ cup butter
½ cup brown sugar
½ cup sugar
1 egg
1¼ cups flour
½ tsp baking soda
Pinch of salt
Chocolate or Molasses:
Swap in your favorite cookie dough—chewy ginger, brownie batter, or soft molasses work great
Instructions
Preheat: Oven to 350°F (175°C). Line a baking sheet.
Mix Dough: Cream butter and sugar, add egg and vanilla, then dry ingredients. Chill 15 mins if too soft.
Shape: Scoop and roll into 1-inch balls.
Press: Bake for 8–10 mins, then immediately press a thumb or spoon into the center.
Fill: While warm, add festive candies: M&Ms, candy corn, Reese’s Pieces, or gummy worms.
Cool: Let set before serving—or drizzle with chocolate for flair!
Nutrition
- Calories: 130–160
Picture this: Seven-year-old me, armed with a rolling pin and a Batman cape (don’t ask), determined to bake cookies for my class Halloween party. My mom handed me her vintage thumbprint cookie recipe—the same one her grandma used. But instead of elegant jam centers? I stuffed mine with gummy worms and candy corn, convinced they’d look like “candy eyeballs.” Spoiler: They melted into psychedelic lava blobs! The cookies spread into ghostly puddles, and my worms looked… well, traumatized. My teacher held up my lopsided creation and declared, “Anna’s cookies are the most creative!” That mishap taught me baking isn’t about perfection—it’s about joyful messes and edible experiments. Now, I make these yearly with my kids, laughing as they press chocolate chips “eyeballs” into peanut butter dough. That’s the real magic: cookies that taste like nostalgia and smell like laughter.
Ingredients: Your Spellbook Staples
Makes 24 cookies (Sugar Cookie Base)
- 1 cup (2 sticks) unsalted butter, softened – The heart of our cookie! Pro tip: Soften at room temp for 1 hour—don’t microwave! Vegan? Swap in coconut oil.
- 1 cup granulated sugar – Creates crisp edges and chewy centers. For deeper flavor, try ½ cup white + ½ cup brown sugar!
- 1 large egg – Binds everything. For egg-free, use ¼ cup applesauce or flax egg.
- 1½ tsp pure vanilla extract – The secret whisper of warmth. Almond extract works for a twist!
- 2½ cups all-purpose flour – Spoon and level it! Gluten-free? Use 1:1 GF flour blend.
- ½ tsp baking powder – Our little lift wizard. Ensure it’s fresh—test by dropping in hot water (if it bubbles, you’re golden!).
- ¼ tsp salt – Balances sweetness. Omit if using salted butter.
- Festive fillings! – M&M’s, candy corn, Reese’s Pieces, gummy worms, or melted chocolate. Chef’s insight: Avoid jelly candies—they get too sticky!
Step-by-Step: Witch-Approved Cookie Magic!
- Preheat & Prep: Fire up your oven to 350°F (175°C). Line baking sheets with parchment paper. Why parchment? No sticking AND easy cleanup—win-win! 💫
- Cream Butter & Sugar: In a large bowl, beat butter and sugar for 2-3 minutes until fluffy and pale. Chef’s hack: Use a stand mixer on medium—this incorporates air for tender cookies!
- Add Wet Ingredients: Crack in the egg and vanilla. Mix just until combined (overbeating = tough cookies!). Scrape the bowl—hidden butter clumps are sneaky!
- Whisk Dry Ingredients: In another bowl, whisk flour, baking powder, and salt. Pro insight: Whisking = no bitter baking powder pockets!
- Combine Gently: Gradually add dry mix to wet ingredients on low speed. Mix JUST until no flour streaks remain. Golden rule: Overmixing = hockey pucks!
- Chill (If Needed): If dough feels sticky, chill 15 minutes. Hot kitchen? Always chill—warm dough spreads like zombie ooze! ❄️
- Shape: Roll dough into 1-inch balls (a cookie scoop = identical cuties!). Place 2″ apart on sheets—they’ll expand!
- First Bake: Bake 8 minutes. They’ll look underdone—perfect! Why? We’ll press them NOW so they hold shape!
- Press & Fill: Pull sheets from oven. Immediately press your thumb (or a spoon handle) into each center. Fill with candies! Tip: Work fast—cookies firm up quickly!
- Second Bake: Return to oven for 1-2 minutes. Candy will soften slightly—just enough to “set” without melting into goo!
- Cool & Devour: Let cookies cool 10 minutes on sheets, then transfer to racks. Patience, padawan: Fillings are lava-hot! Drizzle with melted chocolate for extra spook factor.
Serving Suggestions: Ghoulishly Good Presentation!
Pile these gems on a black slate board or orange platter for instant Halloween vibes! Add plastic spiders or edible glitter for drama. Pair with hot apple cider (adults: spike it with bourbon!) or chocolate milk for kiddos. Heading to a party? Layer cookies in a clear jar with candy corn “sand” at the bottom—guests will dig for buried treasure! 🎃
Recipe Variations: Spooky Twists!
- Peanut Butter Monsters: Swap dough for peanut butter base! Fill with Reese’s Pieces and draw chocolate “stitches” on top.
- Chocolate Cauldrons: Use brownie batter dough! Fill with green mint M&Ms (“potion bubbles”) and add pretzel stick “handles.”
- Gingerbread Ghosts: Molasses dough + white chocolate fillings. Pipe spooky faces with icing!
- Gluten-Free Ghouls: Use GF flour + ¼ tsp xanthan gum. Fill with Skittles for color bursts!
- Vampire Bites: Add red food gel to sugar cookie dough. Fill with raspberry jam + a strawberry candy “fang.”
Chef’s Notes: From Messy to Magical
Over the years, these cookies have become my edible diary! One year, my toddler “helped” by pressing LEGO into every cookie center (RIP, LEGO Batman). Another time, I subbed beet powder for food dye—hello, naturally pink witch hats! My biggest lesson? Embrace imperfection. Cracked edges? “Spiderweb cookies!” Lopsided fillings? “Drunken ghosts!” The dough freezes beautifully too—I stash pre-rolled balls in freezer bags for last-minute “oops, I volunteered to bake!” emergencies. These cookies aren’t just treats; they’re edible hugs. So sing off-key to Monster Mash, spill sprinkles everywhere, and let those little hands smash dough with glee. That’s the real secret ingredient. 👩🍳💖
FAQs & Troubleshooting: Your Cookie Crystal Ball 🔮
Q: Why did my cookies spread into flat ghosts?
A: Dough was too warm! Chill it before baking. Also, check your baking powder’s expiration date—old powder won’t lift properly.
Q: Can I make these ahead?
A: Absolutely! Store unfilled cookies airtight for 3 days. Add candies just before serving so they stay crunchy. Dough balls freeze for 3 months—bake straight from frozen (add 1 minute).
Q: My candy melted into a swamp! Help?
A: You overbaked or used high-melting candies (like chocolate chips). Stick to candy-coated chocolates (M&Ms) or gummies. And NEVER fill before baking—always press candies in AFTER the first bake!
Q: Any nut-free filling ideas?
A: Try Smarties, Skittles, crushed Oreos, or sunflower seed butter cups! For chocolate lovers, melt allergy-friendly chocolate wafers.
Nutritional Info (Per Cookie, Sugar Base)
Calories: ~140 | Fat: 7g | Carbs: 18g | Protein: 1g | Sugar: 10g
Note: Varies with fillings. For lower sugar, use dark chocolate chunks or freeze-dried fruit bits!
Final Thoughts:
Halloween baking doesn’t have to be tricky—it can be all about the treats! These festive thumbprint cookies are the perfect balance of buttery, melt-in-your-mouth goodness and spooky-cute fun. Whether you’re whipping up a batch for a party, sneaking them into lunchboxes, or baking with little helpers in costume, they’ll bring big smiles (and maybe a few candy-sticky fingers). So grab your sprinkles, turn up the spooky playlist, and let these cookies be the sweet finale to your Halloween celebrations.