Healthy Peanut Butter Greek Yogurt Frozen Cookie Cups: Your New Favorite Guilt-Free Treat!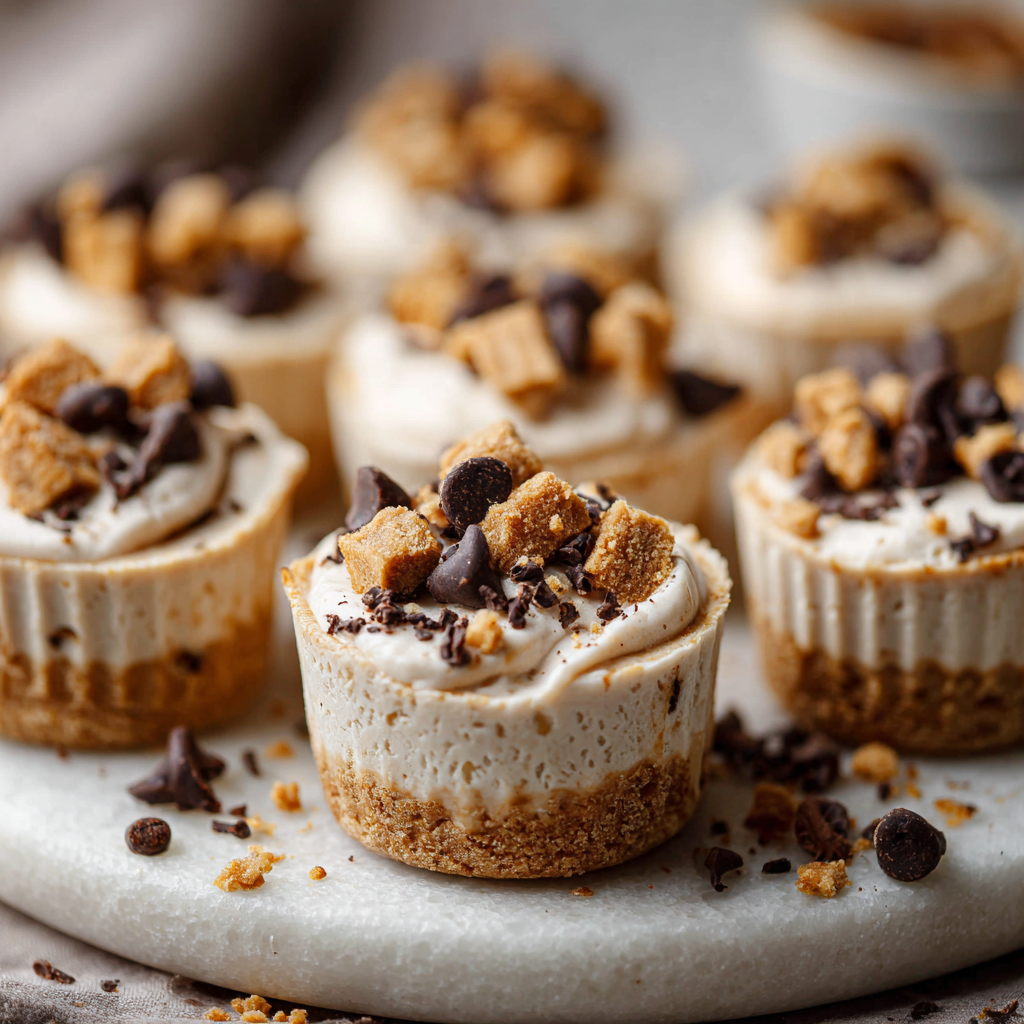
Hey there, friend! Ever have one of those days where you’re craving something sweet, creamy, and utterly indulgent… but your healthy-eating goals are whispering in your ear? Oh, I’ve been there too—probably while standing in front of the freezer at midnight, spoon in hand. 😉 That’s exactly why I’m SO excited to share these Healthy Peanut Butter Greek Yogurt Frozen Cookie Cups with you today. Imagine the luscious creaminess of peanut butter cup filling, the satisfying chill of ice cream, and the protein punch of Greek yogurt—all in one bite-sized wonder. And guess what? They’re ridiculously easy to make, with just 3 core ingredients and 5 minutes of prep! No fancy equipment, no stress—just you, a bowl, and a freezer working magic. These little cups are my secret weapon for turning “I need dessert NOW” moments into wins. They’re naturally sweetened, packed with protein, gluten-free, and taste like a decadent treat without the sugar crash. Whether you’re a busy parent, a fitness enthusiast, or just someone who loves peanut butter (um, that’s all of us, right?), this recipe is your ticket to joy. So grab that jar of peanut butter—let’s make your freezer the happiest place in the kitchen!
Why These Cookie Cups Feel Like a Hug from My Childhood
PrintHealthy Peanut Butter Greek Yogurt Frozen Cookie Cups

Craving something creamy, cool, and satisfying? These Healthy Peanut Butter Greek Yogurt Frozen Cookie Cups are the perfect frozen treat! Packed with protein, naturally sweetened, and made with just a few simple ingredients, they’re a guilt-free indulgence that tastes like dessert.
- Prep Time: 5 mins
- Freeze time: 2 hours
- Total Time: 2 hrs 5 mins
- Yield: 6 cookie cups 1x
Ingredients
½ cup Greek yogurt
⅓ cup peanut butter
2 tbsp honey or maple syrup
Optional: chocolate chips for topping or a cookie crumb base
Instructions
In a bowl, whisk together the Greek yogurt, peanut butter, and sweetener until smooth and creamy.
Line a muffin tin with silicone liners or paper cups.
Spoon the mixture evenly into each cup.
Add chocolate chips or crushed cookies on top if you like.
Freeze for at least 2 hours or until firm.
Let sit at room temp for 5 minutes before enjoying!
Notes
Frozen, creamy, and rich—this is how you treat yourself and stay on track at the same time!
Nutrition
- Calories: 140
- Sugar: 4g
- Protein: 6g
Funny story—these frozen cookie cups actually came from a kitchen “oops” that turned into a happy accident! When my daughter, Lily, was about five, we spent a sweltering summer afternoon attempting homemade peanut butter cups. We melted chocolate, giggled as peanut butter smeared everywhere… and then promptly forgot them on the counter. The filling softened into a gooey puddle! Not wanting to waste it, I stirred in some Greek yogurt (my forever fridge staple), poured it into muffin cups, and froze it as a last-ditch save. The result? Lily took one bite, eyes wide, and declared: “Mama, these are BETTER than the store!” That messy, sticky disaster became our go-to summer ritual. Now, every time I make them, I’m transported back to that sunny kitchen—Lily’s laughter, the smell of roasted peanuts, and the thrill of creating something magical from a “mistake.” It’s proof that the best recipes aren’t just about ingredients; they’re little time capsules of joy. And honestly? I’m kinda glad we ruined those peanut butter cups. 😉
Your Simple, Wholesome Ingredients
Gather these goodies—I promise your pantry probably has most already!
- ½ cup Greek yogurt → Use full-fat for maximum creaminess (it prevents iciness!). Non-fat works, but your cups will be firmer. Chef tip: Straining regular yogurt in a cheesecloth for 30 minutes is a great sub if you’re in a pinch!
- ⅓ cup peanut butter → Natural, unsweetened is my fave for pure peanut flavor. If using sweetened, reduce the honey/maple syrup! Allergy-friendly swap: Almond or sunflower butter work beautifully.
- 2 tbsp honey or maple syrup → Maple syrup keeps it vegan! Agave works too. Pro insight: Warm it slightly for easier mixing—just 10 seconds in the microwave!
- Optional: Chocolate chips or crushed cookies → Dark chocolate chips add richness without overwhelming sweetness. For a cookie crumb base, crush gluten-free cookies (like Enjoy Life) and press 1 tsp into each cup first. Fun twist: Freeze-dried strawberries for a pop of color!
See? Nothing complicated! These ingredients are heroes because they balance protein, healthy fats, and natural sweetness—making indulgence feel nourishing. 🙌
Let’s Make Magic: Step-by-Step!
Ready? Throw on some tunes—this is the fun part!
- Whisk it like you mean it! In a medium bowl, combine Greek yogurt, peanut butter, and honey/maple syrup. Chef hack: If your peanut butter is stiff, microwave it for 15 seconds first! Whisk until silky-smooth—no lumps allowed. Why? This ensures your cups are creamy, not gritty. If the mixture feels thick, add 1 tsp milk (any kind) to loosen it.
- Prep your pan. Line a muffin tin with 6 silicone or parchment liners. Game-changer tip: Lightly spritz liners with oil (even if non-stick!) for effortless removal later. No muffin tin? Use small ramekins!
- Spoon & smooth. Divide the mixture evenly among cups (about 2 tbsp each). Tap the tin gently on the counter to flatten tops. My trick: A damp finger or spoon back smoothes it perfectly!
- Top it off! Sprinkle with chocolate chips or crushed cookies. Chef move: Press toppings in lightly so they stick after freezing. For a swirled effect, add half the batter, sprinkle toppings, then add remaining batter!
- Freeze to set. Pop the tin into the freezer for at least 2 hours, or until firm. Critical tip: Cover loosely with plastic wrap if freezing longer—this prevents freezer odors or ice crystals. They’re ready when a light press feels solid but not rock-hard!
- Thaw & enjoy. Let cups sit at room temp for 5 minutes before eating. Life-saving hack: If they stick, run the liner under warm water for 3 seconds. They should slide right out!
That’s it! You’ve just created freezer magic. ✨
Serving Up Smiles
Presentation is everything—even for frozen bites! Pop them out of liners onto a cute plate or mini dessert board. For extra pizzazz, drizzle with melted peanut butter or dark chocolate, or add a tiny sprinkle of flaky sea salt. These are perfect as an after-dinner treat with coffee, a post-workout refuel, or even a fun lunchbox surprise (pack frozen in a small container!). Serve 1-2 per person—they’re rich but oh-so-satisfying. And trust me, watching faces light up when you say “these are healthy”? Priceless. 😊
Mix It Up: 5 Delicious Twists
Customize these cups to match your mood or pantry!
- Berry Bliss: Swirl 2 tbsp raspberry jam into the batter before freezing. Top with fresh berries!
- Nut-Free Nirvana: Swap peanut butter for sunflower seed butter and use seed-based “chocolate” chips.
- Cookie Dough Dream: Add 2 tbsp oat flour + 1 tsp vanilla to the batter. Mix in mini chocolate chips!
- Tropical Escape: Use coconut yogurt + almond butter. Top with toasted coconut flakes + diced mango.
- Mocha Madness: Stir 1 tsp espresso powder into the batter. Top with cacao nibs for crunch!
Anna’s Extra Kitchen Wisdom
Over the years, these cups have become my “whatever’s in the fridge” lifesaver! I’ve learned a few things: First, full-fat Greek yogurt is non-negotiable for texture—low-fat makes them icy. Second, they evolve with seasons! In winter, I add cinnamon and top with spiced pecans. Summer? Swirl in pureed mango. Once, I accidentally used salted caramel peanut butter—and it was a revelation! Now, I often add a pinch of sea salt to the batter. 😉 A funny fail: I once froze them in a hurry without liners… cue the chiseling! Now I keep silicone liners stocked like gold. Remember, cooking’s an adventure—if your cups aren’t perfect, they’ll still taste amazing. That’s the real magic!
Your Questions, Answered!
Let’s tackle common hiccups so yours turn out flawless:
- Why are my cups icy/crumbly? This usually means your yogurt had excess liquid or you used low-fat Greek yogurt. Fix it: Strain yogurt for 30 mins first, or add 1 tsp coconut oil to the mix for extra creaminess. Also, don’t over-whisk—just blend until combined!
- Can I use regular yogurt? Not recommended—it’s too thin! Greek yogurt’s thickness is key. In a bind, strain ¾ cup regular yogurt overnight in the fridge (discard the liquid).
- How long do they last in the freezer? Up to 2 weeks in an airtight container! Layer parchment between cups to prevent sticking. Thaw 5 mins before eating—never microwave (they’ll melt into soup!).
- Can I make these without a muffin tin? Absolutely! Use an ice cube tray for bite-sized treats (freeze 1 hour), or small jars/ramekins. For a “bark,” spread mixture on parchment-lined tray, top, freeze, then break into pieces!
Nutritional Perks (Per Cup)
Approximate, based on 6 servings with full-fat Greek yogurt + natural PB + honey:
- Calories: 140
- Protein: 6g (Hello, muscle fuel!)
- Added Sugar: 4g (All from natural sources!)
- Gluten-free + naturally sweetened
Note: Toppings like chocolate chips add 10-20 calories per cup.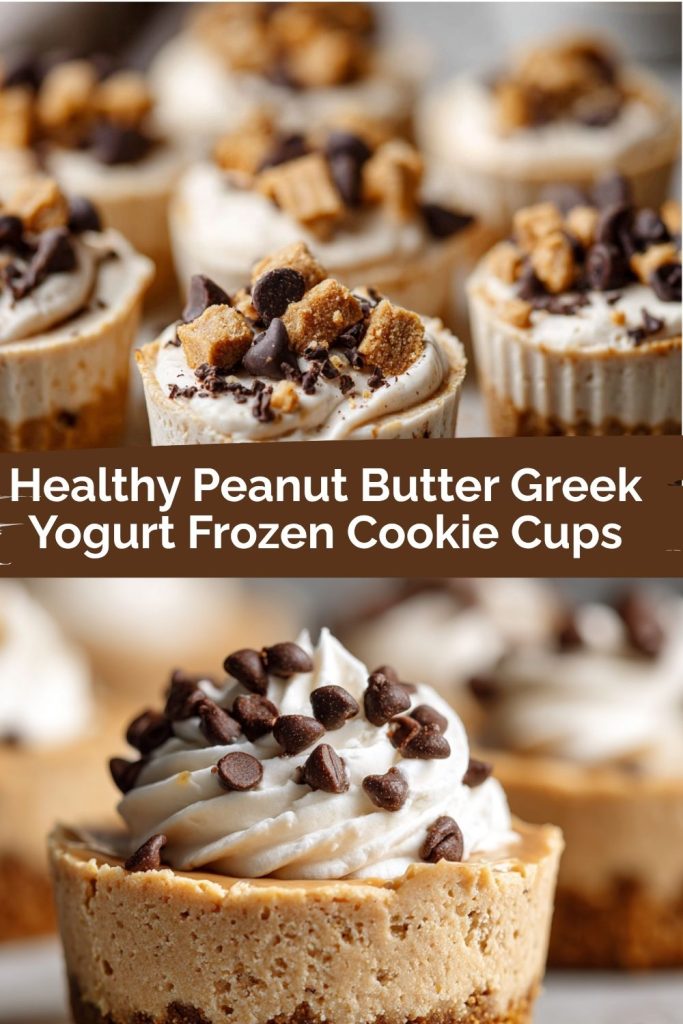
Final Thoughts
There’s something magical about a dessert that feels indulgent but still loves you back—and these Healthy Peanut Butter Greek Yogurt Frozen Cookie Cups are exactly that. They’re proof that a little creativity (and maybe a happy kitchen accident!) can turn simple ingredients into something truly joyful. Whether you’re sharing them with little hands after school or sneaking one solo in your quiet moment after bedtime, I hope they bring you the same smile they bring me every single time. 💛
Here’s to freezer treats that feel like hugs and recipes that turn “oops” into “oh wow!” If you try these, don’t forget to tag me—I’d love to see your spin on them!
Until next time, keep it sweet and simple,