Heart-Shaped Homemade Pop-Tarts: Bake a Little Love
Hey there, friend! Anna here, ready to grab our aprons and make a wonderful, buttery mess. Today, we’re ditching the foil packet and embracing the truly magical experience of homemade Pop-Tarts. But not just any Pop-Tarts—we’re shaping them with love, literally! Imagine a pastry so flaky it shatters at first bite, filled with a jewel-bright pocket of sweet-tart jam, all draped in a simple, glossy glaze and a confetti of sprinkles. Are you smiling yet? I am.
These Heart Homemade Pop-Tarts are more than just a pastry; they’re a moment. They’re for slow weekend mornings where coffee mugs steam and sunlight hits the kitchen table just right. They’re for surprising your sweetheart on a regular Tuesday, or for giggling with kids as you press fork-tines into the dough. They’re proof that the simplest, most nostalgic treats are often the most rewarding to make from scratch. I promise, the magic isn’t just in eating them—it’s in the making. The process is joyful, straightforward, and the result is a homemade masterpiece that will absolutely, positively wow everyone. So, let’s roll up our sleeves, dust the counter with flour, and cook up a little edible happiness together.
The Pop-Tart Pact: A Story from My Kitchen
PrintHeart Homemade Pop-Tarts : Flaky, Fruity, and Made to Share
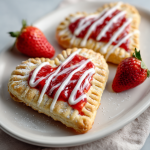
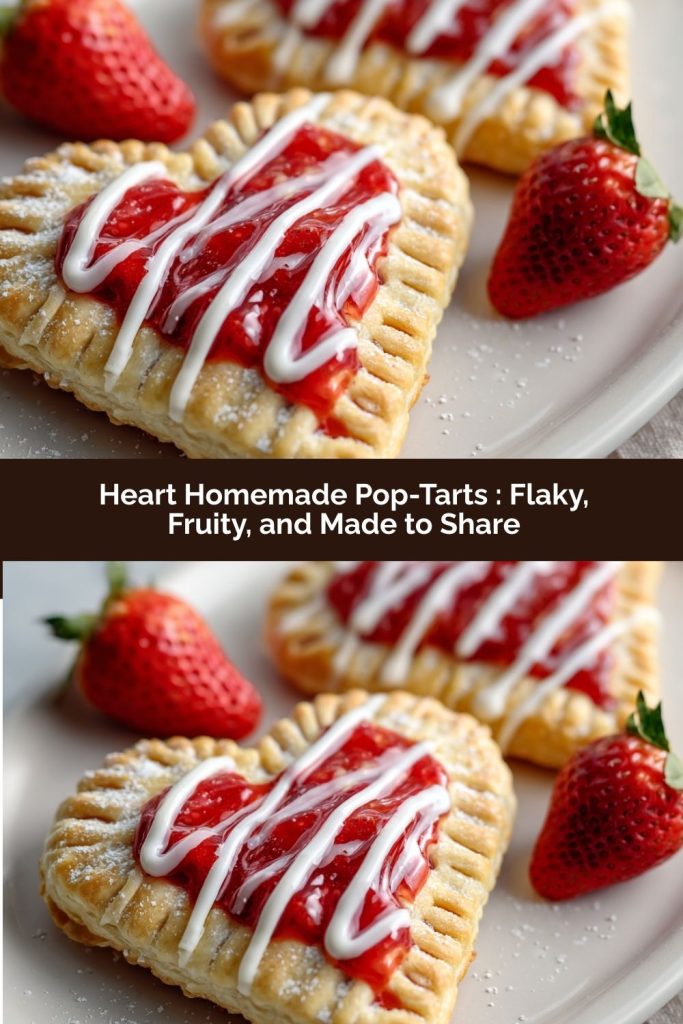
These Heart Homemade Pop-Tarts are buttery, flaky pastries filled with sweet jam and topped with glossy glaze—made from scratch and shaped with love. Whether for a romantic breakfast, sweet brunch spread, or Valentine’s baking project, they’re as charming as they are delicious. Customize the fillings, get creative with sprinkles, and watch them disappear.
- Prep Time: 45 minutes
- Cook Time: 20 minutes
- Total Time: 1 hour 5 minutes
Ingredients
1 ½ cups all-purpose flour
½ tsp salt
1 tbsp sugar
½ cup cold unsalted butter, cubed
3–4 tbsp cold water
For the filling:
½ cup strawberry or raspberry jam
For the glaze:
¾ cup powdered sugar
1–2 tbsp milk
½ tsp vanilla extract
Optional: food coloring, sprinkles
Instructions
In a bowl, mix flour, salt, and sugar. Cut in cold butter until crumbly.
Add cold water, 1 tbsp at a time, until dough comes together. Divide and chill for 30 minutes.
Roll dough on a floured surface and cut out heart shapes (you’ll need 12).
Place 6 hearts on a parchment-lined baking sheet. Add a spoonful of jam in the center.
Top with remaining hearts, press edges with a fork to seal, and poke a vent hole in each.
Bake at 375°F (190°C) for 18–20 minutes or until golden. Cool completely.
Mix glaze ingredients and tint if desired. Drizzle or spread over cooled Pop-Tarts. Decorate with sprinkles.
Nutrition
- Calories: 250
- Sugar: 18g
My love for these hand-held pastries goes way back, but it was cemented one chilly February morning with my then-five-year-old niece, Chloe. We had a “big girls’ baking day” planned, and her request was specific: “Aunt Anna, can we make the kind in the box, but… *fancy*?” I knew exactly what she meant. We wanted the fun, but we wanted the soul that comes from homemade.
We pulled out my grandma’s old rolling pin, mixed up the dough, and Chloe’s job was to press the heart cookie cutter with all her might. Flour dusted her nose and she concentrated so hard, her tongue poked out. As they baked, filling the whole house with that unmistakable, buttery, sweet smell, she danced around the kitchen in anticipation. That moment of pulling the golden, puffed hearts from the oven—and her sheer, unbridled delight when we drizzled on pink glaze and shook on a mountain of sprinkles—was pure kitchen magic. It wasn’t just baking; it was creating a core memory, one flaky layer at a time. Now, every time I make these, I think of her focused little face and that shared joy. That’s the spirit I want to bring to your kitchen today.
Gathering Your Ingredients: A Chef’s Guide
Simple, quality ingredients are the secret to these pastries’ incredible flavor and texture. Here’s what you’ll need, with a few of my favorite tips to set you up for success.
- All-Purpose Flour (1 ½ cups): The backbone of our pastry. I don’t recommend subbing with whole wheat here, as we want that tender, flaky texture. A quick tip: fluff your flour in the bag, then spoon it lightly into your measuring cup and level it off. No packing!
- Salt (½ tsp): Don’t skip it! Salt is the flavor enhancer that makes the butter sing and balances the sweetness. It’s essential in even the sweetest pastries.
- Sugar (1 tbsp): Just a touch in the dough adds a hint of sweetness and promotes a lovely golden-brown color as it bakes.
- Cold Unsalted Butter (½ cup, cubed): This is the STAR. Cold, cold, cold butter is non-negotiable for flaky layers. I cube mine and sometimes even pop it back in the freezer for 10 minutes before using. Unsalted lets you control the salt level perfectly.
- Cold Water (3–4 tbsp): Ice water is best. The cold temperature keeps the butter firm. Add it gradually—you might not need the full 4 tablespoons.
- Strawberry or Raspberry Jam (½ cup): Use a good-quality jam you love! The flavor shines through. For less mess and oozing, avoid super-runny preserves. A thicker jam is our friend. This is where you can get creative—see the variations below!
- Powdered Sugar (¾ cup) & Milk (1–2 tbsp) & Vanilla Extract (½ tsp): The simple glaze trio. Milk thins it to a drizzle-able consistency. Vanilla adds a warm, bakery-style depth. For a vibrant look, a drop of food coloring works wonders.
- Sprinkles (Optional, but Highly Encouraged!): The crowning glory. Use hearts, jimmies, nonpareils—whatever sparks joy. This is your chance to personalize!
Let’s Make Some Magic: Step-by-Step Instructions
Ready? Let’s do this! Read through once, then let’s get our hands in the dough. It’s a forgiving process, I promise.
- Make the Dough: In a large bowl, whisk together the flour, salt, and that one tablespoon of sugar. Scatter your very cold, cubed butter over the top. Now, using a pastry cutter, two forks, or even your clean fingertips, work the butter into the flour. You’re aiming for a crumbly mixture with pea-sized and smaller bits of butter still visible. Chef’s Hack: Those visible butter bits are what will create steam in the oven, leading to those dreamy, flaky layers. Don’t overwork it into a uniform meal.
- Bring It Together: Drizzle in 3 tablespoons of the ice water. Gently mix with a fork. Squeeze a handful of dough—if it holds together without being wet or crumbly, you’re golden. If it’s still dry, add the last tablespoon of water bit by bit. The dough should look shaggy, not smooth.
- Chill Out: Turn the dough out onto a piece of plastic wrap. Gently press it into a disc (don’t knead!), wrap it tightly, and pop it in the fridge for at least 30 minutes. Chef’s Insight: This chill time is crucial. It re-solidifies the butter and relaxes the gluten, making the dough MUCH easier to roll out and preventing shrinkage in the oven.
- Roll and Cut: On a lightly floured surface, roll your chilled dough to about ⅛-inch thickness—not too thin, not too thick. Use a 3-4 inch heart-shaped cutter to cut out your shapes. Re-roll the scraps to get a total of 12 hearts. Place 6 of them on a parchment-lined baking sheet (trust me, the parchment is a lifesaver for cleanup).
- Fill and Seal: Spoon about 2 teaspoons of jam into the center of each heart on the tray, leaving a good ½-inch border all around. Use a pastry brush or your finger to dab a little water around the edges—this acts as glue. Carefully place the remaining 6 hearts on top as lids. Press down gently all around the filling, then use the tines of a fork to crimp the edges shut, making a pretty pattern and ensuring a tight seal. Finally, poke the top of each Pop-Tart 2-3 times with the fork to create steam vents. Chef’s Tip: No overfilling! It’s tempting, but less jam now means no volcanic eruptions in the oven later.
- Bake to Golden Perfection: Bake in a preheated 375°F (190°C) oven for 18-20 minutes. You’re looking for the edges to be lightly golden and the tops to look set and matte, not wet. They’ll puff up beautifully! Let them cool completely on the baking sheet. Patience is Key: If you glaze them while warm, the glaze will just melt right off.
- Glaze and Celebrate: While they cool, whisk together the powdered sugar, 1 tablespoon of milk, and vanilla. Add more milk, a few drops at a time, until it’s thick but drizzle-able. Tint if you like! Drizzle or spread over the cooled pastries and immediately shower with sprinkles. The glaze will set in about 20 minutes… if you can wait that long.
Serving Your Edible Hearts with Style
Presentation is part of the fun! Arrange these beauties on a simple wooden board or a pretty platter. Stack them slightly askew for a rustic, bakery-case feel. They’re perfect alongside a pot of strong coffee, a mug of frothy hot chocolate, or a glass of cold milk. For a special brunch, pair them with fresh berries and a dollop of whipped cream on the side. The real serving suggestion? Share them. Hand one directly to someone you love and watch their face light up. That’s the whole point.
Make Them Your Own: Fun Flavor Twists
The basic recipe is a blank canvas! Here are a few of my favorite spins:
- Brown Sugar Cinnamon: Swap the jam for a mix of ¼ cup brown sugar, 1 tsp cinnamon, and 1 tbsp flour.
- Chocolate Hazelnut: Fill with a spoonful of high-quality chocolate-hazelnut spread. Top the glaze with crushed toasted hazelnuts.
- Lemon Curd & Blueberry: Use lemon curd for the filling and a simple lemon juice (instead of milk) glaze. Top with dried blueberries.
- Savory Breakfast Twist: Fill with sharp cheddar cheese and a dot of cooked bacon or sausage. Skip the glaze and brush tops with an egg wash before baking.
- Vegan/Dairy-Free: Use a high-quality vegan butter (keep it cold!) and a non-dairy milk in the glaze.
Anna’s Chef Notes & Kitchen Stories
This recipe has evolved in my kitchen over countless batches. The biggest lesson? Embrace imperfection. Your first heart might be lopsided. Some jam might sneak out the side. That’s not a failure—it’s a homemade hallmark, and I promise it tastes just as delicious. I once accidentally used salted butter and forgot the added salt; they were still gobbled up, but I missed that flavor balance. So now, I keep a sticky note on my fridge: “BUTTER: UNSALTED!”
These also freeze like a dream. Freeze the unbaked, filled pastries on a sheet pan, then transfer to a bag. Bake straight from frozen, adding 2-3 minutes to the bake time. Having homemade Pop-Tarts on standby feels like having a secret superpower.
Your Questions, Answered: FAQs & Troubleshooting
Q: My jam bubbled out everywhere! What happened?
A: Ah, the great jam eruption! This usually means either the edges weren’t sealed tightly enough (press that fork firmly!) or the filling was too close to the edge. Also, poking solid steam vents gives the expanding air a direct escape route, so don’t skip those holes.
Q: My dough is too sticky/too dry when I’m rolling it. Help!
A: Stickiness means it warmed up. Scoop it up, re-wrap it, and chill it for another 15 minutes. If it’s too dry and cracking, you may have needed a touch more water or over-worked the flour. Sprinkle a few drops of water on the dry spots and knead *very* gently to incorporate.
Q: Can I make these ahead of time?
A> Absolutely! You have two great options: 1) Assemble and freeze unbaked (as noted above). 2) Bake, cool completely, and store unglazed in an airtight container at room temp for 2 days, or freeze for a month. Glaze the day you serve them for the best texture.
Q: My pastry isn’t very flaky. What did I do wrong?
A> The most common culprit is the butter getting too warm. Ensure everything is cold (butter, water, even the bowl if your kitchen is hot). Also, avoid over-mixing the dough once the water is added. We want to see those butter flecks!
Nutritional Info (Per Pop-Tart, Approximate)
Prep Time: 45 minutes | Bake Time: 20 minutes | Makes: 6 Pop-Tarts
Calories: ~250 | Sugar: ~18g
Note: Nutritional info is an estimate and will vary based on specific ingredients and portion sizes used.
 Final Thoughts
These Heart-Shaped Homemade Pop-Tarts are more than just a treat—they’re a celebration in pastry form. With buttery, flaky layers, a jewel-bright jam center, and a glossy, sprinkle-topped finish, they capture the magic of homemade baking without the fuss of boxed convenience.
The best part? They’re completely customizable. Sweet, savory, classic, or bold—you can fill them with jam, chocolate, lemon curd, or even breakfast favorites like cheese and bacon. And because the dough is forgiving, they’re perfect for baking alongside kids, friends, or as a solo kitchen adventure.
Make a batch for breakfast, brunch, or a whimsical snack, and watch faces light up with every bite. Whether you keep them simple or go all out with colorful glazes and creative fillings, these Pop-Tarts prove that a little effort in the kitchen can create big smiles—and a lot of love. Bonus: they freeze beautifully, so a homemade sweet treat is always within reach.