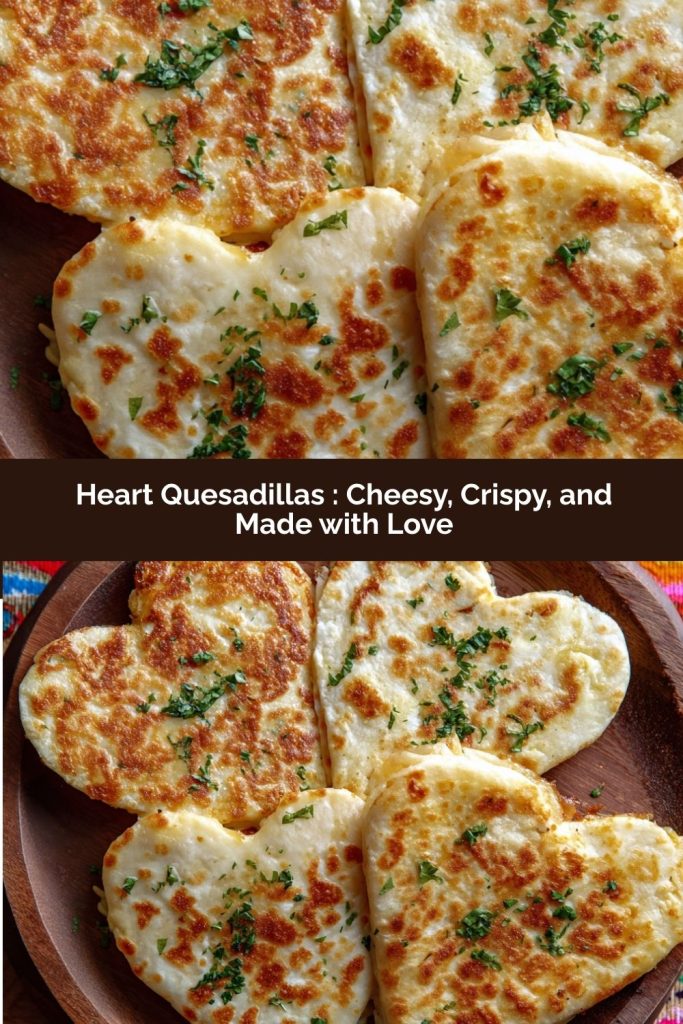
Heart Quesadillas: Cheesy, Crispy, and Made with Love
Hey there, friend! Come on in, grab an apron, and let’s talk about one of my absolute favorite ways to sprinkle a little edible magic into an ordinary day: the humble, glorious quesadilla. Now, I’m a firm believer that the simplest dishes often hold the most joy. And when you take that classic, melty, crispy concept and shape it into a heart? Well, you’re not just making lunch. You’re crafting a little love note on a plate.
These Heart Quesadillas are my go-to for turning “what’s for dinner?” into “wow, this is special!” They’re the ultimate kitchen win: impossibly easy for a beginner cook to master, yet endlessly customizable for a seasoned chef to play with. They’re perfect for a playful Valentine’s Day dinner, a surprise in your kid’s lunchbox that’ll make them grin, or the most deliciously low-effort, high-reward date night snack you can imagine. The best part? That satisfying sizzle in the pan, the irresistible pull of melted cheese, and the sheer fun of eating something shaped with intention. This isn’t about perfection; it’s about connection, creativity, and the pure joy of making something delicious with your own two hands. So, let’s fire up the stove and cook up some happiness, one cheesy heart at a time.
The Story Behind the Shape: More Than Just Cheese
PrintHeart Quesadillas : Cheesy, Crispy, and Made with Love

This Chicken Shawarma Cream Pasta brings bold Middle Eastern flavors into rich, cozy pasta comfort. Juicy, spiced chicken is tossed with a garlic cream sauce, wilted spinach, and perfectly cooked pasta—then finished with a splash of lemon for brightness. It’s warm, flavorful, and totally crave-worthy.
- Prep Time: 10 minutes
- Cook Time: 20 minutes
- Total Time: 30 minutes
- Yield: 4 1x
Ingredients
2 cups cooked, shredded or sliced chicken
8 oz short pasta (like fusilli, penne, or rotini)
1 tbsp olive oil
2 garlic cloves, minced
1 tsp ground cumin
1/2 tsp smoked paprika
1/2 tsp ground coriander
1/4 tsp turmeric
Pinch of cinnamon
2 cups baby spinach
3/4 cup heavy cream or half & half
1/4 cup grated Parmesan (optional)
Juice of 1/2 lemon
Salt & pepper, to taste
Instructions
Cook pasta according to package directions. Reserve 1/4 cup pasta water and drain.
In a skillet, heat olive oil over medium. Add garlic and all spices. Cook for 30 seconds until fragrant.
Stir in cream and bring to a gentle simmer. Add Parmesan if using, then season with salt and pepper.
Add spinach and stir until wilted.
Mix in cooked chicken and pasta. Toss to coat, using reserved pasta water to loosen sauce if needed.
Finish with lemon juice and serve warm.
Nutrition
- Calories: 460
- Fat: 22g
- Carbohydrates: 35g
- Protein: 32g
This recipe always takes me right back to my daughter’s first “school cookout” in second grade. The assignment was to make something simple to share. We were stressed, out of time, and staring blankly into the fridge. Then, I saw the tortillas and the block of cheddar. In a moment of pure, desperate inspiration, I grabbed her play-dough cookie cutters. We cut wonky hearts, stuffed them with cheese, and fried them up in a buttery skillet. We packed them still warm, wrapped in foil.
Later that day, I got a text from another parent: “What was in those heart things? My picky eater ate three and is begging for them!” That’s when it hit me. The magic wasn’t in a fancy ingredient; it was in the shape, the silliness, the shared moment of pressing that cutter into the soft tortilla. It transformed a basic snack into an experience, a memory. Ever since, these heart quesadillas have been our secret code for “I’m thinking of you,” whether it’s for a tough day, a small celebration, or just a Tuesday that needs a lift. Food shaped with love, quite literally, tastes better.
What You’ll Need: Simple Ingredients, Big Flavor
Here’s the beautiful part: you likely have most of this already! This is a fantastic blueprint recipe. Gather these basics, and then let your fridge and your cravings guide you.
- 8 small flour tortillas: The “small” (typically 6-inch) size is perfect for manageable, adorable hearts. They fry up evenly and are just the right amount for one serving. Chef’s Insight: If you only have large tortillas, you can fold one in half over the filling instead of using two cut-outs—it makes a half-moon heart, which is just as cute!
- 1 ½ cups shredded cheese: This is your glue and your glory! I love a mix of sharp cheddar for punch and melty Monterey Jack or mozzarella for that glorious stretch. A pre-shredded Mexican blend works in a pinch, but for the creamiest melt, shred your own from a block—it lacks the anti-caking agents that can make cheese a bit grainy when melted.
- 1 tbsp butter or olive oil: For that golden, crispy exterior. Butter gives you incredible flavor and color, while olive oil is a great dairy-free option. I often use half of each for the best of both worlds!
- Optional Fillings (The Fun Part!):
- Sautéed peppers & onions: A classic! Slice them thin and cook until soft and sweet for a great texture contrast.
- Black beans or pinto beans: Rinse and drain them well for a protein and fiber boost.
- Cooked, shredded chicken or taco-seasoned beef: Fantastic for making this a full meal.
- Diced jalapeños: For a spicy kick! Remove the seeds and ribs to control the heat level.
- Fresh corn: A pop of sweetness is divine, especially with a little chili powder.
- Optional Toppings for Dipping & Drizzling:
- Salsa: The acidic punch cuts through the richness perfectly.
- Sour cream or Greek yogurt: Cool, creamy, and essential in my book.
- Guacamole or simply sliced avocado: Adds healthy fats and a luxurious texture.
- A squeeze of fresh lime juice: Never underestimate the power of a little fresh acid to make all the flavors sing.
Let’s Make Some Magic: Step-by-Step Instructions
Ready? This is where the fun begins. I’ll walk you through each step with all my favorite kitchen hacks to ensure your quesadilla hearts are crispy, melty, and utterly flawless.
- Shape Your Hearts. Grab your heart-shaped cookie cutter (any size you like, but one that fits comfortably within your tortilla). Press firmly to cut a heart shape from the center of each tortilla. Chef’s Hack: Don’t you dare throw away those scraps! Stack them up, give them a rough chop, and toast them in a dry pan for 2-3 minutes. You’ve just made instant tortilla chips for dipping into salsa or guacamole. Zero waste, maximum crunch.
- Build Your Flavor Layers. Lay half of your tortilla hearts on a clean work surface. Sprinkle a modest layer of cheese directly onto the tortilla—this is your “glue” base. Then, add your chosen fillings, but here’s my golden rule: less is more. Overstuffing is the number one culprit for fillings falling out and the quesadilla not sealing properly. Aim for a single, even layer. Finish with another light sprinkle of cheese on top of the fillings. This top layer of cheese will melt and help the top tortilla adhere.
- Create the Sandwich. Carefully place a second tortilla heart on top, aligning the edges. Gently press down with your palm to seal everything together. It’s okay if a little cheese peeks out the sides; that’ll get deliciously crispy.
- Heat Your Pan & Fat. Place a large skillet or griddle (non-stick or well-seasoned cast iron is best) over medium heat. Let it get properly warm for a full minute—this ensures even cooking. Add your butter or oil and let it coat the bottom. You should hear a gentle sizzle when you add the quesadilla, not a silent slide.
- Cook to Golden Perfection. Using a spatula, transfer one or two quesadillas to the hot skillet. Don’t crowd the pan! Cook for 2-3 minutes on the first side. Peek underneath by gently lifting an edge. You’re looking for a beautiful, even golden-brown spotty color. Chef’s Secret: Resist the urge to press down with the spatula! You’ll squeeze out all the precious melted cheese. Just let it be.
- The Flip & Final Crisp. Once the first side is golden, slide your spatula fully underneath and confidently flip it over. It should feel sturdy. Cook for another 2-3 minutes on the second side until equally golden and you can see the cheese is fully melted (the quesadilla will feel less rigid when you lift it). Transfer to a cutting board and let it rest for just 60 seconds. This allows the cheese to set slightly, so it doesn’t all gush out on the first bite.
How to Serve Your Edible Hugs
Presentation is part of the fun! I love serving these on a big, colorful platter. Arrange the heart quesadillas slightly overlapping. Place small bowls of vibrant salsa, creamy sour cream, and chunky guacamole right in the center for dipping. Scatter some fresh cilantro leaves or a few thin slices of radish over the top for a fresh, colorful finish. For a cozy date night, plate two hearts per person with a small side salad of greens with a lime vinaigrette. For kids, cut the hearts into fun strips or use smaller cutters to make mini hearts—they’re dippable, adorable, and guaranteed to disappear.
Mix It Up! Creative Twists & Swaps
The beauty of this recipe is its versatility. Here are a few of my favorite ways to play:
- Breakfast of Champions: Fill with scrambled eggs, crispy diced bacon or sausage, and a mix of cheddar and pepper jack cheese.
- Caprese Style: Use fresh mozzarella pearls, sliced cherry tomatoes, and a few fresh basil leaves. Brush the tortillas with a little olive oil before cooking for an extra Italian flair.
- BBQ Chicken: Toss shredded cooked chicken in your favorite BBQ sauce, add some red onion, and use a smoked gouda or cheddar cheese.
- Vegan Delight: Use vegan butter, a plant-based melty cheese shred, and fill with sautéed mushrooms, spinach, and black beans.
- Dessert Quesadilla: Yes, really! Fill with Nutella and sliced bananas, or a mix of cream cheese and berries. Cook as usual, then dust with powdered sugar or cinnamon sugar.
Anna’s Kitchen Notes & Stories
This recipe has seen many iterations in my kitchen! I once tried to make a giant, family-sized heart using a pizza cutter and a steady hand. Let’s just say the flipping process was… an adventure that required two spatulas and a lot of laughter. We ate a delicious, if abstract, “heart-ish” quesadilla that night. The lesson? Embrace the wobbles. The first time my husband made these for me, he used so much cheese it formed a glorious, lacy, crispy cheese skirt around the entire heart in the pan. It’s now our “secret” indulgent method. I’ve learned that the best recipes, like the best memories, aren’t about rigid rules. They’re about the music playing in the background, the conversation over the sizzling pan, and the shared smile when you take that first, perfect, cheesy bite. This recipe is your canvas. Paint it with flavors you love.
Your Questions, Answered!
Q: My cheese isn’t melting before the tortilla burns! What’s happening?
A: Ah, the classic dilemma! Your heat is likely too high. Cheese needs gentle, consistent heat to melt beautifully. Reduce the heat to medium-low, cover the skillet with a lid for the last minute of cooking (this traps steam and helps melt the cheese without further browning the tortilla), and be patient. A properly preheated pan is key.
Q: Can I make these ahead of time for a party?
A: Absolutely! You can assemble the uncooked quesadilla hearts, layer them between parchment paper, and store them in an airtight container in the fridge for up to 4 hours. Cook them just before serving. You can also cook them fully, let them cool completely, and reheat in a 350°F oven or air fryer for 5-7 minutes to re-crisp.
Q: The fillings keep falling out when I flip them. Help!
A> You’re probably overstuffing (a common act of love!). Use less filling than you think you need. Also, ensure you have that crucial “glue” layer of cheese directly on the bottom tortilla and on top of the fillings before adding the top tortilla. Finally, make sure your fat (butter/oil) is hot enough before adding the quesadilla; this instantly sets the exterior and helps seal it.
Q: Can I use corn tortillas?
A> You can, but they’re less pliable and more prone to cracking when folded or cut. For corn tortilla hearts, I recommend warming them slightly first to make them more flexible, and handle them very gently. They’ll have a delicious, different flavor and texture!
Nutritional Information*
*Per heart quesadilla (using 6-inch flour tortilla and 1.5 cups total cheese divided by 4, no extra fillings).
- Prep Time: 10 minutes
- Cook Time: 6 minutes
- Calories: ~200
- Protein: ~7g
- Carbohydrates: ~18g
- Fat: ~10g
 Final Thoughts
At the end of the day, these Heart Quesadillas are about so much more than melted cheese and crispy tortillas. They’re little edible reminders that love doesn’t have to be complicated or grand to be meaningful. Sometimes it’s as simple as taking an extra minute to press a cookie cutter into a tortilla and turning an ordinary meal into something playful, thoughtful, and joy-filled.
Whether you’re serving them to your sweetheart, your kids, your best friend, or just yourself after a long day, my hope is that these cheesy hearts add a spark of warmth to your table. The laughter in the kitchen, the smell of butter toasting, the first melty bite — that’s the real recipe here. So keep the cookie cutters handy, trust your inner kid chef, and don’t forget to savor every delicious, love-shaped moment. ❤️