Welcome to My Kitchen Counter: Let’s Make Some Magic!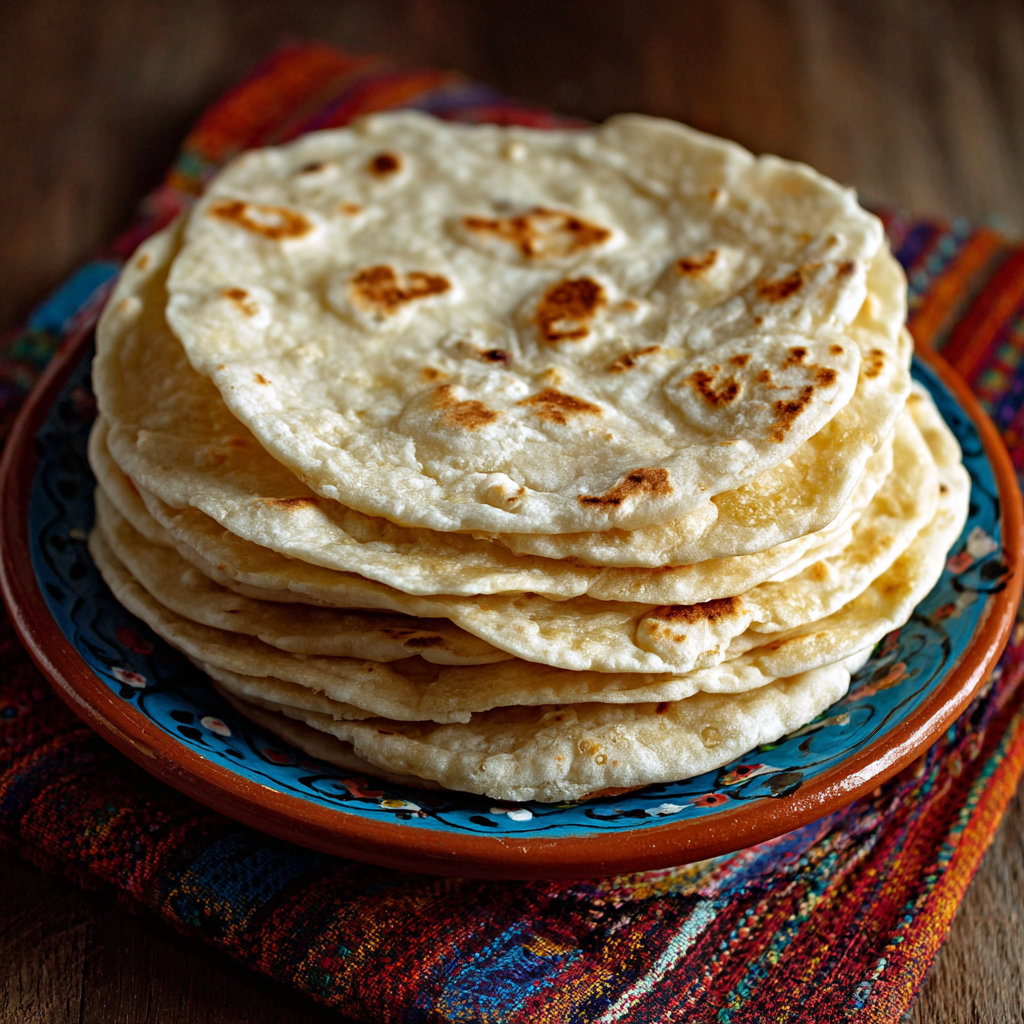
Hey there, friend! Pull up a stool and let me tell you a secret. There’s a simple, humble ingredient that has the power to transform your meals from “good” to “oh-my-goodness, where have you been all my life?” It’s not a rare spice or an expensive cut of meat. It’s something far more fundamental, far more magical: a warm, soft, freshly made flour tortilla.
If your only experience with tortillas is the plastic-wrapped kind from the store aisle, you are in for the most beautiful, delicious surprise. Imagine this: a soft, pliable circle of dough, hot from the skillet, with those perfect, toasty golden spots. It’s chewy yet tender, with a subtle, comforting flavor that makes everything you wrap inside it taste infinitely better. The smell alone—that warm, toasty, homey aroma—will have your whole family hovering in the kitchen.
I know what you might be thinking: “Anna, making tortillas from scratch? Isn’t that… hard?” I’m here, with my apron on and a smile, to tell you: absolutely not. This is one of those back-to-basics kitchen skills that feels incredibly empowering. No yeast, no fancy equipment, no complicated techniques. Just you, a bowl, a rolling pin (or even a wine bottle!), and a skillet. We’re talking about five simple ingredients you probably already have. This isn’t about perfection; it’s about the joy of creating something fundamental with your own hands.
So, are you ready to trade the ordinary for the extraordinary? To fill your kitchen with that incredible scent and serve up tacos, quesadillas, or wraps that will have everyone asking for your secret? Let’s dust the counter with flour, roll up our sleeves, and cook up something amazing together. This is where the real kitchen magic begins.
The Memory in the Dough: My Abuelita’s Kitchen
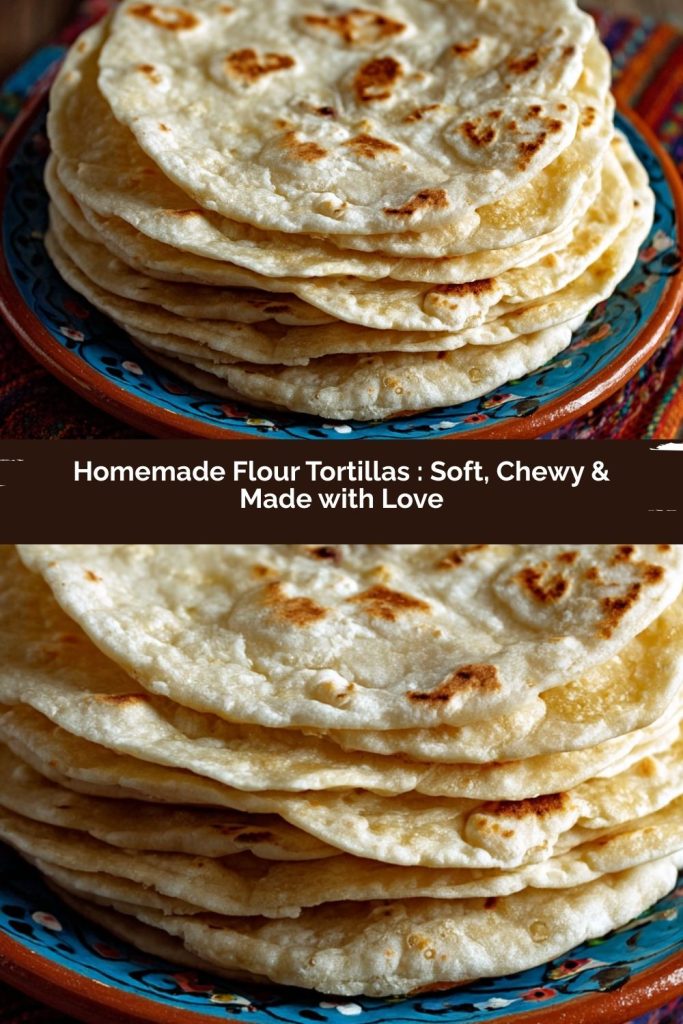
PrintHomemade Flour Tortillas : Soft, Chewy & Made with Love

Once you try these Homemade Flour Tortillas, you’ll never go back to store-bought. They’re tender, flexible, and full of that warm, fresh-off-the-skillet flavor that makes every taco, wrap, or quesadilla taste better. No yeast, no fancy equipment — just a few pantry staples and a little love.
- Prep Time: 15 mins
- rest time: 20 mins
- Cook Time: 10 mins
- Total Time: 8 tortillas
Ingredients
2 ½ cups all-purpose flour
1 tsp baking powder
1 tsp salt
1/4 cup vegetable oil or melted butter
3/4 cup warm water
Instructions
Mix Dry Ingredients: In a large bowl, whisk together flour, baking powder, and salt.
Add Oil & Water: Stir in oil, then gradually add warm water, mixing until a soft dough forms.
Knead & Rest: Turn dough onto a floured surface and knead for 2–3 minutes until smooth. Cover and let rest for 20–30 minutes.
Divide & Roll: Divide dough into 8 equal balls. Roll each into a thin circle (6–8 inches wide).
Cook Tortillas: Heat a dry skillet over medium-high heat. Cook each tortilla 30–60 seconds per side, until puffed and golden spots appear.
Keep Warm: Wrap cooked tortillas in a clean towel to keep soft and warm until serving.
Nutrition
- Calories: 150
- Fat: 5g
- Protein: 3g
For me, the smell of tortillas on a hot comal (that’s a griddle, for the uninitiated!) is the smell of love, laughter, and my Abuelita’s tiny, always-warm kitchen. I didn’t grow up making these; I grew up watching them be made, which is its own kind of delicious education. Every Sunday at her house, the ritual was the same. The big yellow mixing bowl would come out, and with swift, confident hands that never seemed to measure, she’d create the dough.
My sister and I would be given the coveted job of rolling the little balls into (very lopsided) circles, our small hands struggling to make them even. Abuelita would then take over at the stove, a culinary conductor orchestrating a symphony of soft *pffts* and gentle sizzles as each tortilla puffed up like a little pillow. The first one off the griddle was always for us, slathered with a pat of cold butter that melted instantly into the steamy surface, then sprinkled with a pinch of salt. We’d fold it and eat it standing right there, burning our fingertips but not caring one bit. It was pure, unadulterated joy—the taste of patience, tradition, and home.
This recipe is my attempt to capture that feeling in my own kitchen. It’s my love letter to those Sundays, to the power of simple food made with intention. When I make these now, the rhythm of kneading and rolling connects me to that memory, and I hope it helps you create some of your own delicious moments, too.
Your Short & Sweet Shopping (or Pantry!) List
See? I told you it was simple! Here’s everything you’ll need. Don’t just think of these as ingredients; think of them as your building blocks for flavor and texture.
- 2 ½ cups all-purpose flour: This is our trusty foundation. The protein content gives the tortillas structure and that lovely chew. For a slightly more tender, whole-wheat vibe, you can swap out up to ½ cup for whole wheat flour.
- 1 teaspoon baking powder: Our little leavening magic trick! It’s not for big bubbles like bread, but for creating those soft, airy pockets and helping the tortillas puff up beautifully on the griddle. Make sure yours is fresh for the best lift.
- 1 teaspoon salt: Never, ever skip the salt in your dough! It’s the flavor enhancer that turns “flour paste” into something delicious. It strengthens the gluten, too, giving us a better texture.
- ¼ cup vegetable oil or melted butter: Here’s where the tenderness happens! The fat coats the flour proteins, resulting in a softer, more pliable tortilla that won’t crack when you bend it. Vegetable oil gives a neutral flavor and super-soft texture. Melted butter adds a rich, heavenly flavor that’s perfect for sweet or savory wraps. For a dairy-free option, stick with a neutral oil.
- ¾ cup warm water: Not hot, not cold—just warm to the touch. This warmth helps hydrate the flour quickly and makes the dough more elastic and easier to work with. Think bathwater temperature.
Let’s Get Rolling: Your Foolproof Tortilla Roadmap
Ready? Apron on, music playing, let’s do this! Follow these steps, and you’ll be a tortilla master in no time.
1. Mix Your Dry Ingredients: In a large, cozy-looking bowl, whisk together your flour, baking powder, and salt. Get them all friendly and evenly distributed. This ensures every bite is perfectly seasoned and our baking powder doesn’t clump. Chef’s Hack: Give the flour a quick fluff with a fork before measuring for the most accurate cup.
2. Add the Fat & Water: Make a little well in the center of your flour mixture and pour in the oil or melted butter. Use a fork or your fingers to mix it in until the mixture looks like coarse crumbs. Now, pour in that warm water, a little at a time, mixing until a shaggy dough forms. It might look a bit messy—that’s perfect!
3. Knead & Rest (The Secret Step!): Dump that shaggy mass onto a lightly floured surface. Now, we knead! Use the heel of your hand to push the dough away from you, then fold it back over itself. Give it a quarter turn, and repeat. Do this for just 2-3 minutes, until the dough is smooth and slightly springy. Don’t over-knead! Place the smooth dough ball back in the bowl, cover it with a damp kitchen towel or plastic wrap, and let it REST for 20-30 minutes. This is non-negotiable magic. It relaxes the gluten, making the dough infinitely easier to roll out thinly without it snapping back.
4. Divide & Conquer: After its little nap, your dough will be lovely and relaxed. Divide it into 8 equal pieces. I like to cut it like a pizza for even portions. Roll each piece into a smooth, taut ball between your palms. Place them on a plate and cover again while you heat your pan.
5. Roll Them Out Thin: On a lightly floured surface, flatten a dough ball with your hand. Using a rolling pin, roll from the center outwards, turning the dough a quarter turn after each roll to keep it circular. Aim for a thin, 6-8 inch circle. Don’t stress about perfect circles! Rustic, hand-made shapes have charm. Pro Tip: If the dough is fighting you, let it rest for another minute—it’s telling you the gluten is still tense.
6. Cook to Golden Bliss: Heat a dry, heavy skillet (cast iron is perfect!), griddle, or non-stick pan over medium-high heat. No oil needed! When a drop of water sizzles instantly, it’s ready. Gently lay your rolled tortilla in the hot pan. Cook for 30-45 seconds until the bottom has golden-brown spots and the top looks dry and slightly bubbly. Flip! Cook for another 30-60 seconds on the second side, pressing down gently with a spatula until it puffs up like a little balloon. That puff means you’ve nailed it—it’s creating steam layers that make it tender.
7. Keep ‘Em Warm & Soft: As each tortilla finishes, place it in a basket or plate lined with a clean, dry kitchen towel. Fold the towel over to wrap them up. This creates a cozy steam pocket that keeps them soft, warm, and pliable until you’re ready to devour them all.
How to Serve Your Homemade Masterpieces
The best part! Serve these beauties warm, wrapped in that towel right on the table. They’re the star of any taco night, the perfect vessel for sizzling fajitas, or the ultimate cheese-delivery system in a quesadilla. For a truly sublime experience, do as my Abuelita did: slather the first one with butter, drizzle with a little honey, sprinkle with cinnamon sugar, and roll it up. It’s a dessert taco that will ruin you for all other desserts. You’re welcome.
Mix It Up! Creative Twists on the Classic
Once you’ve mastered the basic recipe, the canvas is yours to paint! Here are a few fun ways to play:
- Herb & Garlic: Add 1 teaspoon of dried oregano or rosemary and ½ teaspoon of garlic powder to the dry ingredients.
- Whole Wheat Bliss: Substitute 1 cup of the all-purpose flour with whole wheat flour for a nuttier flavor and extra fiber.
- Spinach or Beet: Puree ½ cup of cooked spinach or roasted beets with the ¾ cup warm water for stunning, colorful (and veggie-packed!) tortillas.
- Lard for Authenticity: Replace the oil with an equal amount of rendered lard for the most traditional, incredibly flaky and flavorful tortilla imaginable.
- Everything Bagel Style: After rolling out the dough, sprinkle one side generously with everything bagel seasoning before cooking.
Anna’s Extra Sprinkle of Thoughts
This recipe has been my kitchen companion for years, evolving from my early, too-thick “pita-bread-tortilla hybrids” to the soft, flexible circles I make today. The biggest lesson? The rest time is truly the secret. I once had a friend call me in a panic because her dough was “impossible” to roll. I asked, “Did you let it rest?” The long silence was answer enough!
Also, embrace the odd shapes! My first ones looked like maps of fictional countries. They still tasted incredible. The more you make them, the more intuitive it becomes. Now, I can almost hear my Abuelita’s laugh when I get that perfect, round puff in the pan. It’s a little victory that never gets old.
Your Questions, Answered!
Q: My tortillas turned out tough and chewy. What happened?
A: The most common culprit is over-kneading or not enough fat. Knead just until smooth—2-3 minutes max. Also, make sure you’re using the full ¼ cup of oil or butter; it’s essential for tenderness.
Q: They didn’t puff up at all! Why?
A: A few possibilities: Your skillet might not be hot enough (wait for the water droplet to sizzle). The dough might be rolled too thick. Or, there might be a tiny tear or hole that’s letting the steam escape. Press down gently with your spatula after flipping to encourage that puff.
Q: Can I make the dough ahead of time?
A: Absolutely! After kneading, wrap the dough ball tightly in plastic and stash it in the fridge for up to 2 days. Let it come to room temperature for an hour before dividing and rolling. You can also freeze the cooked and cooled tortillas between sheets of parchment in a zip-top bag for up to 3 months. Reheat in a dry skillet or directly over a low gas flame.
Q: What can I use if I don’t have a rolling pin?
A: Get creative! A smooth-sided wine bottle, a large glass jar, or even a sturdy water glass works in a pinch. Just make sure it’s clean and dry!
Just the Facts (Because We’re Curious!)
Prep Time: 15 mins | Rest Time: 20 mins | Cook Time: 10 mins
Servings: 8 tortillas
Approx. Per Tortilla: 150 calories | 3g protein | 5g fat | 22g carbs
Final Thoughts
Homemade tortillas are one of those small kitchen victories that feel absolutely magical. They’re soft, warm, and flexible, but more than that—they carry the kind of comfort and nostalgia that no store-bought wrap can touch. Every bite connects you to the rhythm of the dough, the sizzle of the skillet, and the memories of kitchens filled with laughter and love.
Don’t worry about perfect circles or even puffing every single one—they’ll still taste incredible. The joy is in the process: kneading, rolling, flipping, and smelling that toasty, buttery aroma fill your home. Serve them immediately, or wrap them in a cozy towel to keep them warm, and watch how they transform even the simplest meal into something extraordinary.
These tortillas aren’t just food—they’re a hug in hand form, a chance to slow down, and a canvas for every taco, quesadilla, or dessert you can dream up. Make them with love, share them with joy, and let every soft, golden bite remind you that the best kitchen magic comes from simplicity, patience, and a little flour on your fingers. 🌮💛