The Bagel Revelation: Why This 3-Ingredient Wonder Changed My Mornings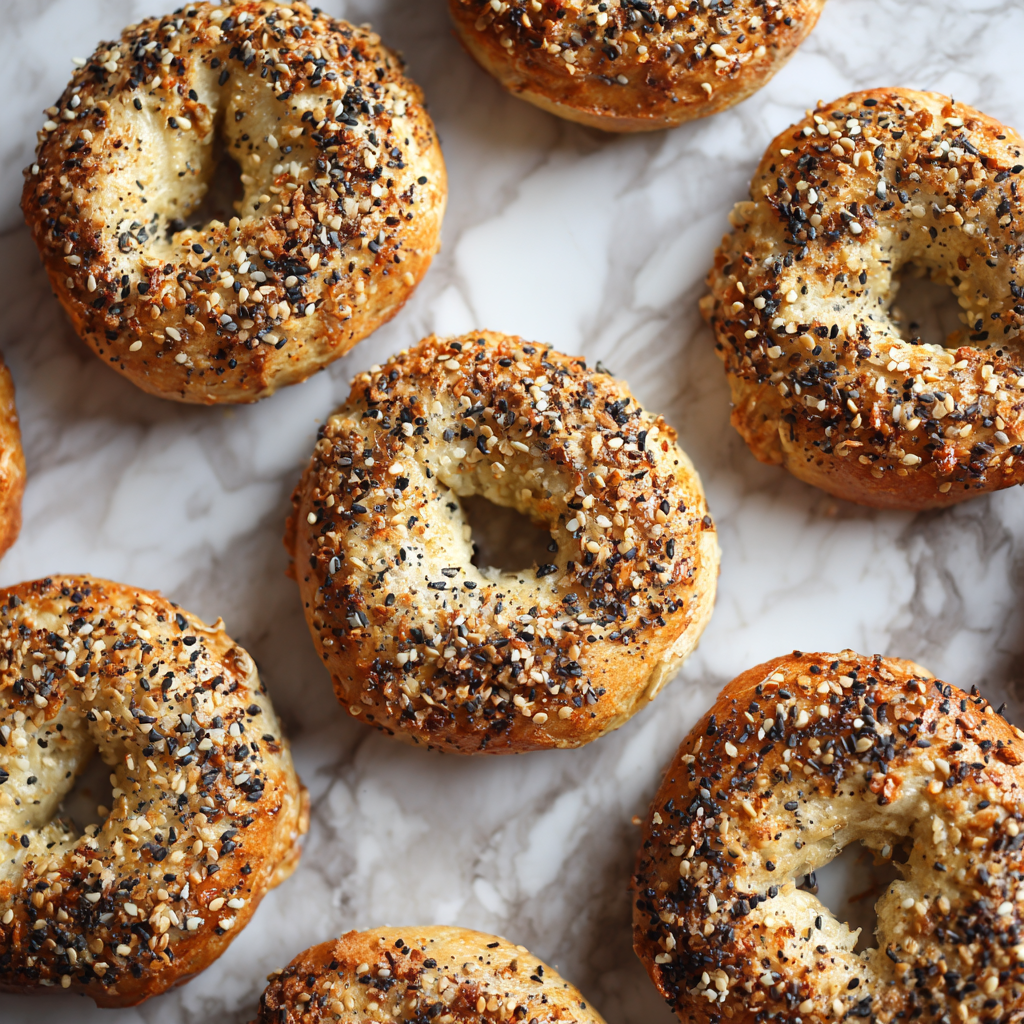
Raise your hand if you’ve ever stared longingly at a bakery’s gleaming display of bagels, only to remember the gluten, the lengthy yeast process, or the fact that your morning schedule more closely resembles a sprint than a leisurely stroll. Yeah, me too. For the longest time, I thought a truly satisfying, chewy bagel was something I had to outsource—a weekend treat that required planning, patience, and a tolerance for ingredients that didn’t always love me back.
But what if I told you that the most shockingly simple, gloriously chewy, and protein-packed bagel of your dreams is waiting for you in your own kitchen, and it requires just three humble ingredients? No, it’s not kitchen sorcery (though it feels like it!). It’s the magic of a little formula I stumbled upon in a moment of desperation and have since perfected into what my family now calls our “Miracle Morning Rings.”
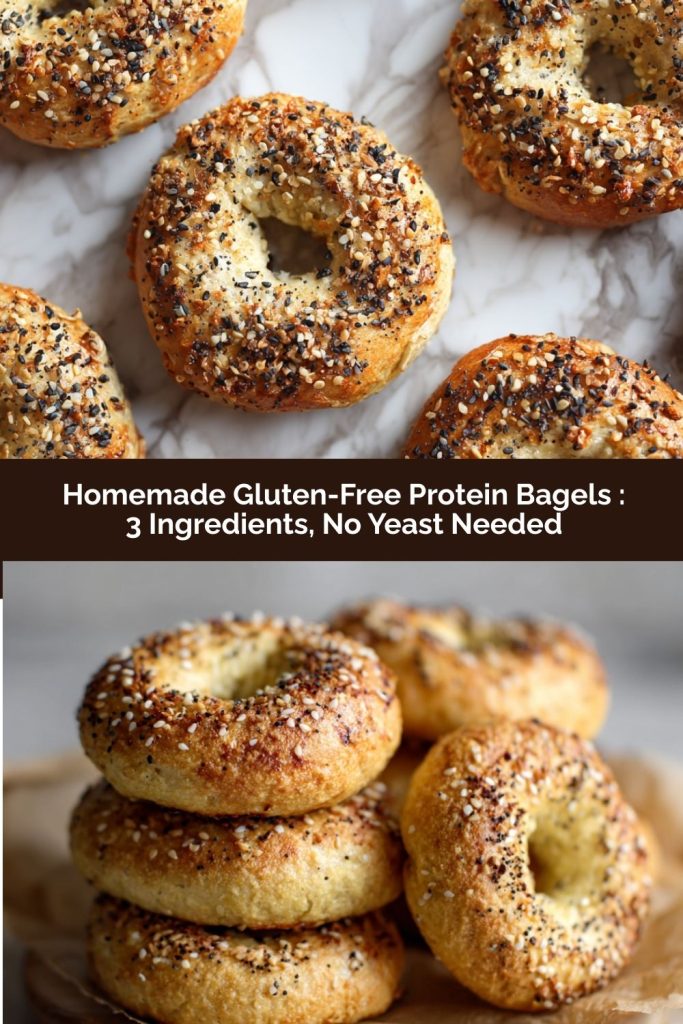
These Homemade Gluten-Free Protein Bagels are my ultimate kitchen hack. They are the answer to rushed mornings, gluten-sensitive cravings, and that deep desire for something warm, baked, and wholly satisfying that you made with your own two hands. With just gluten-free flour, Greek yogurt, and baking powder, you’re about 40 minutes away from a fresh-baked victory. They’re soft, they’re wonderfully chewy, they’re packed with staying power, and they are proof that incredible food doesn’t need to be complicated. So, let’s tie on our aprons and turn that craving into a celebration. Your future self, happily munching on a warm, everything-seasoned bagel, will thank you.
The “Everything but the Kitchen Sink” Experiment
PrintHomemade Gluten-Free Protein Bagels : 3 Ingredients, No Yeast Needed
These Homemade Gluten-Free Protein Bagels are the easiest way to enjoy fresh-baked bagels without the gluten, yeast, or fuss. Made with just flour, Greek yogurt, and baking powder, they’re soft, chewy, and packed with protein to keep you going. Perfect for breakfast, meal prep, or a healthy snack—top them with your favorite seasonings and enjoy warm from the oven.
- Prep Time: 10 mins
- Cook Time: 30 mins
- Total Time: 40 minutes
- Yield: Makes 4 bagels 1x
Ingredients
1 cup gluten-free flour
1 cup Greek yogurt (plain, unsweetened)
1½ tsp baking powder
Optional: everything bagel seasoning, sesame seeds, or cinnamon sugar for topping
Instructions
-
Preheat the oven: Set your oven to 375°F (190°C) and line a baking sheet with parchment paper or a silicone mat.
-
Mix the dough: In a medium bowl, combine 1 cup gluten-free flour and 1½ tsp baking powder. Add 1 cup Greek yogurt and stir until a sticky dough forms. If the dough is too dry, add a teaspoon of yogurt at a time until it comes together.
-
Shape the bagels: Divide the dough into 4 equal portions. Roll each portion into a ball, then gently press your finger through the center to form a bagel shape. Place them on the prepared baking sheet.
-
Add toppings (optional): Sprinkle everything bagel seasoning, sesame seeds, or cinnamon sugar on top for extra flavor. Press lightly so they stick.
-
Bake: Place the bagels in the oven and bake for 25–30 minutes, or until they are lightly golden and firm to the touch.
-
Cool slightly & enjoy: Let the bagels cool for 5 minutes before slicing. Serve warm or store in an airtight container for up to 2 days.
Nutrition
- Calories: 140
- Carbohydrates: 18g
- Protein: 10g
This recipe was born from a classic “Anna in the Kitchen” scenario: a rainy Sunday, a bare pantry, and a serious bagel craving. My youngest was begging for something “bready and round,” my gluten-free friend was coming over for coffee, and I had exactly zero yeast in the house. I’d seen the viral “2-ingredient dough” floating around, but my past attempts always left something to be desired—often a dense, sad little biscuit.
I stood in my kitchen, looking at a tub of Greek yogurt and my favorite blend of gluten-free flour. “What if,” I thought, “we just… go for it?” I added a generous pinch of baking powder for lift, mixed it with a hopeful heart, and shaped the sticky dough into four little rings. As they baked, filling the house with a scent that was suspiciously bagel-like, I crossed my fingers. When I pulled out that first golden-brown, puffy bagel, I did a little dance right there by the oven. They were perfect! Chewy, tender, and so incredibly easy. It was one of those happy accidents that immediately earned a permanent spot in our family recipe rotation. Now, it’s my go-to “I-made-this!” secret that never fails to impress.
Your Simple, Powerful Bagel Toolkit
Here’s the beautiful shortlist. The quality of these three stars really shines through, so let’s talk about each one.
-
- 1 Cup Gluten-Free Flour: This is your foundation. I highly recommend using a 1:1 all-purpose gluten-free flour blend that contains xanthan gum (like Bob’s Red Mill, King Arthur, or Cup4Cup). The gum acts as the glue that gives these bagels their essential chewy texture, mimicking gluten. Chef’s Insight: Don’t try to use a single flour like almond or coconut here—the blend is key for the right structure.
- 1 Cup Greek Yogurt (Plain, Unsweetened): The powerhouse! This provides the moisture, tang, and a huge protein boost. Use full-fat for the richest, most tender result, but low-fat works in a pinch. Pro Substitution: For a dairy-free version, an equal amount of thick, plain dairy-free yogurt (like coconut or almond milk yogurt) works, but make sure it’s very well-strained and thick, not runny.
1 ½ Teaspoons Baking Powder: Our leavening hero! This is what gives our no-yeast bagels their lift and airy interior. Critical Tip: Make sure your baking powder is fresh for maximum puff. Test it by sprinkling a little in hot water—if it fizzes vigorously, you’re good to go!
- Optional Toppings: This is your playground! Everything Bagel Seasoning is my classic go-to. Sesame seeds, poppy seeds, dried garlic flakes, or a cinnamon-sugar mix are all fabulous. An egg wash (1 egg beaten with a splash of water) brushed on before topping will make those seeds stick and give a gorgeous shine.
Let’s Make Some Magic: Step-by-Step
Ready? This is where the fun begins. I’ll walk you through every step with my favorite kitchen hacks to ensure bagel perfection.
Step 1: Prep & Preheat. First, line a baking sheet with parchment paper. No need to grease it! Then, preheat your oven to a nice, hot 375°F (190°C). Giving your oven plenty of time to get fully hot is the secret to that initial “oven spring” that makes our bagels puff up beautifully.
Step 2: The “Dough” Comes Together. In a medium mixing bowl, whisk together your gluten-free flour and baking powder. This ensures the baking powder is evenly distributed. Now, add the entire cup of Greek yogurt. Using a sturdy spoon or even your hands, mix and knead it right in the bowl until a shaggy dough forms. It will seem dry at first, but keep going! Chef’s Hack: If the dough feels too sticky after a minute of kneading, add a dusting (just a tablespoon or so) more flour. If it’s too dry and crumbly, add a teaspoon of water. Gluten-free flour can vary in absorbency.
Step 3: Shape Your Bagels. Lightly dust a clean surface with a bit more gluten-free flour. Turn the dough out and knead it gently 5-6 times until it becomes smooth. Divide it into 4 equal portions. Here’s the fun part: roll each portion into a rope about 6-7 inches long. Don’t worry about perfection! Now, connect the ends to form a ring, pinching the seam firmly together. If the seam won’t stick, dab a tiny bit of water on it. Place each shaped bagel on your prepared baking sheet. Pro Tip: If you want a more traditional “hole,” make the rope a bit longer and the center hole larger—the bagels will puff up in the oven.
Step 4: Top & Bake. If using toppings, now is the time! For the best adherence, brush each bagel lightly with an egg wash or even just a bit of milk or water. Then, sprinkle generously with your chosen seasoning. Slide the tray into your preheated oven and bake for 28-32 minutes. You’re looking for a lovely, deep golden brown color on top and bottom. They should sound slightly hollow if tapped on the bottom.
Step 5: The Crucial Cool Down. This might be the hardest step! Let the bagels cool on the baking sheet for at least 10-15 minutes before slicing. They are still setting up inside, and slicing too early can make them seem gummy. I promise, the wait is worth it for the perfect chewy texture.
Serving Up Your Success
Now for the best part: eating! Slice your slightly cooled bagel in half. I love toasting them to bring back that warm, crisp exterior. They are phenomenal schmeared with creamy avocado, whipped cream cheese, or a generous swipe of almond butter and jam. For the ultimate savory treat, top with lox, red onion, and capers. However you choose to enjoy them, serve them with pride—you just made bagels from scratch!
Make Them Your Own: Delicious Twists
Once you’ve mastered the basic recipe, the flavor world is your oyster! Try these easy twists:
- Sweet Cinnamon Raisin: Mix 1 tsp of cinnamon into the dry ingredients. Knead in ¼ cup of raisins (soaked in warm water for 5 mins and drained) with the yogurt. Top with a cinnamon-sugar mix before baking.
- Cheesy Garlic Herb: Add ½ cup of shredded sharp cheddar and 1 tsp of dried Italian herbs to the dough. Top with everything seasoning or more cheese!
- Everything “Pretzel” Bagels: Before baking, boil a pot of water with 2 tbsp of baking soda. Briefly dip each shaped bagel (30 seconds per side), then top with coarse salt and everything seasoning before baking as directed.
- Dairy-Free Delight: Use a thick, plain, unsweetened plant-based yogurt (coconut works well) and a vegan egg wash (like aquafaba or plant milk) for topping.
Anna’s Kitchen Notes
This recipe is a living, breathing thing in our house! Over time, I’ve learned that letting the mixed dough rest for 5-10 minutes before shaping makes it much easier to handle, as the flour fully hydrates. Also, my kids love when I make “bagel bites” by dividing the dough into 8 smaller pieces and baking for 20-25 minutes—perfect for little hands and dipping. The first time I made these, I was so excited I tried to slice one immediately and it squished gloriously. It was still delicious, but I learned my lesson about patience! Remember, baking is part science, part love. Have fun with it.
Your Questions, Answered
Q: My dough is SO sticky! What did I do wrong?
A: Don’t panic! Gluten-free flours vary. Just add a tablespoon of extra flour at a time and knead it in until the dough is manageable but still soft. It should be slightly tacky, not a gooey mess.
Q: Can I make these ahead of time?
A> Absolutely! You have two great options: 1) Shape & Freeze: Shape the raw bagels, place them on a parchment-lined tray to freeze solid, then transfer to a bag. Bake from frozen, adding 3-5 extra minutes. 2) Bake & Store: Baked bagels keep in an airtight container at room temp for 2 days, or freeze for up to 3 months. Reheat in a toaster or warm oven.
Q: Why are my bagels dense and not puffy?
A> The most common culprit is old baking powder that’s lost its lift. Always test it! Also, be sure not to over-knead the dough, and make sure your oven is fully preheated before baking.
Q: Can I use regular all-purpose flour?
A> You can! The recipe works with regular flour, but it will no longer be gluten-free. The texture will be slightly different but still delicious. Start with 1 cup and add more if the dough is too wet, as AP flour may be less absorbent.
Nutritional Info*
Makes 4 Bagels | Prep Time: 10 mins | Bake Time: 30 mins
*Per bagel (calculated using full-fat Greek yogurt and without toppings):
Calories: ~140 | Protein: 10g | Carbohydrates: 18g | Dietary Fiber: 2g | Fat: 2g
 Final Thoughts
These 3-ingredient gluten-free protein bagels are proof that incredible, satisfying food doesn’t need to be complicated. With just gluten-free flour, Greek yogurt, and baking powder, you can whip up chewy, golden bagels in under an hour—perfect for breakfast, brunch, or a protein-packed snack on the go.
They’re endlessly customizable, forgiving for gluten-free beginners, and versatile enough for sweet or savory toppings. From a simple smear of cream cheese to a loaded everything bagel masterpiece, each bite feels like a little victory in your own kitchen.
Whether you’re rushing out the door, hosting a cozy weekend brunch, or looking for a fun baking experiment with the kids, these bagels deliver comfort, flavor, and that warm, “I made this myself!” pride. Keep a batch in the freezer, and you’ll have fresh, homemade bagels ready whenever you need them—no yeast, no stress, just pure, chewy joy.
Baking these bagels might just change your mornings the way they did mine—turning rushed routines into little celebrations, one golden, protein-packed ring at a time.