Why This Might Just Be The Easiest (And Creamiest) Deviled Egg Recipe You’ll Ever Make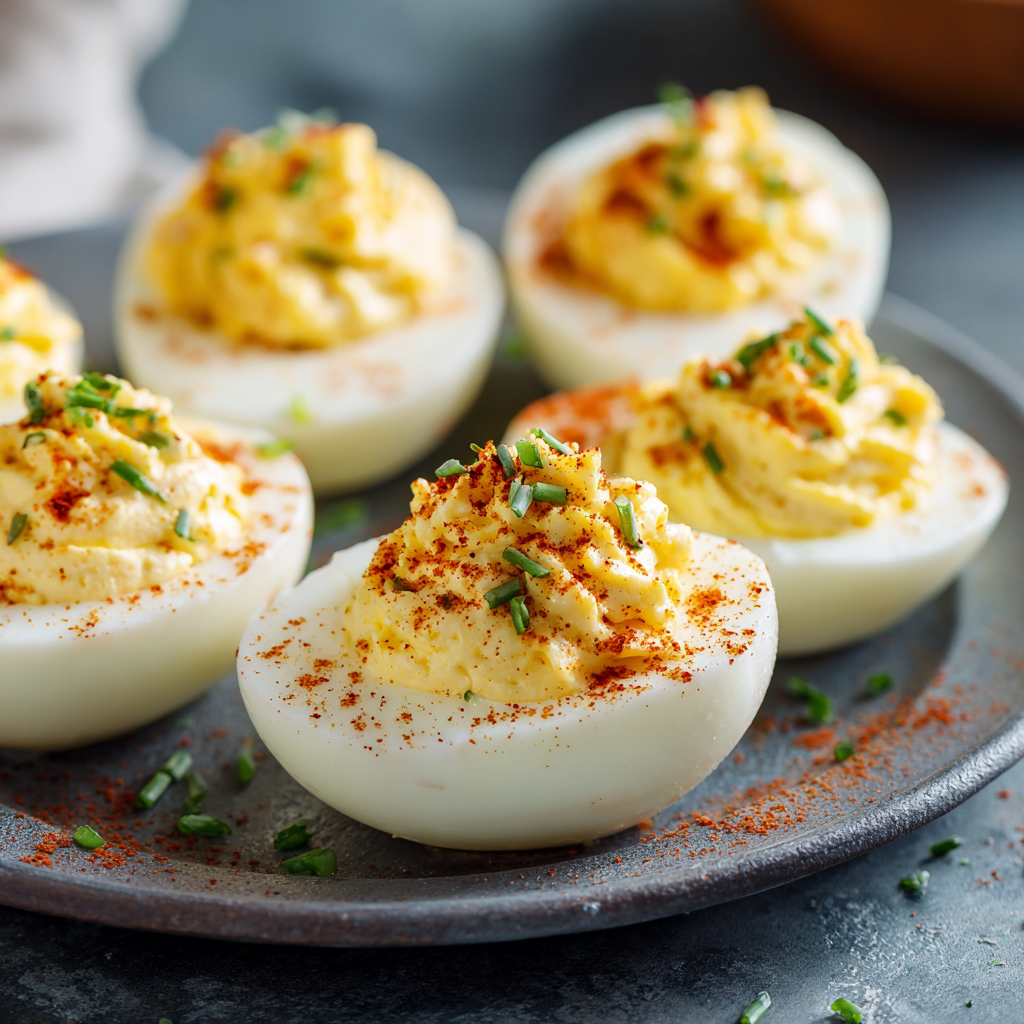
Hey there, friend! Let’s talk about one of life’s great, simple pleasures: the deviled egg. You know the scene. You spot that familiar platter across a crowded party table, and something primal kicks in. You must have one. That creamy, tangy, paprika-dotted bite is a tiny promise of pure satisfaction. But if you’re the one making them? The story can get a little… stressful. Boiling water, frantic peeling, yolks that refuse to smooth out, and that lingering fear that you’ll present a platter of lumpy, cracked eggs to your eagerly waiting guests.
What if I told you we could throw all that fuss right out the kitchen window? What if we could make deviled eggs that are not only flawlessly creamy and impossibly easy to peel but also come together in a fraction of the time? Enter the humble hero of our modern kitchens: the Instant Pot. And the secret weapon in our filling? A glorious dollop of sour cream.
These Instant Pot Deviled Eggs with Sour Cream are my absolute go-to for a reason. The pressure cooker delivers eggs with shells that practically slide off, every single time. And by swapping half (or more!) of the traditional mayo for rich, tangy sour cream, we achieve a filling that’s luxuriously smooth, perfectly balanced, and downright addictive. This isn’t just a recipe; it’s your ticket to becoming the deviled egg legend of every potluck, picnic, and family gathering. So, let’s grab those eggs and make some magic—the easy way.
The Plate That Started It All: My Grandma’s “Fancy” Eggs
My love for deviled eggs is deeply personal, and it all started with my Grandma Eleanor. She was a woman of simple means but extraordinary taste. Every Easter, Thanksgiving, and random Sunday dinner, she’d present her “fancy eggs” on a specific green glass platter with a little crystal dish of extra paprika on the side, “for the grown-ups.” To me, they were the height of sophistication.
I’d watch her, mesmerized, as she carefully peeled each boiled egg, her hands moving with a patience I didn’t understand as a kid. The filling was mixed in her favorite yellow bowl with a fork, and she’d painstakingly spoon it back into the whites. I was her official taste-tester (a title I took very seriously). That first bite was always a revelation—creamy, a little sharp from the mustard, with the smoky finish of paprika. It tasted like love and celebration.
When I got my first Instant Pot years later, the very first thing I experimented with was hard-boiled eggs. The moment I lifted that first perfectly smooth, effortlessly peeled egg from the ice bath, I heard Grandma’s voice in my head: “Well, isn’t that clever!” This recipe is my modern homage to her classic. It keeps the soul of her “fancy eggs”—the comfort, the joy, the promise of something special—but uses our handy kitchen helpers to make the process joyful, not tedious. I think she’d approve, especially of the extra creaminess from the sour cream. She never skimped on the good stuff.
What You’ll Need: A Breakdown of Our Flavor All-Stars
PrintInstant Pot Deviled Eggs with Sour Cream : Creamier, Easier, Crowd-Favorite

Deviled eggs just got an upgrade! These Instant Pot Deviled Eggs with Sour Cream are ultra-smooth, tangy, and totally addicting. Cooking the eggs in the Instant Pot makes peeling a breeze, while sour cream adds a rich, creamy texture that mayo alone can’t match. Perfect for parties, potlucks, or snack boards—these are the deviled eggs everyone will ask about.
- Total Time: 25 mins
Ingredients
6 large eggs
3 tbsp sour cream
1 tbsp mayonnaise
1 tsp Dijon mustard
1/8 tsp garlic powder
Salt & pepper to taste
Paprika, for garnish
Optional: chopped chives or dill
Instructions
Cook Eggs: Place eggs on a trivet in the Instant Pot with 1 cup water. Cook on high pressure for 5 minutes. Let naturally release for 5 minutes, then quick release and place eggs in ice water for 5 minutes.
Peel & Halve: Peel eggs and slice in half lengthwise. Remove yolks and place in a bowl.
Make Filling: Mash yolks with sour cream, mayo, mustard, garlic powder, salt, and pepper until smooth.
Fill Eggs: Spoon or pipe filling back into egg whites.
Garnish: Sprinkle with paprika and add optional herbs if desired.
Nutrition
- Calories: 60
- Fat: 5g
- Protein: 3g
Gathering your ingredients is the first step to any kitchen adventure! Here’s exactly what you need for these ultra-creamy deviled eggs, plus why each item matters and how you can swap things in or out based on what’s in your fridge.
- 6 large eggs: The stars of the show! I find large eggs give you the perfect yolk-to-white ratio. For the easiest peeling, use eggs that are a few days old rather than brand new from the farm, but honestly, the Instant Pot method is so forgiving, even fresh eggs work better here than with traditional boiling.
- 3 tbsp sour cream: This is our secret weapon! It introduces a lovely tang and a rich, luxurious texture that mayo alone can’t achieve. It makes the filling incredibly smooth. Chef’s Insight: For the best results, use full-fat sour cream. If you’re in a pinch, Greek yogurt can work, but it will lean a bit more tart.
- 1 tbsp mayonnaise: We’re not abandoning mayo! It brings its own unique richness and helps bind everything together. Use your favorite brand—whether it’s Duke’s, Hellmann’s, or a good homemade version.
- 1 tsp Dijon mustard: Dijon adds a complex, sharp flavor without the eye-watering punch of yellow mustard. It’s the backbone of our “deviled” character. No Dijon? A good whole-grain mustard can add a nice texture, or use 3/4 tsp of yellow mustard.
- 1/8 tsp garlic powder: A tiny pinch of magic! Garlic powder blends in seamlessly, giving a subtle savory depth without the raw bite of fresh garlic. Trust me on this one.
- Salt & pepper to taste: Essential for making all the flavors pop! I start with 1/8 tsp of fine salt and a few cracks of black pepper, then always taste and adjust after mixing.
- Paprika, for garnish: The classic finishing touch. Sweet paprika is traditional and lovely, but for a bit of smoky heat, try smoked paprika (my personal favorite). It’s both a flavor booster and a beautiful visual cue.
- Optional: chopped fresh chives or dill: A sprinkle of fresh green herbs takes these from great to “wow.” Chives add a mild oniony freshness, while dill pairs beautifully with the tang of the sour cream.
Let’s Make Them! Your Foolproof, Step-by-Step Guide
Ready to see how effortlessly these come together? Follow these steps, and you’ll have a perfect platter in no time. I’m walking you through every little detail!
Step 1: Cook the Eggs in the Instant Pot. Place the metal trivet that came with your Instant Pot into the inner pot. Gently place your 6 eggs on the trivet. Pour in 1 cup of cold water. Secure the lid, set the valve to “Sealing,” and cook on HIGH PRESSURE for 5 minutes. That’s it! Just 5 minutes. Chef’s Hack: No trivet? A steamer basket works, or you can even use a heat-safe bowl that keeps the eggs above the water. The key is they shouldn’t be submerged.
Step 2: The Release & Ice Bath. When the timer beeps, let the pot sit and naturally release pressure for 5 minutes. This gentle cooking phase is crucial for tender whites and perfectly set yolks. After 5 minutes, carefully turn the valve to “Venting” for a quick release of any remaining pressure. Using tongs, immediately transfer the hot eggs to a bowl of ice water. Let them chill for at least 5 minutes. This shock stops the cooking and contracts the egg inside the shell, making peeling a dream.
Step 3: The Magical Peel. Tap each egg gently on the counter to crackle the shell all over. Start peeling from the wider end, where there’s usually an air pocket. You should find the shell and membrane come off in satisfying, large pieces. Rinse any little shell bits away under cool water. Pat the eggs dry. Commentary: I swear, this moment never gets old. It feels like a mini kitchen victory every single time.
Step 4: Halve & Scoop. Slice each egg neatly in half lengthwise. Gently pop the yolks out into a medium mixing bowl. Arrange the empty white halves on your serving plate. Tip: For clean slices, use a sharp, thin-bladed knife and wipe it clean between eggs.
Step 5: Create the Dreamy Filling. To the bowl with yolks, add the sour cream, mayonnaise, Dijon mustard, garlic powder, salt, and pepper. Now, mash and mix! I start with a fork to break up the yolks, then switch to a small whisk or silicone spatula to beat the mixture until it’s completely smooth and creamy. TASTE IT! This is the most important step. Adjust with more salt, pepper, or a tiny bit more mustard until it sings to you.
Step 6: Fill & Garnish. You can simply spoon the filling into the egg white cups, or for a fancier look, spoon the mixture into a zip-top bag, snip off a corner, and pipe it in. A little swirl looks gorgeous! Finally, dust the tops lightly with paprika and sprinkle with fresh herbs if using. Chef’s Final Touch: For the best flavor, cover lightly and pop them in the fridge for at least 30 minutes before serving. This lets the flavors meld beautifully.
Presenting Your Masterpiece
You’ve made something delicious—now let’s show it off! I love using a simple white platter or a rustic wooden board to let the vibrant yellow filling and red paprika really pop. For a retro touch, a deviled egg tray is always fun. Scatter a few extra herb sprigs or edible flowers around the plate for a touch of elegance. These eggs are the perfect anchor for a snack board—surround them with crisp veggies, salty olives, and some good crackers. Remember, we eat with our eyes first, and these little gems are naturally gorgeous!
Make It Your Own: Fun Flavor Twists
The classic is perfect, but playing with flavors is half the fun! Here are a few of my favorite riffs:
- Everything Bagel Style: Mix 1 tsp of everything bagel seasoning into the filling. Garnish with extra seasoning and a tiny piece of everything bagel crisp.
- Bacon & Chive: Fold 2 tbsp of finely chopped, crispy cooked bacon and 1 tbsp of fresh chives into the filling. Top with more bacon—because bacon.
- Spicy Sriracha: Add 1-2 tsp of sriracha to the filling (adjust to your heat preference!). Garnish with a tiny drizzle of sriracha and black sesame seeds.
- Green Goddess: Blend the yolks with 2 tbsp of green goddess dressing instead of the sour cream/mayo combo. Garnish with finely chopped tarragon and chives.
- Vegan “Deviled” Eggs: A fun project! Use firm tofu or boiled small potatoes, scooped out. For the filling, blend the scooped-out centers with vegan mayo, mustard, turmeric (for color), black salt (for an “eggy” flavor), and a splash of pickle brine.
Anna’s Kitchen Notes & Stories
This recipe has become such a staple in my home that it’s evolved in little ways. I almost always double it—a dozen eggs disappear frighteningly fast! I’ve learned that if I’m making them a full day ahead, I’ll store the filling in one container and the whites in another, then assemble an hour before the party. This keeps the whites from getting soggy.
One funny kitchen fail I must share: I once got overzealous with the smoked paprika and created what my husband lovingly called “volcano eggs.” They were delicious but… intensely smoky. A light hand with the garnish is key! The beauty of this recipe is its flexibility. It’s a confident base recipe that welcomes your personality. Don’t be afraid to tweak it and make it yours. That’s what home cooking is all about.
Your Questions, Answered!
Q: My eggs were still hard to peel! What did I do wrong?
A: The Instant Pot is a game-changer, but a couple of things can help guarantee success. First, ensure you’re using the 5-5-5 method (5 min high pressure, 5 min natural release, 5 min ice bath). Second, make sure your ice bath is truly icy—the rapid cooling is crucial. Finally, peeling under a thin stream of running water can help wash away any stubborn shell bits.
Q: Can I make these ahead of time?
A> Absolutely! You can cook and peel the eggs up to 2 days in advance. Store them whole in a sealed container in the fridge. You can also make the filling 1 day ahead. Store it separately in a piping bag or airtight container. Assemble and garnish within a few hours of serving for the best texture.
Q: My filling is too runny/thick. How do I fix it?
A> This is easy to adjust! If it’s too runny, your yolks may have been undercooked or the sour cream might be a thinner brand. Add a tiny bit more mashed yolk or a sprinkle of cornstarch to thicken. If it’s too thick and pasty, simply beat in a teaspoon of milk, water, or more sour cream until it reaches your desired creamy consistency.
Q: I don’t have an Instant Pot. Can I still make your recipe?
A> Of course! The filling recipe remains the same. For perfectly boiled eggs, place eggs in a single layer in a saucepan, cover with an inch of cold water, and bring to a full boil. Cover, remove from heat, and let sit for 10-12 minutes. Then, transfer to an ice bath for 5+ minutes. Peel and proceed!
Nutritional Information*
*This is an estimate provided for informational purposes. Values can vary based on specific ingredients used.
Per serving (1 egg half): Calories: ~60 | Protein: 3g | Carbohydrates: 0.5g | Fat: 5g
Final Thoughts
Deviled eggs may be simple, but they carry a kind of magic that never goes out of style.
They show up quietly at every gathering, never flashy, never complicated—yet somehow they’re always the first thing to disappear. And with this Instant Pot version, there’s no stress, no stubborn shells, no lumpy filling… just smooth, creamy, tangy perfection made easy enough for a Tuesday afternoon and special enough for your holiday table.
I love that this recipe keeps the heart of the classic alive while giving us a little modern kitchen shortcut (thank you, pressure cooker) and a creamy upgrade thanks to that humble spoonful of sour cream. It’s proof that tradition doesn’t have to be rigid—it can evolve, get easier, get creamier, and still feel like home.
So whether you’re making these for a big family spread, a backyard potluck, or just because you deserve a good snack straight from the fridge, I hope they bring you the same quiet joy they bring me.