Your Instant Ramen, But Better: A 10-Minute Bowl of Comfort Magic
Hey there, friend! Let’s have a real kitchen talk for a second. We’ve all been there: it’s been a long day, your energy is on empty, and the siren song of that instant ramen packet in the pantry is calling your name. It’s fast, it’s familiar… but sometimes, it just feels a little… lonely in that bowl.
What if I told you that in the exact same amount of time it takes to make that basic packet, you could be sitting down to a bowl that feels nourishing, intentional, and downright restaurant-worthy? I’m talking about a steaming, savory broth, springy noodles, and the crowning glory—a perfectly jammy soft-boiled egg that oozes golden richness into every bite.
This isn’t about reinventing the wheel or spending hours on broth. This is about the art of the clever, joyful upgrade. It’s about using what you have, adding just one or two special touches, and creating a meal that truly satisfies your soul, not just your stomach. It’s the ultimate glow-up for your go-to quick fix. So, let’s ditch the “just surviving” dinner vibe and cook up a little bit of delicious magic together. Your future self, cozied up with this amazing bowl, will thank you.
Why This Bowl Holds a Special Place in My Heart
PrintInstant Ramen with Soft-Boiled Egg (Upgraded in 10 Minutes!)
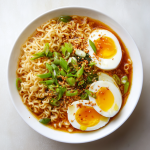
Turn your basic instant ramen into a comforting, crave-worthy bowl with a soft-boiled egg that adds richness and protein. It’s budget-friendly, fast, and way more satisfying than the packet alone. Think of it as your instant glow-up meal.
- Prep Time: 3 mins
- Cook Time: 7 mins
- Total Time: 10 minutes
Ingredients
1 pack instant ramen (any flavor you like)
1 egg
2 cups water
Optional add-ins: sliced green onions, sesame seeds, sriracha, soy sauce, frozen veggies, or spinach
Instructions
Soft-Boil the Egg:
Bring water to a boil in a small pot.
Gently lower in the egg and boil for 6–7 minutes for a jammy center.
Remove and place in cold water or an ice bath to stop cooking. Peel once cool.
Cook the Ramen:
In the same pot, boil 2 cups of water.
Add noodles and cook according to package instructions (usually 3–4 mins).
Stir in seasoning packet and any extras like veggies or sauces.
Assemble:
Pour noodles and broth into a bowl.
Slice the egg in half and place on top.
Add optional toppings like green onion, chili oil, or sesame seeds.
Nutrition
- Calories: 400–450 per bowl (depends on ramen brand & extras)
- Protein: 12–15g
My love for this upgraded ramen started in my first tiny apartment, with a kitchen the size of a postage stamp. I was fresh out of college, living paycheck to paycheck, and my “gourmet” cooking usually meant adding an extra ingredient to boxed mac and cheese. Ramen was a budget lifesaver, but I missed the feeling of cooking something that felt like a real meal.
One particularly gloomy, rainy Thursday, I was video-calling my older brother, who was living across the country. We were both eating dinner “together” – him with takeout, me with my sad, plain ramen. He laughed and said, “Annie, you’re a food blogger in training! At least throw an egg in there. Mom always did.” It was a lightbulb moment. I rummaged around, found a single egg, and clumsily soft-boiled it for the first time. Plopping that wobbly, golden-centered egg on my ramen transformed it. It went from a mere packet of noodles to my dinner. It felt cared for. It was my first little lesson that cooking, even the simplest kind, is an act of self-care. Now, every time I make this bowl, it tastes like resourcefulness, comfort, and that cozy memory of turning something ordinary into my own kind of special.
Gathering Your Flavor Boosters
Here’s the beautiful part: the “recipe” starts with your favorite instant ramen. That’s the blank canvas. From there, we’re building layers of flavor and texture. Here’s what you’ll need for one seriously satisfying bowl.
- 1 pack instant ramen (any flavor you like): This is your foundation! I’m partial to a classic soy or miso flavor for this, but use what you love. Chef’s Insight: Don’t discard the flavor packet—it’s our seasoning base. We’re just going to enhance it.
- 1 large egg: The star of the show! The goal is a jammy, soft-boiled egg with a set white and a luxuriously runny yolk. Pro Tip: Using an egg straight from the fridge is totally fine for this method. We’ll account for it.
- 2 cups water: For both boiling the egg and creating the broth. Simple as that!
- Optional Add-Ins (The Fun Part!): This is where you make it your own. Raid your fridge and pantry!
- Sliced green onions: A non-negotiable for me. They add a fresh, sharp bite and gorgeous color.
- A handful of spinach or frozen veggies: Peas, corn, or mixed veggies add nutrition and color instantly. Just toss them in with the noodles for the last minute of cooking.
- Soy sauce or toasted sesame oil: A tiny drizzle (½ tsp) of either after cooking adds depth and umami.
- Sriracha or chili crisp: For that gentle, aromatic heat. Chili crisp also adds amazing texture.
- Everything Bagel Seasoning or sesame seeds: A sprinkle for a nutty, crunchy finish.
- Leftover rotisserie chicken or tofu: For extra protein power.
Let’s Build Your Bowl: Step-by-Step
Ready? This comes together so fast, so have your ingredients ready. We’re going to multitask like a pro!
Step 1: Master the Jammy Egg
We’ll start with the egg because it needs a minute to cool before peeling. Fill a small pot with enough water to cover an egg by about an inch and bring it to a rolling boil over high heat. Using a spoon, gently lower your egg straight from the fridge into the boiling water. This prevents cracking! Set your timer immediately:
- 6 minutes: For a very runny, jammy yolk and a set white.
- 6 ½ – 7 minutes: My sweet spot! A thick, custardy, golden jammy yolk.
Chef’s Hack: While the egg boils, prep your green onions or other toppings. Multi-tasking magic! When the timer goes off, quickly remove the egg with a spoon and plunge it into a bowl of cold water (add ice if you have it). This “ice bath” stops the cooking instantly and makes peeling a dream. Let it sit while you cook the noodles.
Step 2: Cook & Supercharge the Noodles
No need to wash the pot! Use the same pot (just pour out the hot water and give it a quick refresh). Bring 2 cups of fresh water to a boil. Add your noodles (discard the flavor packet for now). Cook the noodles for 2 minutes. Here’s my secret: Add half of the seasoning packet now. Letting the noodles simmer in seasoned water helps them absorb flavor from the inside out. After 2 minutes, add any quick-cooking veggies (like spinach or frozen peas). Then, add the remaining half of the seasoning packet and any sauces (soy, sriracha). Stir and cook for the final 1-2 minutes as per your package directions. Taste! This is your moment. Need more savoriness? Add a dash more soy. More heat? More sriracha. You’re in charge.
Step 3: The Grand Assembly
Pour the noodles and broth into your favorite deep bowl. Carefully peel your soft-boiled egg—it should be cool enough to handle. I like to rinse it under a little water to get any stubborn shell bits off. Slice it in half lengthwise with a gentle sawing motion. Nestle those beautiful, jammy halves right on top of the steaming noodles. Now, garnish with abandon! Scatter those green onions, a sprinkle of sesame seeds, a drizzle of chili oil… make it look as incredible as it’s going to taste.
How to Serve This Instant Masterpiece
This bowl is best served immediately, while the broth is piping hot and the egg yolk is still runny. Grab a big spoon and chopsticks if you have them (it’s more fun that way!). The ritual is part of the joy: pierce the yolk, let it swirl into the broth, twirl up noodles coated in the golden richness, and get a little bit of everything in each bite. It’s a solo dinner celebration, but the method easily doubles or triples for a quick, impressive meal for friends or family.
Make It Your Own: Delicious Twists
The fun doesn’t stop here! Play with these ideas:
- Miso Ginger: Whisk ½ tablespoon of white or red miso paste into the broth with the seasoning packet. Add a few thin slices of fresh ginger while the noodles cook.
- Peanut Sriracha: Stir 1 tablespoon of creamy peanut butter and 1 tsp of sriracha into the cooked broth for a rich, spicy, Thai-inspired flavor.
- Cheesy Kimchi: Top your finished bowl with a small handful of shredded mozzarella or cheddar and a big spoonful of chopped kimchi. The heat and funk are incredible.
- Dairy-Free & Soy-Free: Use a mushroom or vegetable-flavored ramen packet. Use coconut aminos instead of soy sauce, and top with avocado for creaminess.
Anna’s Kitchen Notes
This recipe is my kitchen security blanket. Over the years, I’ve learned a few things: first, the ice bath for the egg is 100% worth it for easy peeling. Second, seasoning in two stages (half with the noodles, half at the end) genuinely makes a difference in flavor depth. And third, this recipe is wonderfully forgiving. Forgot the green onions? No problem. Don’t have sesame oil? A tiny pat of butter melted into the hot broth is a divine, rich alternative. The goal is never perfection; it’s a delicious, comforting meal that makes you smile. I’ve made this for my kids after soccer practice, for myself during late-night writing sessions, and even for guests as a fun, casual lunch. It always, always hits the spot.
Your Questions, Answered!
Q: My egg yolk is still completely liquid, or the white isn’t fully set. What happened?
A: No worries! This usually means you need an extra 30-60 seconds of boiling time. Fridge-cold eggs and pot size can slightly affect timing. If the white is too runny, you can gently place the unpeeled egg back in the hot broth for a minute to firm it up. Consider it a “reverse poach”!
Q: How can I reduce the sodium in this?
A: Great question. Use only half of the seasoning packet and boost flavor with other elements: a big splash of rice vinegar, a squeeze of lime, fresh garlic simmered in the water, or a dollop of miso paste. These add big flavor without all the salt.
Q: Can I make the soft-boiled eggs ahead of time?
A> Absolutely! Cook and peel the eggs, then store them in a container of cold water in the fridge for up to 2 days. When ready to serve, you can gently warm them by placing them in the hot broth for 60 seconds before slicing.
Q: My ramen broth tastes flat. How can I fix it?
A> This is your chef moment! Think about balancing flavors. Add a splash of acidity (rice vinegar, lime juice), a touch of sweetness (a tiny bit of honey or mirin), or more umami (a few drops of soy sauce or fish sauce). Taste after each addition until it sings.
Nutritional Information*
*This is a rough estimate based on using one standard pack of instant ramen (without the full seasoning packet), one large egg, and green onions. Adding oils, sauces, or proteins will change the values.
- Prep Time: 3 minutes
- Cook Time: 7 minutes
- Total Time: 10 minutes
- Calories: ~400-450
- Protein: ~14-18g
It’s a satisfying, balanced quick meal that provides carbs for energy, protein from the egg to keep you full, and endless room for veggie additions!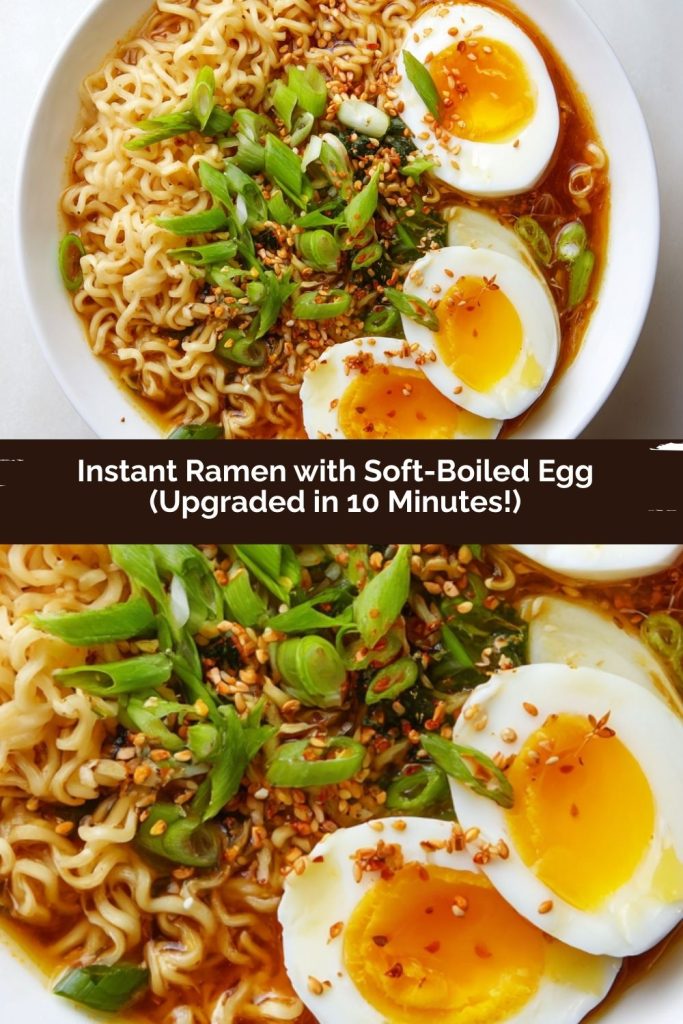
Final Thoughts
This little bowl of upgraded ramen is proof that comfort doesn’t have to be complicated. It’s not about fancy ingredients or perfect technique—it’s about taking five extra minutes to care for yourself in a small, delicious way. About turning “I guess this will do” into “wow, I really needed this.”
Every time I crack into that soft-boiled egg and watch the golden yolk melt into the broth, I’m reminded that good food isn’t always about grand gestures. Sometimes it’s just hot noodles, a quiet kitchen, and a moment to breathe after a long day.
So the next time life feels heavy and your pantry feels bare, remember this bowl. You’re never more than ten minutes away from something warm, satisfying, and deeply comforting.
Here’s to simple upgrades, cozy nights, and meals that feel like a hug in a bowl. 🍜✨